
Full VM Recovery
With the Full VM Recovery option, you can restore the backup data to the same or different Hyper V host/server exactly in the same state as it was during the backup, including its configuration.
Step 1 : Choose the VM and Restore type
- Choose the VM that you wish to restore. You will be allowed to select only one VM to perform Full VM Recovery.
- Now, select the Full VM Recovery option and click Next.
Step 2: Choose a Restore point
- Select a restore point to restore the backup data. BDRSuite Backup Server retains the restore points as per the retention policy you have selected for the backup job.
- Full backup and Incremental backup restore points are viewed in the dropdown box structure.
- Each incremental restore point is a virtual full backup that makes full data recovery possible in each step. This makes the restoration process easier without having to recover a full backup and all the previous increments.
-
If the restore point is denoted with symbols (d), (w), (m), (+P) at the end, it indicates the following:
- Daily Merge (d)
- Weekly Merge (w)
- Monthly Merge (m)
- Persistent boot changes (+P)
- Daily, Weekly, and Monthly merges take place based on the retention policies you have configured.
- If you select Restore version time-stamp with (+P), then you have enabled the option to ’Include persistent boot changes during restore’ option that includes the changes you performed in the VM/Host during the instant boot restore process.
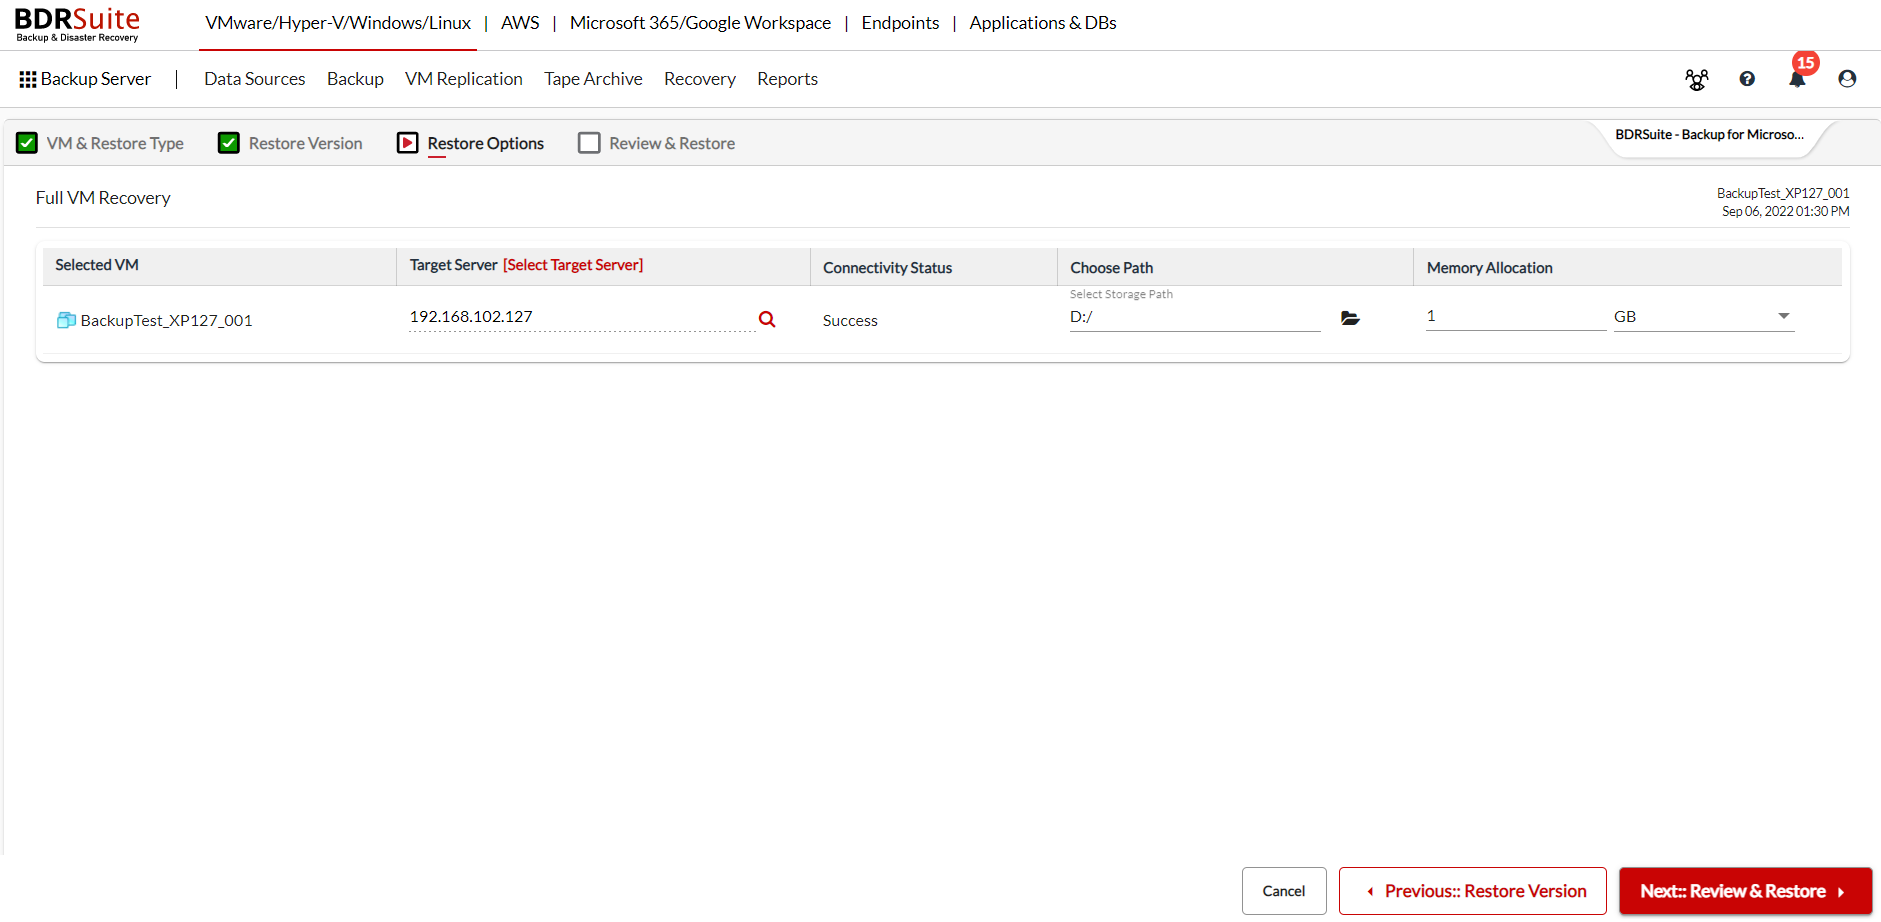
Step 3: Choose the Restore Location
Choose to which location you want to restore the VM.
If you wish to restore the VM to a location, then you have to manually provide the following details.
Step 4: Review & Restore
- Target Server
- Storage Path
- Memory Allocation
Review all the Full VM Recovery configurations and click Restore to restore the entire backed-up VMs directly to any target ESXi / Hyper-V host.