
Adding Backup Agents by importing CSV File
To learn about the steps to create a CSV File and having it imported to the BDRSuite Backup Server and the download link for BBA (BDRSuite Backup Agent), in the BDRSuite Backup Server navigate to the Data Center, private cloud & Endpoints tab. Under the Data Source tab, click on Add Microsoft Windows.
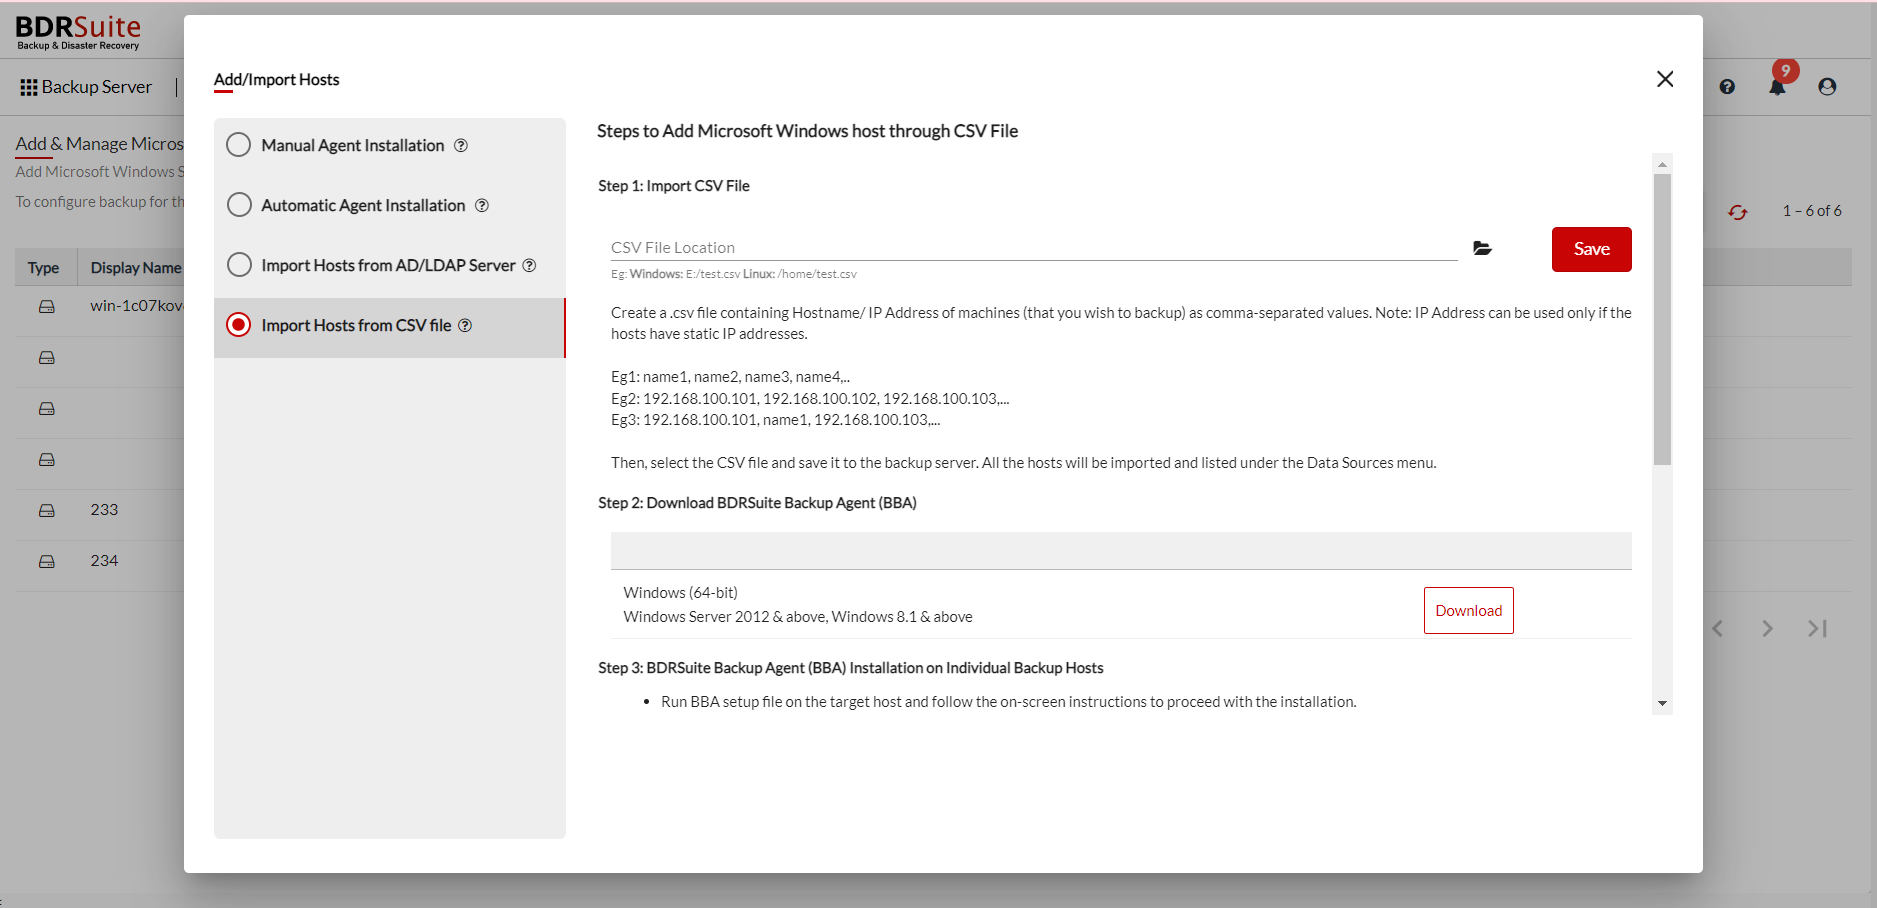 Once the steps mentioned in the BDRSuite Backup Server for creating and importing CSV file and downloading the BBA is complete, then follow the below procedure for bulk installation of Endpoints.
Step 1: Create an MSI with a property value for passing installation arguments
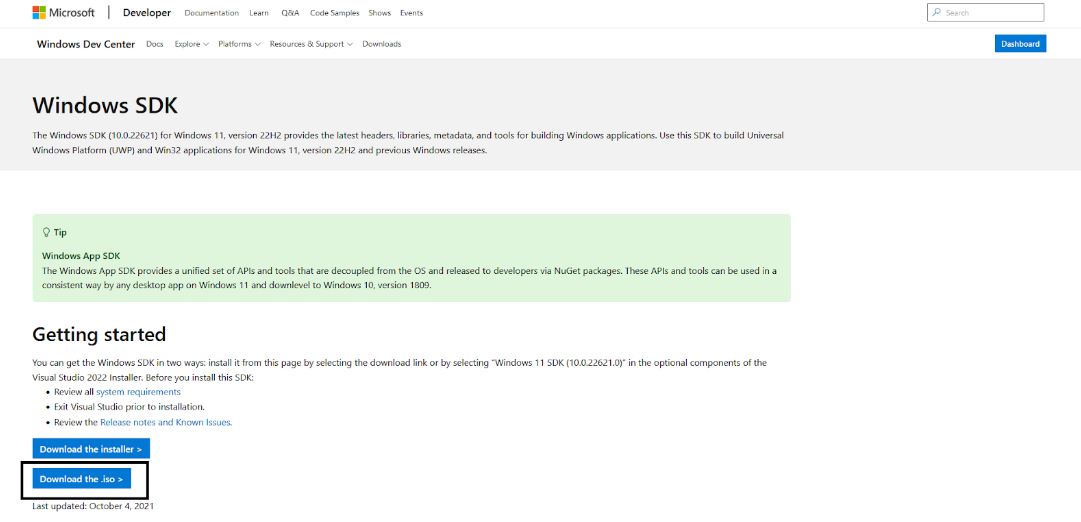
- Download Windows SDK as per your OS requirement from the machine in which you are going to create the MSI with property value .
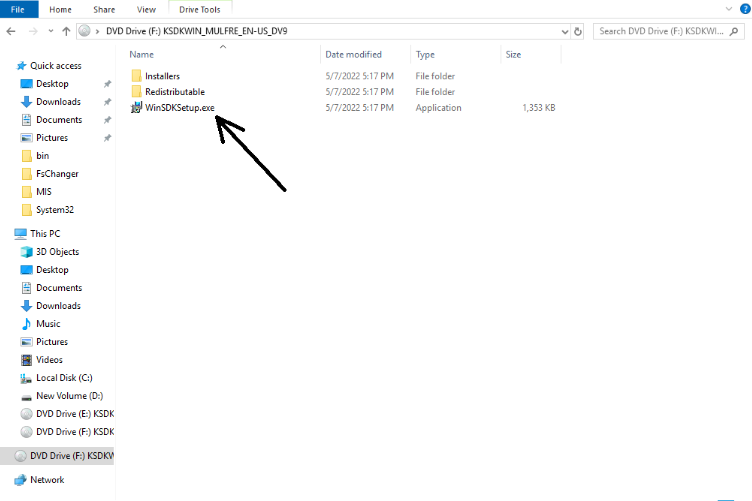
- Mount the ISO file and run the setup exe.
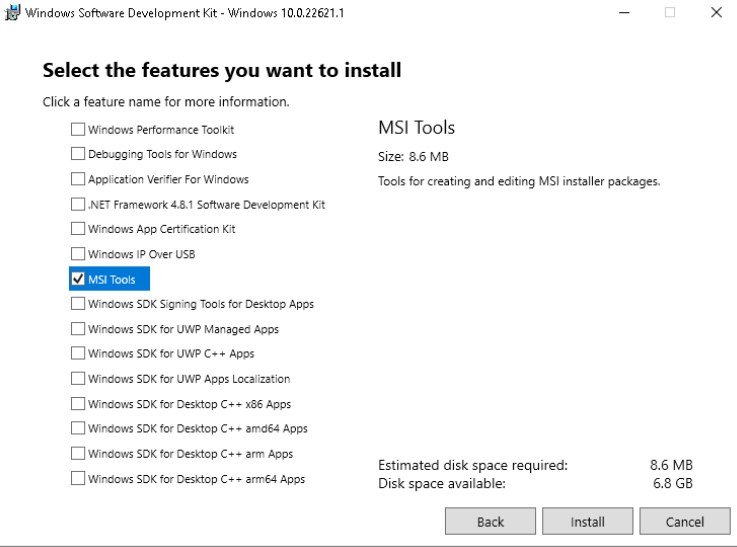
- Choose the MSI tool and proceed with your installation.
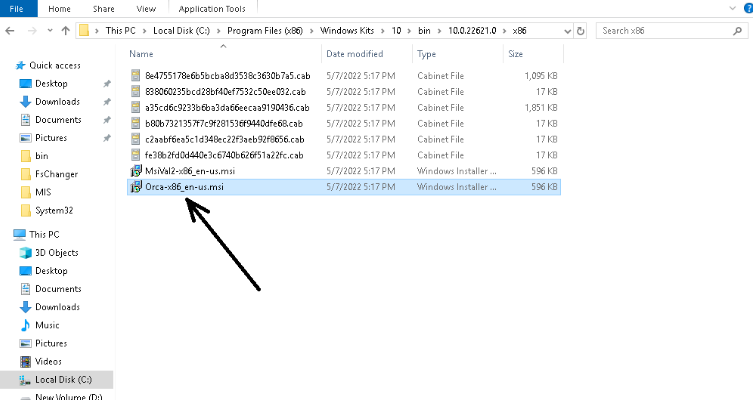
- Once the installation is completed, navigate to the location “C:\Program Files (x86)\Windows Kits\10\bin\10.0.22621.0\x86” (depends on the Windows SDK version, location may vary)
1. Run the ORCA MSI installer.
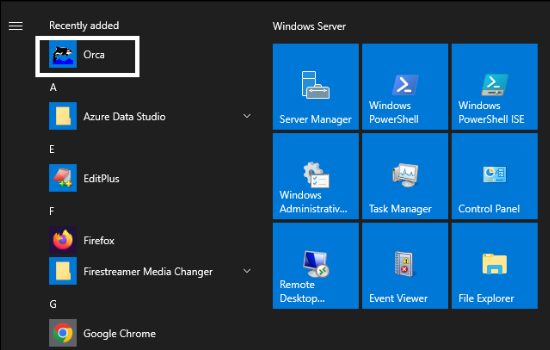
2. Once the installation is completed, you can find the Orca application in the start menu.
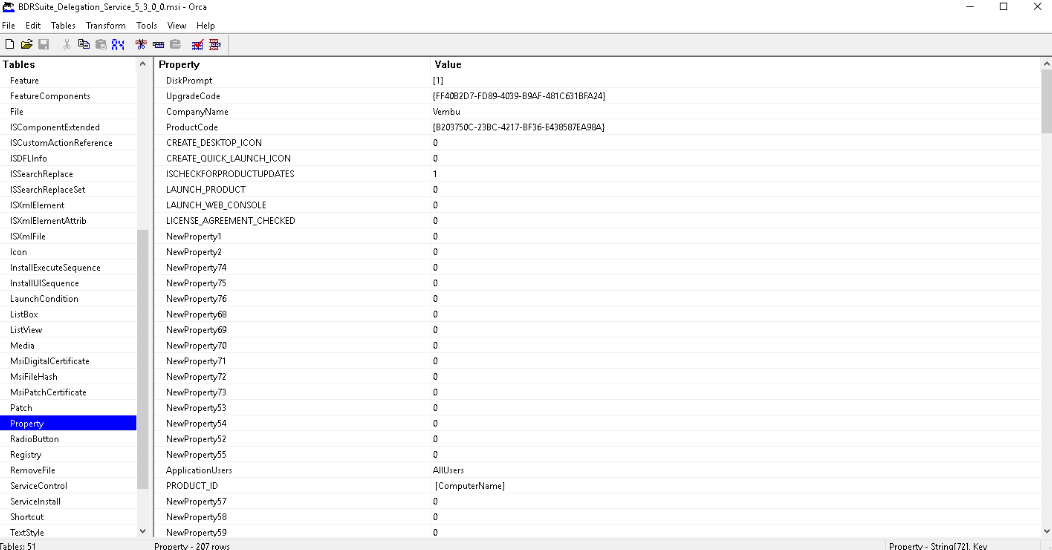
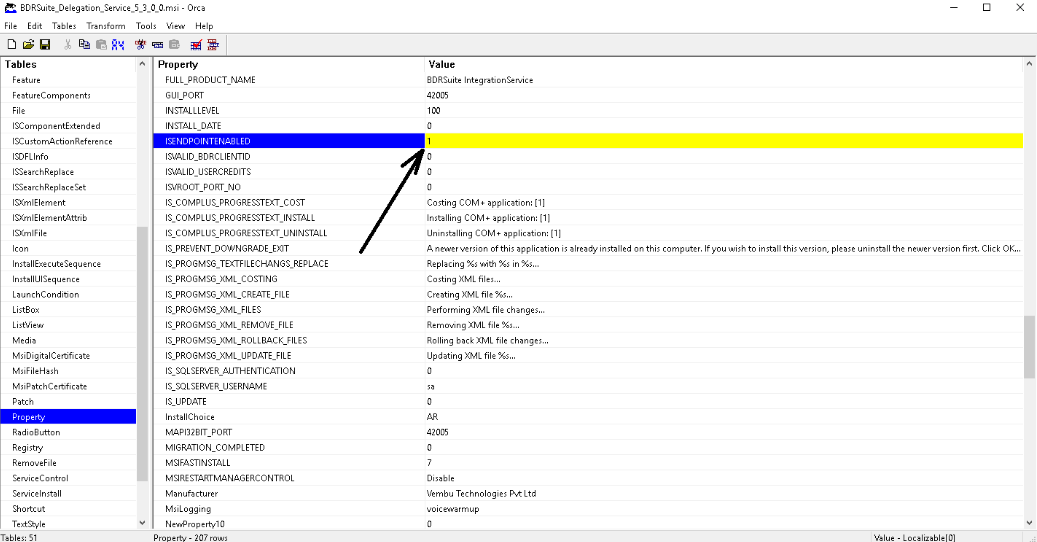
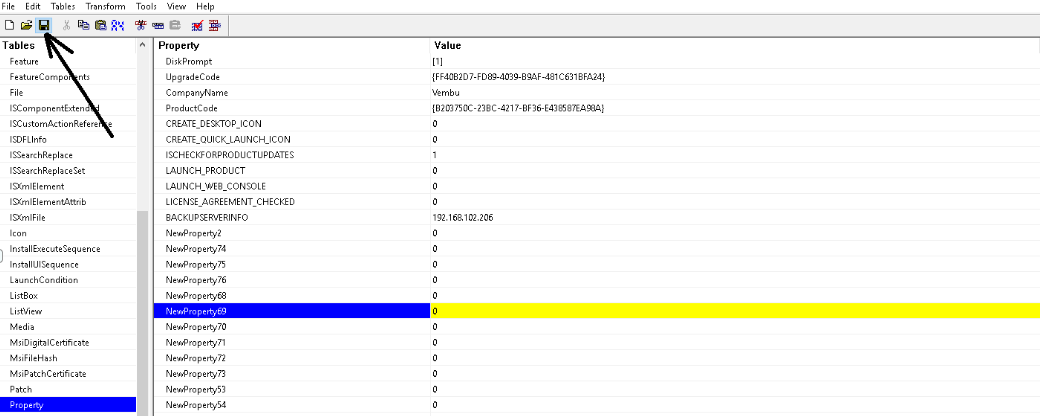
3. Open the “BDRSuite_Delegation_Service_5_6_0_2.msi” in ORCA and navigate to the property table of the MSI.
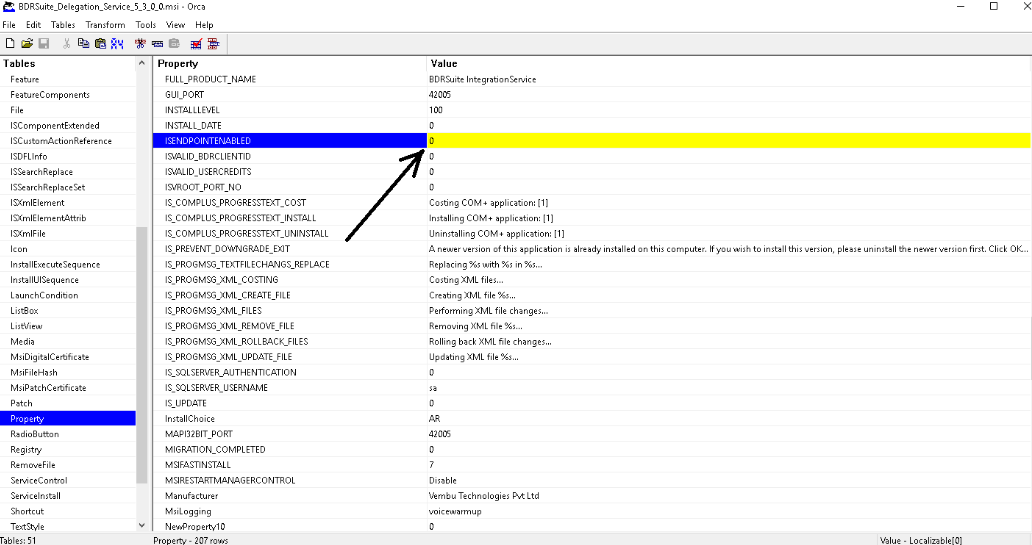
4. Now search for the “ISENDPOINTENABLED” value on the right side of the wizard and change the value from “0” to “1”.
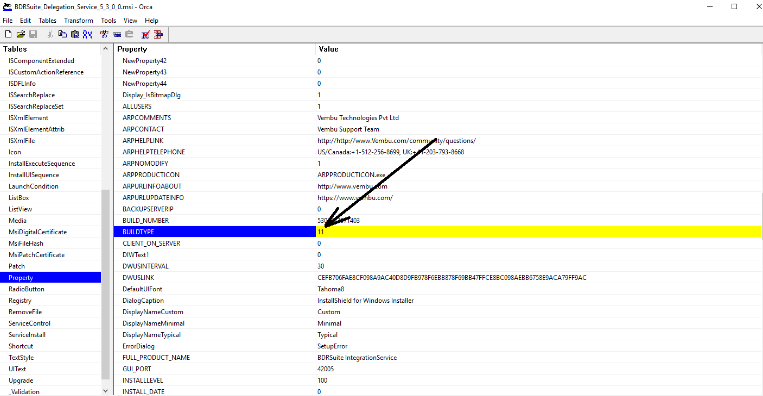
5. Now search for the “BUILDTYPE” value on the right side of the wizard and change the value from “11” to “14”.

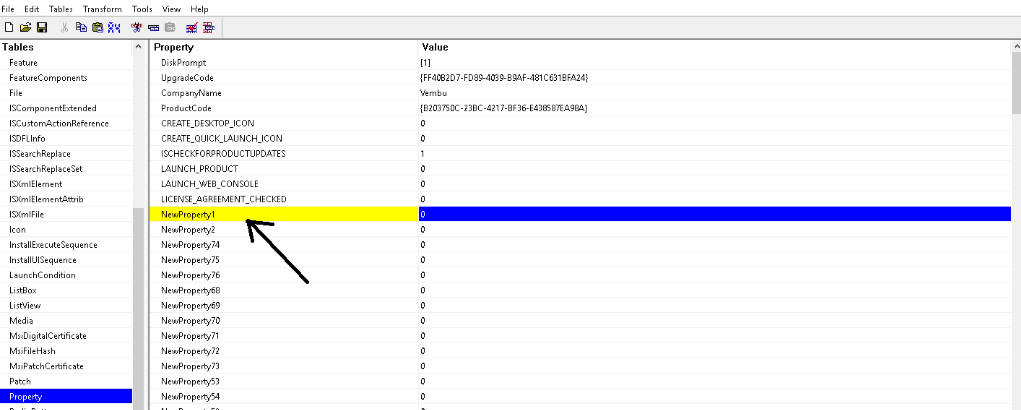
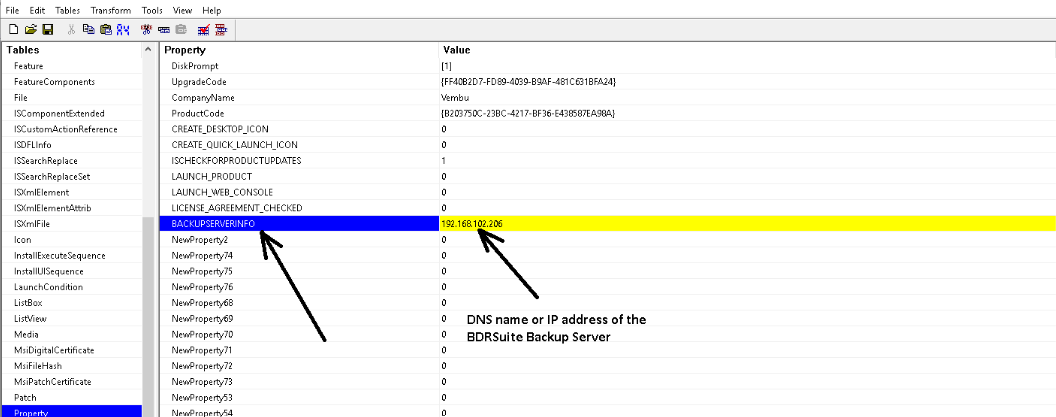
6.Now add a new property table by clicking “NewProperty1” on the right side of the wizard, name the table as “BACKUPSERVERINFO” and set the BDRSuite Backup Server’s IP address or DNS name as the value.

|
Note: Table name is case sensitive use only “BACKUPSERVERINFO” don’t use lower case.
7. After making the above change click save on the file menu.
Step 2: Copy the MSI file to a shared folder
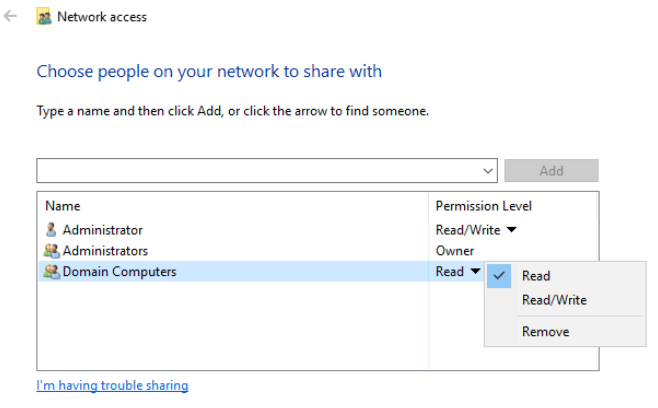
- Copy the downloaded MSI file to a newly created folder and share the folder via right-click over the folder ‘Share with Specific People’.
- Type ‘Domain Computers’ in the search box and give read permissions for ‘Domain Computers’ account and click ‘Share’.
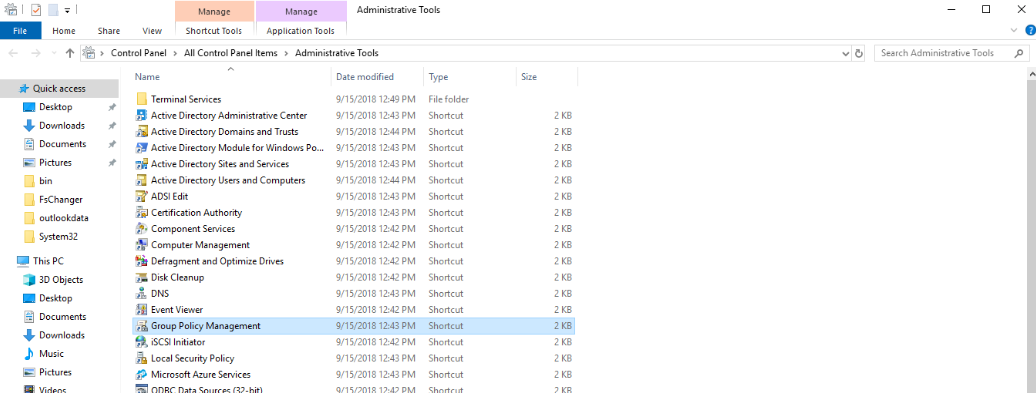
Step 3: Open or Install Group Policy Management
- To open Group Policy Management, go to: ‘Start Administrative Tools Group Policy Management’.
- To install Group Policy Management, open command prompt with administrative privileges and type the below command:
ServerManagerCmd -install gpmc
- Once installed, open Group Policy Management as described above.
Step 4: Go to existing policies and create a new GPO
- Navigate to ‘Domains -> <YOURDOMAIN> -> ‘Group Policy Objects’.
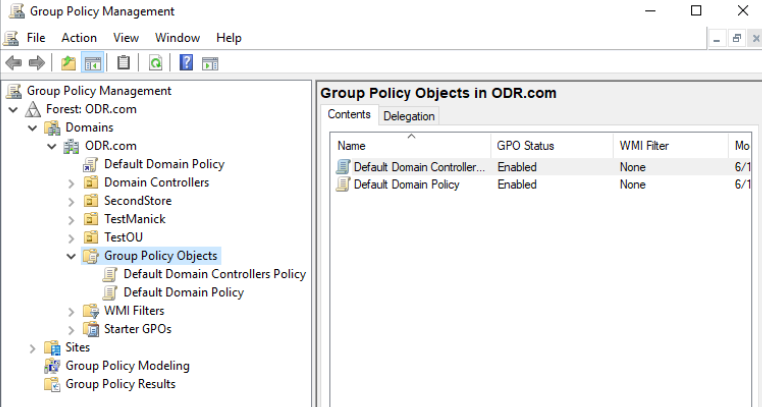
- Click Action New and provide a name for GPO to be created.
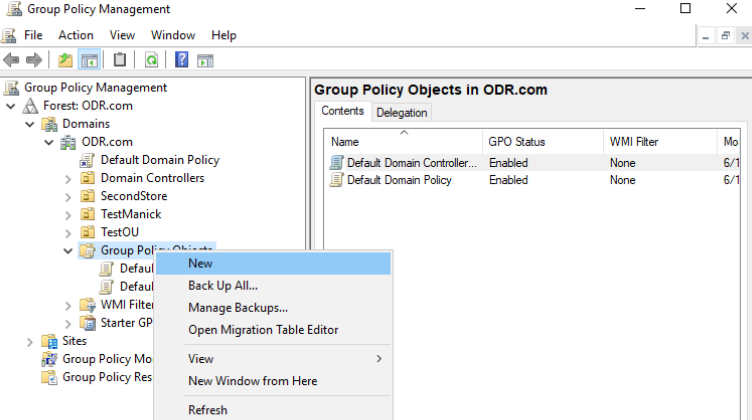
- Once created, it’ll be listed under ‘Group Policy Objects’.
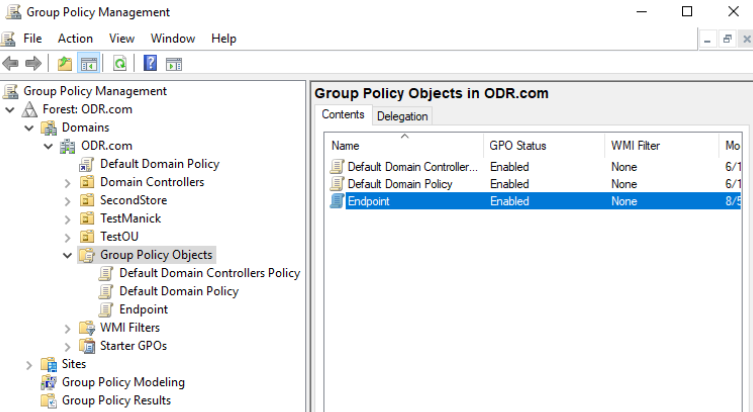
- Click on the new GPO you created in the navigation pane.
- On Right Pane, a box titled ‘Security Filtering’ can be found under the ‘Scope’ tab.
- Click ‘Authenticated Users’ under ‘Security Filtering’ and click ‘Remove’.
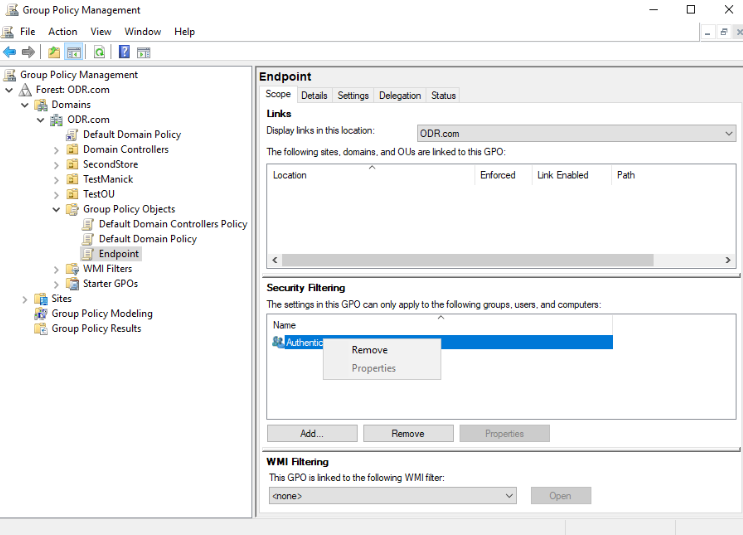
Note: This is to ensure the policy is applied to a specific set of users(as mentioned in below step)
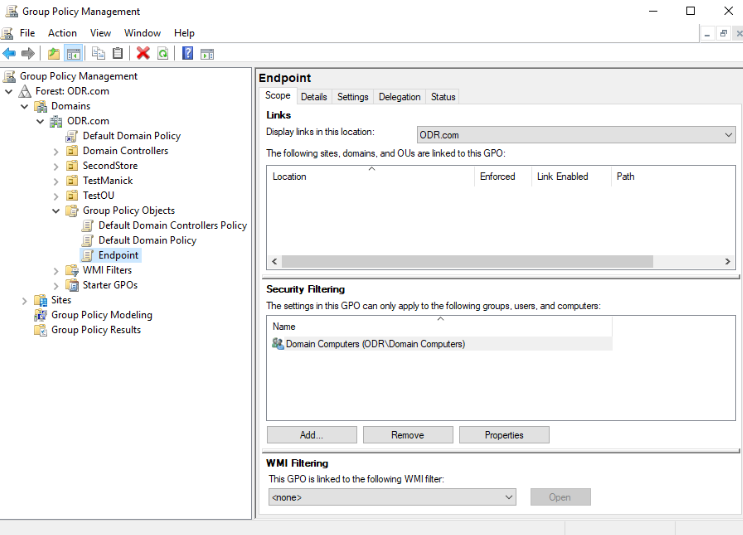
- Now click ‘Add’ and under ‘Select User, Computer, or Group’ Dialog Box, provide specific computer names or usernames you want the GPO to be applied.
Step 5: Add MSI builds
- Right-click on the newly created GPO and click ‘Edit’.
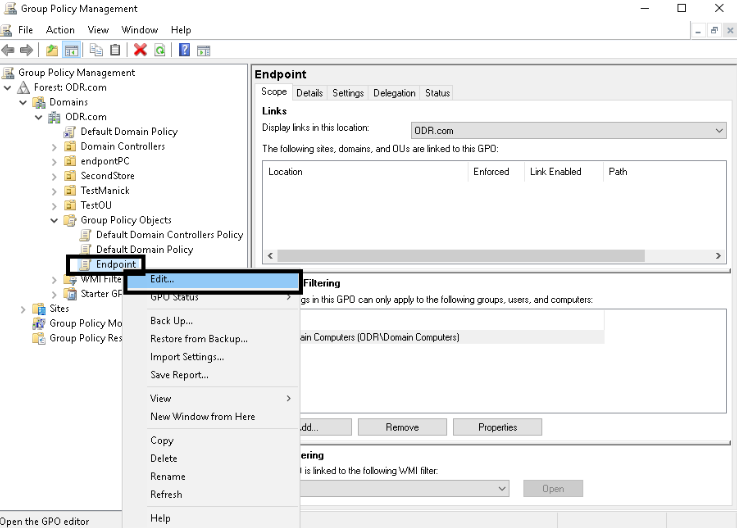
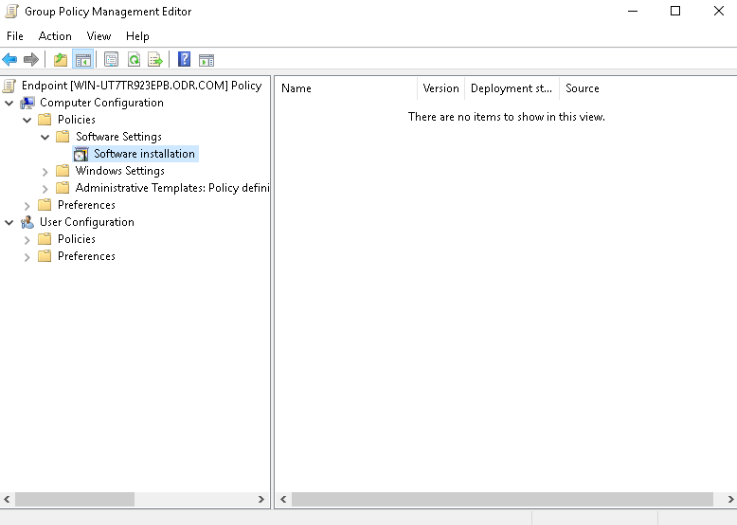
- ‘Group Policy Management Editor’ dialog box will open, navigate to ‘Computer Configuration’-> ‘Policies’ ->‘Software Settings’ ->‘Software Installations’ in the navigation pane.
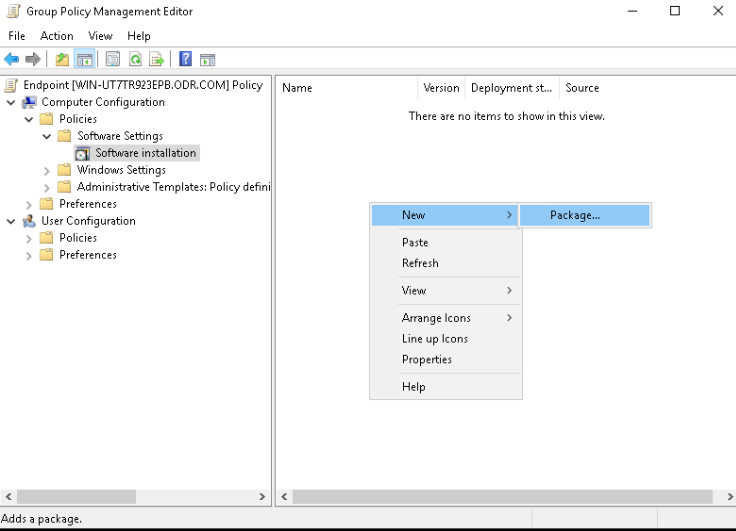
- Right-click over the empty pane on right and go to ‘New’ ‘Software Package’.
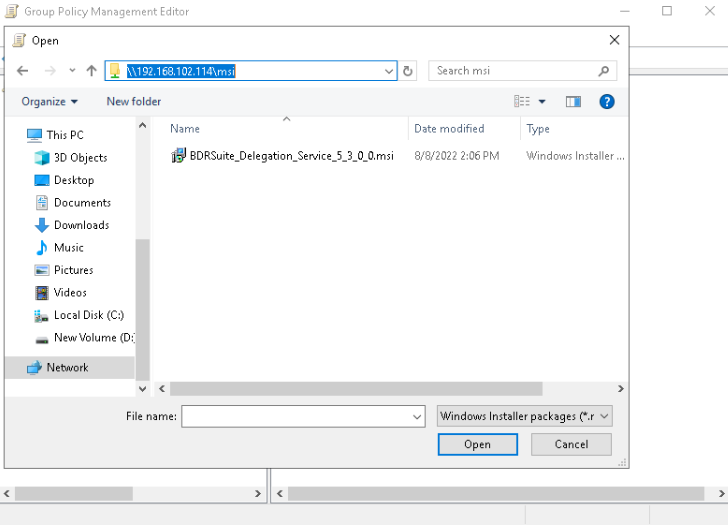
- In the window that pops up, navigate to the share created earlier(Under Step: 5) and select MSI clients.
Note: Type the full Universal Naming Convention (UNC) path of the shared installer package that you want. For example, \\<file server>\<share>\<file name>.msi. Don’t just browse local drive and add the MSI. Use only the share path
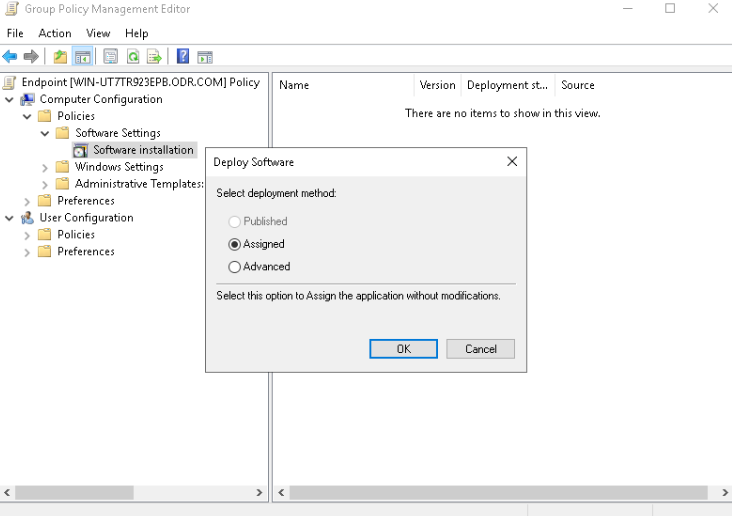
- Click the ‘Assigned’ bubble and click OK.
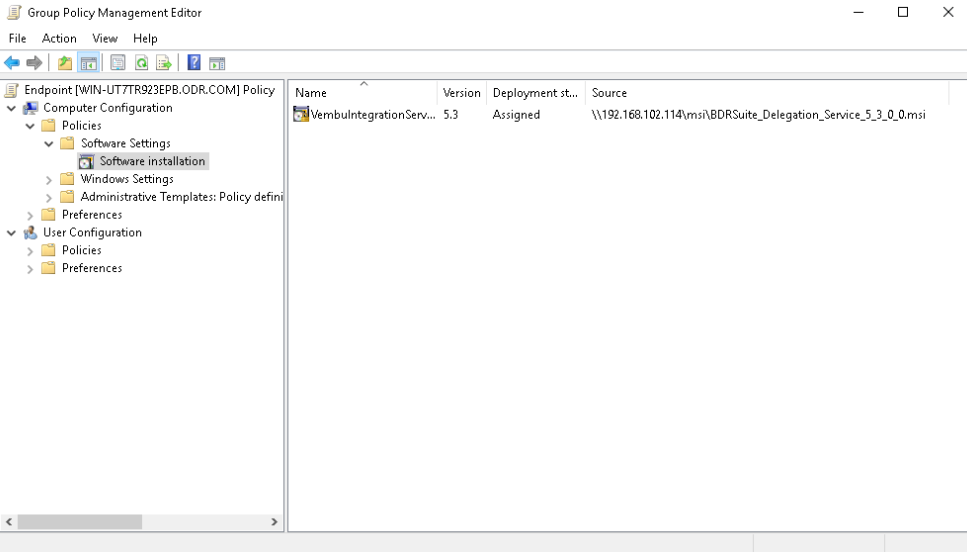
- Now the “BDRSuite_Delegation_Service_5_3_0_0.msi” will be listed in right side wizard.
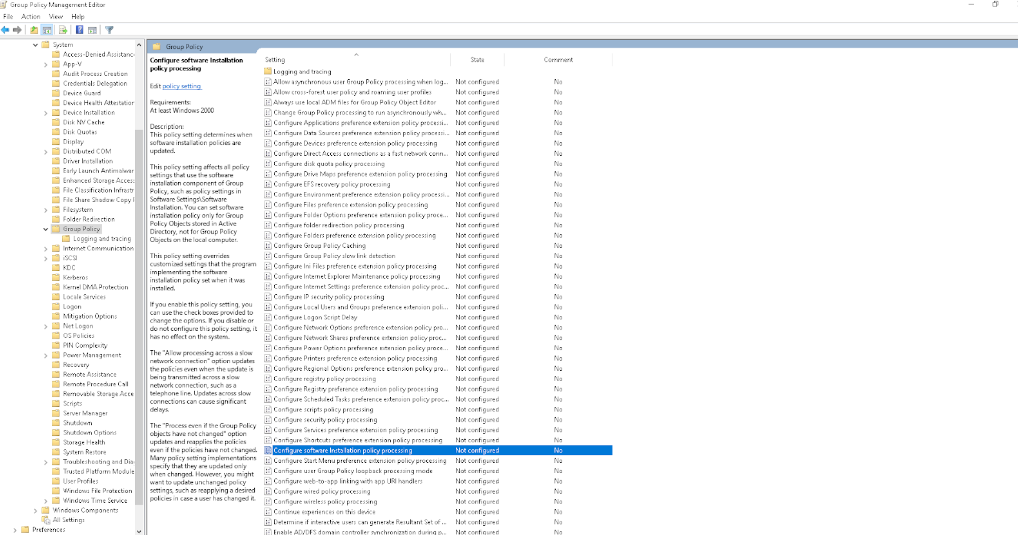
- Now navigate to Computer Configuration->Policies>Administrative Templates->System->Group Policy and go to the option “Configure software Installation policy processing”.
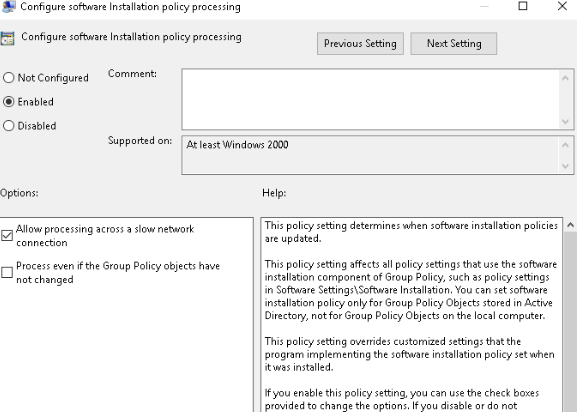
- Double click it and enable it and choose the option “Allow processing across a slow network connection.” and click apply.
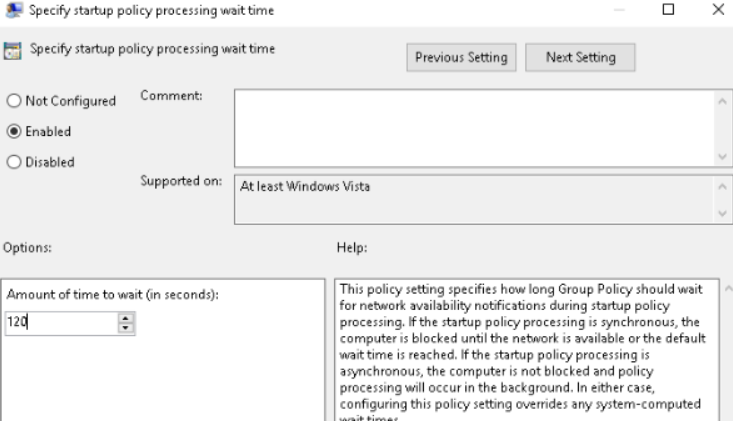
- Now go to the option “Specify startup policy processing wait time” and double click it.
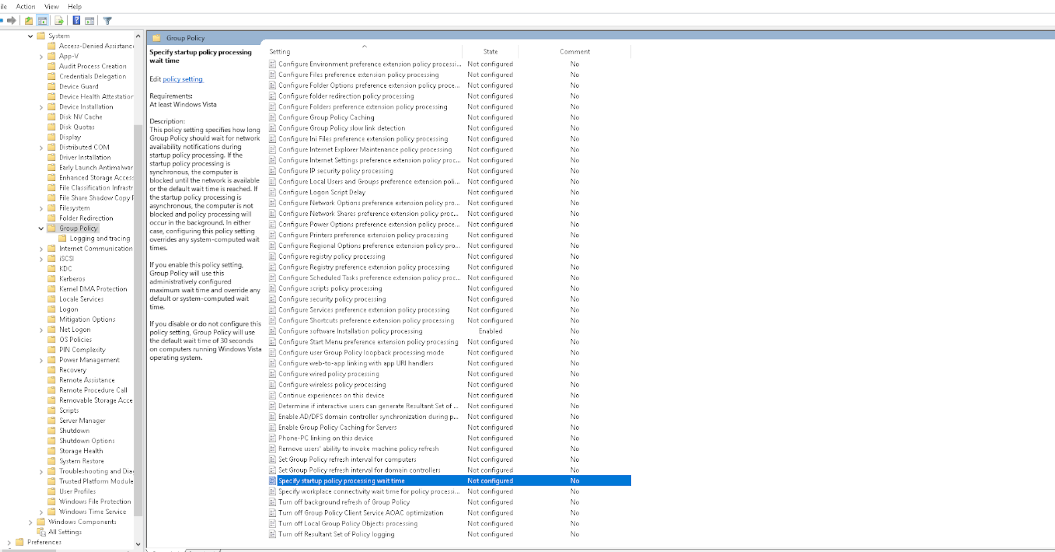
- Enable it and set time time value as 120 (default value).
- Close the Group Policy snap-in, click OK, and then close the Active Directory Users and Computers snap-in.
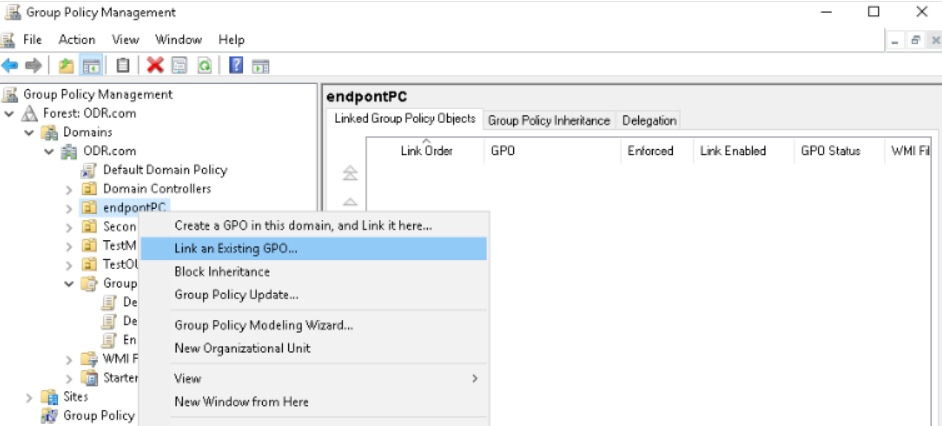
- Re-open the Group Policy Management.
- Right click the on the organization unit for which your are going to install the Endpoint MSI and select “Link and existing GPO.
- Select the newly created GPO.
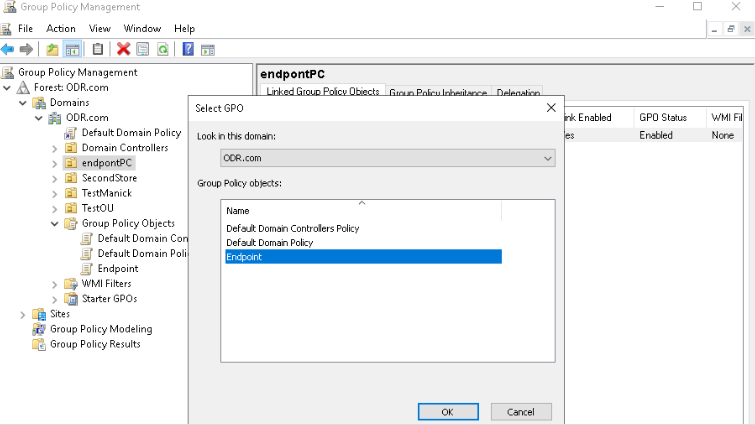
- Now the selected GPO will be listed on right side of the wizard.
- Now close the GPO wizard and update the GPO by opening the command prompt with administrator privilege and run the command “gpupdate /force”.
- Now the MSI will be installed into the Endpoint host when the user logs in.
Note: Not applicable for BDRSuite Client for VMware/Hyper-V/Windows/Linux.