
Read on:
VMware for Beginners – Overview of vSphere: Part 1
VMware for Beginners – vSphere Installation Requirements: Part 2
VMware for Beginners – How to Install vSphere: Part 3
VMware for Beginners – vSphere Networking : Part 4
VMware for Beginners – vSphere Datastores – Part 5
VMware for Beginners – vSphere Virtual Machines – Part 6
In the latest article regarding VMware for Beginners, we talked about Virtual Machines and what they are, their configurations, and how to create them.
We are now ready to switch our configuration from ESXi host management to central management using VMware Center.
In vCenter, we can manage more than one ESXi host, create ESXi Clusters, Datastore Clusters, create Distributed Switches, etc.
So our articles, from now on, will be focusing on creating our VMware environment through vCenter.

First, we need to install vCenter in our ESXi host that we created in previous articles.
Start by downloading the vCenter ISO to deploy in your ESXi host. vSphere 8 and vCenter 8 have been launched, but we will stick to vCenter 7 for now.
After we have all our VMware infrastructure installed, we will learn how to upgrade the VMware environment(ESXi and vCenter) to the latest vSphere 8.
Login to your VMware account and download the latest vCenter 7 ISO.
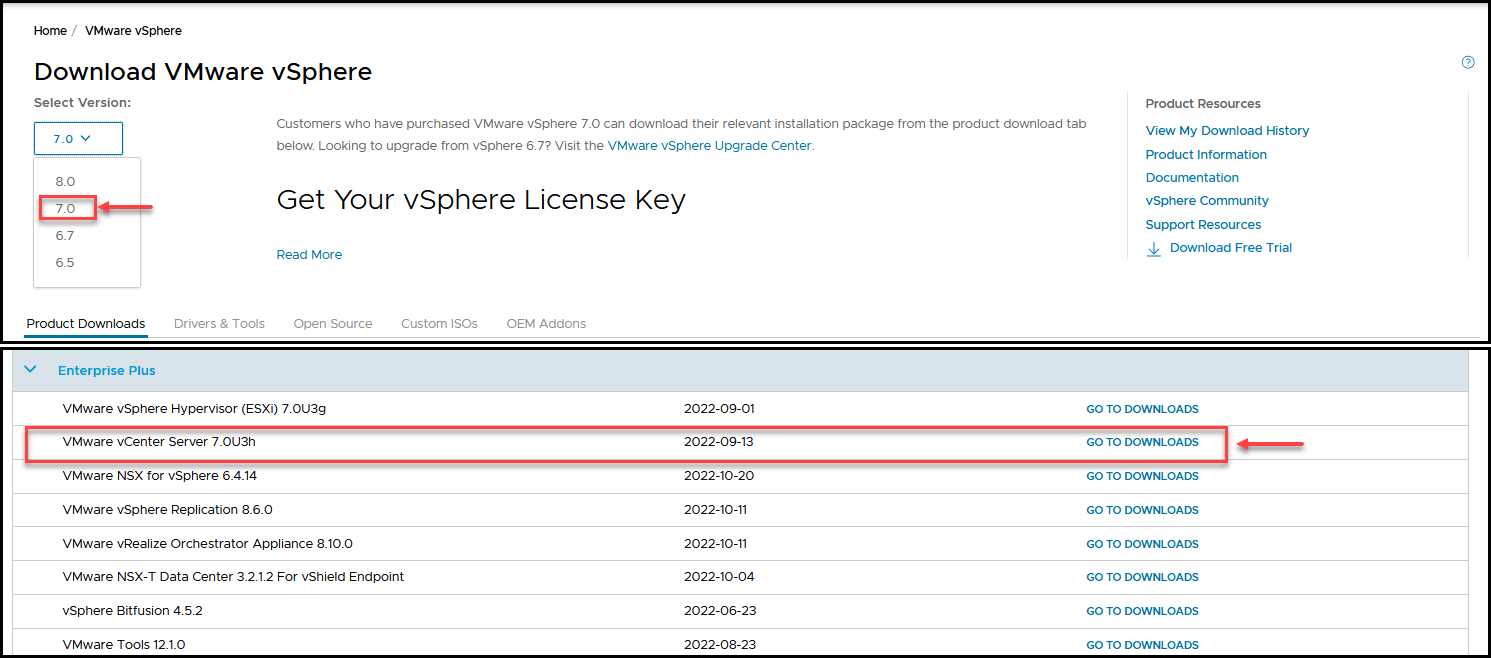
After you select your vCenter version and build, download the ISO, not the upgrade bundle(we will use that one in later articles when we upgrade our environment).
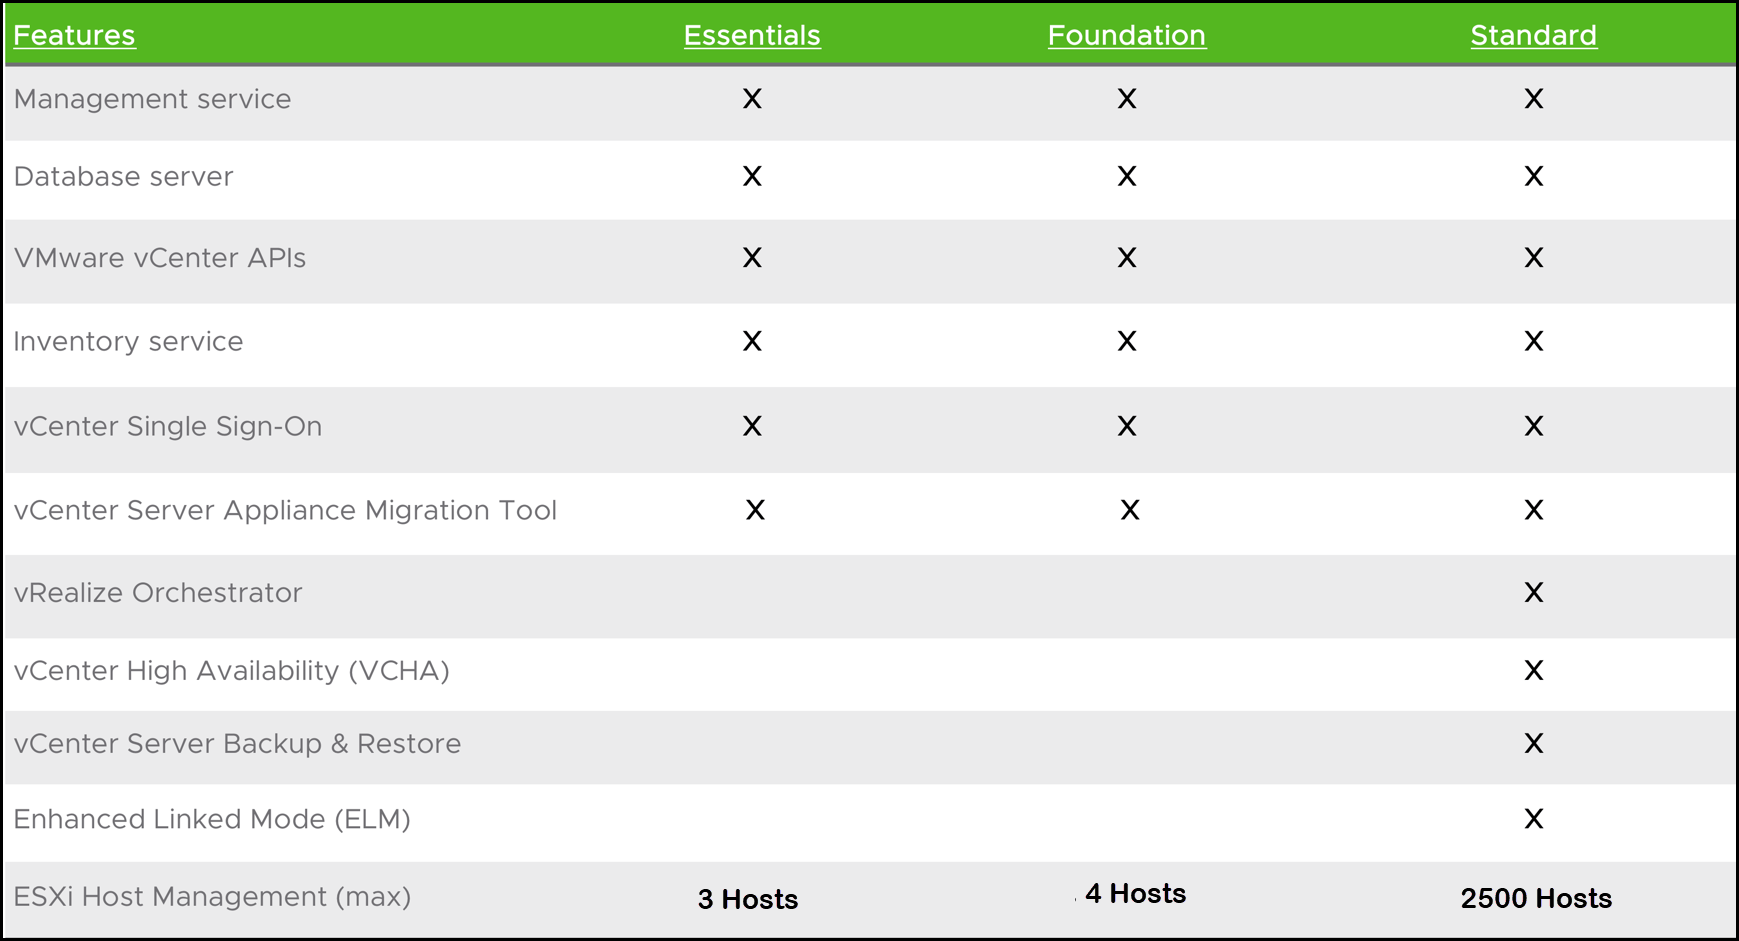
vCenter licensing:
When you install a vCenter Server system, it is automatically in evaluation mode. No need to add a license and the vCenter Server system expires 60 days after the product is installed.
When the license or evaluation period of a vCenter Server system expires, all hosts disconnect from that vCenter Server system. The virtual machines running on the disconnected hosts remain intact.
There are 3 types of vCenter licensing, Standard, Foundation, and Essentials.
vCenter Server licenses for Standard or Foundation are sold separately from vSphere licensing except vCenter Server Essentials licensing. vCenter Essentials license is included with a vSphere Essentials Kit.
The “normal” license is the Standard that includes all vCenter features, and when you install vCenter, the evaluation mode is the Standard license.
How to install vCenter
After downloading your ISO file, you must run it from a Windows machine. In our case, you can mount the ISO (VMware-VCSA-all-7.0.3-20395099.iso) in your Windows or extract the whole ISO. I will mount the ISO in my F: drive for our case.
The file installer.exe to run the installer is in F:\vcsa-ui-installer\win32.
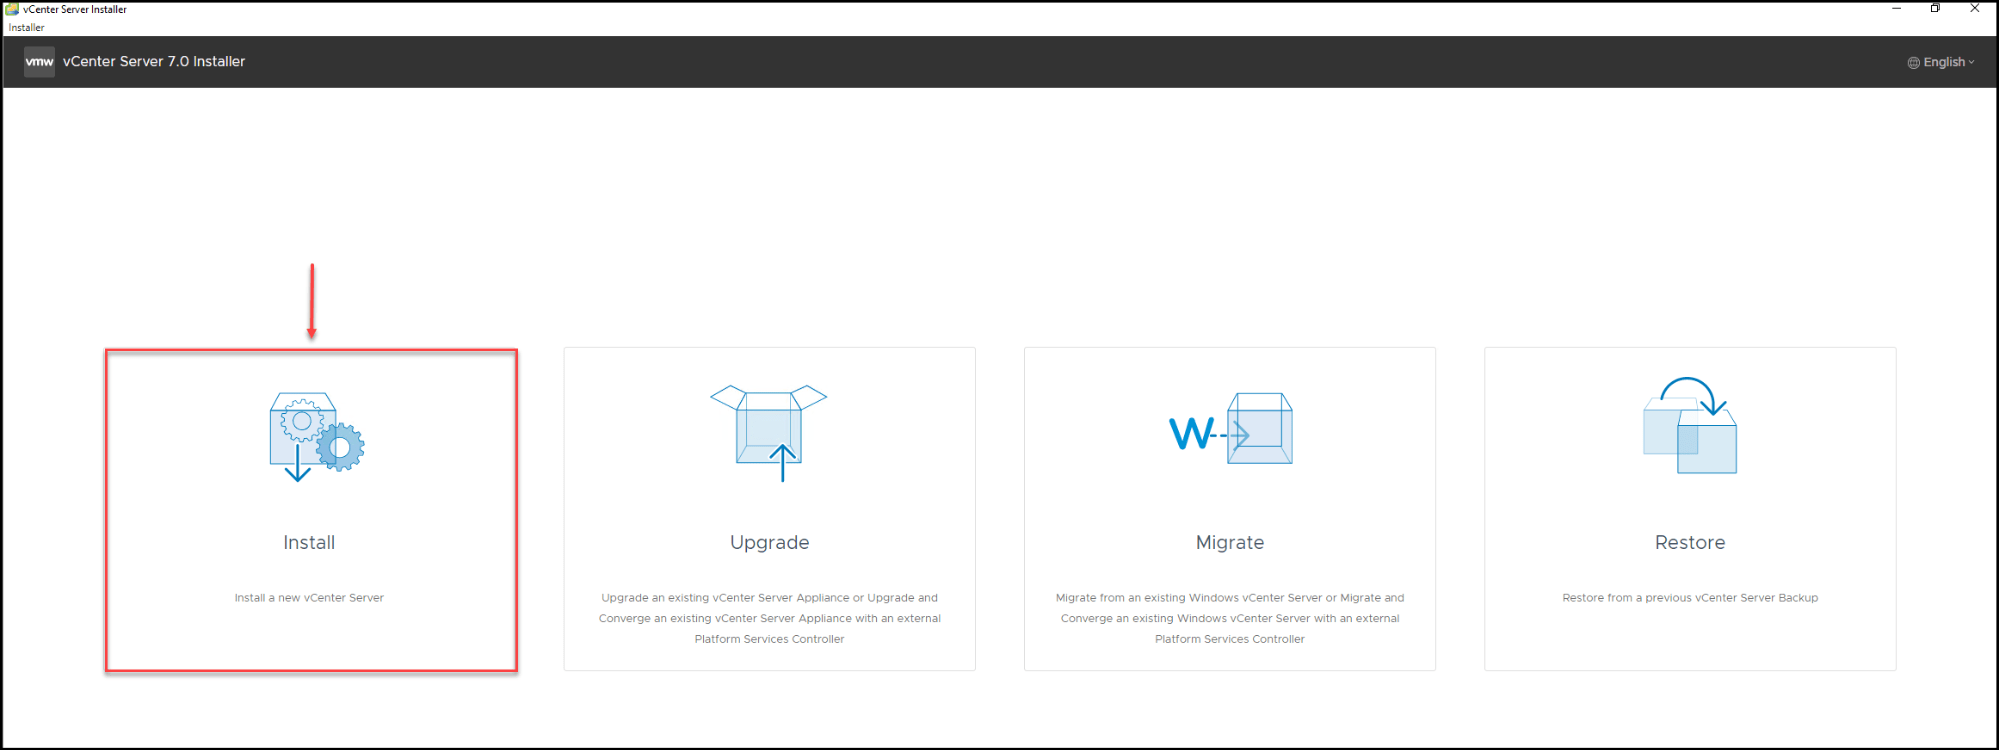
Run the file and start the installation of vCenter.
With the installer.exe file, we can install, upgrade, migrate or restore a vCenter. For installing, we select the Install option.
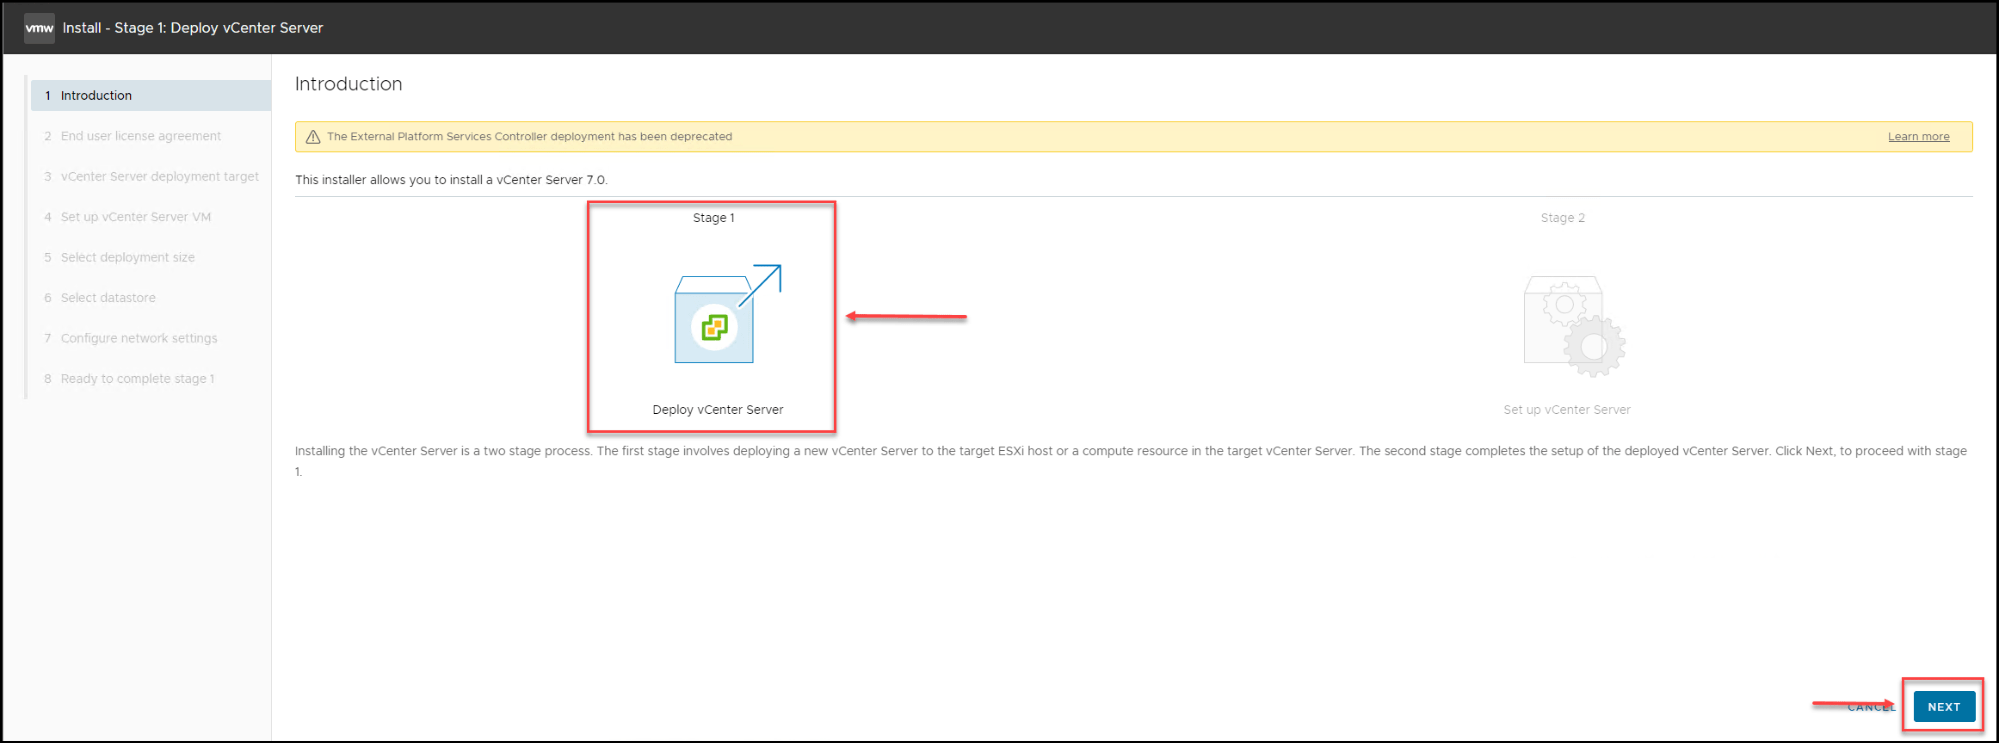
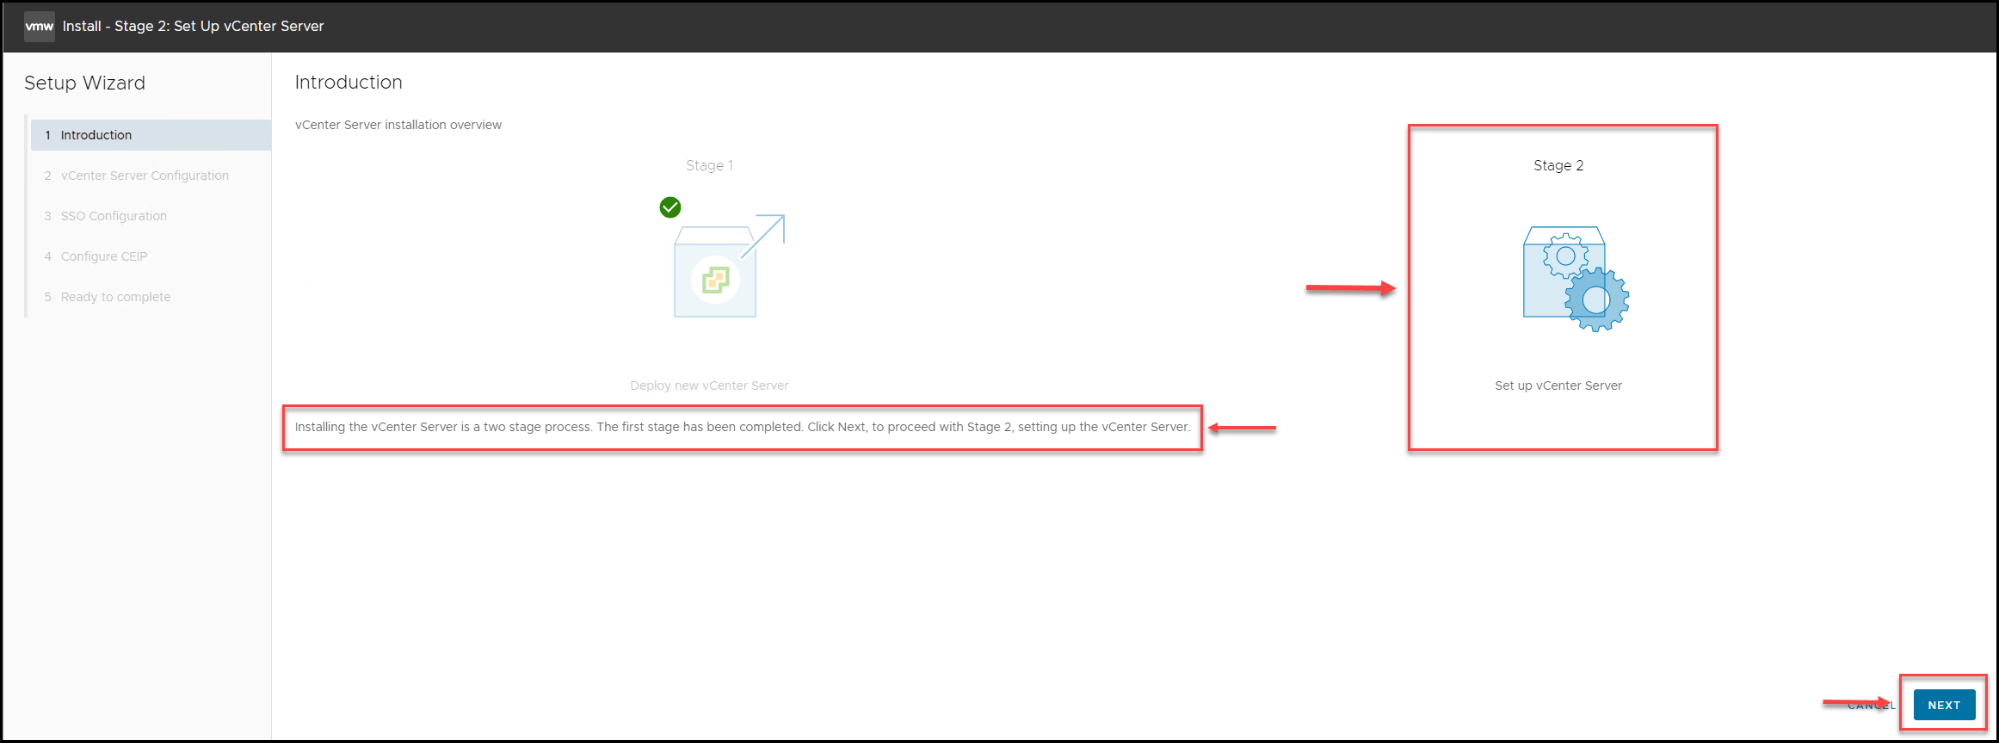
When we install or upgrade vCenter, it deploys in two stages:
The first stage is: Deploy the vCenter Server (creates the vCenter Appliance in your ESXi host and configurations like IP, Gateway, DNS, etc.)
The second Stage is: Set up the vCenter Server (Mainly creates the vCenter Single Sign-On Domain)
In the initial stage, just click Next.
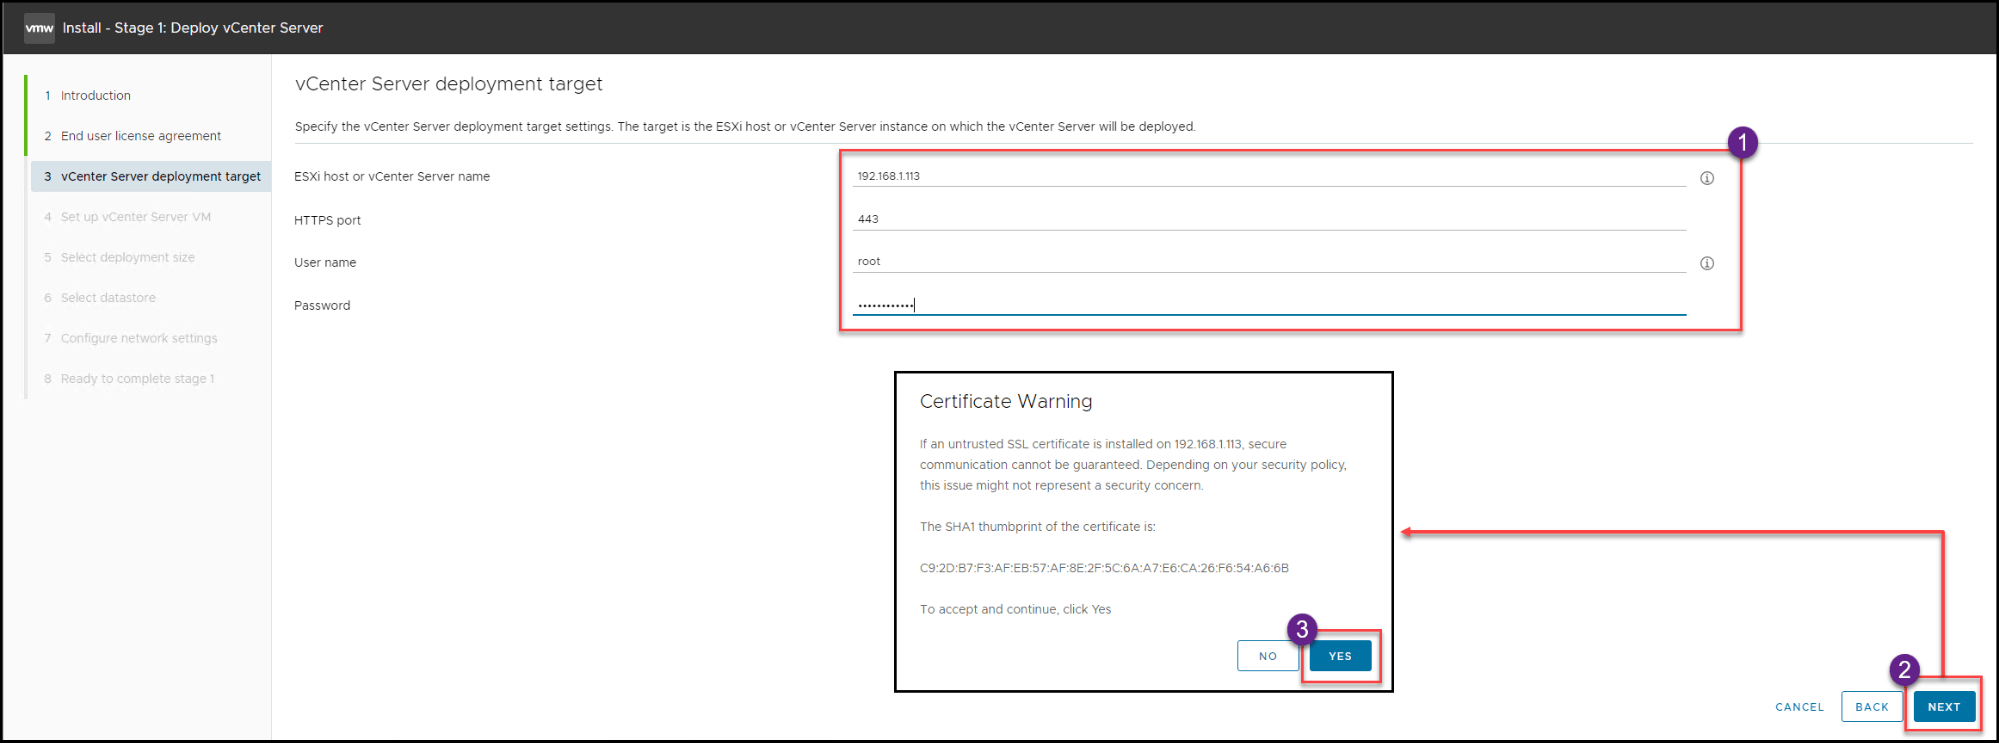
After we accept the End user license agreement, we need to set the ESXi host and the credentials where we will install this vCenter Appliance.
Add the ESXi host and credentials we built in the previous articles and click Next. Accept the certificate and continue.
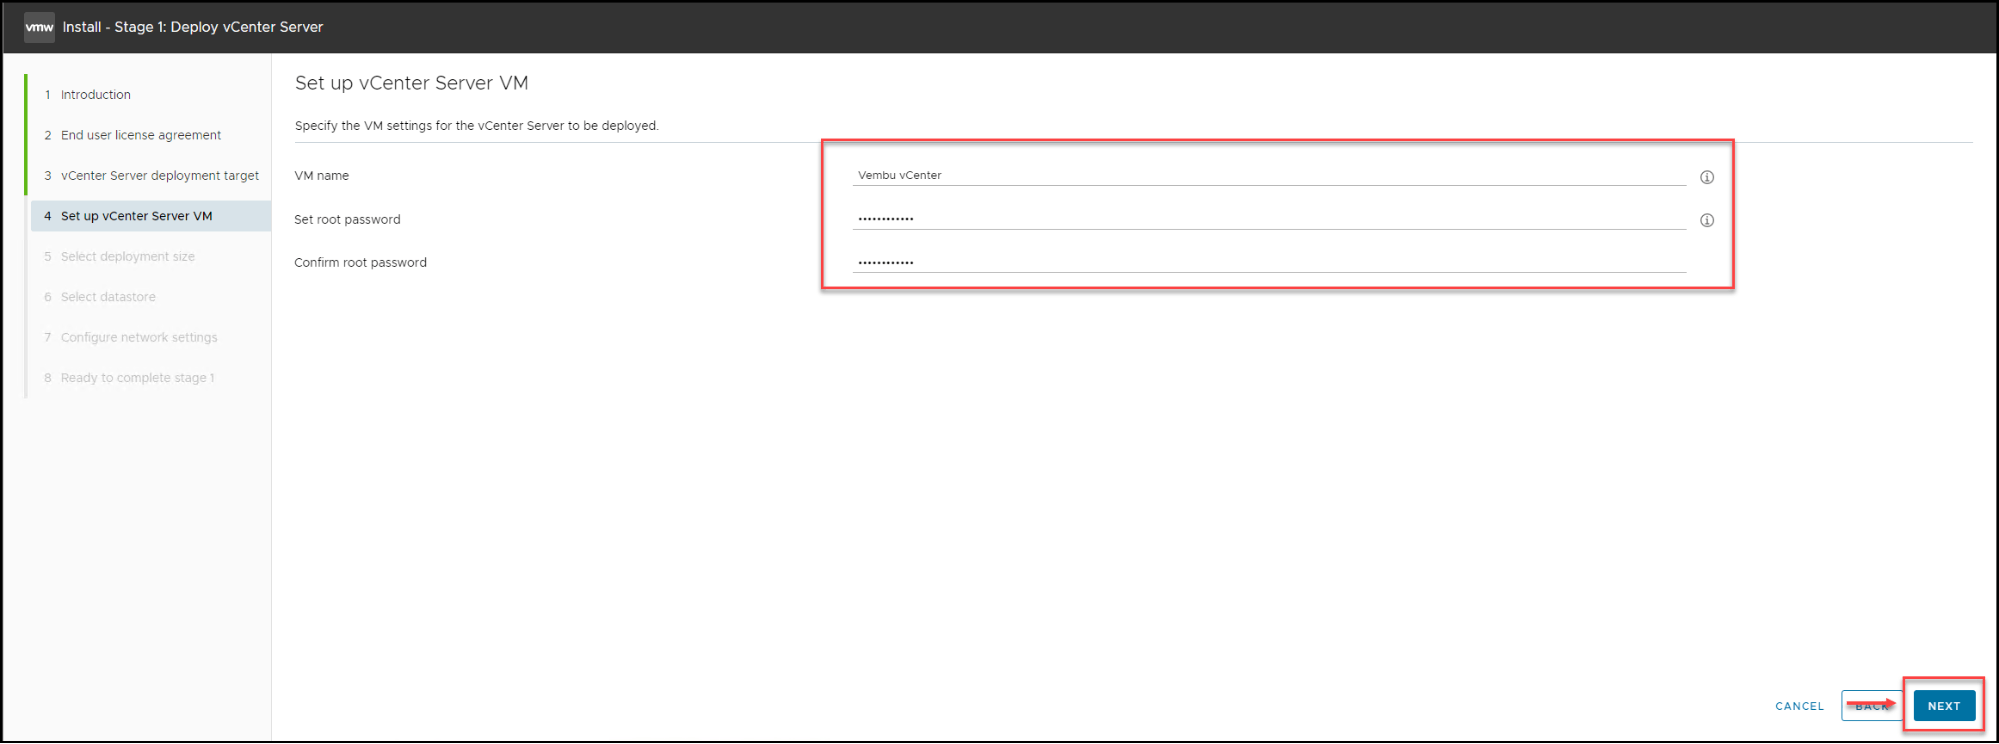
Since vCenter will be a Virtual Machine in your ESXi host, you need to set a name for your vCenter VM and set a root password for the Appliance.
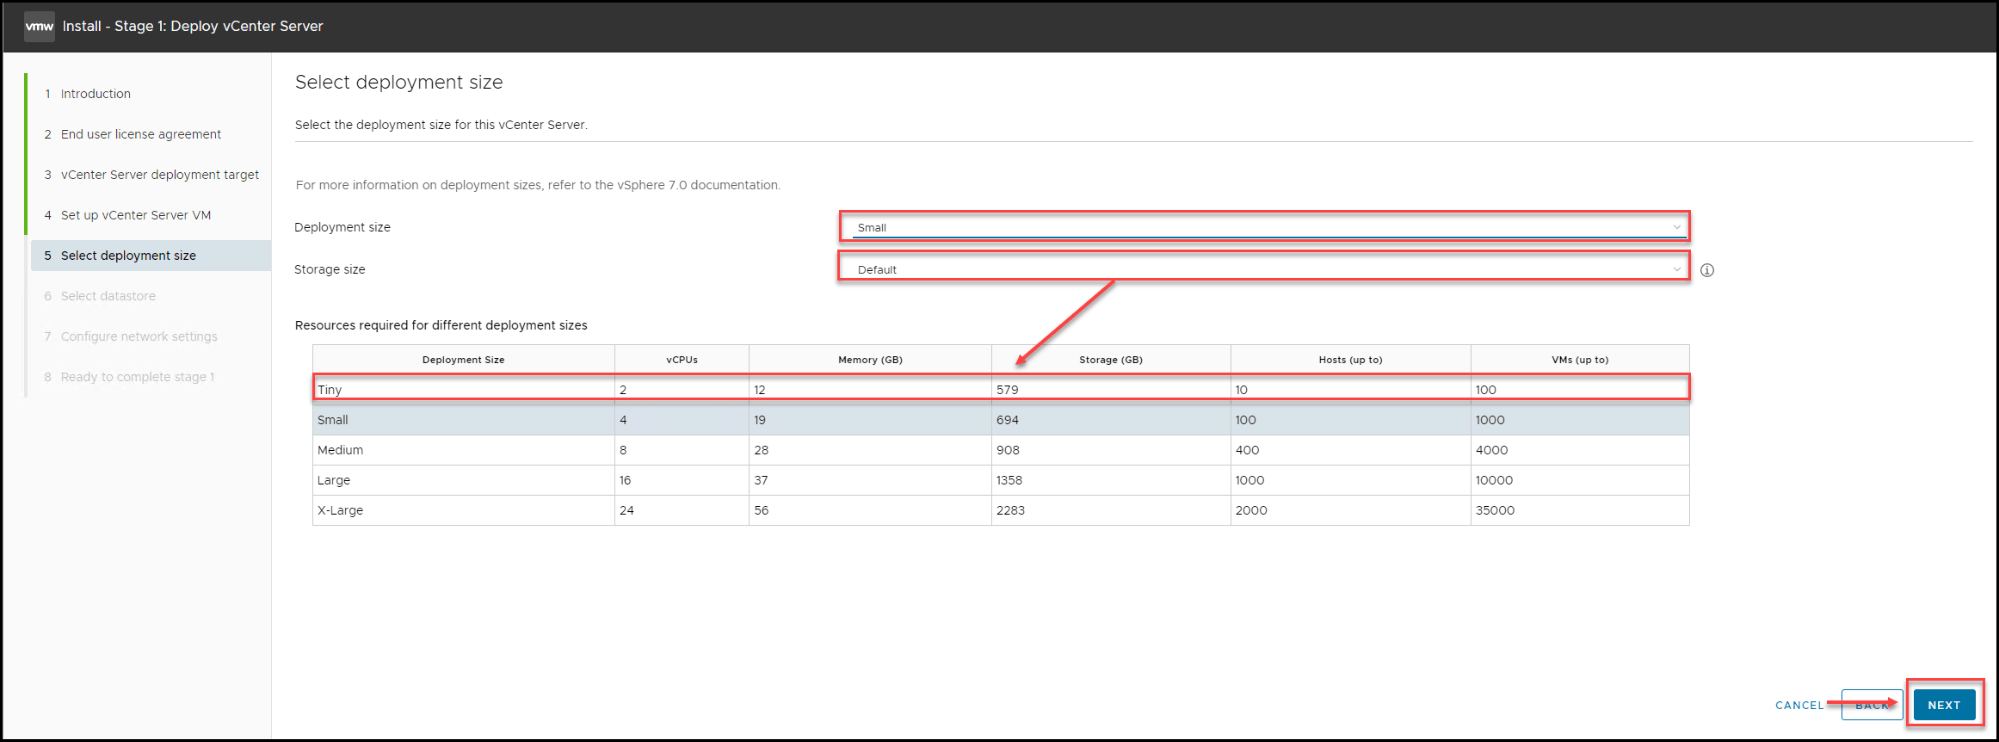
Next, we select the size of our vCenter. Here your option depends on your environment. If you are building for a test lab, then the Tiny option is more than enough(it can manage up to 10 ESXi hosts and up to 100 VMs), but if you are building for a production environment, you need to select what it will be for your future environment.
The size of the Storage size is also essential. If you plan to have all full stats, alarms, tasks, etc., you need a bigger disk size to allocate all that information because it will have a bigger DB. Then you can select from Large to X-Large. The size in GB depends on the Deployment size.
For our case, we stick to the Tiny option and default Storage size with 579 GB.
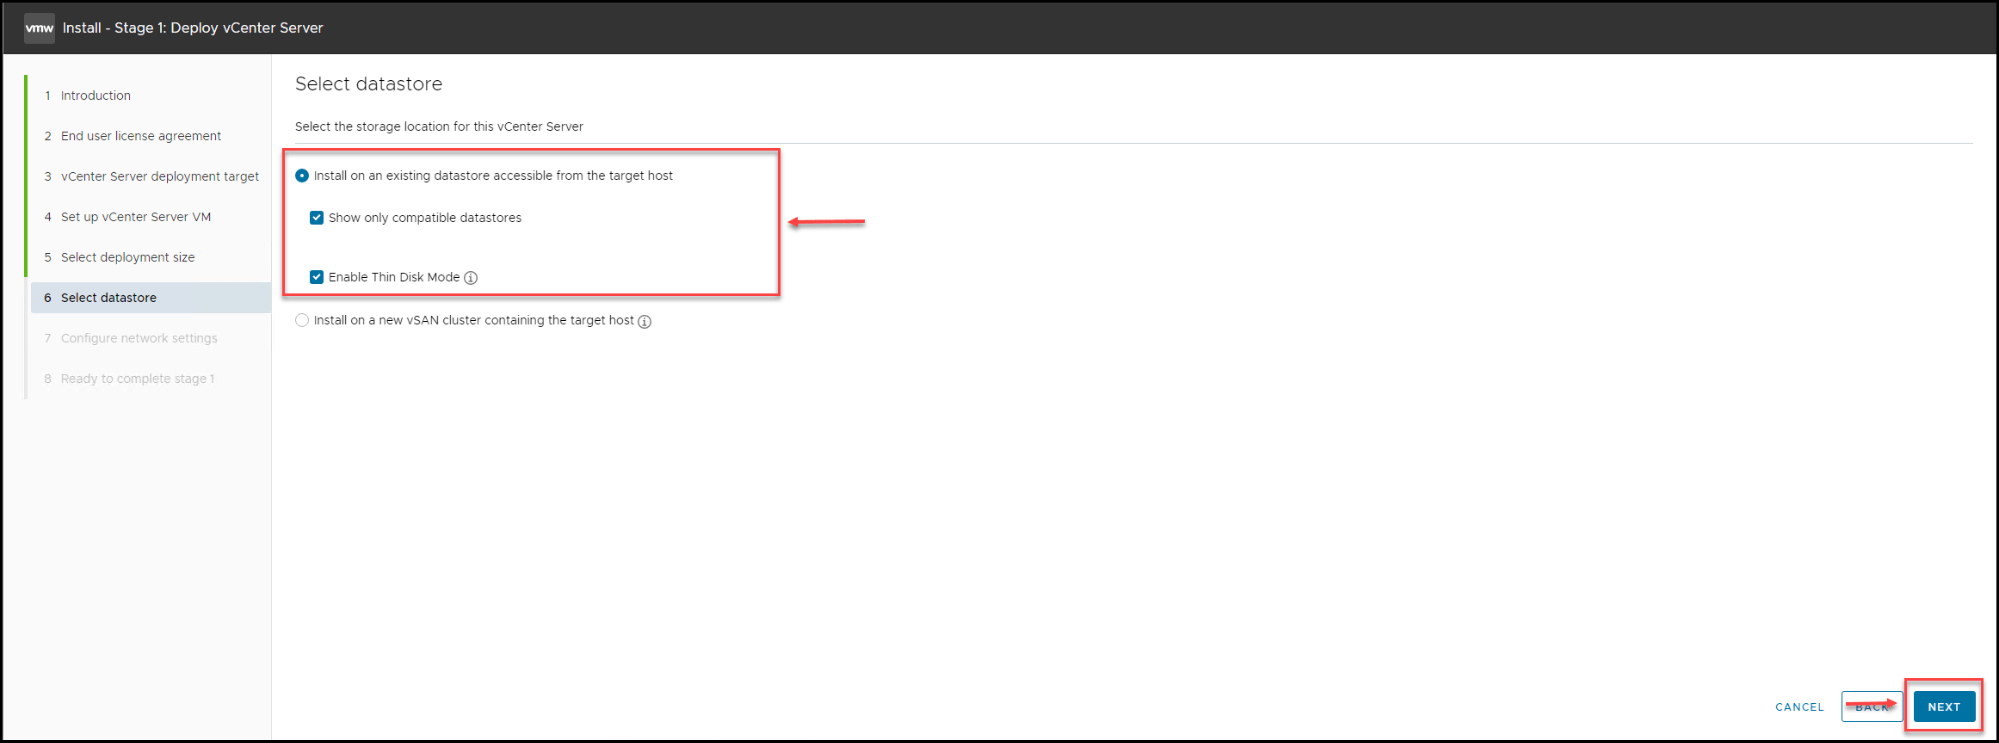
Important note: Don’t forget that you need to have in your ESXi host a Datastore with the size that could allocate the vCenter size).
In this section, we select Datastore to install our vCenter Appliance. As I said above, we need enough space to deploy the 579 GB Appliance. But since in our ESXi host, we only have 150Gb, we will select the option Thin Disk Mode.
Note: We will discuss disk type in further articles, but Think Disk means that we will only use the needed space. Even though the Disk is 579 GB, it only uses/writes 20/30GB. So by using this option, we can install the Appliance and save storage space.
If we had more physical disks in your ESXi host, vCenter would create one host vSAN Datastore to deploy this vCenter Appliance (we will explain about vSAN in further articles). We will skip this option.
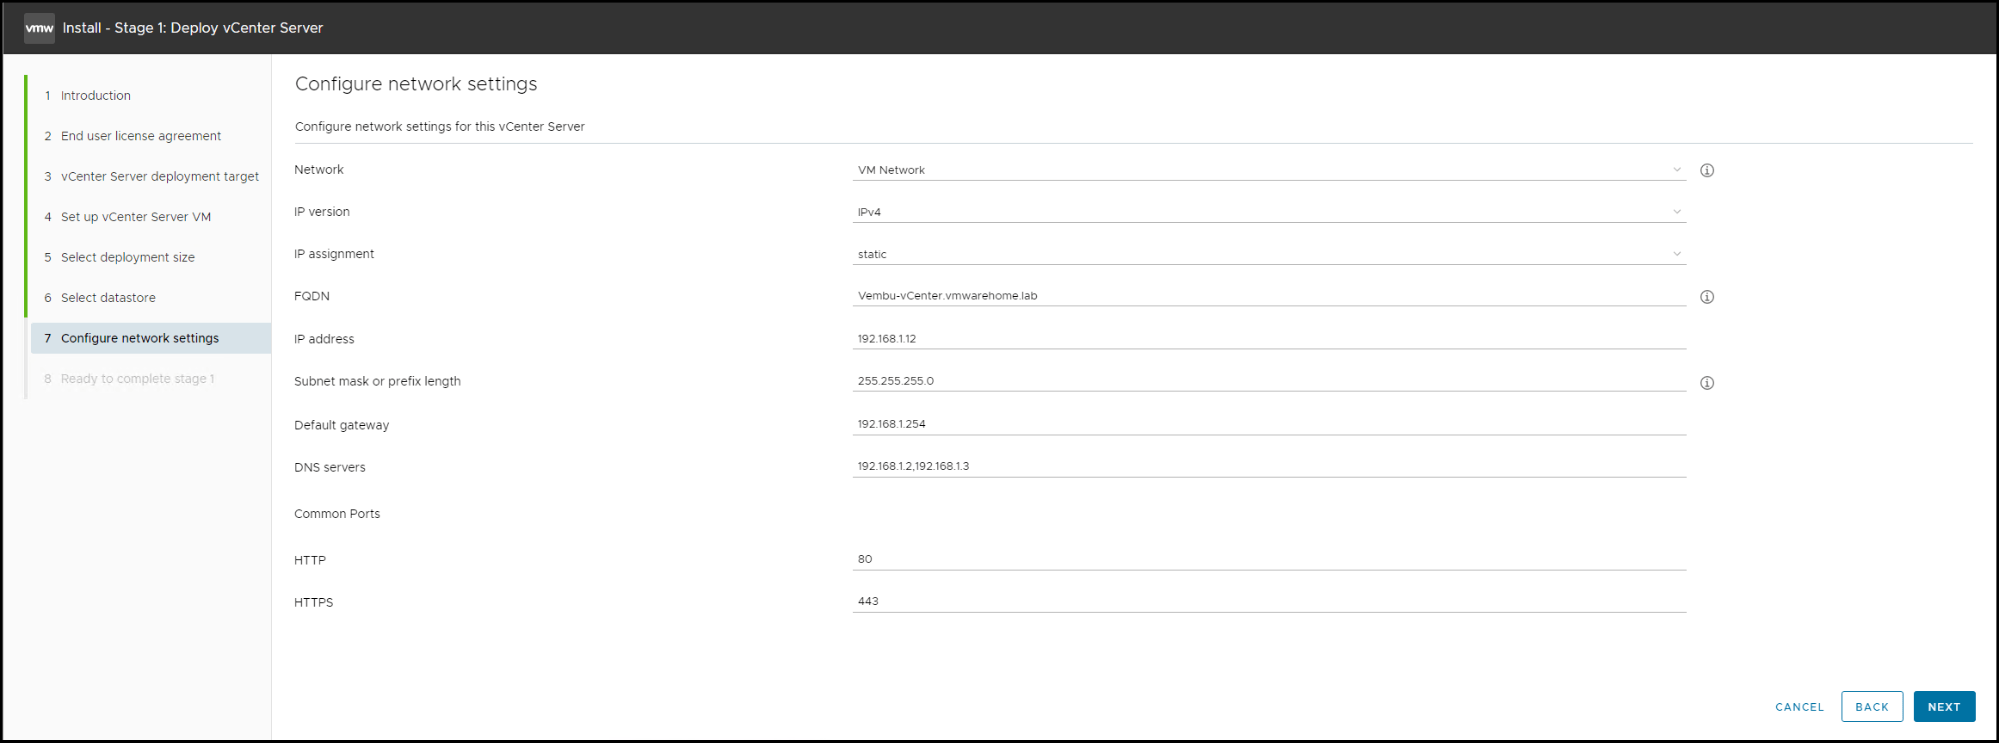
Next, add the VM network that we created in the latest articles regarding networks for Virtual Machines.
You need to add an IP address, Gateway, or DNS. Or you can use your DHCP server to set this(in that case, you need to change from static to DHCP). Only change ports if this is mandatory in your company environment. If not, leave the default.
Note: Create a DNS record for your vCenter.
Confirm all the information; if everything is ok, click Finish and deploy the vCenter Appliance in your ESXi host.
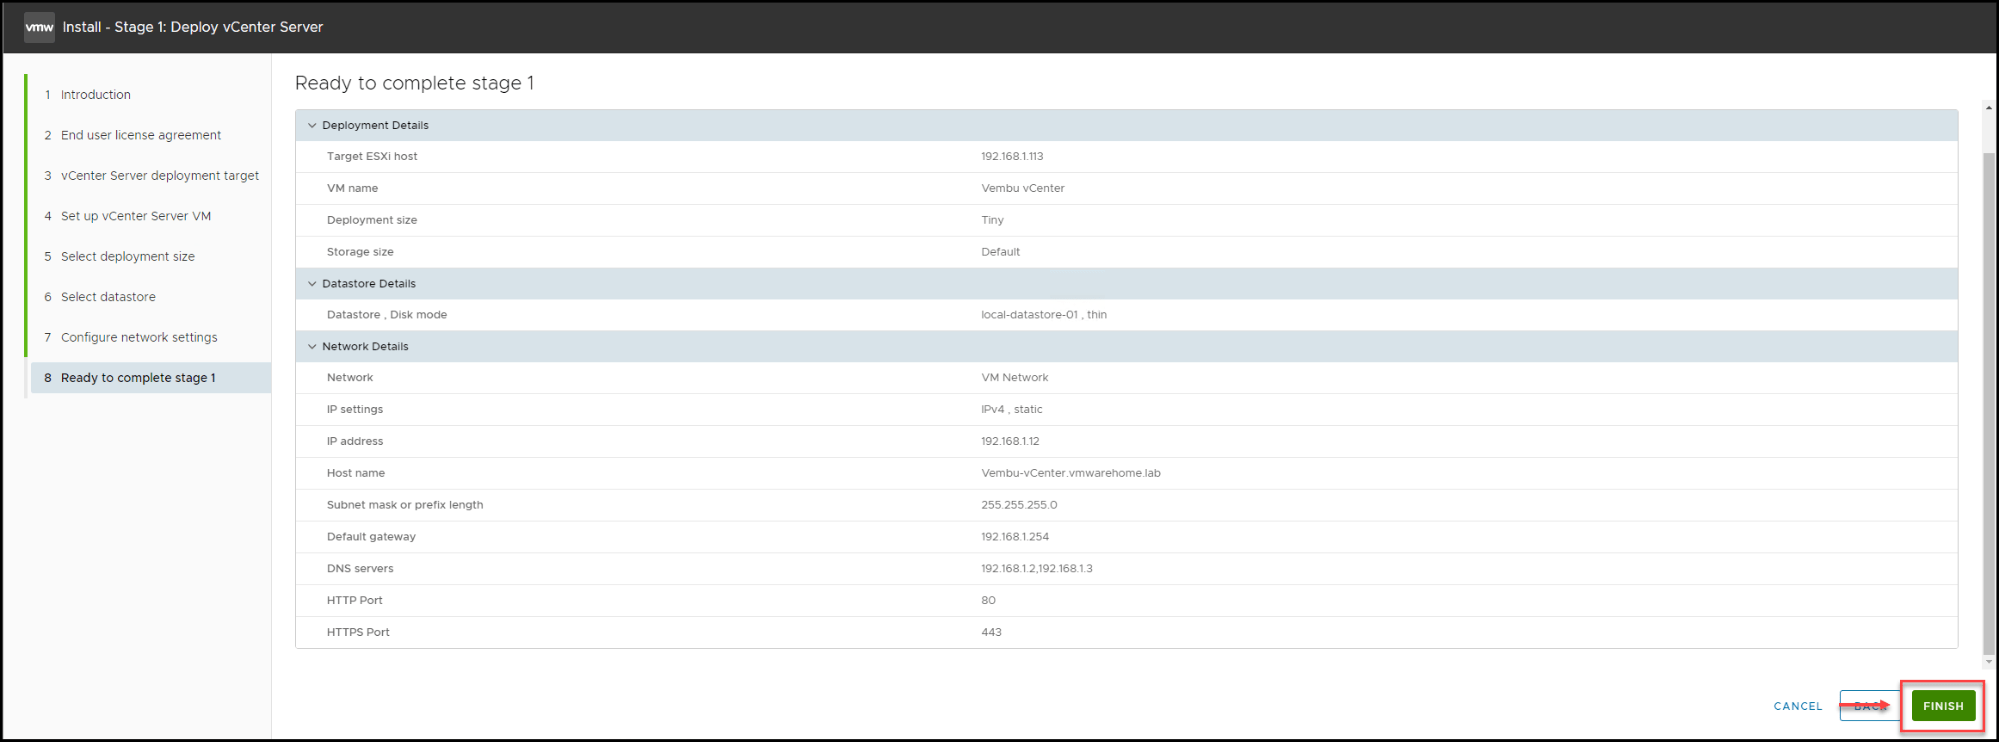
vCenter Appliance starts deploying the first Stage.
After it is finished, you click Continue.

Now we can start deploying vCenter second Stage by clicking Next
Next, configure Time synchronization mode and NPT Servers. vCenter used Time synchronization between vCenter and ESXi hosts. So please be sure that you have vCenter and ESXi using the same NTP servers or select to synchronize time with ESXi hosts.
Here you can also enable SSH access to your vCenter. In homelab, I am always enabling to help in troubleshooting.
It depends on the company security policies in production; you should only enable it if you use it. If not, leave it disabled.

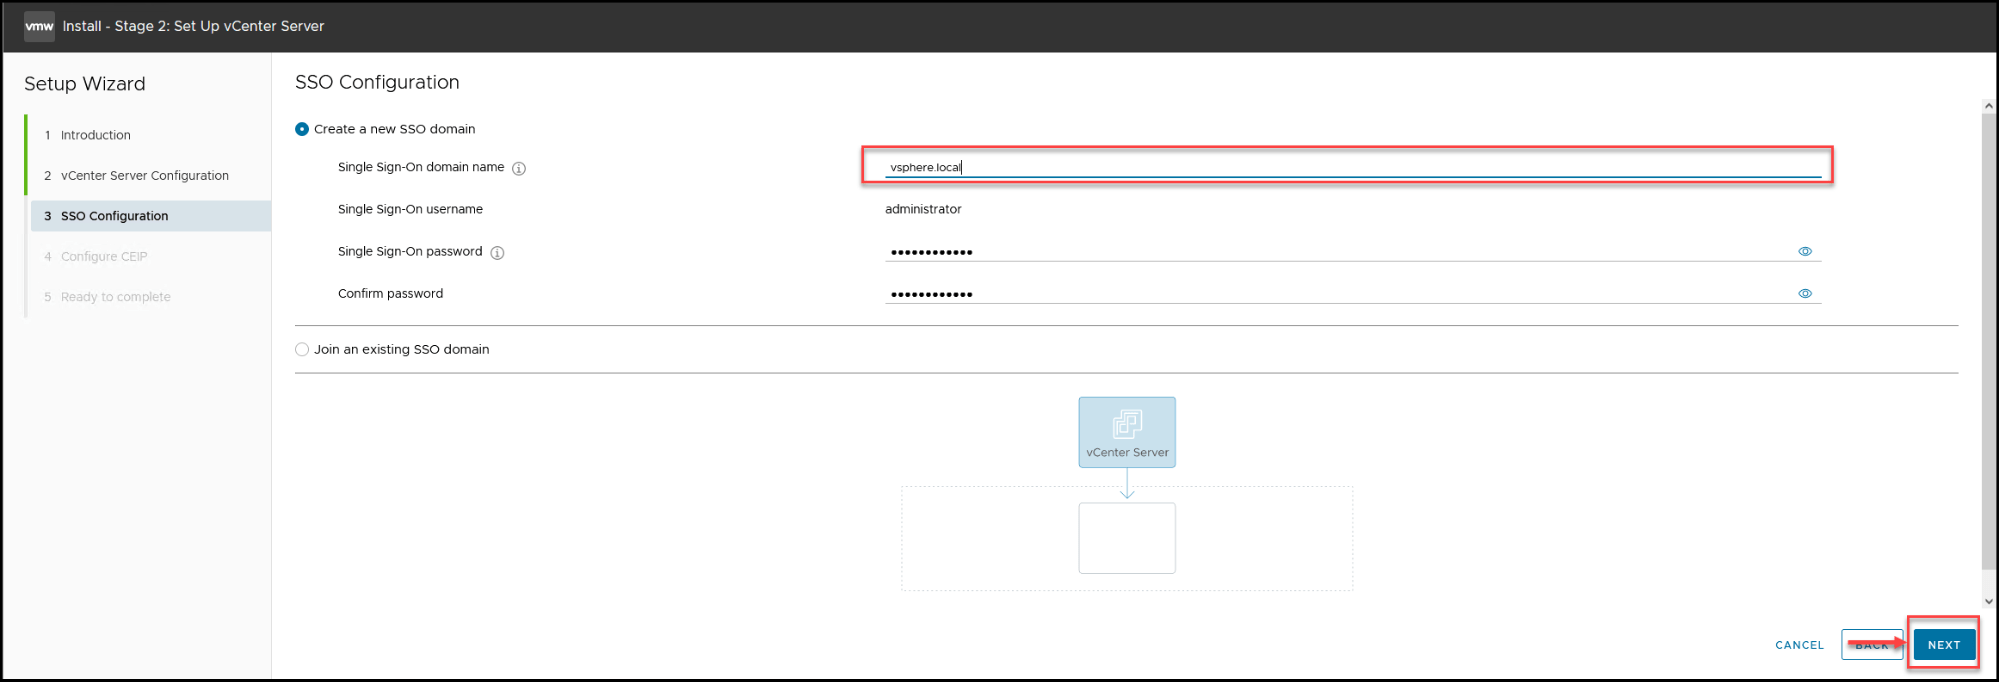
In the second Stage mainly, we will configure the vCenter Single Sign-On Domain for our vCenter.
What is the vCenter Server Single Sign-On (SSO) Domain?
An SSO Domain is the domain that vSphere uses to connect vCenter Servers in a federation. An SSO Domain contains Tags, Licenses, Categories, Global Permissions, Roles, and Privileges. The SSO Domain name defaults to vsphere.local, but administrators can use a different domain name during the vCenter Server installation.
We can also use SSO Domain to use Active Directory or LDAP identity source to allow users and groups to authenticate in vCenter.
vCenter Single Sign-On includes the Security Token Service (STS), an administration server, vCenter Lookup Service, and the VMware Directory Service (vmdir). The VMware Directory Service is also used for certificate management.
In this section, you add your SSO Domain(we will use the default vsphere.local) and set the password for the SSO administrator.
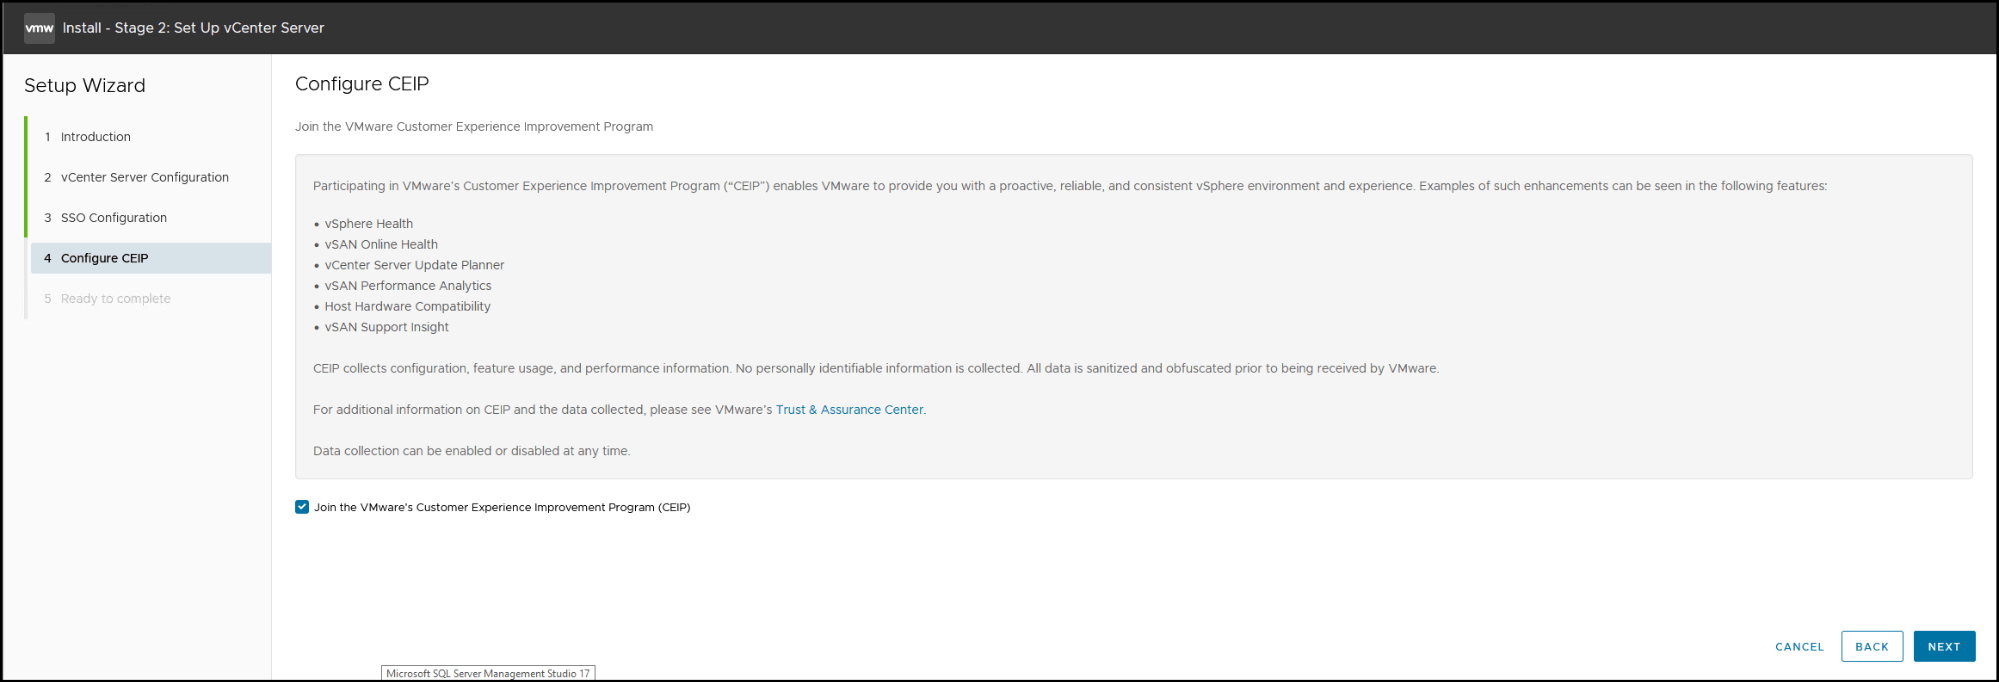
Next is VMware’s Customer Experience Improvement Program (CEIP)
You can decide if you want to enable it or not.
Click Next to continue and finish your vCenter installation.
Next, double-check all the information, and if all Is good, click Finish, and your vCenter installation will finish.

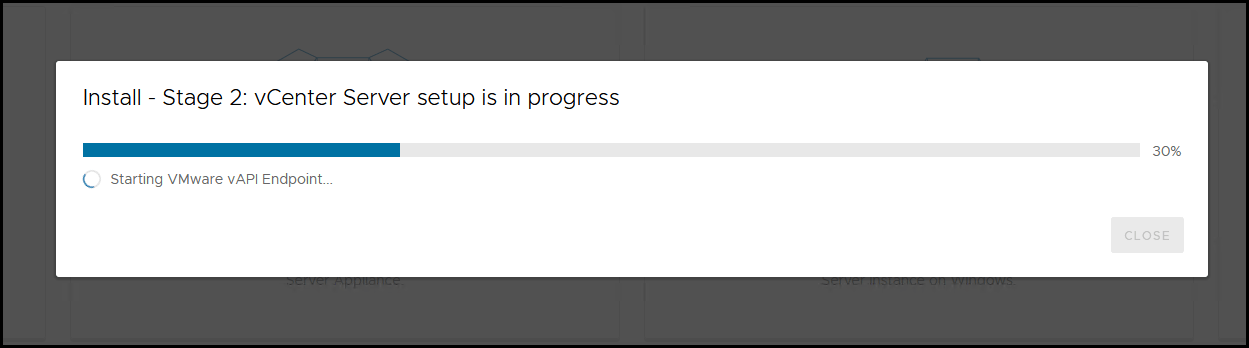
After finishing, you click Close. vCenter is finished, and it automatically opens the vCenter Server Appliance Management Interface (VAMI) page. We will not need it for now. In the following article, we will talk a bit about the VAMI page.
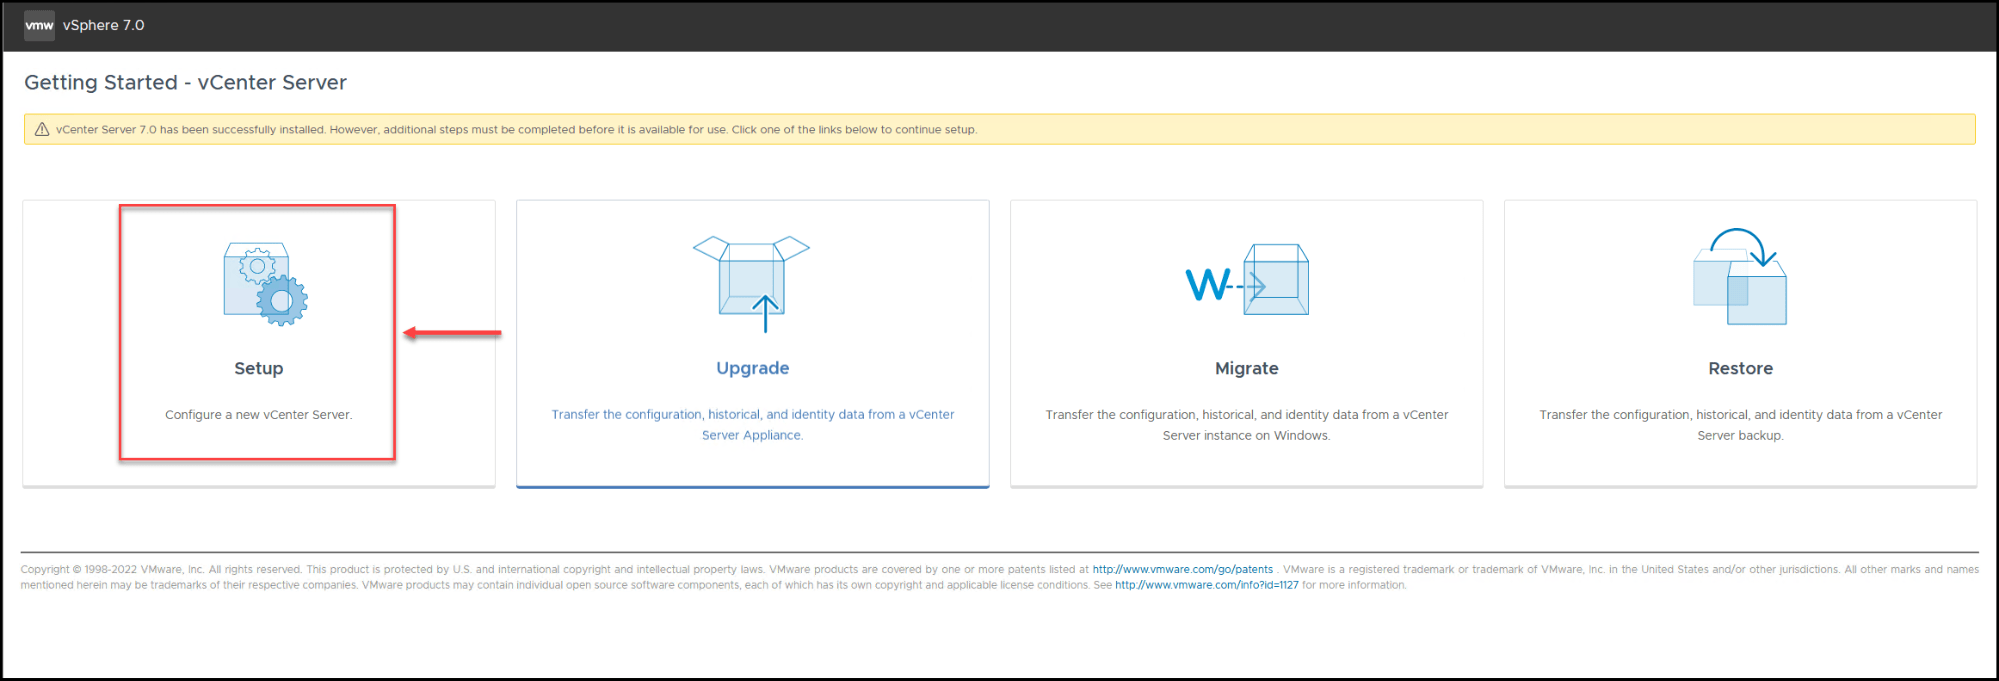
TIP: If, for any reason, you can’t continue to the second Stage, or you need to pause or something. You can restart stage 2 by opening the vCenter VAMI page: https://IP-FQDN:5480 and selecting Setup
This will bring you to the beginning of the second Stage configuration.
We finish our vCenter installation in the ESXi host with this last tip.
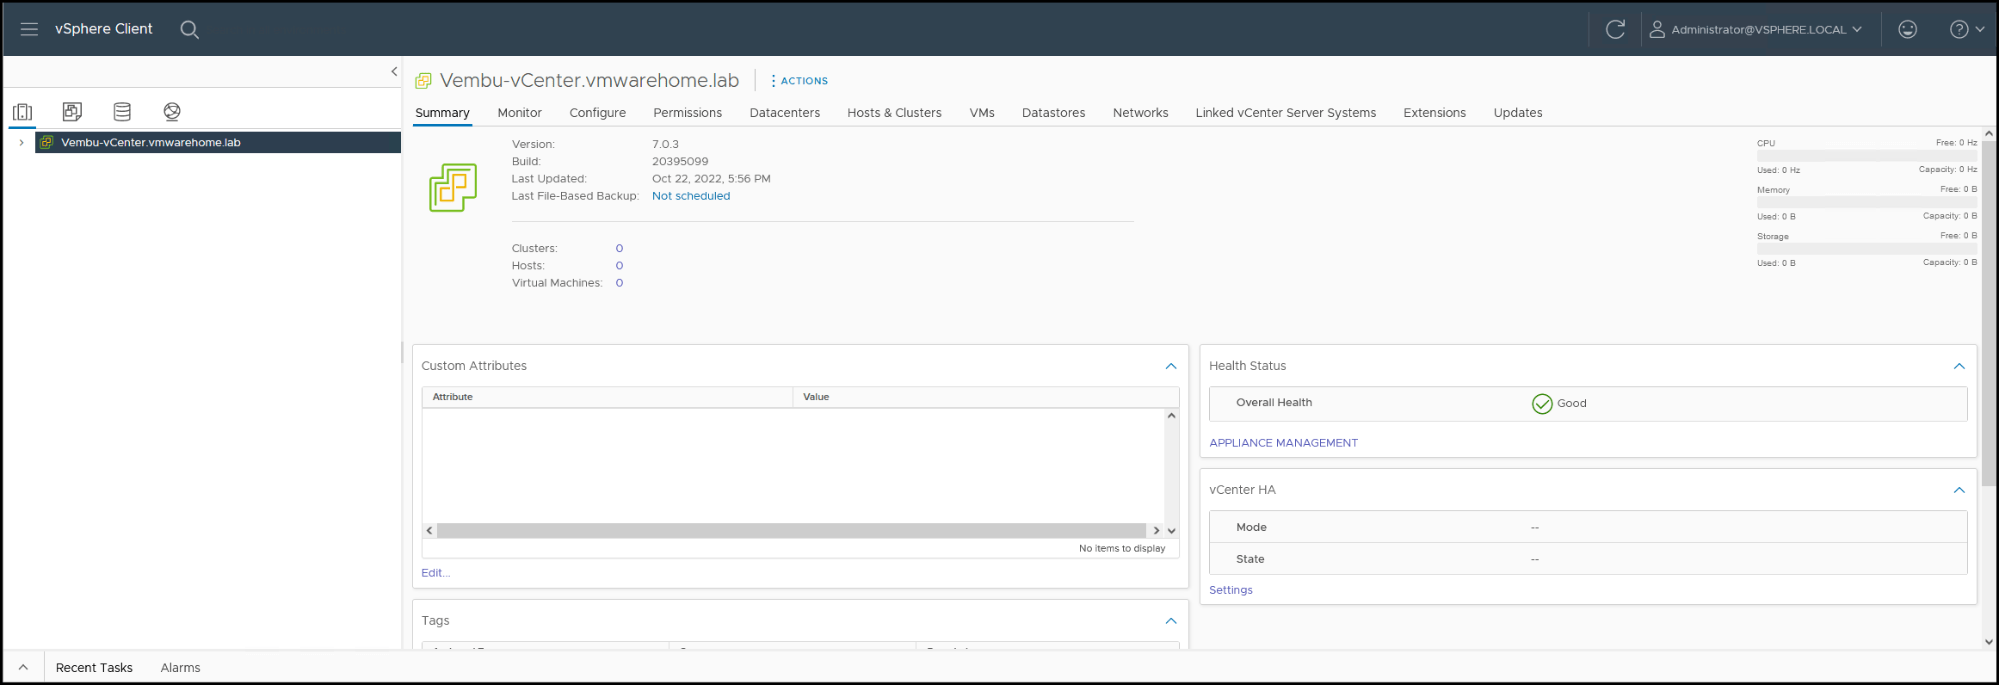
Next, you can login to your vCenter with the https://IP-FQDN and use the SSO Domain administrator user: administrator@vsphere.local.

For now, it is empty, but in the next article, we will start configuring and managing vCenter. We will start by creating a Datacenter and ESXi host Cluster and adding ESXi hosts to our vCenter.
There will be a lot of configuration and features that we can use in the vCenter. In future articles, we will discuss some of those features and configurations.
Follow our Twitter and Facebook feeds for new releases, updates, insightful posts and more.