
Read on:
VMware for Beginners – Overview of vSphere: Part 1
VMware for Beginners – vSphere Installation Requirements: Part 2
VMware for Beginners – How to Install vSphere: Part 3
VMware for Beginners – vSphere Networking : Part 4
VMware for Beginners – vSphere Datastores – Part 5
In the last article, we discussed vSphere partitions, what they are, the partition details, and also how to create Datastores in vSphere to store Virtual Machines.
In this article, we learn how to create Virtual Machines and store them on the Datastores we have created in the previous article. vSphere Datastore.
This article will be the last article where the ESXi host is used. In the following articles, we will move to VMware vCenter and start doing all the tasks through vCenter(Datastores, Storage, Virtual Machines, central Networking, etc.).
Before we explain how to create a Virtual Machine, let us discuss some of the components, features, and how a Virtual Machine interacts with the ESXi host.

What is vHW?
The vHW represents the features and hardware functions available and supported by a Virtual Machine. For example, the maximum vCPU supports, how many virtual and what type of virtual networks cards support, and which OS is supported on that Virtual Machine. So it is always essential to have the latest vHW in our Virtual Machines.
Check HERE to get all the resources available on vHW versions.
What is VMware tools?
It is a software(agent) installed automatically in the Operation System by the ESXi host (or manually by the administrator) as a tool.
It is a suite of services and utilities that enhances the virtual machine guest operating system performance and improves virtual machine management while interacting with the Guest Operating System.
VMware Tools interacts with the Operation System to use the best resources and drivers between Guest OS and the ESXi.
Provides a lot of improvements and functionality in the Operating system for reducing:
- Low video resolution
- Inadequate color depth
- Incorrect display of network speed
- Restricted movement of the mouse
- Inability to copy and paste and drag-and-drop files
- Missing sound
- Provides the ability to take quiesced snapshots of the guest OS
- Synchronizes the time in the guest operating system with the time on the host
VMware Tools also has the ability to:
- Pass messages from the host operating system to the guest operating system
- Customize guest operating systems as a part of the vCenter Server and other VMware products
- Run scripts that help automate guest operating system operations. The scripts run when the power state of the virtual machine changes
- Synchronize the time in the guest operating system with the time on the host operating system
In Virtual Machines with Guest OS Linux versions, Open VM Tools (open-vm-tools) is recommended to be used. The open-vm-tools is an open source (not developed by VMware).
You check HERE for more information about VMware Tools.
Virtual Machine files
A Virtual Machine has files, like configuration files, hard disk files, etc.
These are some of the files you can encounter in a Virtual Machine Datastore folder.
- .vmdk – files are Virtual disk characteristics files or configuration disk files. If a VM has more than one disk, the file for the second virtual disk shows as vmname_1.vmdk
- -flat.vmdk – is the second file for a virtual hard disk. The first is with the disk information, and this one is the data file
Note: The file size depends on the type of virtual hard disk selected (thin or thick). For thick disks, the full size is stored in the Datastore, which in this case was 35Gb. But if It was a thin virtual hard disk, the file size depends on what is already used.
It only uses space that is really used on the OS(but we will discuss the type of disks in the following articles).
Note: In the Datastore browser, you only see the vmdk files, not the flat files.
- .vmsd – These are files with the Virtual machine snapshot information. It is a database of the virtual machine’s snapshot information and the primary source of information for the Snapshot Manager. The file contains line entries that define the relationships between snapshots and the child disks for each snapshot
- .vmsn – This file includes the current configuration and, optionally, the active state of the virtual machine if there was a non memory snapshot. It can revert to a Virtual Machine state
- .vmx – file Is the Virtual machine configuration file. It has all the information about the VM resources and configurations
- Virtual machine swap file
- -delta.vmdk – This file receives all the changes in a virtual Hard Disk after you create a snapshot. All changes are saved in this file until the snapshot is removed Delta disk represents the difference between the current state of the virtual disk and the state that existed at the time that the previous snapshot was taken
- .log – This is the log file for the Virtual Machine
You can learn more about each file type HERE and snapshot files HERE.
After this brief explanation about some of the tools and features that work together with a Virtual Machine and the type of files that create a Virtual Machine, let us start creating our first Virtual Machine.
How to create a Virtual Machine:
In vSphere, creating a Virtual Machine is very simple.
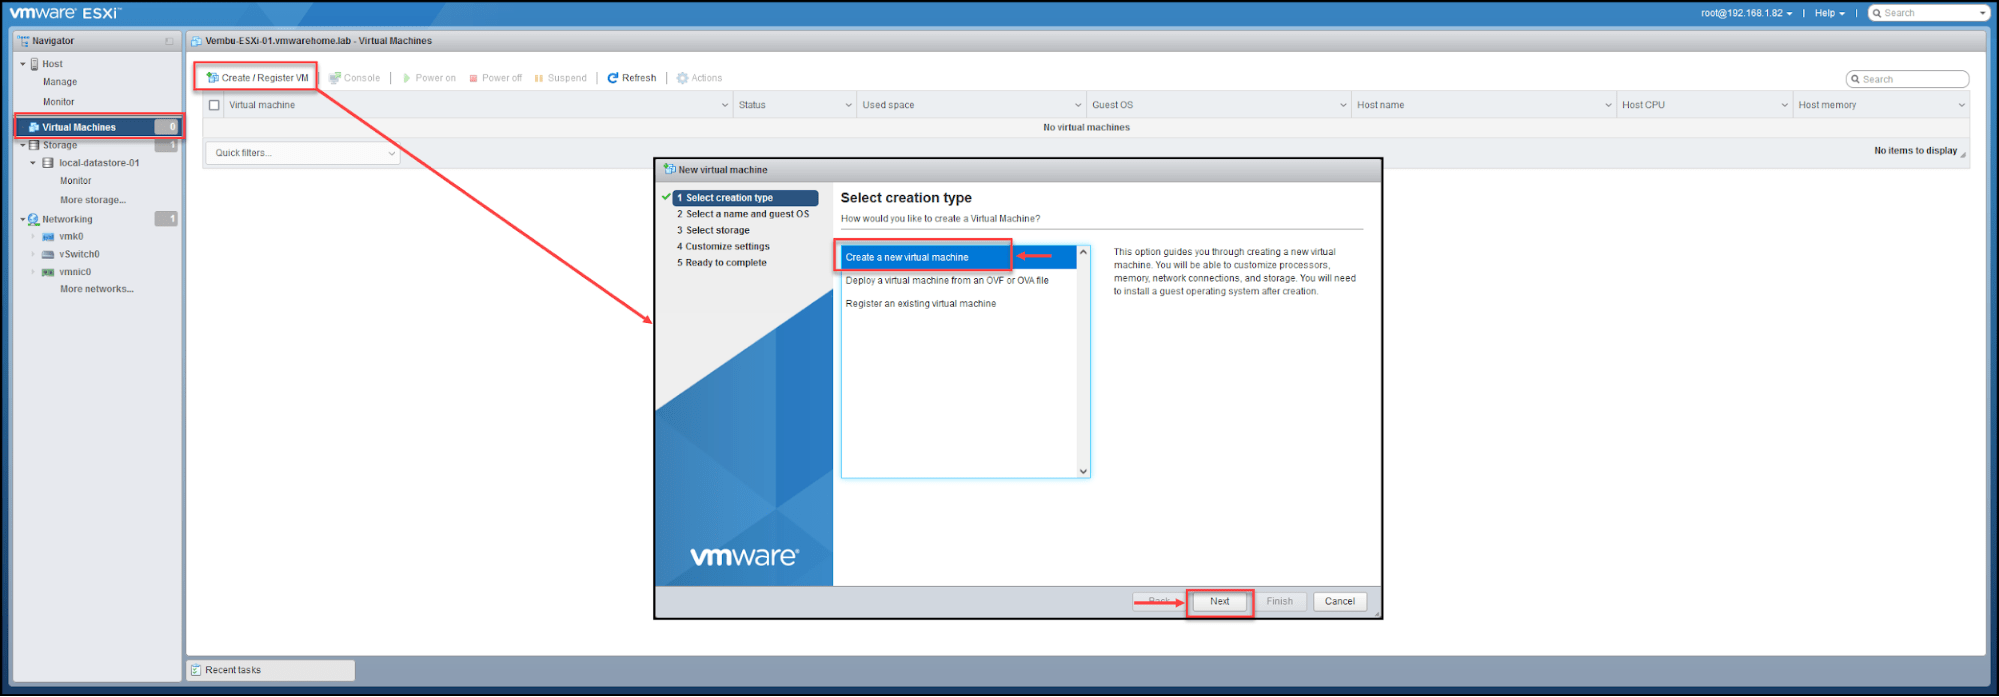
Go to the Virtual Machines option and then click Create / Register VM
Please select the option Create a new Virtual Machine(we will talk about Deploying OVF or OVA files in the following articles of this VMware for Beginners series).
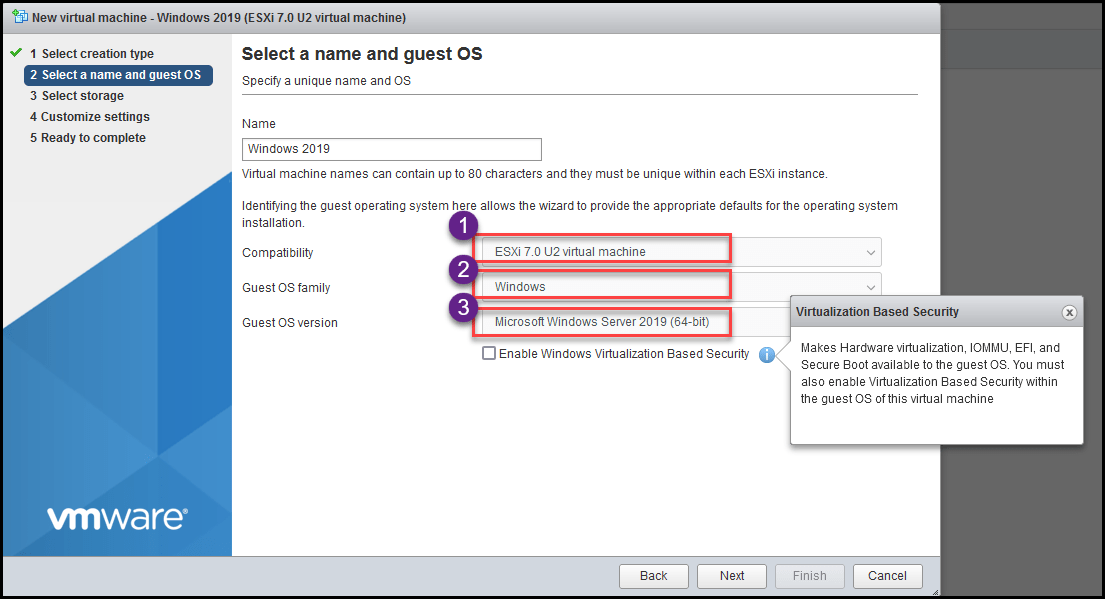
Next, we select what type of Operation System we will install in our Virtual Machine. So that vSphere knows what system is installed and prepares a Virtual Machine.
Option number 1, is the compatibility that this Virtual Machine will work with. Since we have installed a vSphere 7, we will use the latest update, in this case, update 2. So Virtual Machine will be created with the Virtual Hardware v19, and the latest VMware tools can be installed in the Virtual Machine.
The Windows Virtualization Base Security(VBS) is a security provided by Microsoft for their systems(only Windows 2016 and above). You can enable it or not. But be aware of the requirements to enable this feature. For this test environment, we will not enable this feature.
Select your Operating System version(I selected Windows 2019 for this Virtual Machine) and click Next.
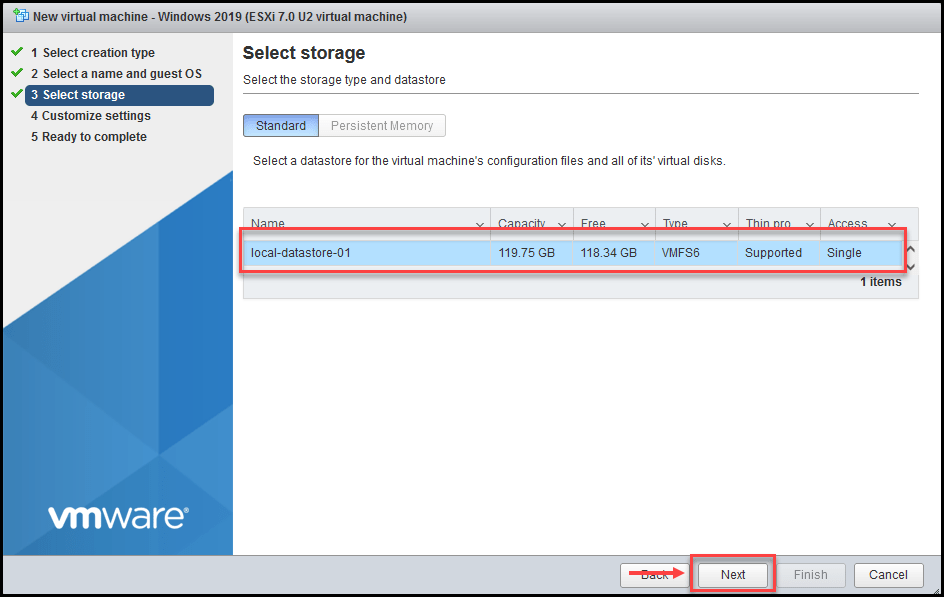
Now we need to select where we will store this Virtual Machine. In our case it is the new Datastore that we just created.
Next, select the resources(CPU, memory, etc.) for this Virtual Machine.
Note: When you select an Operating System, vSphere automatically provides you the minimum requirements for the Virtual Machine to run this OS.
We will use the default for vCPU and vMemory, and reduce the disk size to only 35Gb. If you plan to change this, be aware of your ESXi host limits.
You should never use more memory than you have in your Server. The number of vCPUs available for a Virtual Machine is always equal to the physical CPUs you have in your Server (double if you are using Hyperthreading).
Regarding vMemory, you can set more than you have in your physical Server, but memory overcommitment can affect the performance on the virtual machine
Network:
You will use the network we created in the previous article, where we created a VM Network network for Virtual Machines.
Click Next to continue and finish the Virtual Machine.

Next is to double-check the information we have selected in the previous steps and confirm by clicking Finish
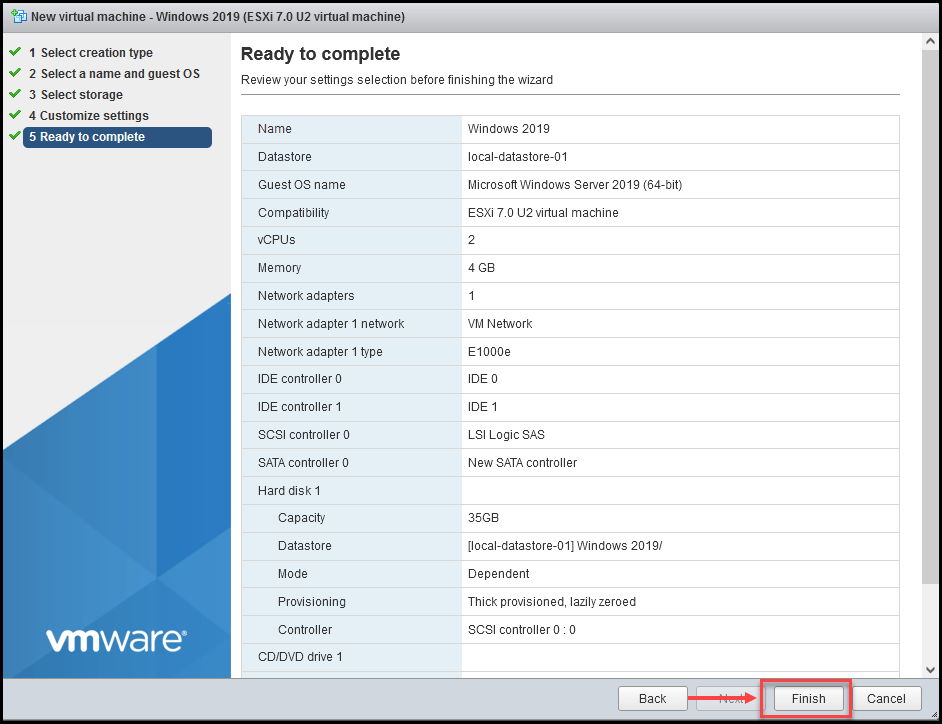
As we see in the following image, we have our new Virtual Machine created in our vSphere.
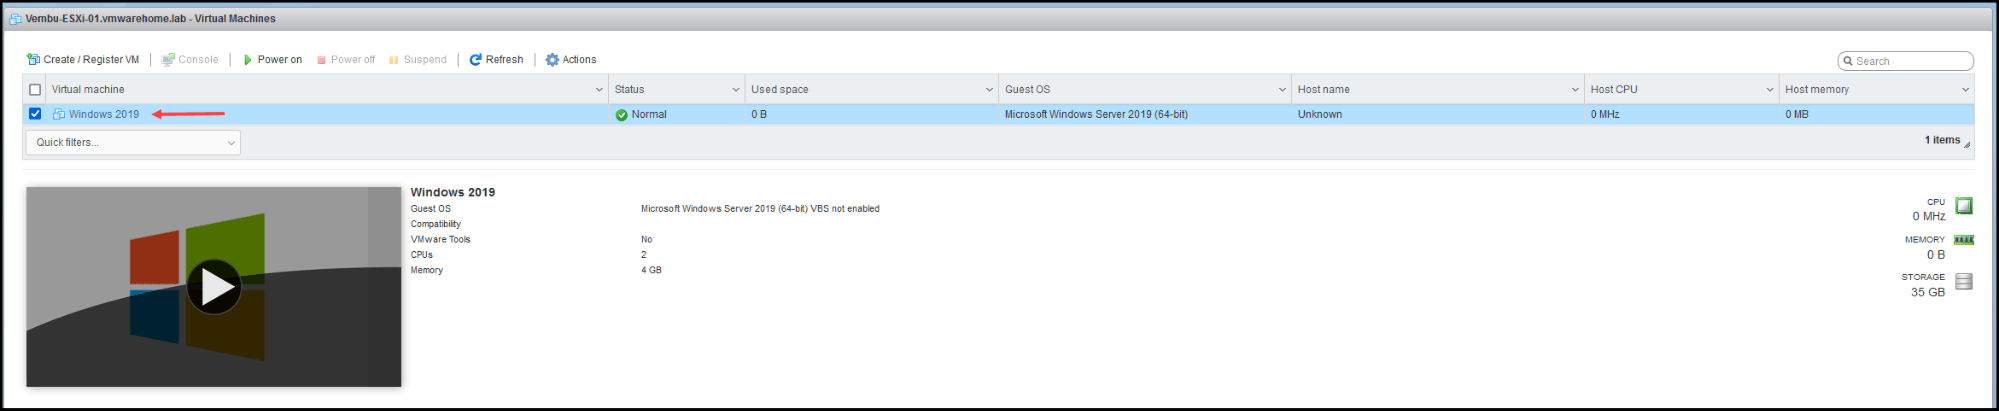
We now have our first Datastore to store Virtual Machines and one Virtual Machine created on the same Datastore.
Now we need to install the Operating System on the Virtual Machine, and we need a Windows ISO.
To use a Windows ISO in our Virtual Machine, vSphere needs to access that ISO file. And for Virtual Machines, vSphere can only access ISO files stored in Datastores.
So we need to upload a Windows ISO file to our Datastore. How to do that?
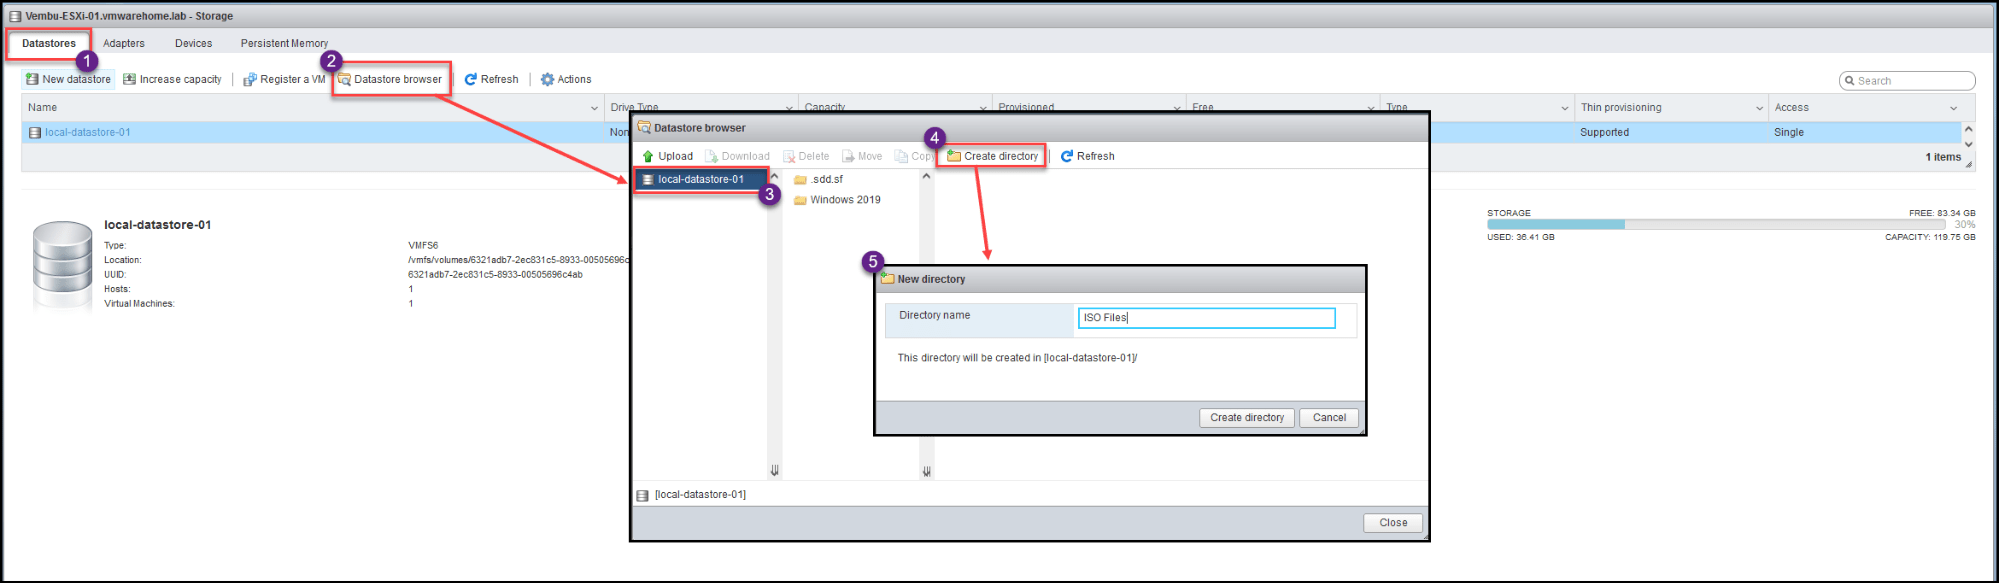
First, we will assume you have the Windows ISO already on your computer, then go to vSphere, and in Datastores, select your Datastore and then click the Datastore browser tab.
Since we will add an ISO file, I will create a folder with the name ISO Files so we can upload this ISO and all the ISOs we will need in the future; this is not mandatory. It is just for better management.
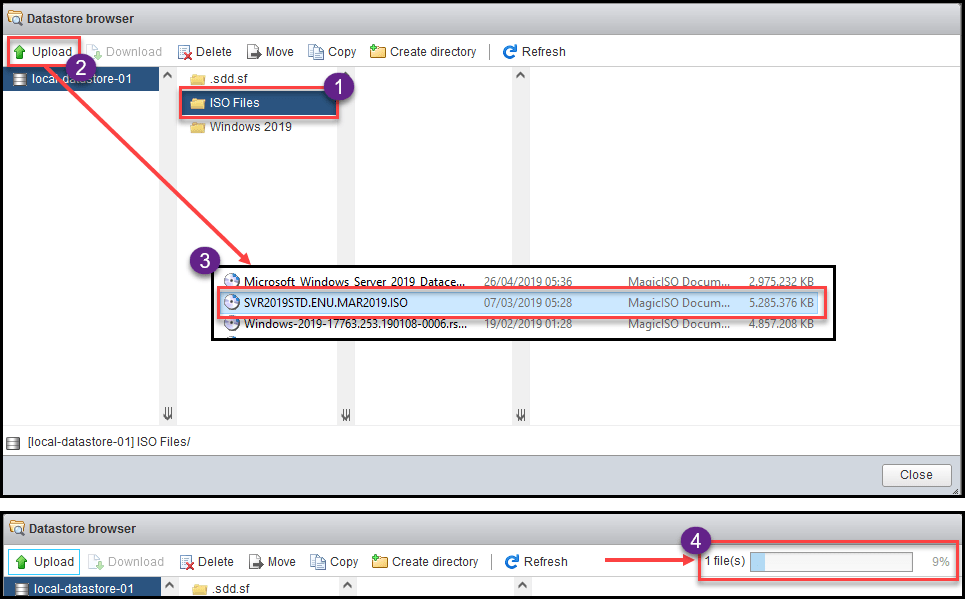
After creating the folder, click the Upload option and select the Windows ISO file stored on your computer.
vSphere will start uploading the file, and you can see it in the upload task vSphere tasks.
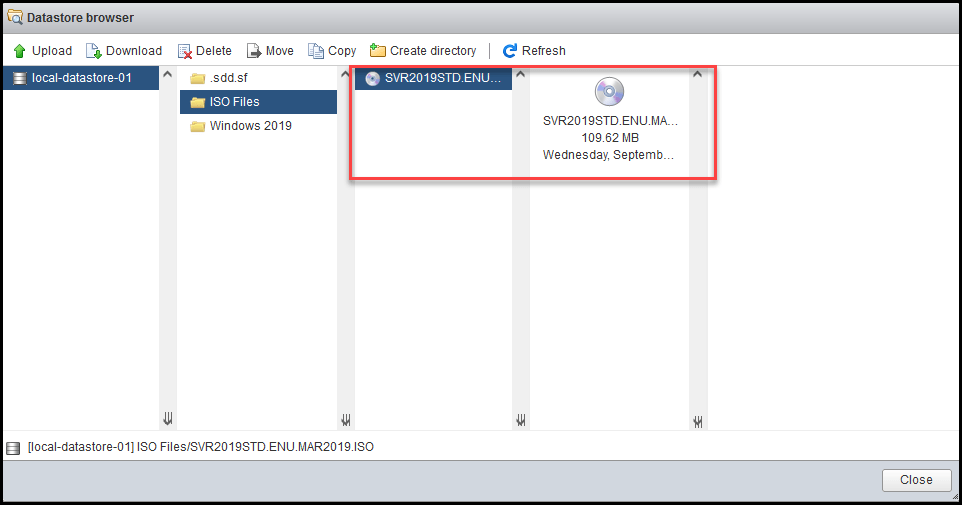
After it is finished, confirm that the file is already uploaded.
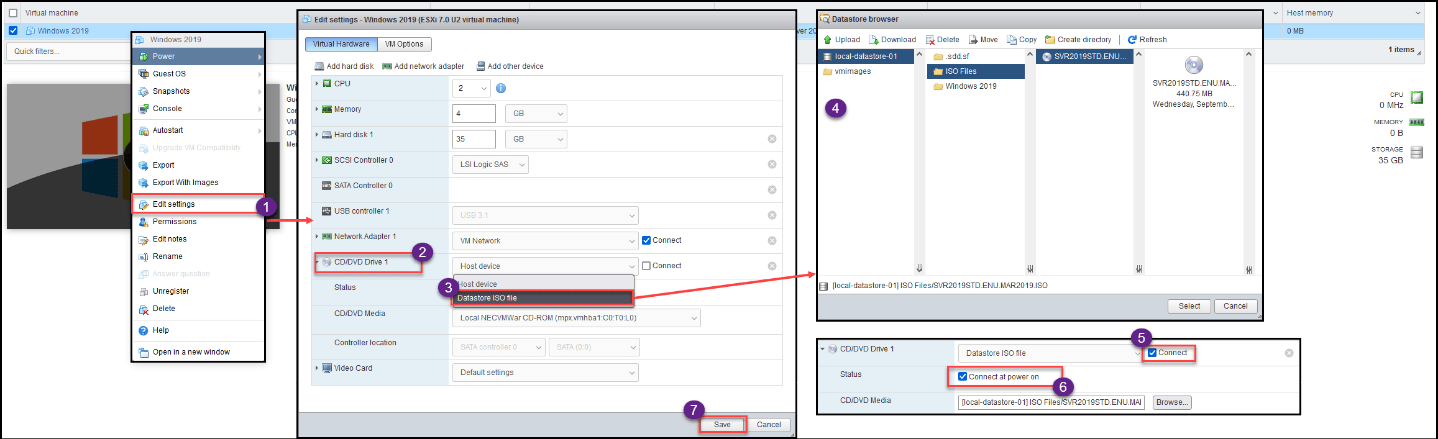
Next, go back to the Virtual Machines option and select your Virtual Machine with the right mouse click, or select the Actions option, and select Edit Settings
Next, in the Virtual Machine Settings, select CD/DVD Drive, and select Datastore ISO file and click Browse.
It opens the Datastore browse explore, in here, you select your Datastore and the folder(if you have created it) and select the Windows ISO file.
After the Virtual Machine is set with the Datastore ISO file, you need to select the option Connect and Connect at power on. So that when the Virtual Machine starts, it will launch the ISO file on the boot.
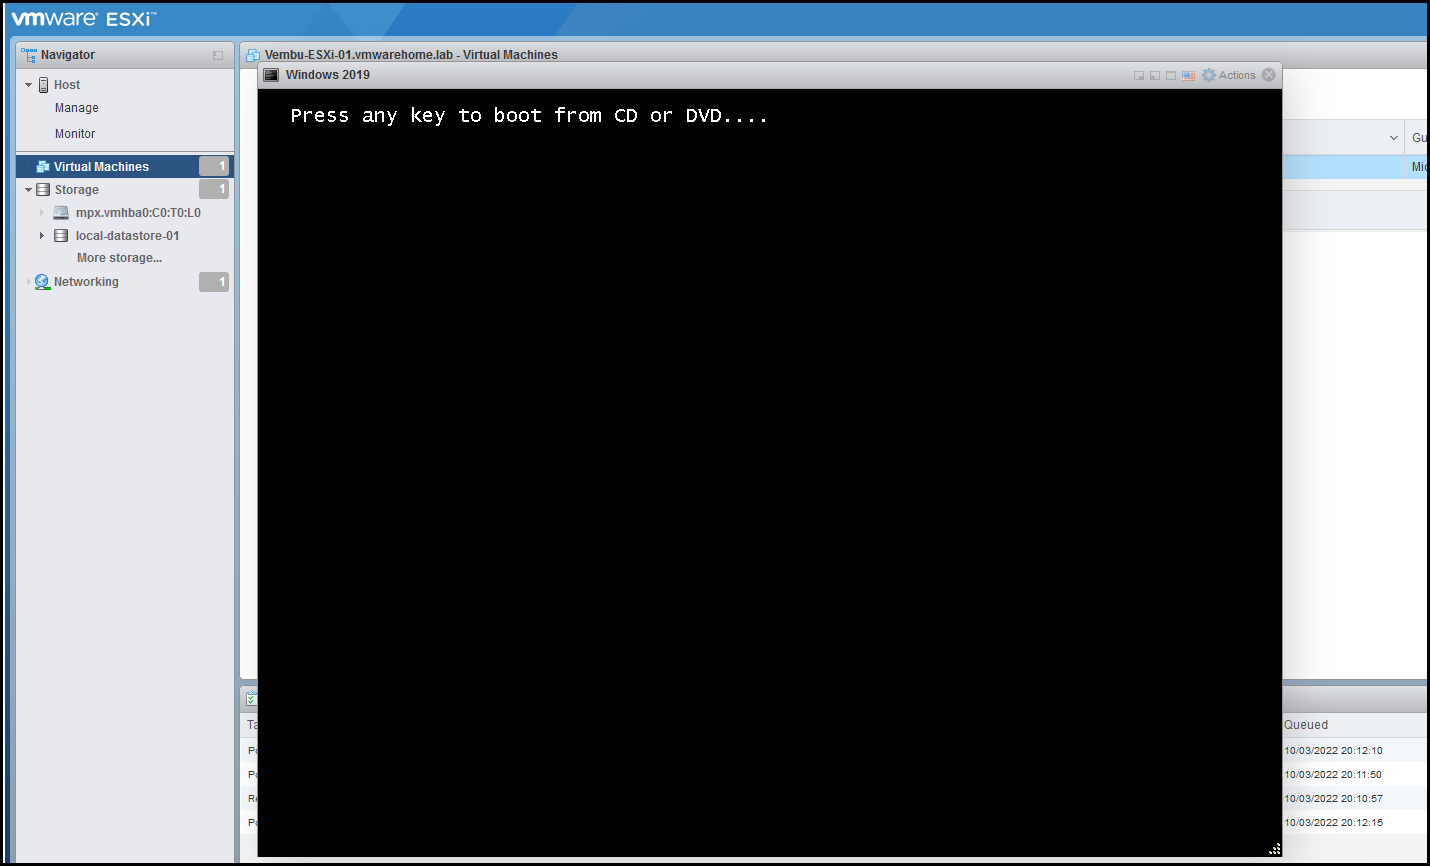
After, power on your Virtual Machine and start to install the Windows Operating System.
You should see the Virtual Machine windows console. To interact with the window console, you need to click inside the window console, after Keyboard and Mouse work inside the window console.
Note: To leave the console, press ALT+CRL, and you are back on your computer.
Next, you can start installing your Operating System. The installation of an OS is a standard install, like an install in a physical server. There is no difference.
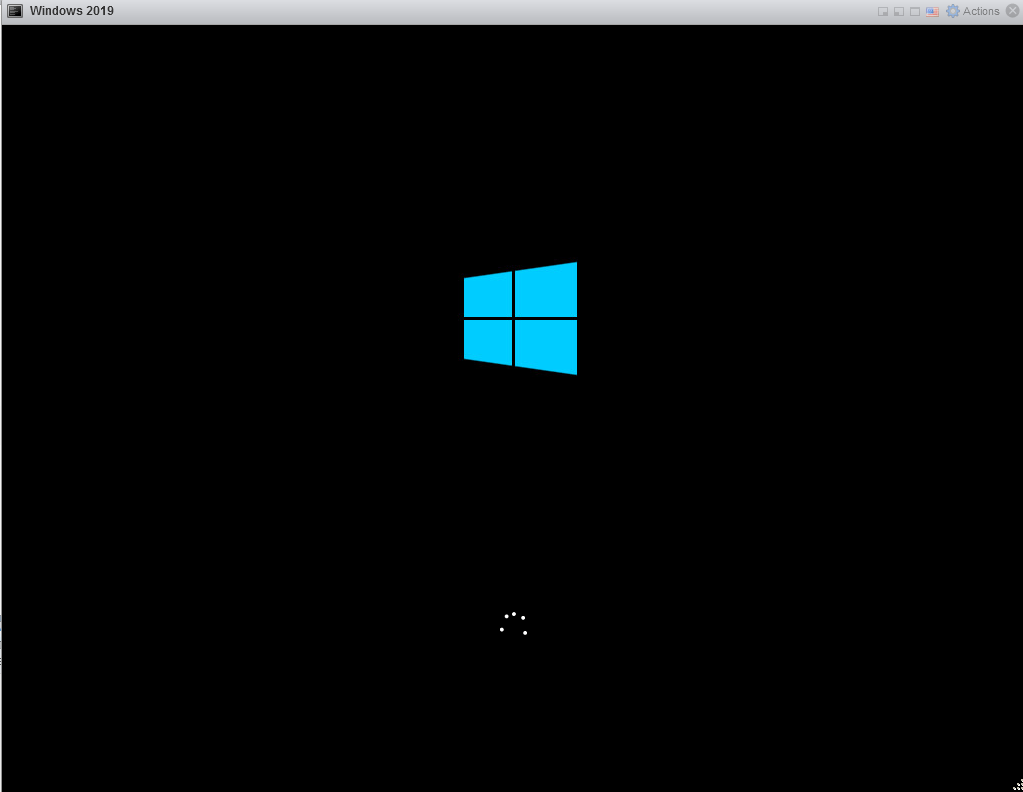
This is a Windows install example, but the same process for any other OS(like Linux). Upload the ISO file, add it to the Virtual Machine, and start the installation.
We finish the Virtual Machine and install the Guest OS with the last step. In the next article, we will start installing vCenter and using vCenter for all our tasks and managing our ESXi hosts.
Follow our Twitter and Facebook feeds for new releases, updates, insightful posts and more.