
Read on:
VMware for Beginners – Overview of vSphere : Part 1
VMware for Beginners – vSphere Installation Requirements : Part 2
Prepare to Install vSphere 7.0
For this example, we will install vSphere 7.0 in a nested environment. It means the installation of vSphere 7.0 is on a Virtual Machine.
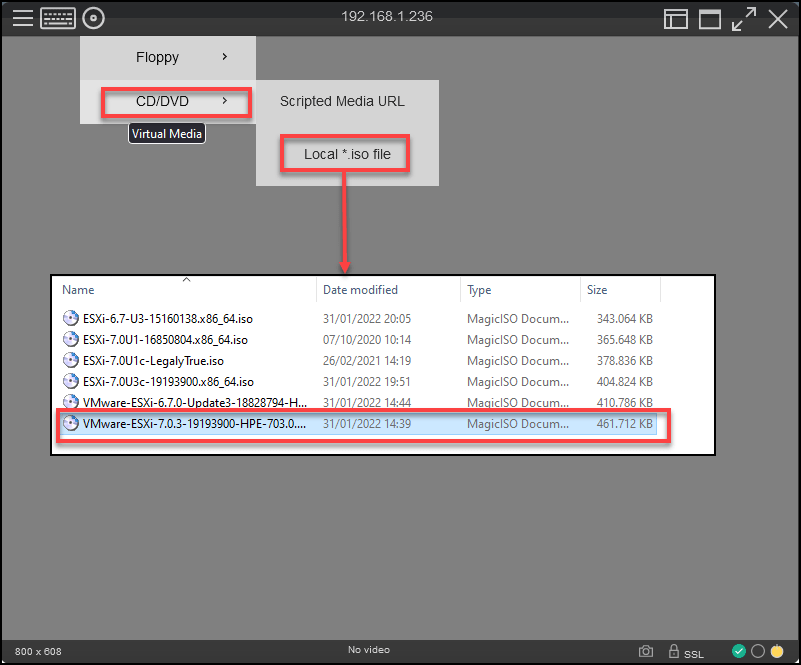
The following image is just an example of how to boot vSphere 7(or another version) ISO in an HPE, so we use the iLO console to upload the ISO image to the virtual CD/DVD and start the installation.
Since it is an HPE, as I said above, we should use a vendor Customized vSphere ISO.

The following tasks are only for nested environments:
Nested Virtualization:
Why should you use nested virtualization? Because you are not using it for production, just for training and demos, you can build great lab demos with nested environments. You can create Clusters and more than one ESXi host when you have only one server or when using your computer/laptop, such as VMware Workstation.
We can Install and test all features in a nested environment, like vCenter, ESXi, vSAN, and HA or DRS, etc., without spending thousands on hardware.
Of course, nested environments are built for testing and not for performance.
The nested environment is a big subject, and I would need a whole article just talking about that, so I will resume the subject a bit to add to this vSphere 7 install article.
Our VM “server” for installation has the following resources.
- 4x vCPU
- 24 Gb Memory
- 16 Gb Local disk (for ESXi install)
Regarding the network, I try to simulate the physical implementations.
- 6x Virtual Network Adapter vNICS: VMXNET3 (since my Physical host has 8 Physical Network Cards, I can use 6 vNICs in my Nested, but you can do this only with 2 vNICs)
- 2x for Management network (192.168.1.x)
- 2x for NFS/iSCSI Network (192.168.10.x) + for vMotion Network (192.168.0.x)
- 2x for Virtual Machines Network
Note: We can use subnets, and all be routed or use VLANs for each subnet. We only use routing for this case.
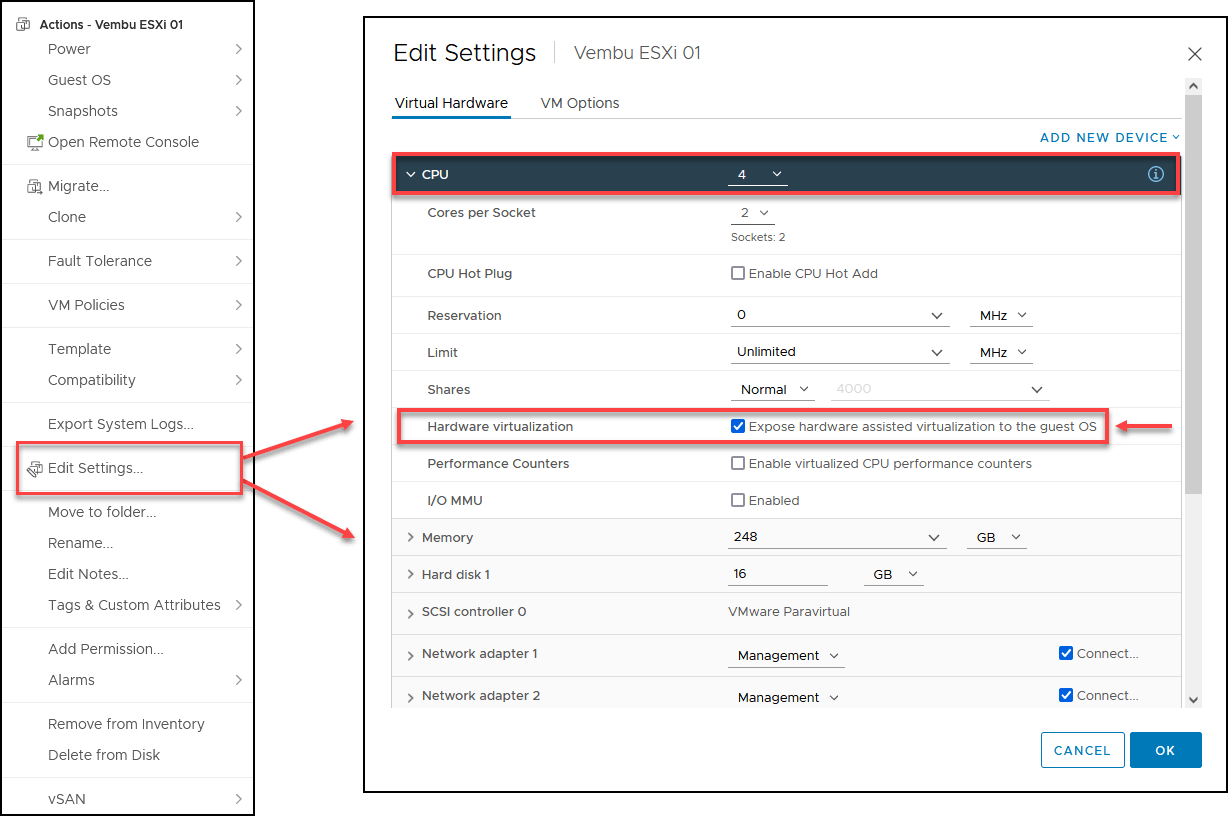
After you create your VM for the nested vSphere 7, you need to expose the CPU virtualization to the vCPU VM Guest OS(in this case, to the vSphere).
We do that by changing the following options:
This example is when you create a vSphere 7 Virtual Machine for your nested vSphere 7
When creating the VM for the nested vSphere, change the Guest OS option to Other and VMware 7.0 or later.
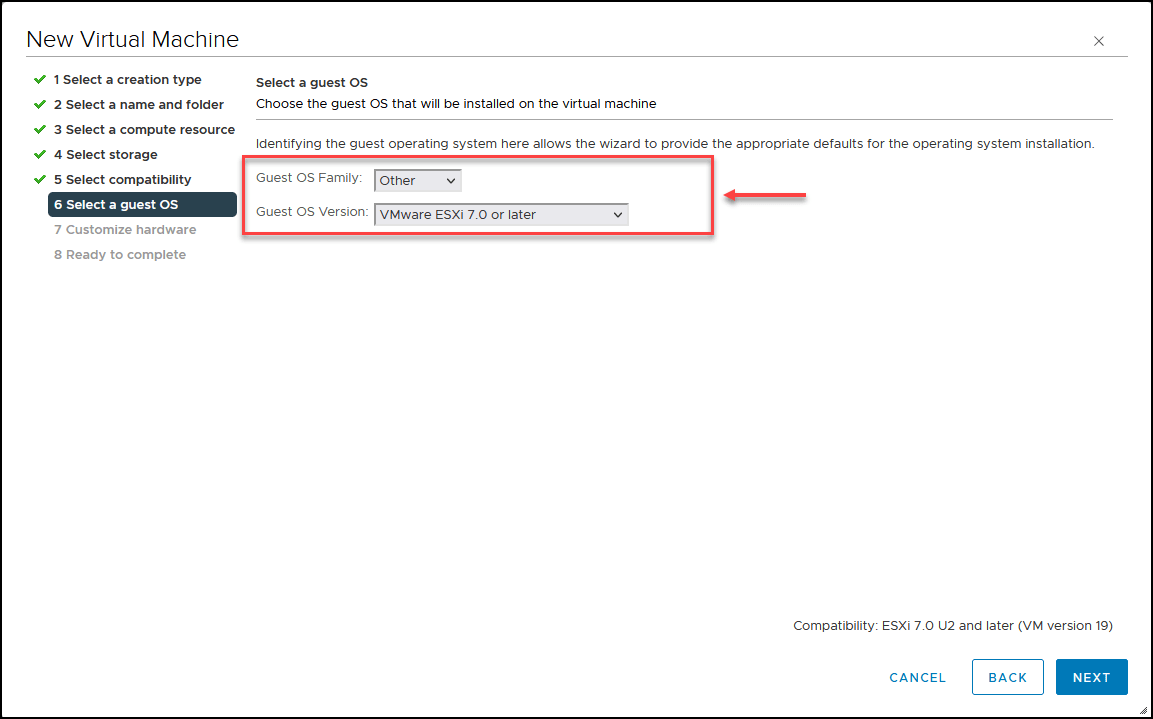
Next, when the VM is created, on the VM Edit Settings and enable the vCPU option: Expose hardware assisted virtualization to the guest OS
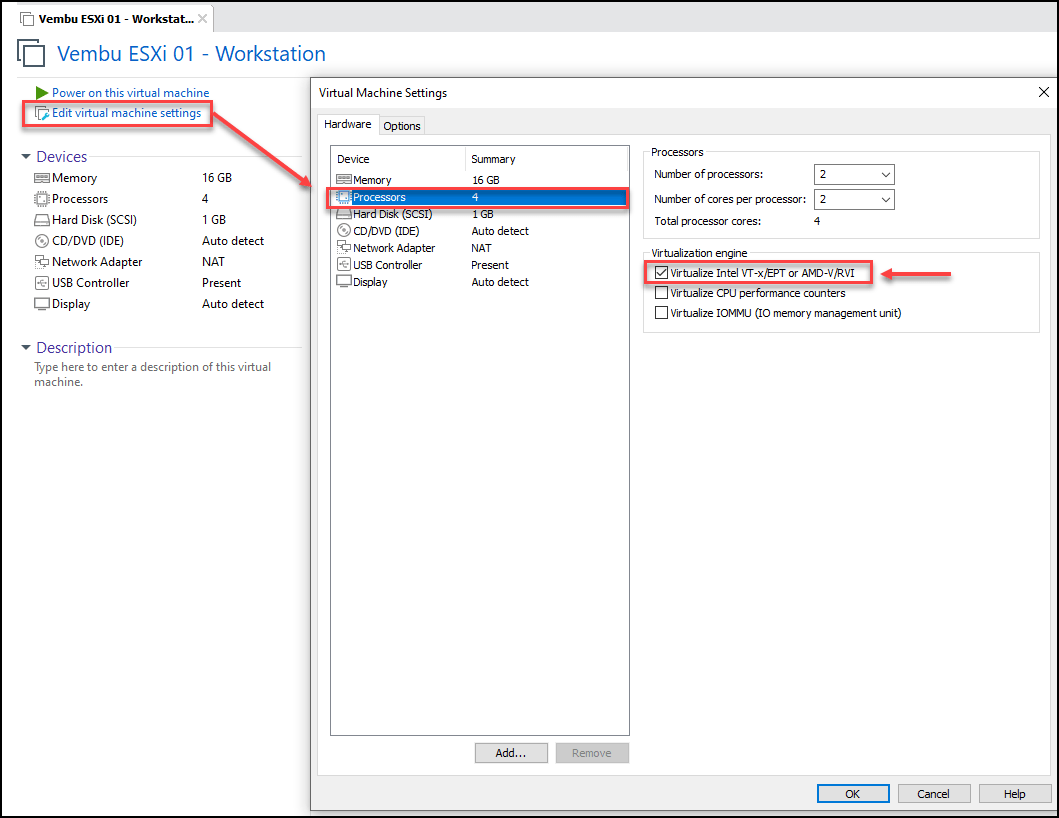
This example is when you create a Virtual Machine in VMware Workstation 16 for your nested vSphere 7
When creating the VM for the nested vSphere, select the Guest OS option to VMware ESX and VMware 7.0 or later
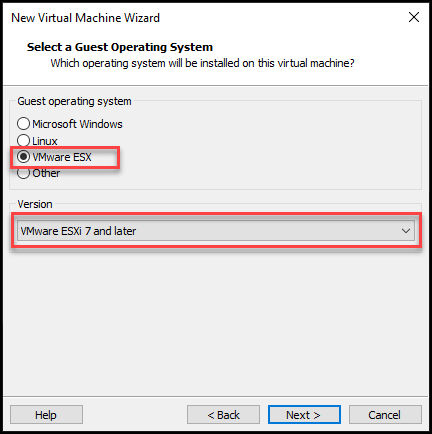
Next, when the VM is created, on the VM Edit Settings and enable the vCPU option: Virtualize Intel VT-x/EPT or AMD-V/RVI
Note: Please check my article HERE, where I explain step by step how to plan and create nested vSphere. The article is for the vSphere 6.5 version, but the process is the same. Maybe GUI could be slightly different, but the options are the same.
So far we have learnt how to boot vSphere ISO from an HPE iLO and about nested installations and enabling nested environments in a virtual machine created in vSphere(for servers) and VMware Workstation(for computer/laptops).
Now we are going to install vSphere 7, do the initial configurations, and also learn how to install it on CPUs that are not supported anymore by VMware in version 7.
After we have our ISO added to the boot(in the previous article, I show using HP iLO), we can boot the server and start the installation.
After booting with vSphere 7 ISO, vSphere starts loading the ESXi installer.
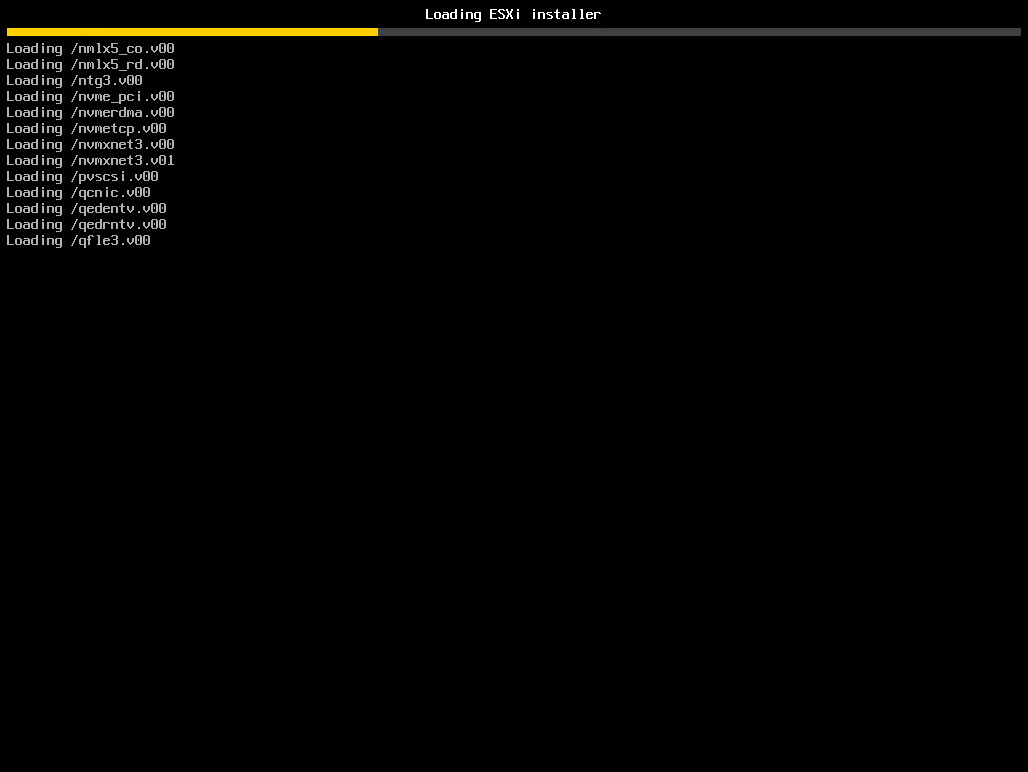
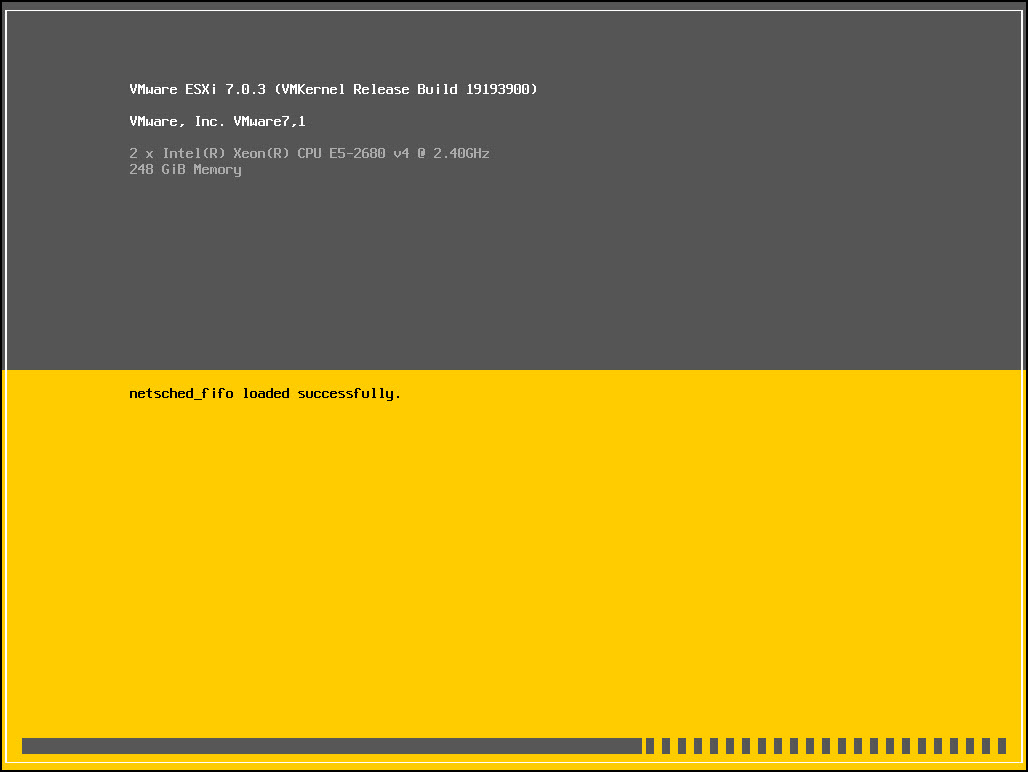
You can start selecting and configuring the installation when the loading is finished.
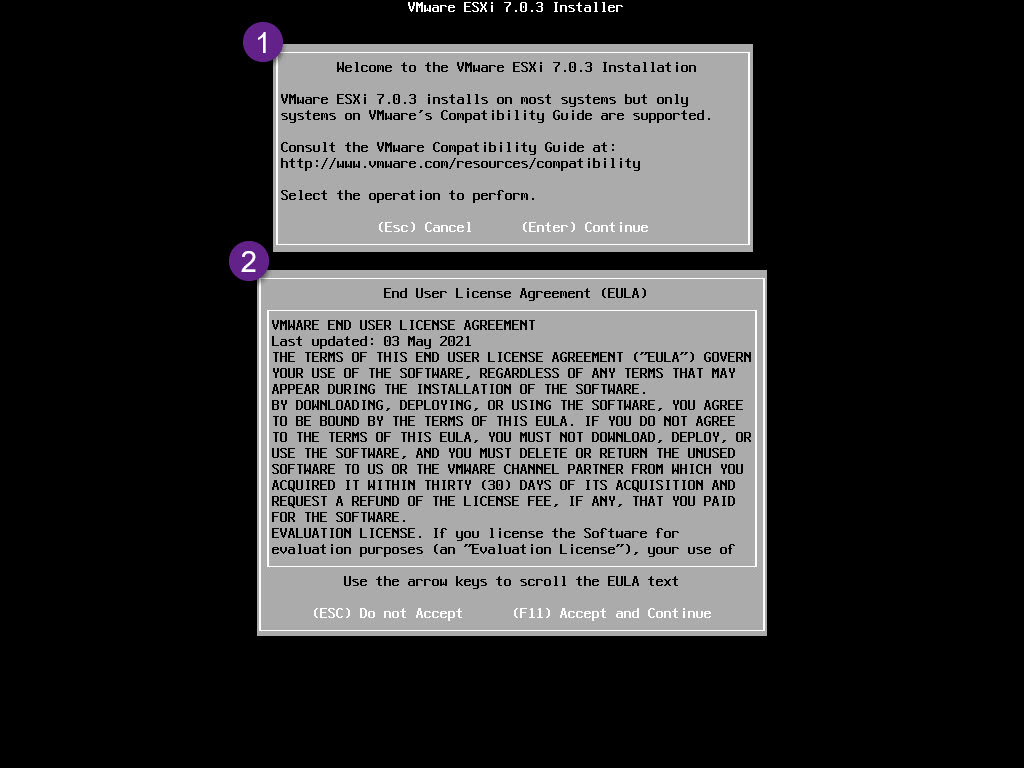
Next, press Enter to start and accept EULA to start the installation.
Press F11 to accept and start and continue.
Next, the installation shows you how many local disk devices exist. In this case, it is a local disk with 16Gb. Any RAID in your server, USB, or SD Flash can be seen here.
You can also check what is inside of that disk device(if there is an old vSphere installation or an SSD flash disk/card, the install informs you) by pressing F1. But as we can see, it is a new and clean disk, and no vSphere is installed.
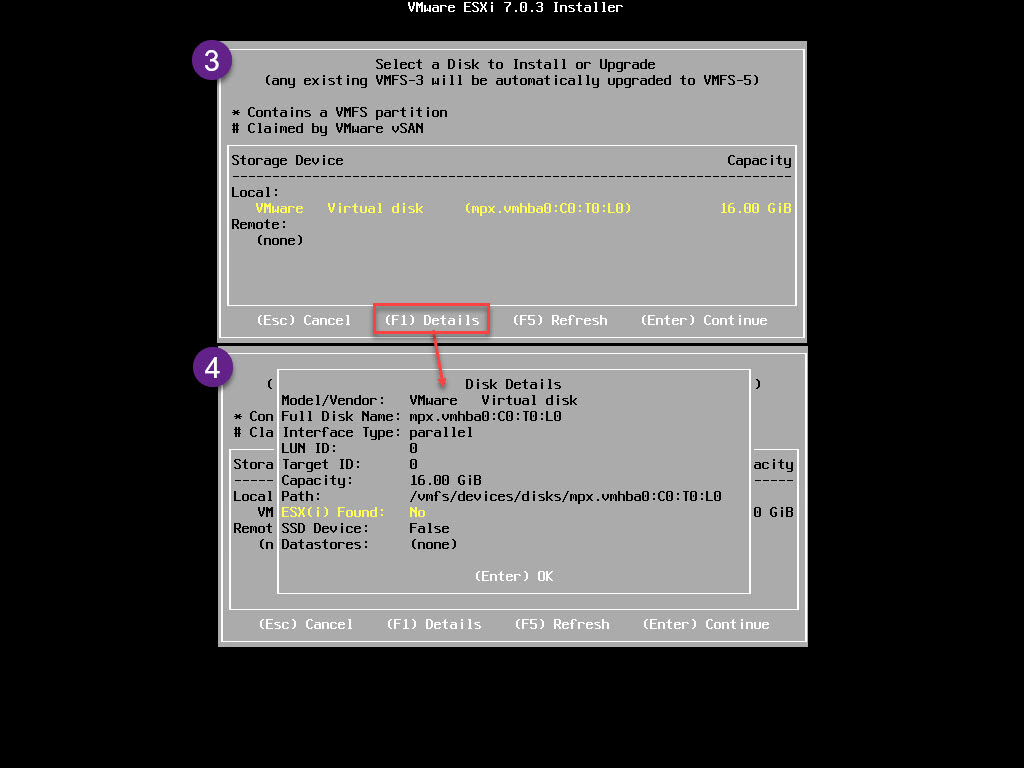
Press Enter and continue the installation.
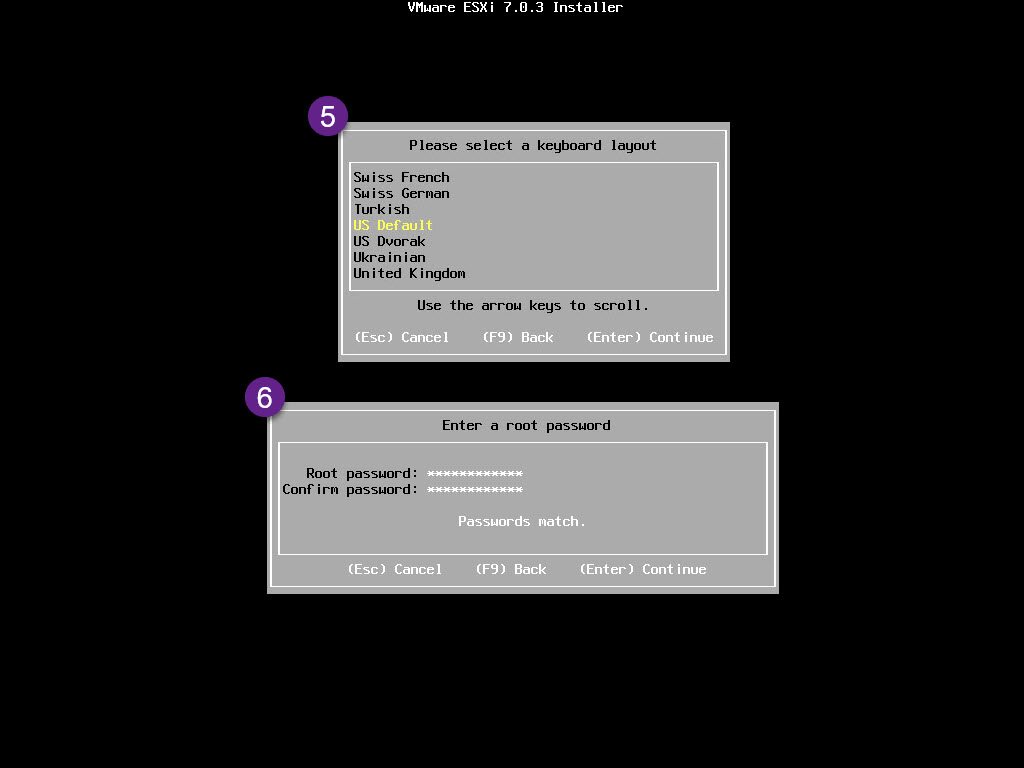
Next, select your country/language and enter the root password you will use to log in to your ESXi host.
ESXi Passwords
- ESXi enforces password requirements for access from the Direct Console User Interface, the ESXi Shell, SSH, or the VMware Host Client
- By default, you must include a mix of at least three from the following four character classes: lowercase letters, uppercase letters, numbers, and special characters such as underscore or dash when you create a password
- By default, the password length is at least 7 characters and less than 40
- Passwords must not contain a dictionary word or part of a dictionary word
Note: Take note of your password. Resetting the ESXi root password is difficult and often demands a new vSphere install.
Check HERE to know ESXi host password policies and requirements.
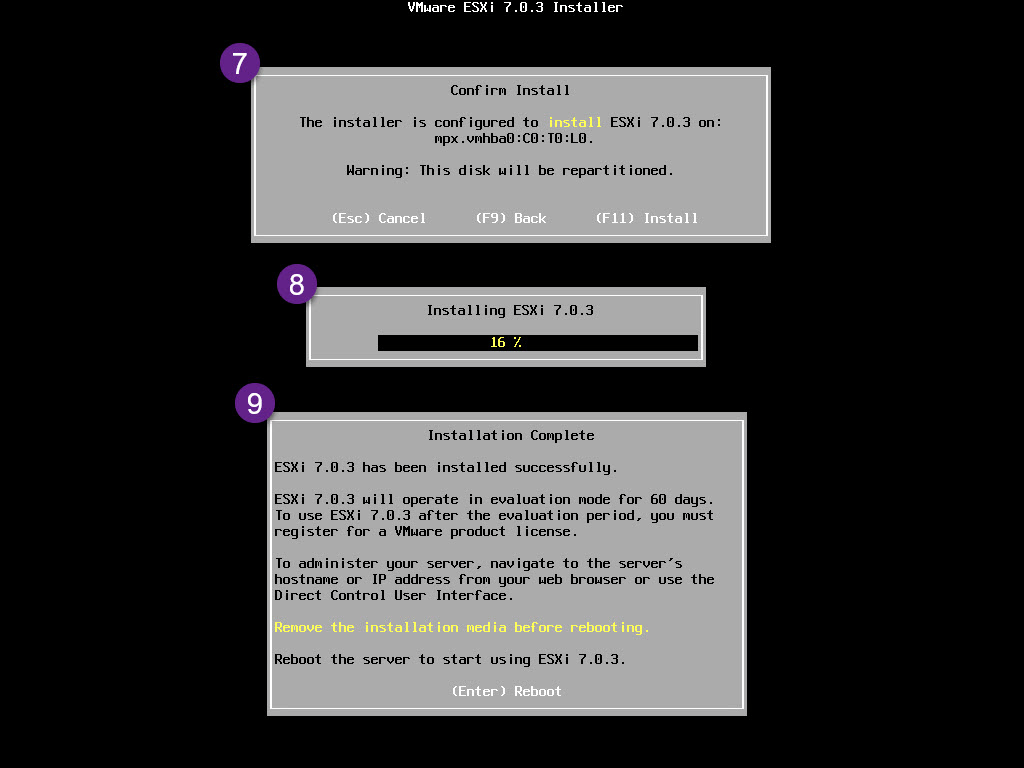
After the initial configurations, press F11 to start the installation of ESXi.
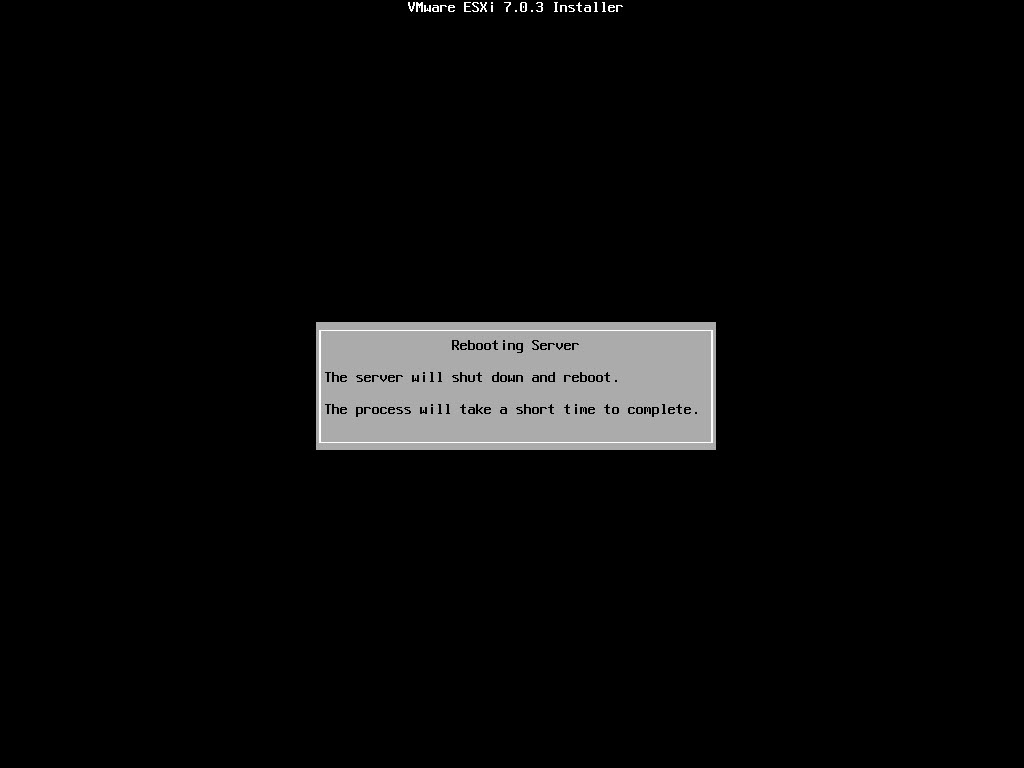
When it is finished (the time of the install depends on your servers, what disk device you are using, or if your vSphere ISO takes longer to upload into the server), you can remove the ISO from any virtual device or boot device, and press Enter to reboot the server.
Now that we have installed our ESXi host, you must do post-install tasks.
After your server reboots, to enter the ESXi host Accessing Direct Console User Interface (DCUI), press F2
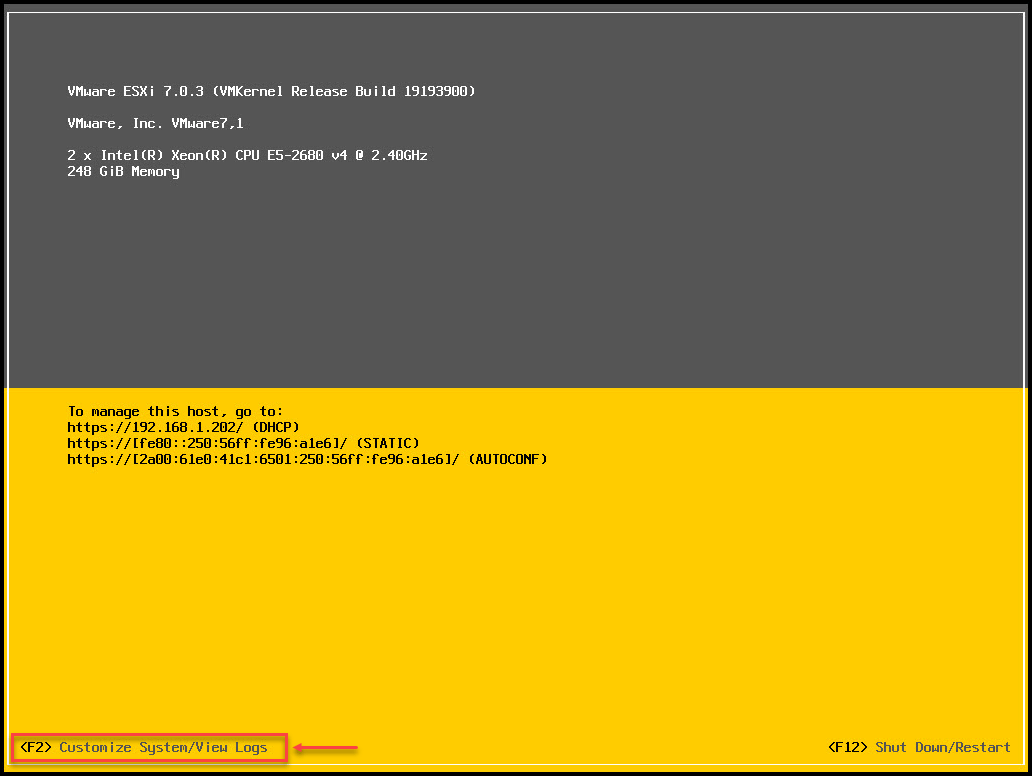
Note: Since I have a DHCP server in the network, we already have an IP address for your ESXi host.
ESXi automatically picks up a DHCP IP address if you have connected your physical cables to your network cards.
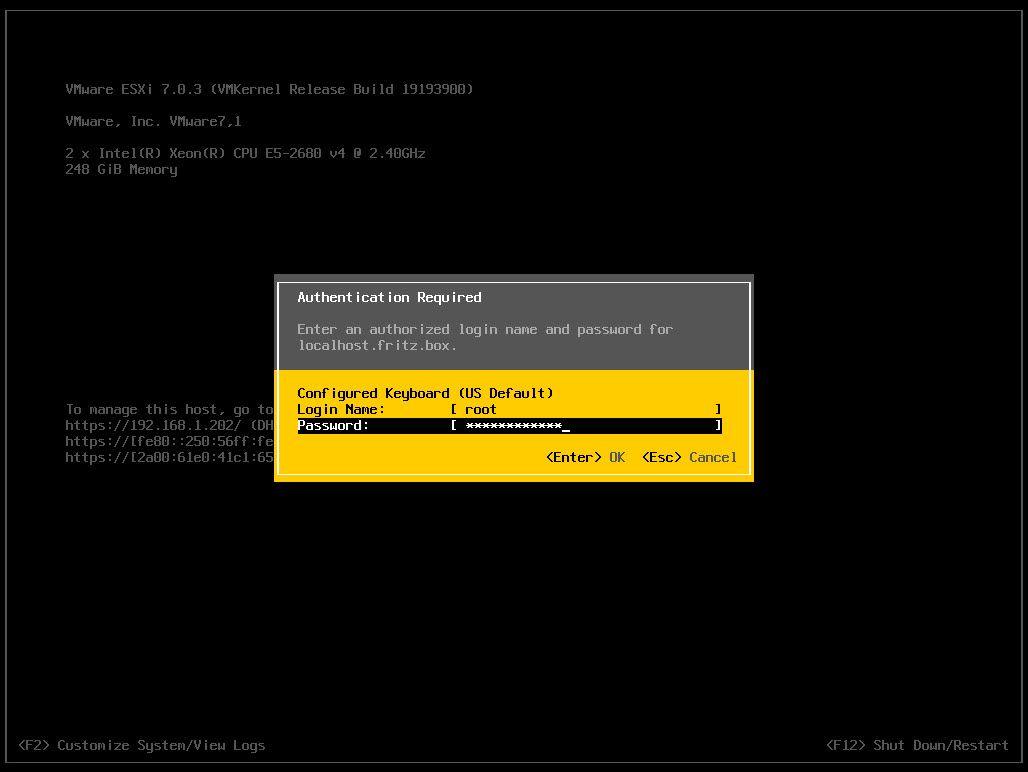
Next, log in with the root user and the password created in the previous installation password step.
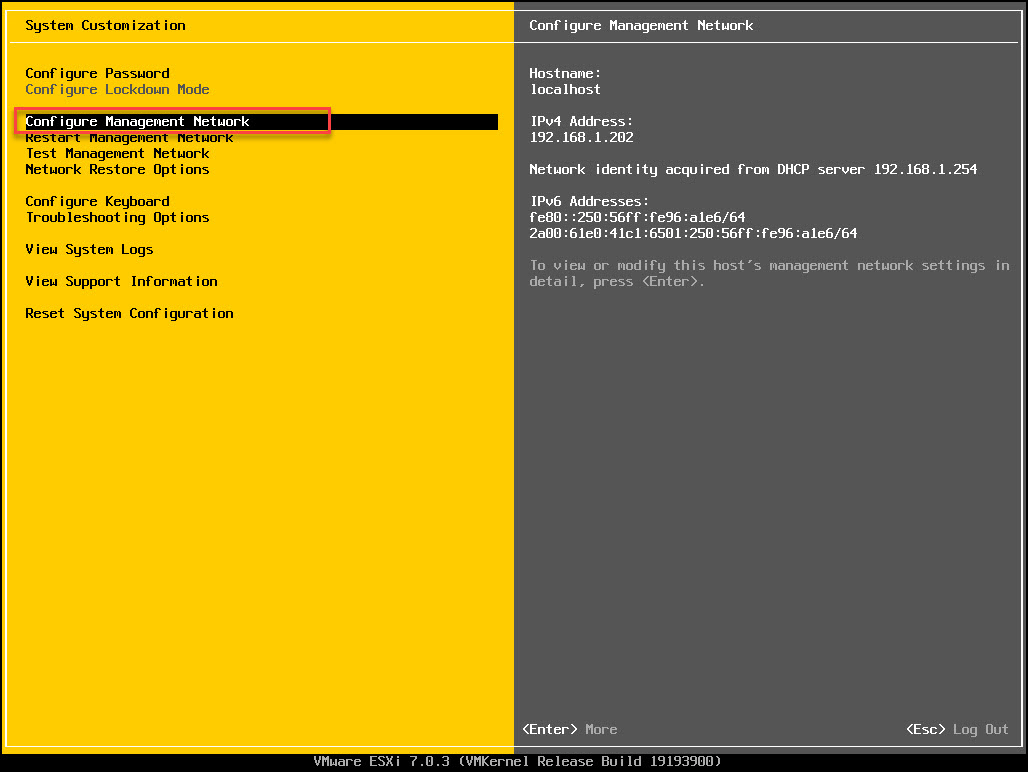
Now that we are inside ESXi DCUI let us manually configure our network and DNS settings.
Select Configure Management Network
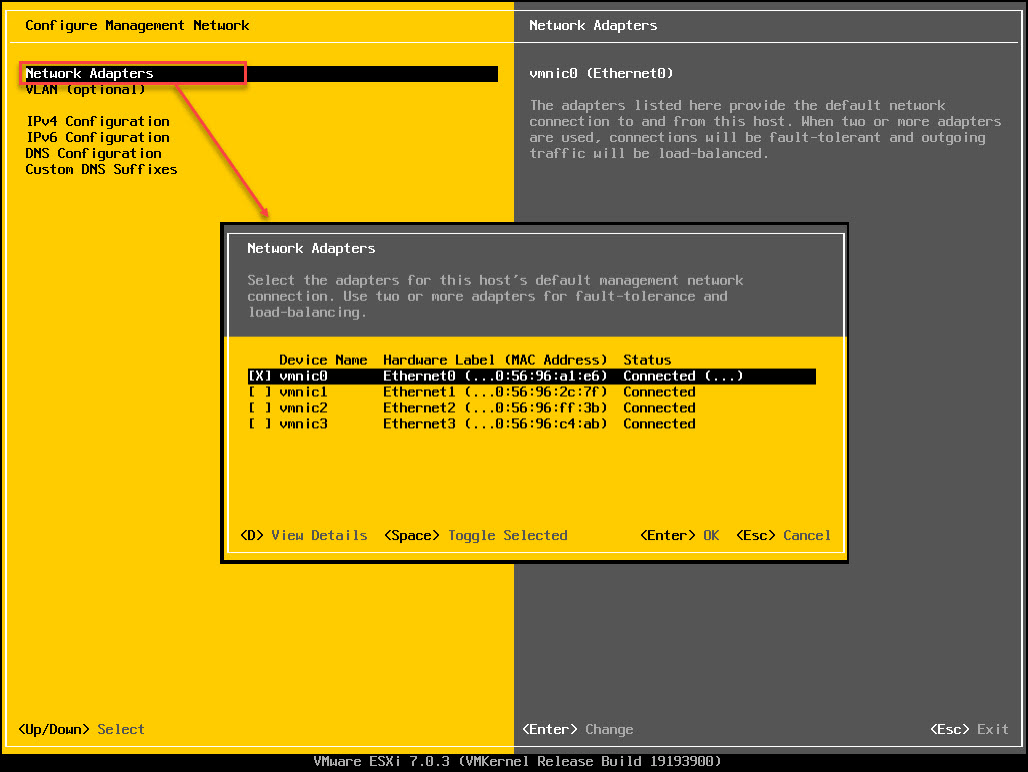
The first option that we have is the network adapters. Here we can see how many network adapter ports we have. By default, the ESXi host will enable your server’s number one network port, which is called vmnic0.
In this section, we don’t change anything for now. Later, we will add a second network port(in ESXi is vmnic) to the management network for high availability.
In this section, we can also create and configure VLANs for our ESXi host network. But for now, we skip VLANs(I will show this in the article about ESXi networks).
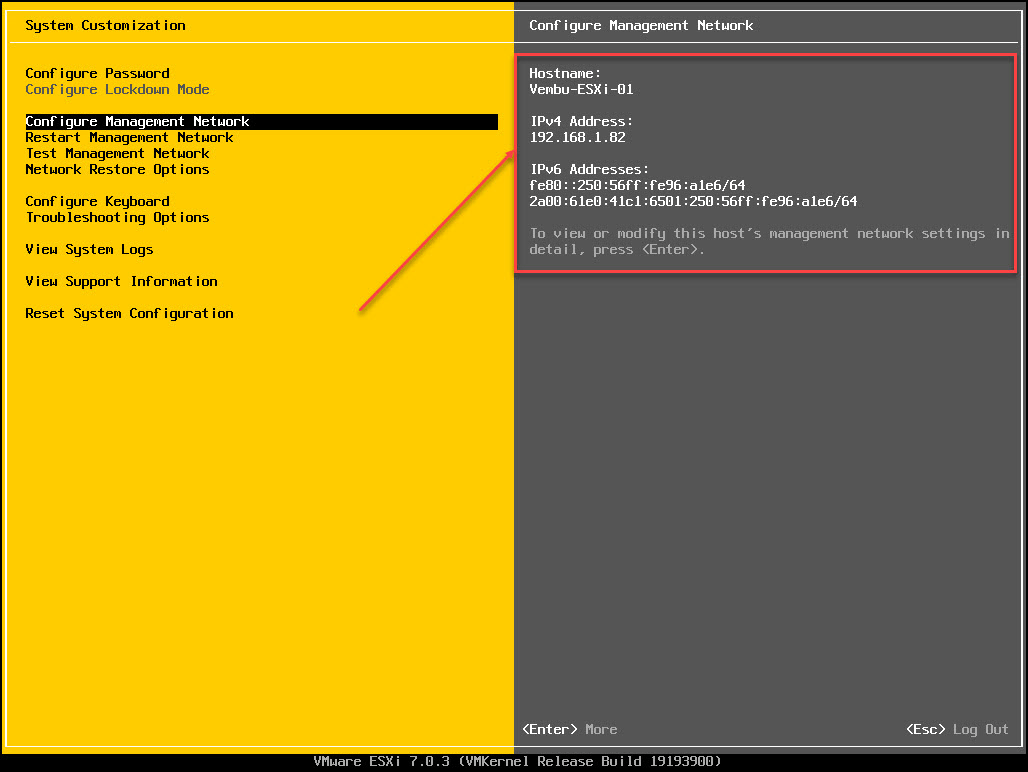
Next, configure a static IP address, DNS, and ESXi hostname.
Continuing inside Configure Management Network, select the option IPv4 Configuration, select the option Set static IPv4 address and network configuration:
Add your IP address, subnet mask, and network gateway, and click Enter to accept the values.
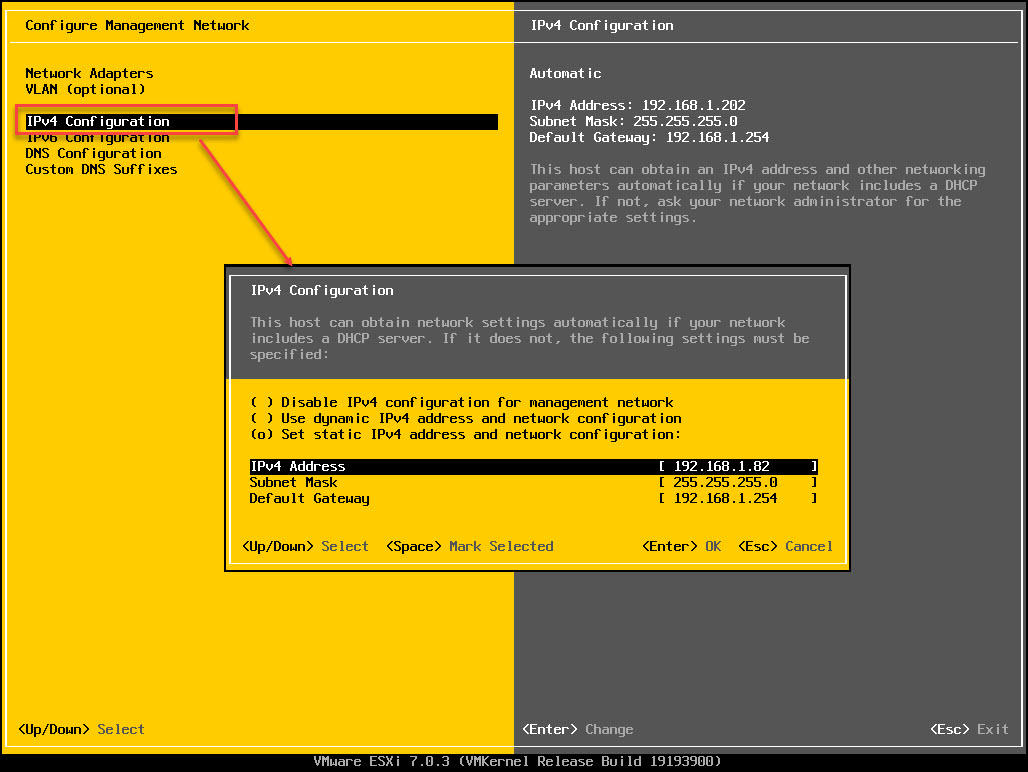
Note: You can also use static IPv6, but in this case, we leave the IPv6 and use the default DHCP.
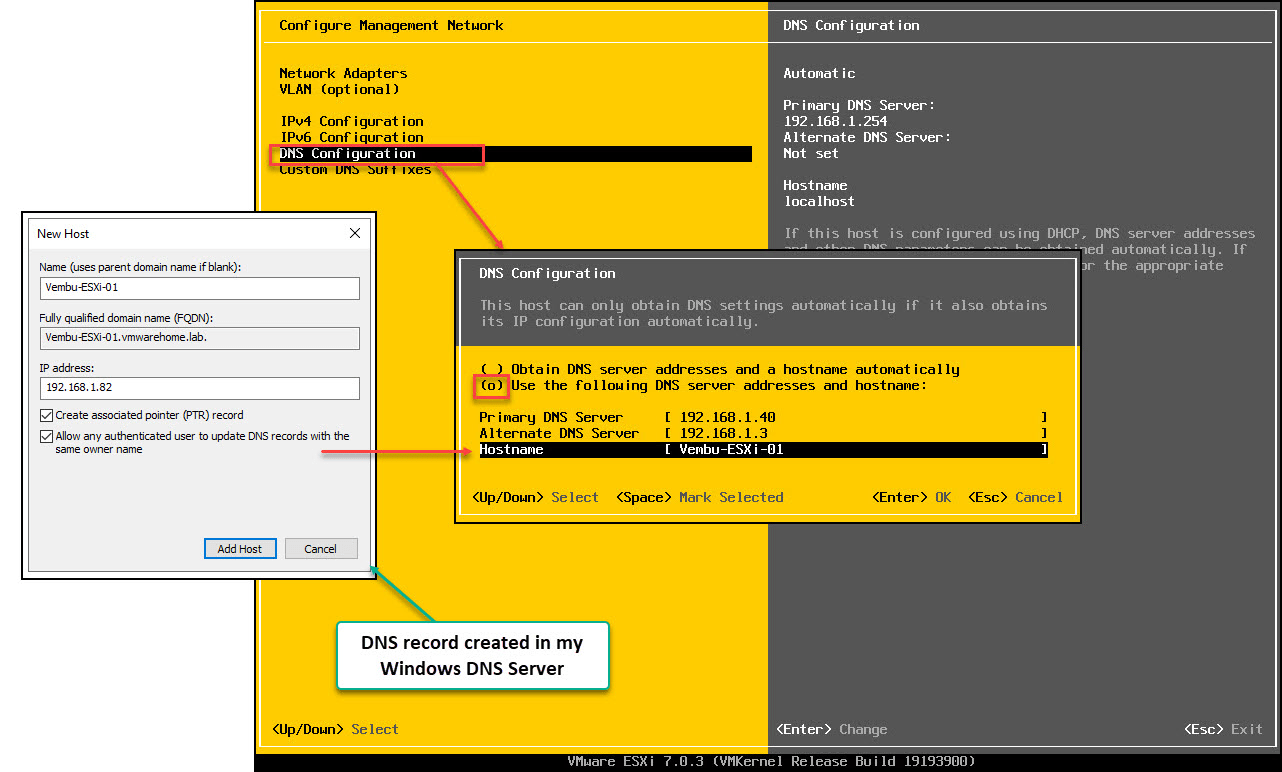
Next, select the DNS Configuration option.
Add your DNS servers and ESXi hostname.
Note: Do not forget to create a DNS record for this IP/hostname in your DNS. I created it in my Windows DNS Server.
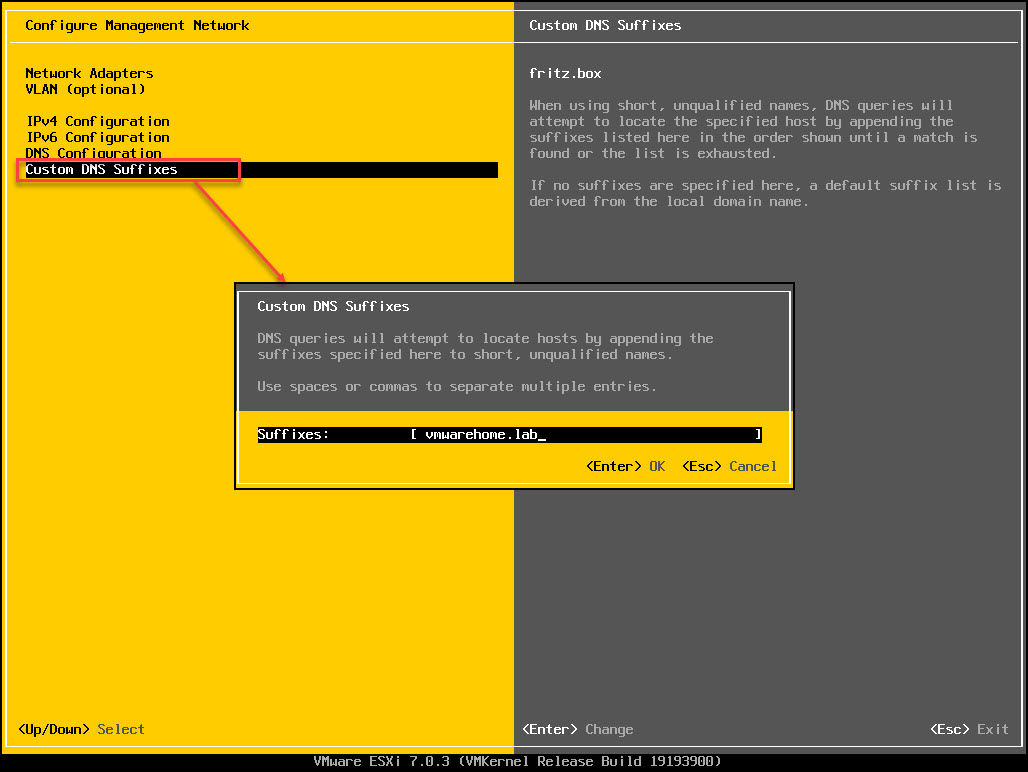
Though not mandatory, you should also add your DNS Suffixes(network domain) for a better query DNS for an IP address on your network. I add my DNS domain and click enter.
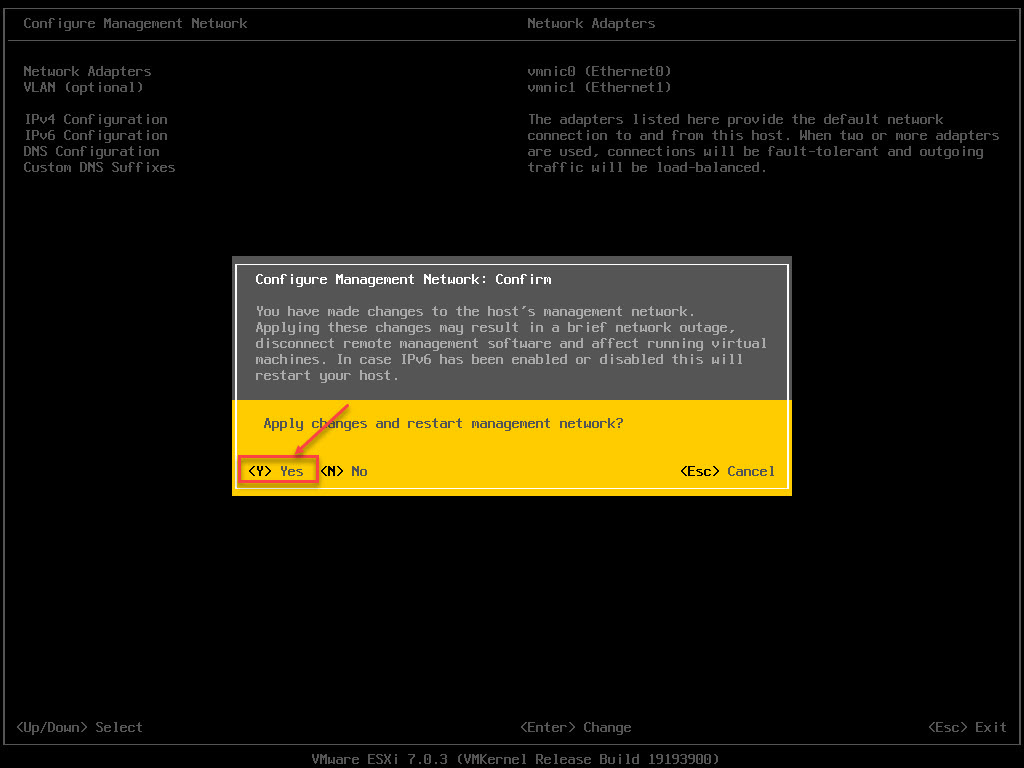
Now that we have all our network settings press the ESC key to leave the Management Network menu and save the configuration by selecting Yes(Y)
Note: No configuration is saved if you do not save your changes.
If all settings were added and saved correctly, now you can see the new settings on the right.
The final test is to run the Test Management Network option to see if all is okay and, if the ESXi host is reachable in the network too, if DNS can query your IP/DNS Name.
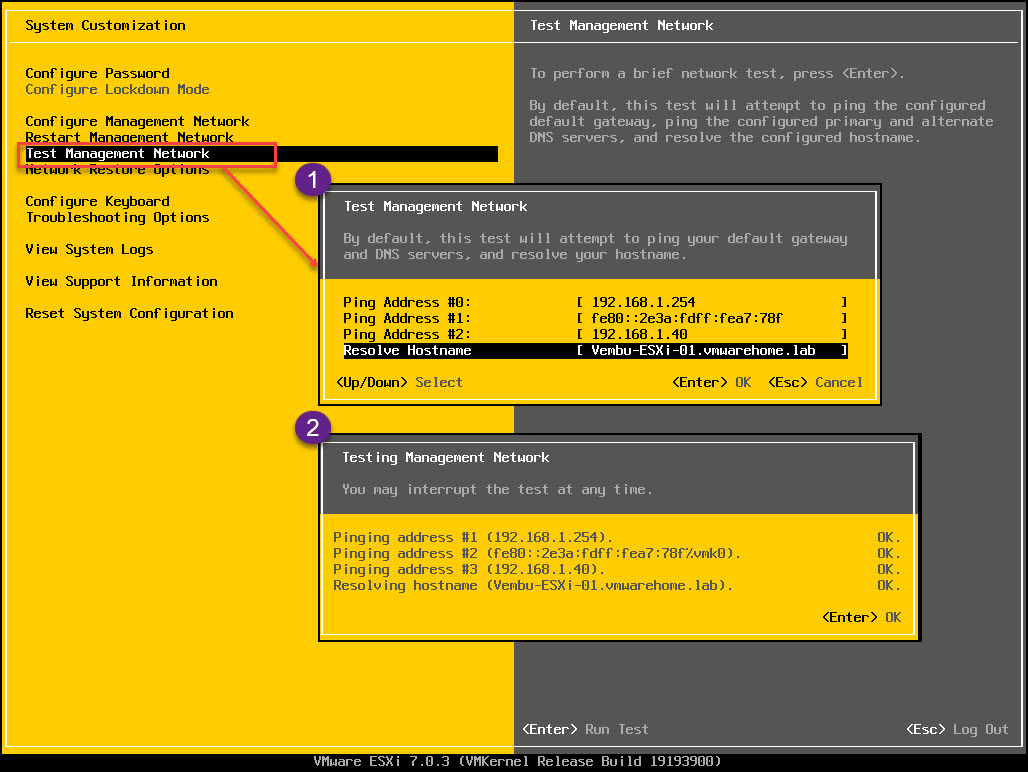
As we can see above, all is okay, and our ESXi installation is finished along with the post-install tasks, and we can now connect to the ESXi host using the vSphere Web Client host.
Press ESC a couple of times to leave the DCUI and log out.
Install vSphere 7 in non-supported CPU
Before we continue configuring our ESXi host using the vSphere Web Client host, let me explain what happens if you try installing vSphere 7 in a non-supported CPU.
Since vSphere 7, some legacy CPUs are not supported anymore, but we can still install vSphere 7 on it.
As already explained in this VMware for Beginners Series article, we can check any hardware supported or non-supported in vSphere in the HCL lists provided by VMware. We can do this for a CPU or a server model. For example, DL360 G7 using Intel(R) Xeon(R) CPU E5620 is not supported anymore, but we can still install vSphere 7 without any problem.
Search the HCL VMware list by CPU series, and you can find your CPU, in which vSphere versions are supported and which are not.
Example:

Note: VMware has a Knowledge base about changes in the CPU support. Check HERE for the list of all CPUs.
When installing vSphere in a non-supported CPU, you get the following error:
CPU_SUPPORT_WARNING: The CPUs in this host is not supported by ESXi 7.0.3. Please refer to the VMware Compatibility Guide(VCG) for the list of supported CPUs
To bypass this, we need to add a parameter to the vSphere boot install.
Boot the server with the ISO when the vSphere 7.0 boot starts(yellow screen), press Shift + O to open boot parameters and add the above parameter AllowLegacyCPU=True (is there is any parameter on the line after a blank space, insert the new parameter).

Note: This procedure will not work for all CPUs(if they are very old) and works for the most recent ones that are not supported anymore with vSphere 7.
I have written a whole blog post about this subject. If you want more details about this subject, please check my blog post
How to connect to the vSphere Web Client host
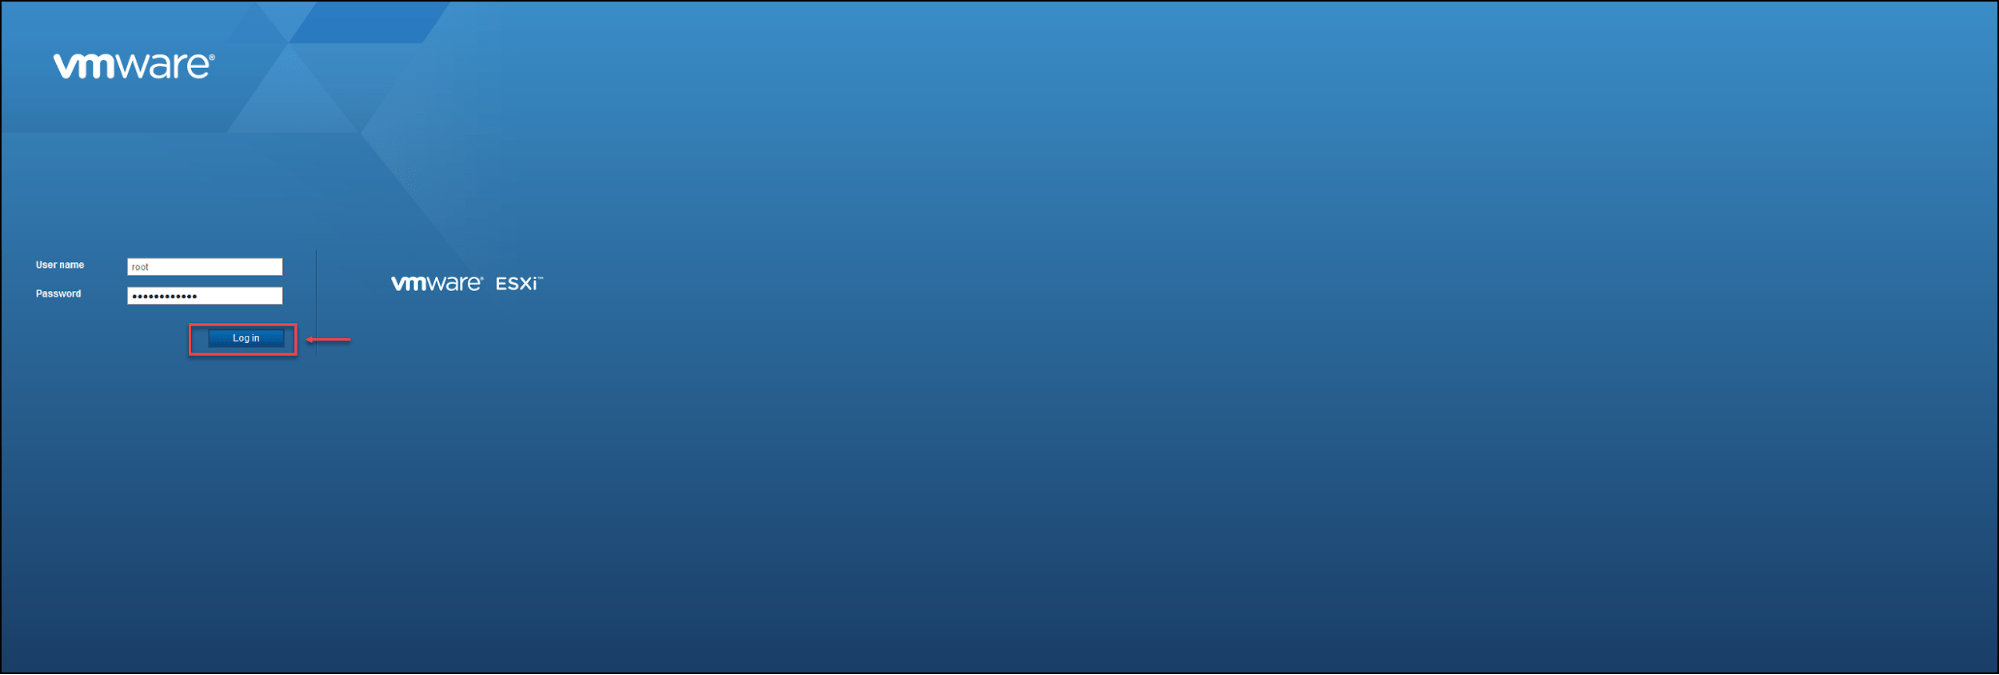
Our vSphere 7 is installed and configured, now, open a browser and add ESXi host IP/FQDN.
Add your user and root password and click Log in.
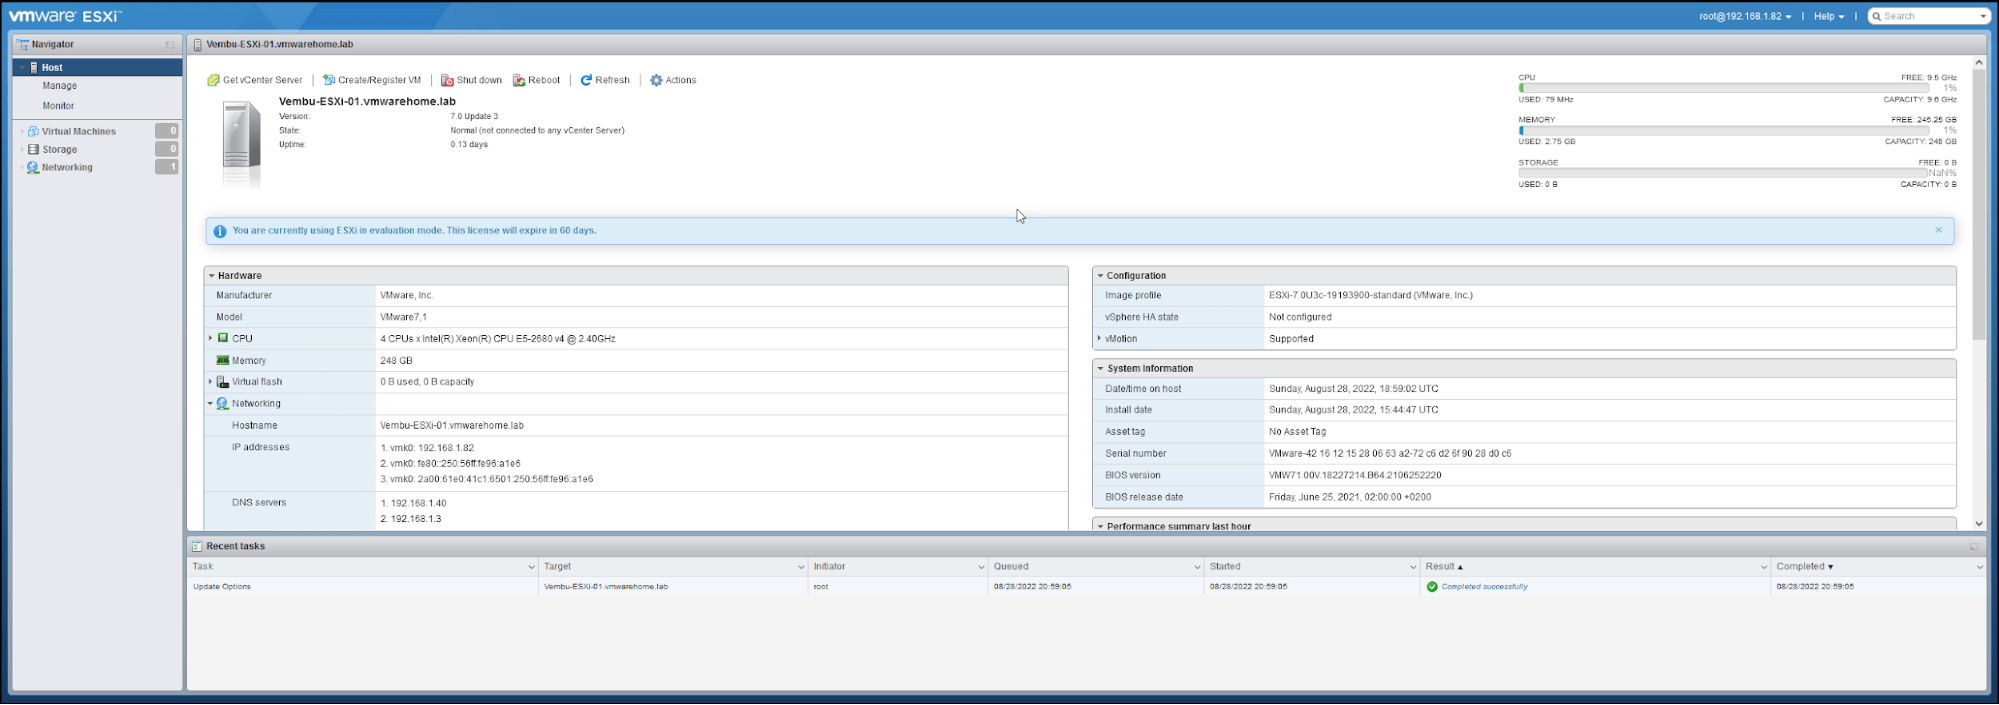
The above shows see all the resources and settings in our new ESXi host.
Conclusion:
In this VMware for Beginners Series – Install vSphere : Part 3 we touched upon Nested virtualization, how to boot with vSphere 7 ISO, install vSphere 7, check all options during installation, and do the initial post-install tasks so that we have an IP address, DNS, and hostname.
We also learn how to install vSphere 7 in non-supported CPUs using vSphere boot parameters.
In the next article, we will talk about how to configure vSphere virtual networks, local Datastores for management(already existing) and networks/datastores for our Virtual Machines.
Follow our Twitter and Facebook feeds for new releases, updates, insightful posts and more.