
Imagine you are an IT Professional in an organization and you need to create a virtual machine for different use cases including training, QA, and DEV. Since each department utilizes different networks, user accounts, time zones, and domains, configuring the VMs and incorporating these small details manually can be a time-consuming process.
If you are using VMware, you can create a customization settings template that will include all of the above-mentioned settings. Then, when creating a new VM, you can apply the template to a new VM and sit back with a cup of coffee while the entire process runs its course.
In this article, I will guide you through the process of creating customization settings and then applying them to a new virtual machine. As a result, you will get a virtual machine that can be used out of the box without any manual interaction from your side. So, let’s dig deep into it.
Requirements: You need to have a virtual machine template ready. If you don’t have a virtual machine template and would like to learn how to create one, you can refer to the article A Guide to Creating VM Templates in VMware
Step 1: Create VM customization settings template
In the first step, you need to create a template with all settings included. That will include computer name, domain name, local administrator account, time zone, network, and more. Here are step-by-step instructions on how to do it.
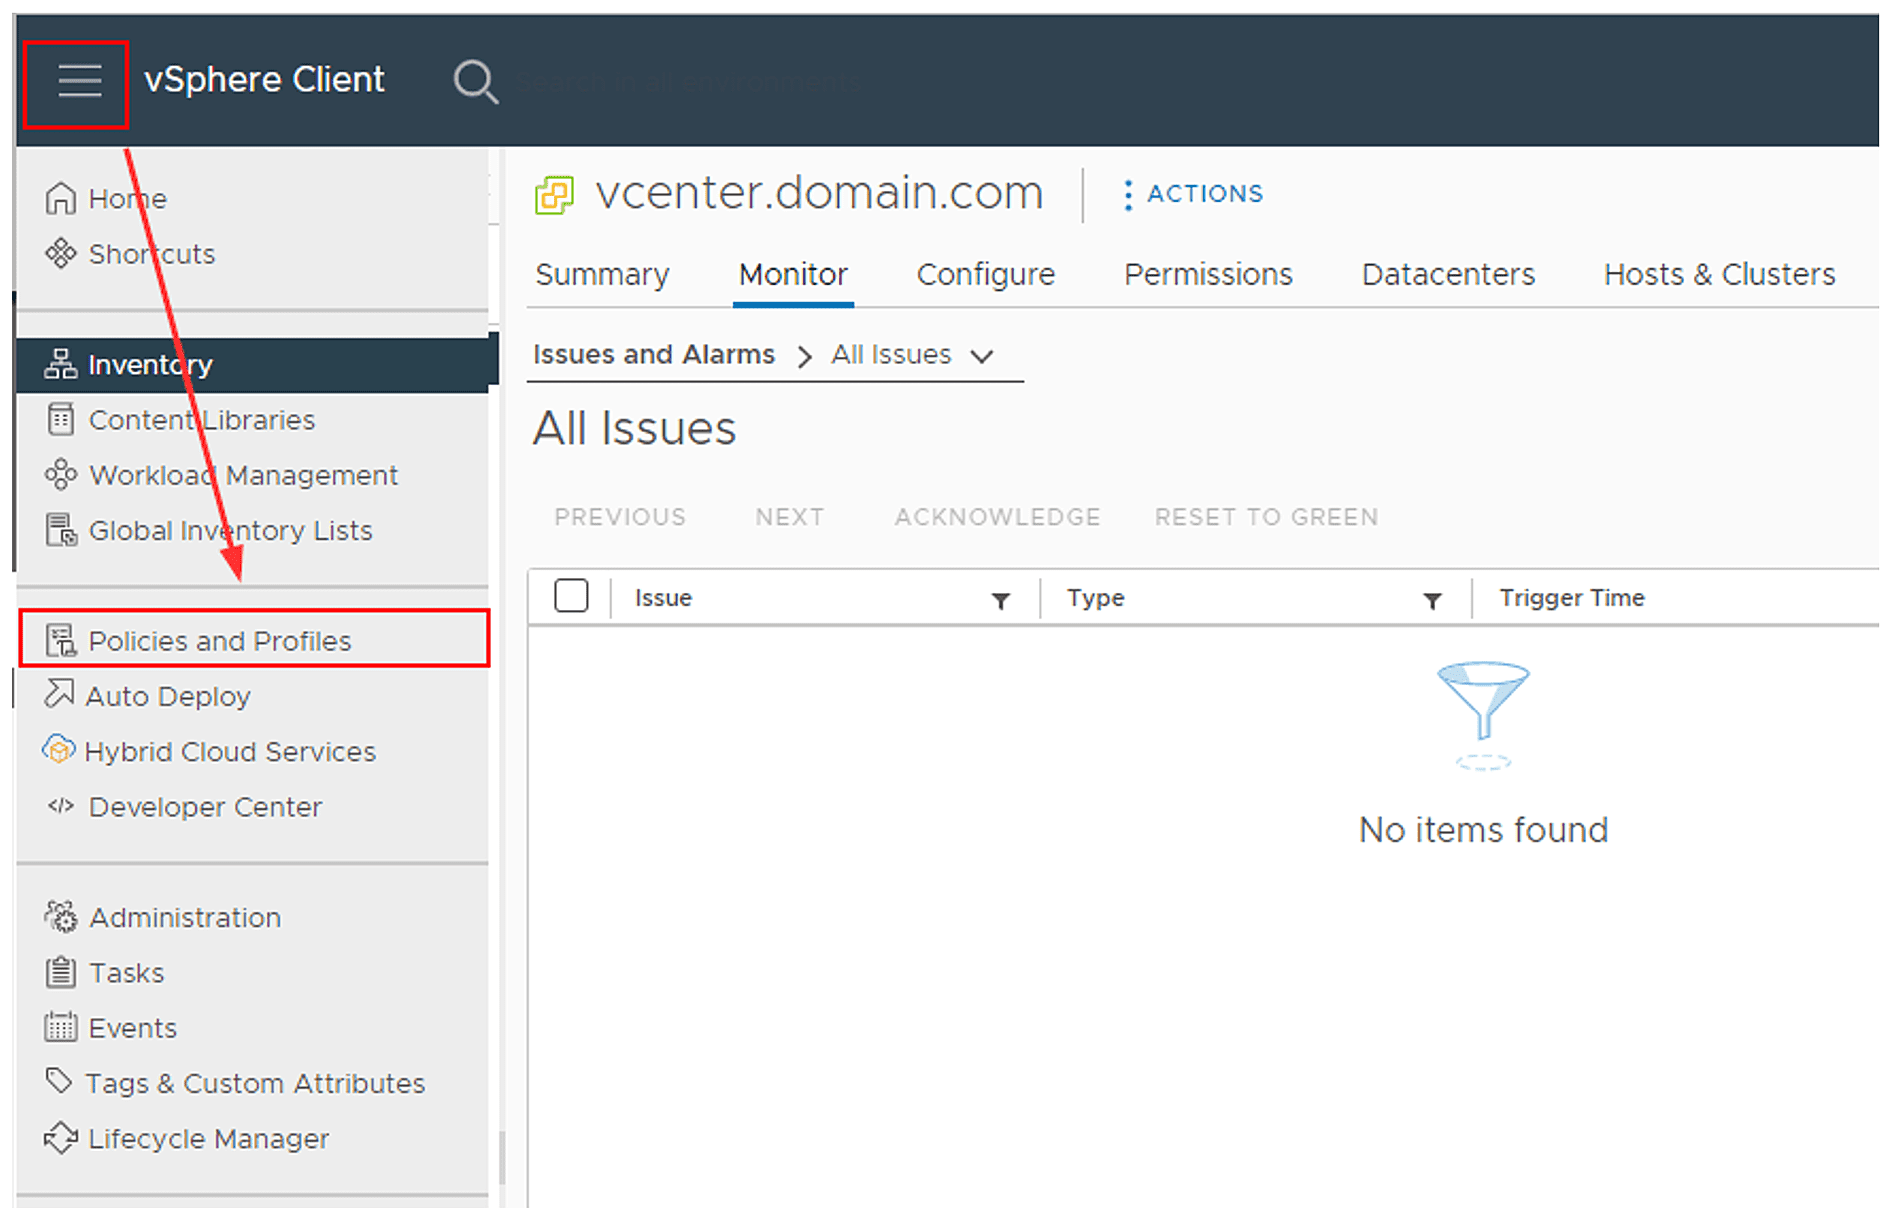
- Log in to your Center
- Select the hamburger menu located at the top left corner and then click on Policies and Profiles
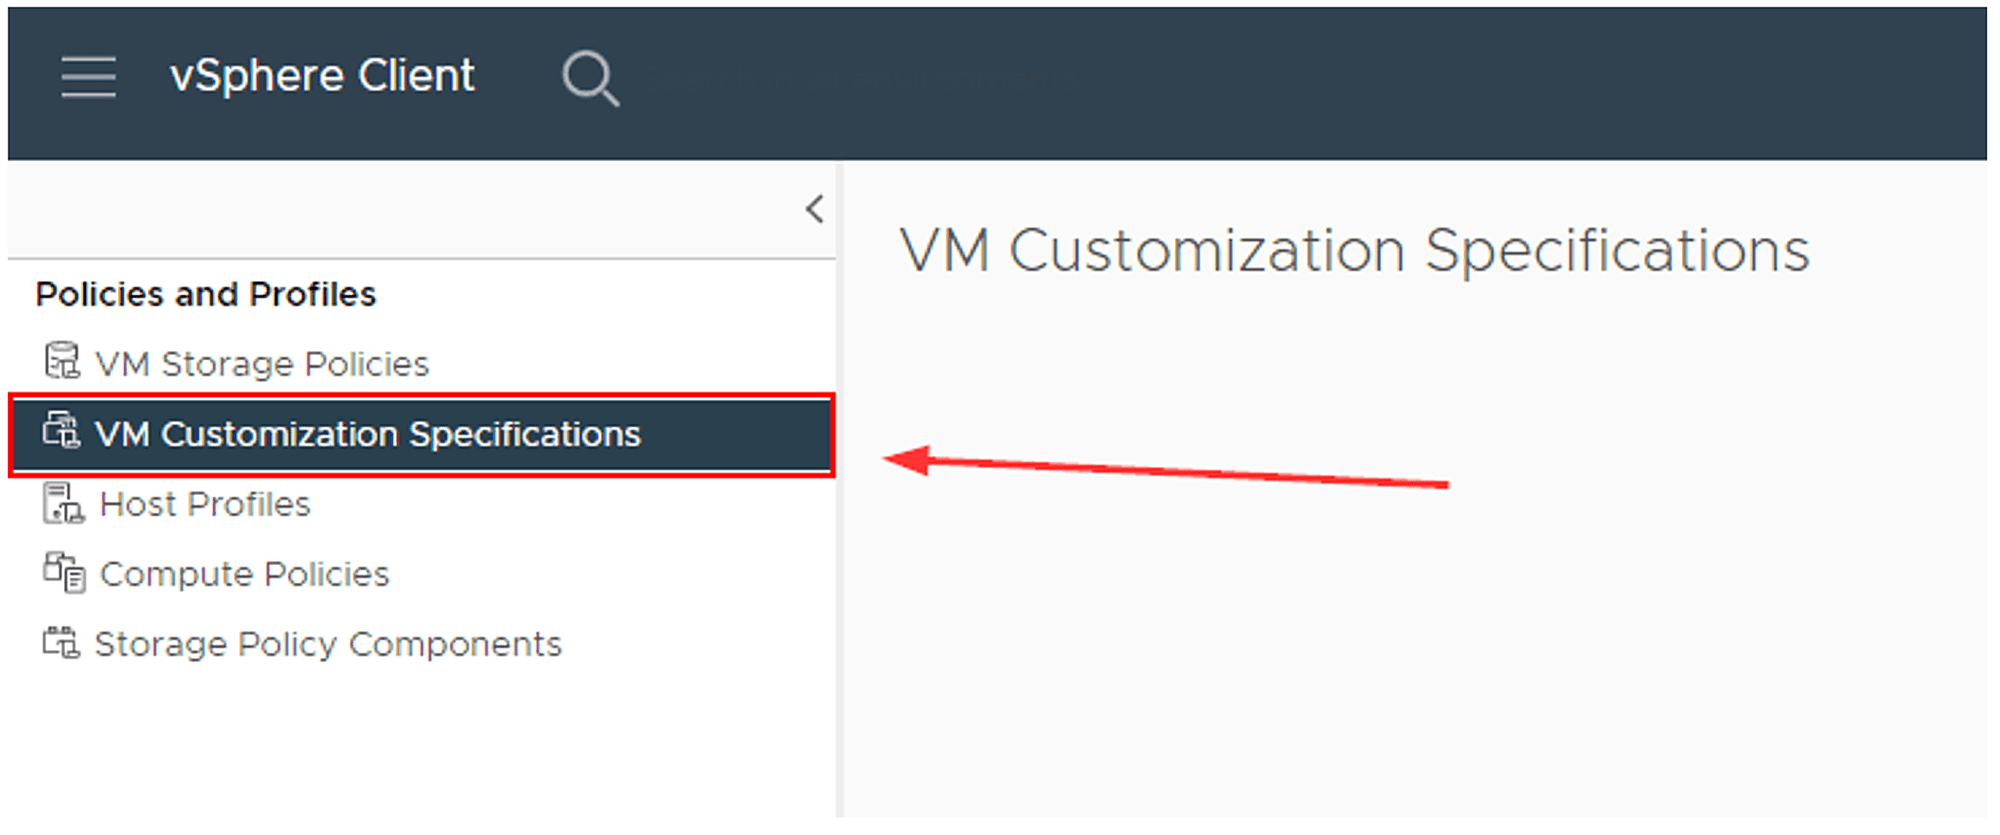
- Click on VM Customization Specifications
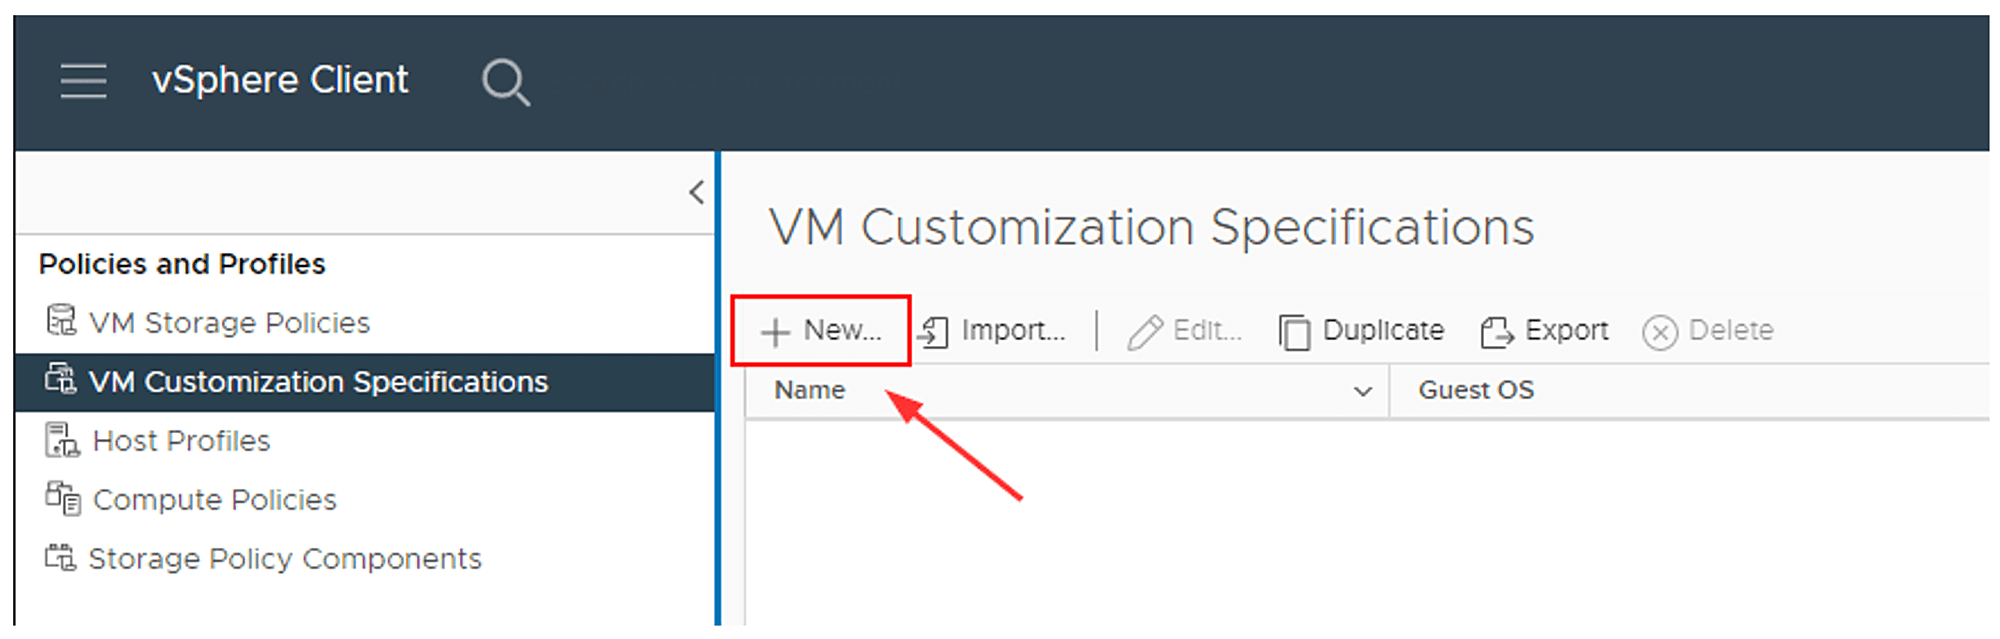
- Click on +New… to create a new customization setting
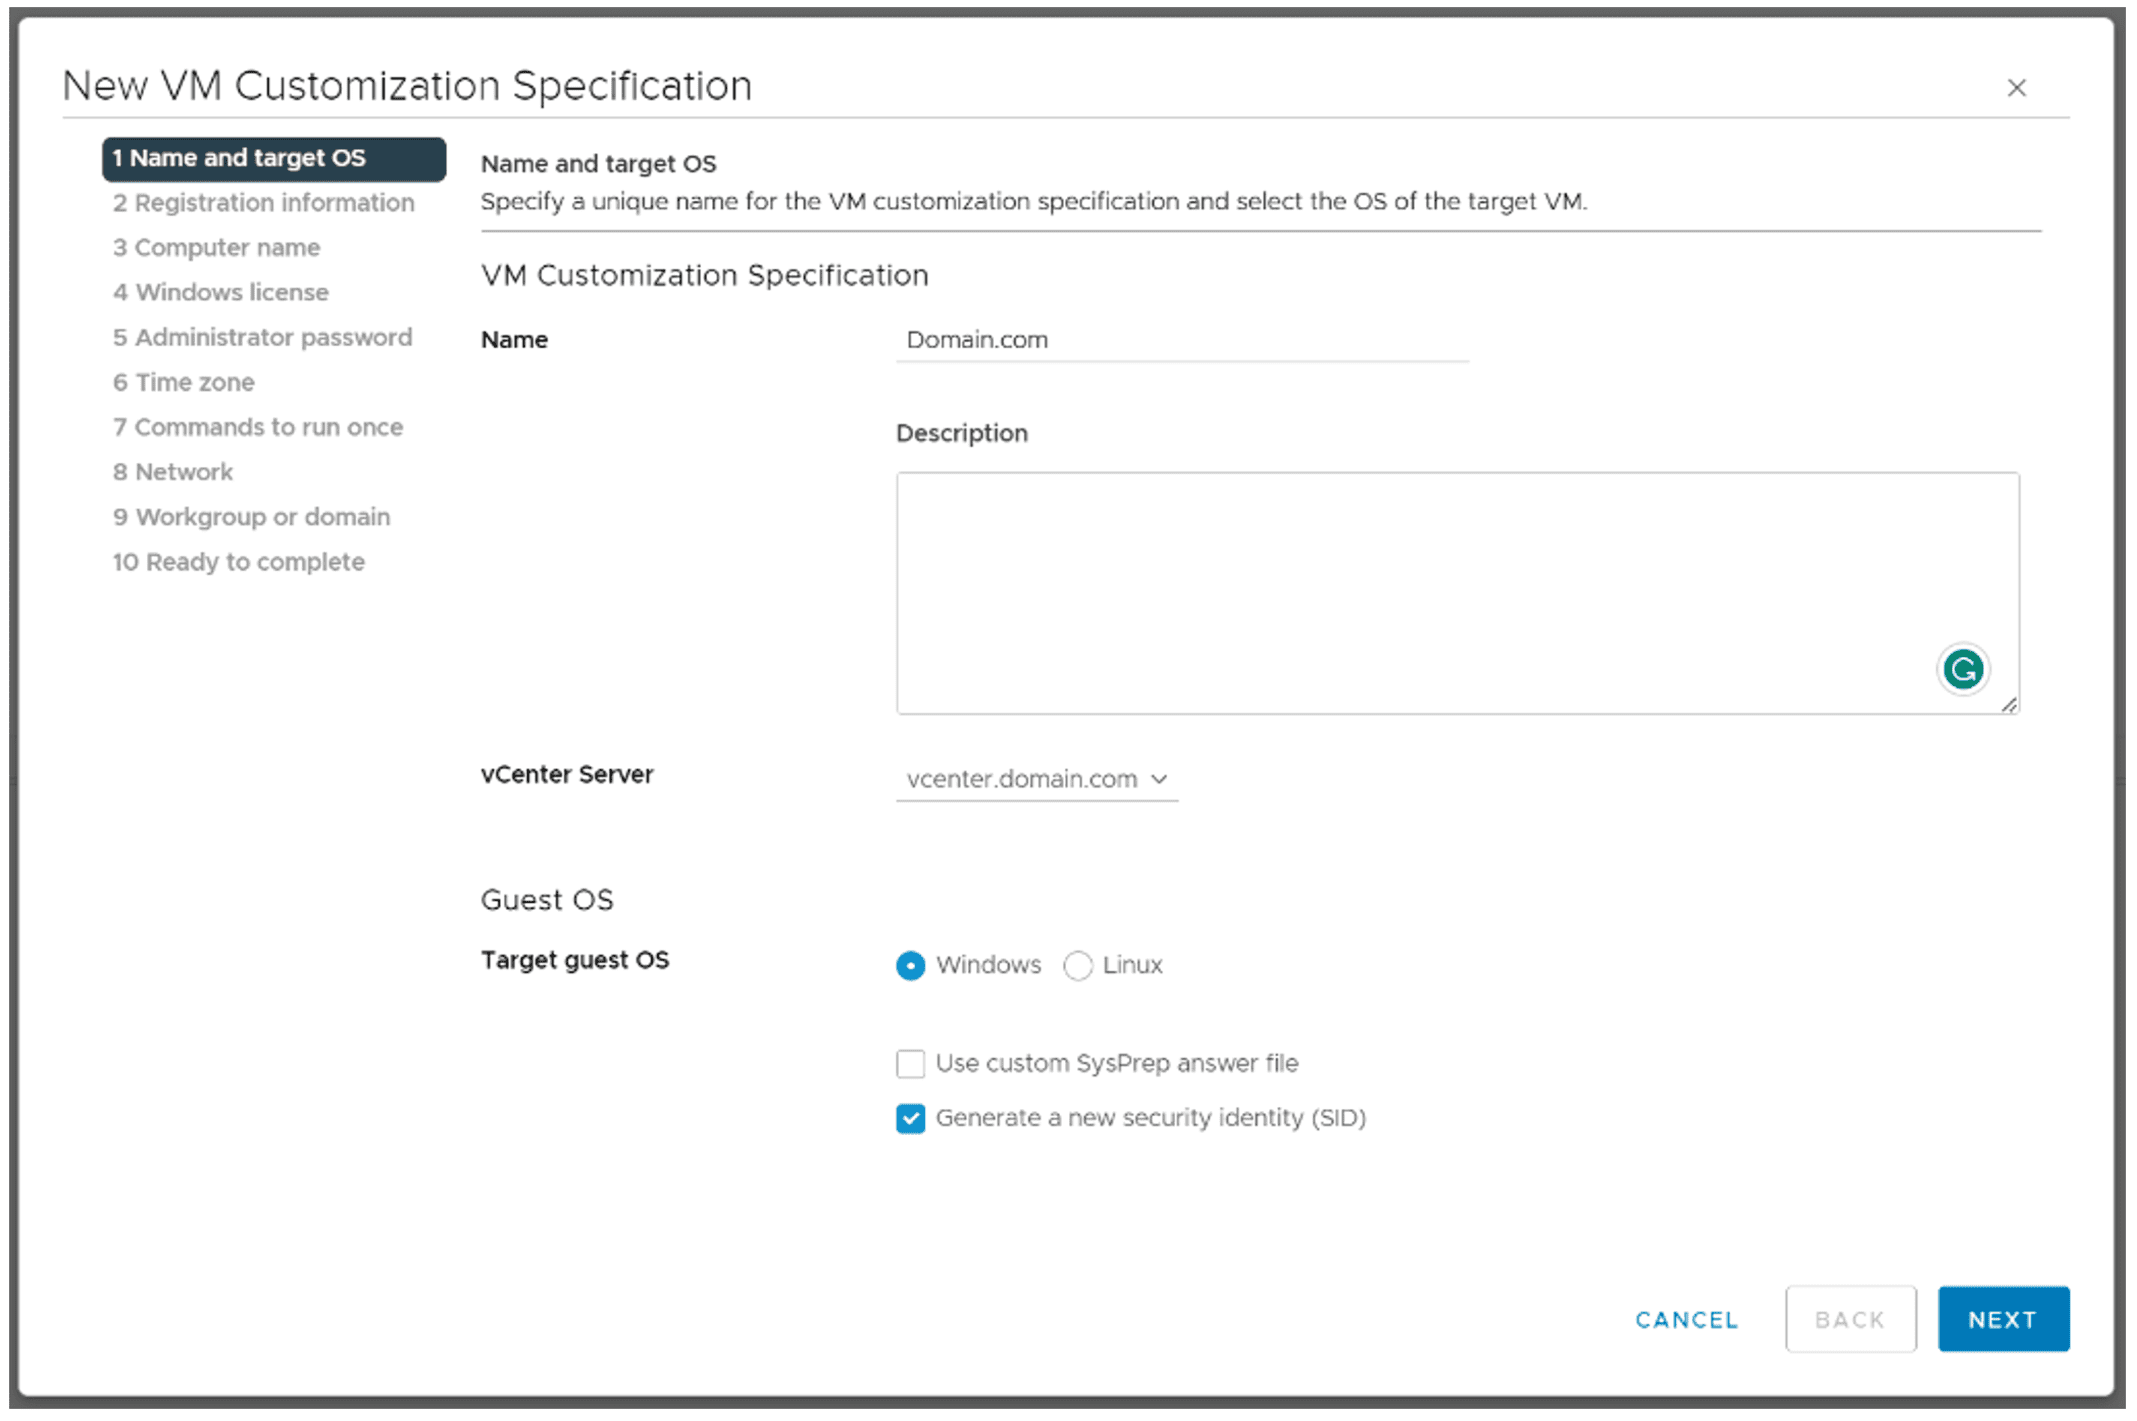
- Under Name and target OS, enter the name of the VM customization specification, select the vCenter Server and target Guest OS, and then click Next. Keep Generate a new security identity (SID) selected
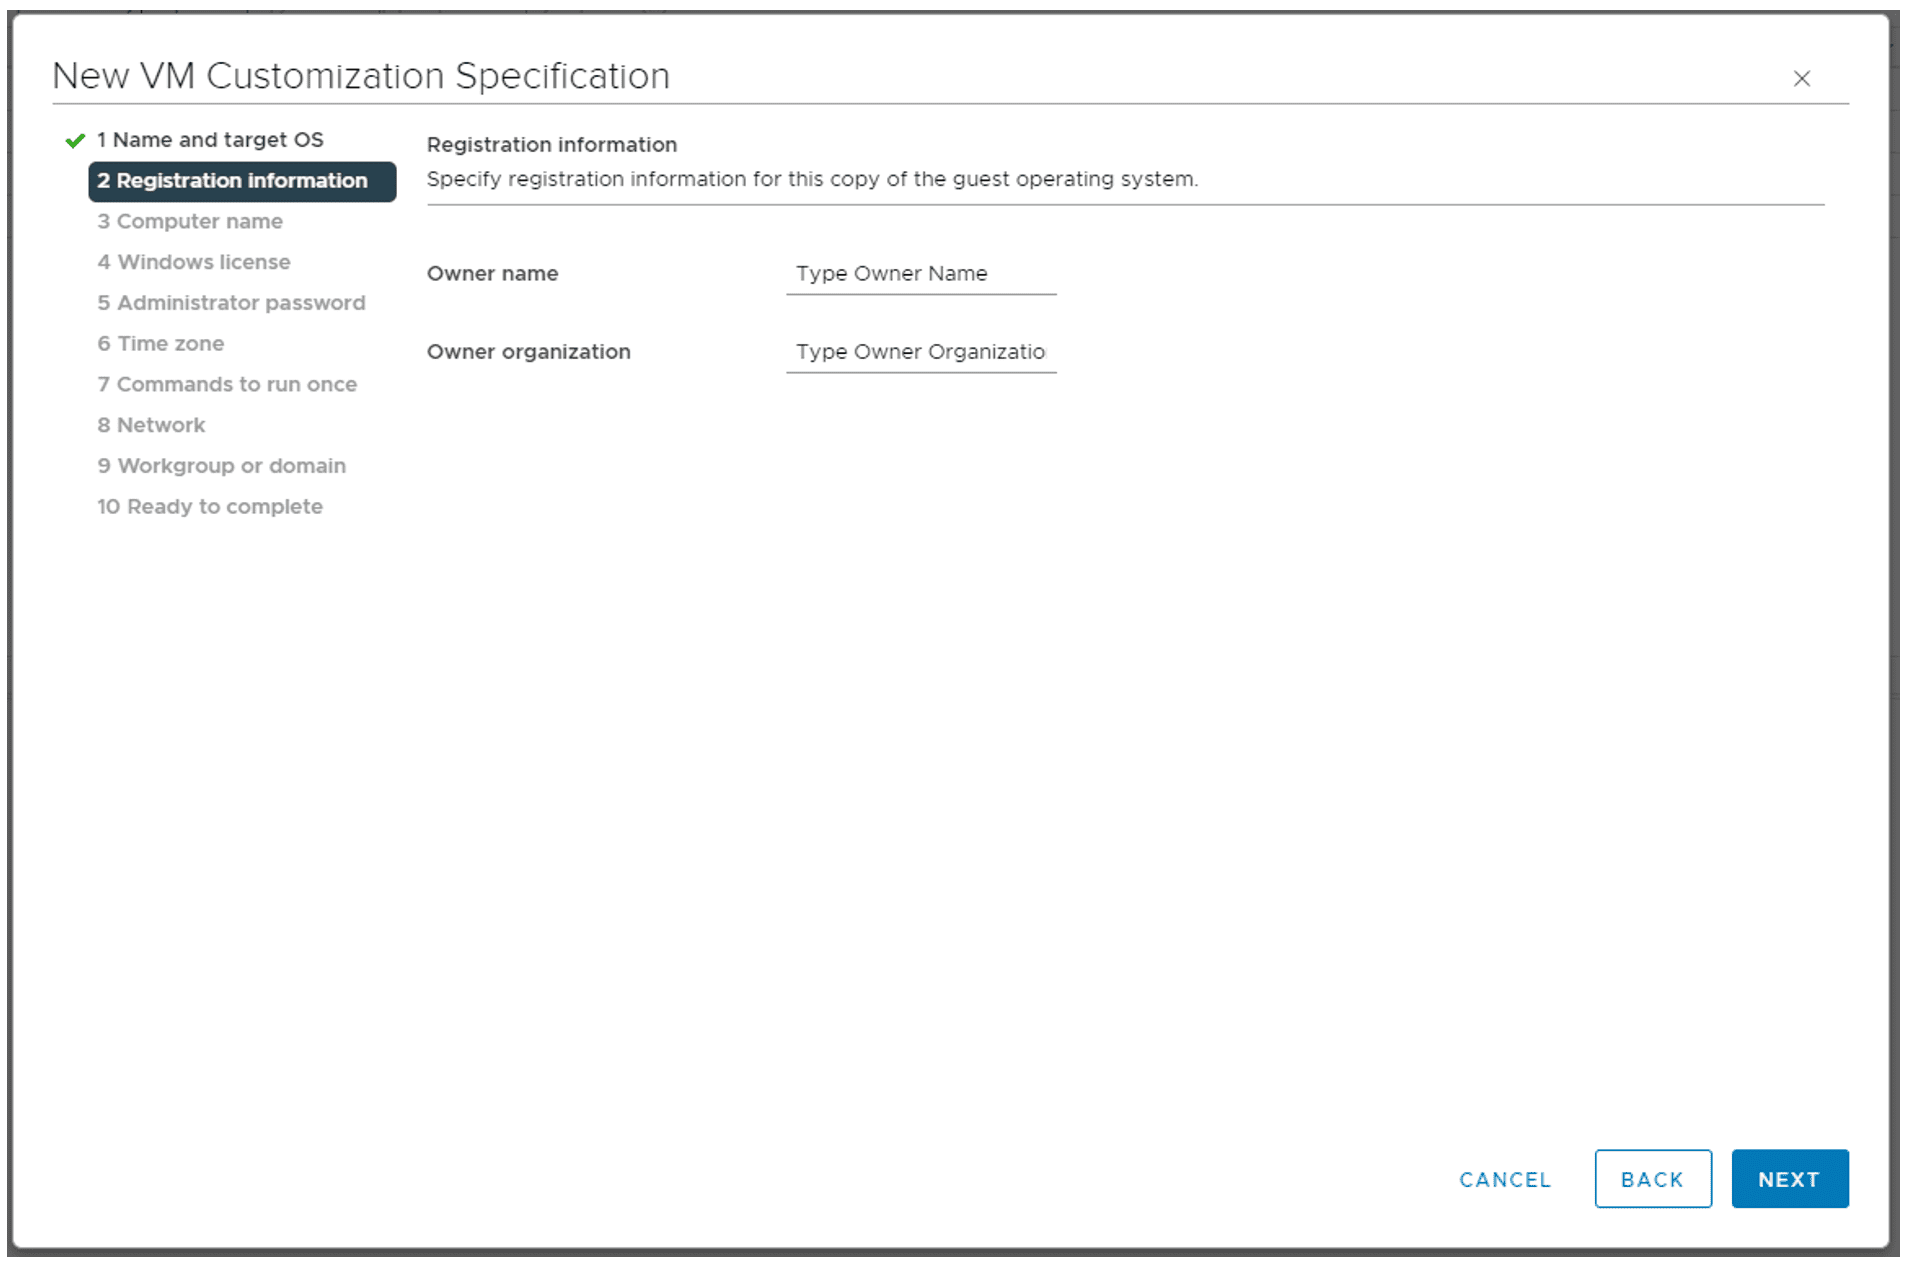
- Under Registration Information, provide the owner name and owner organization and then click Next.
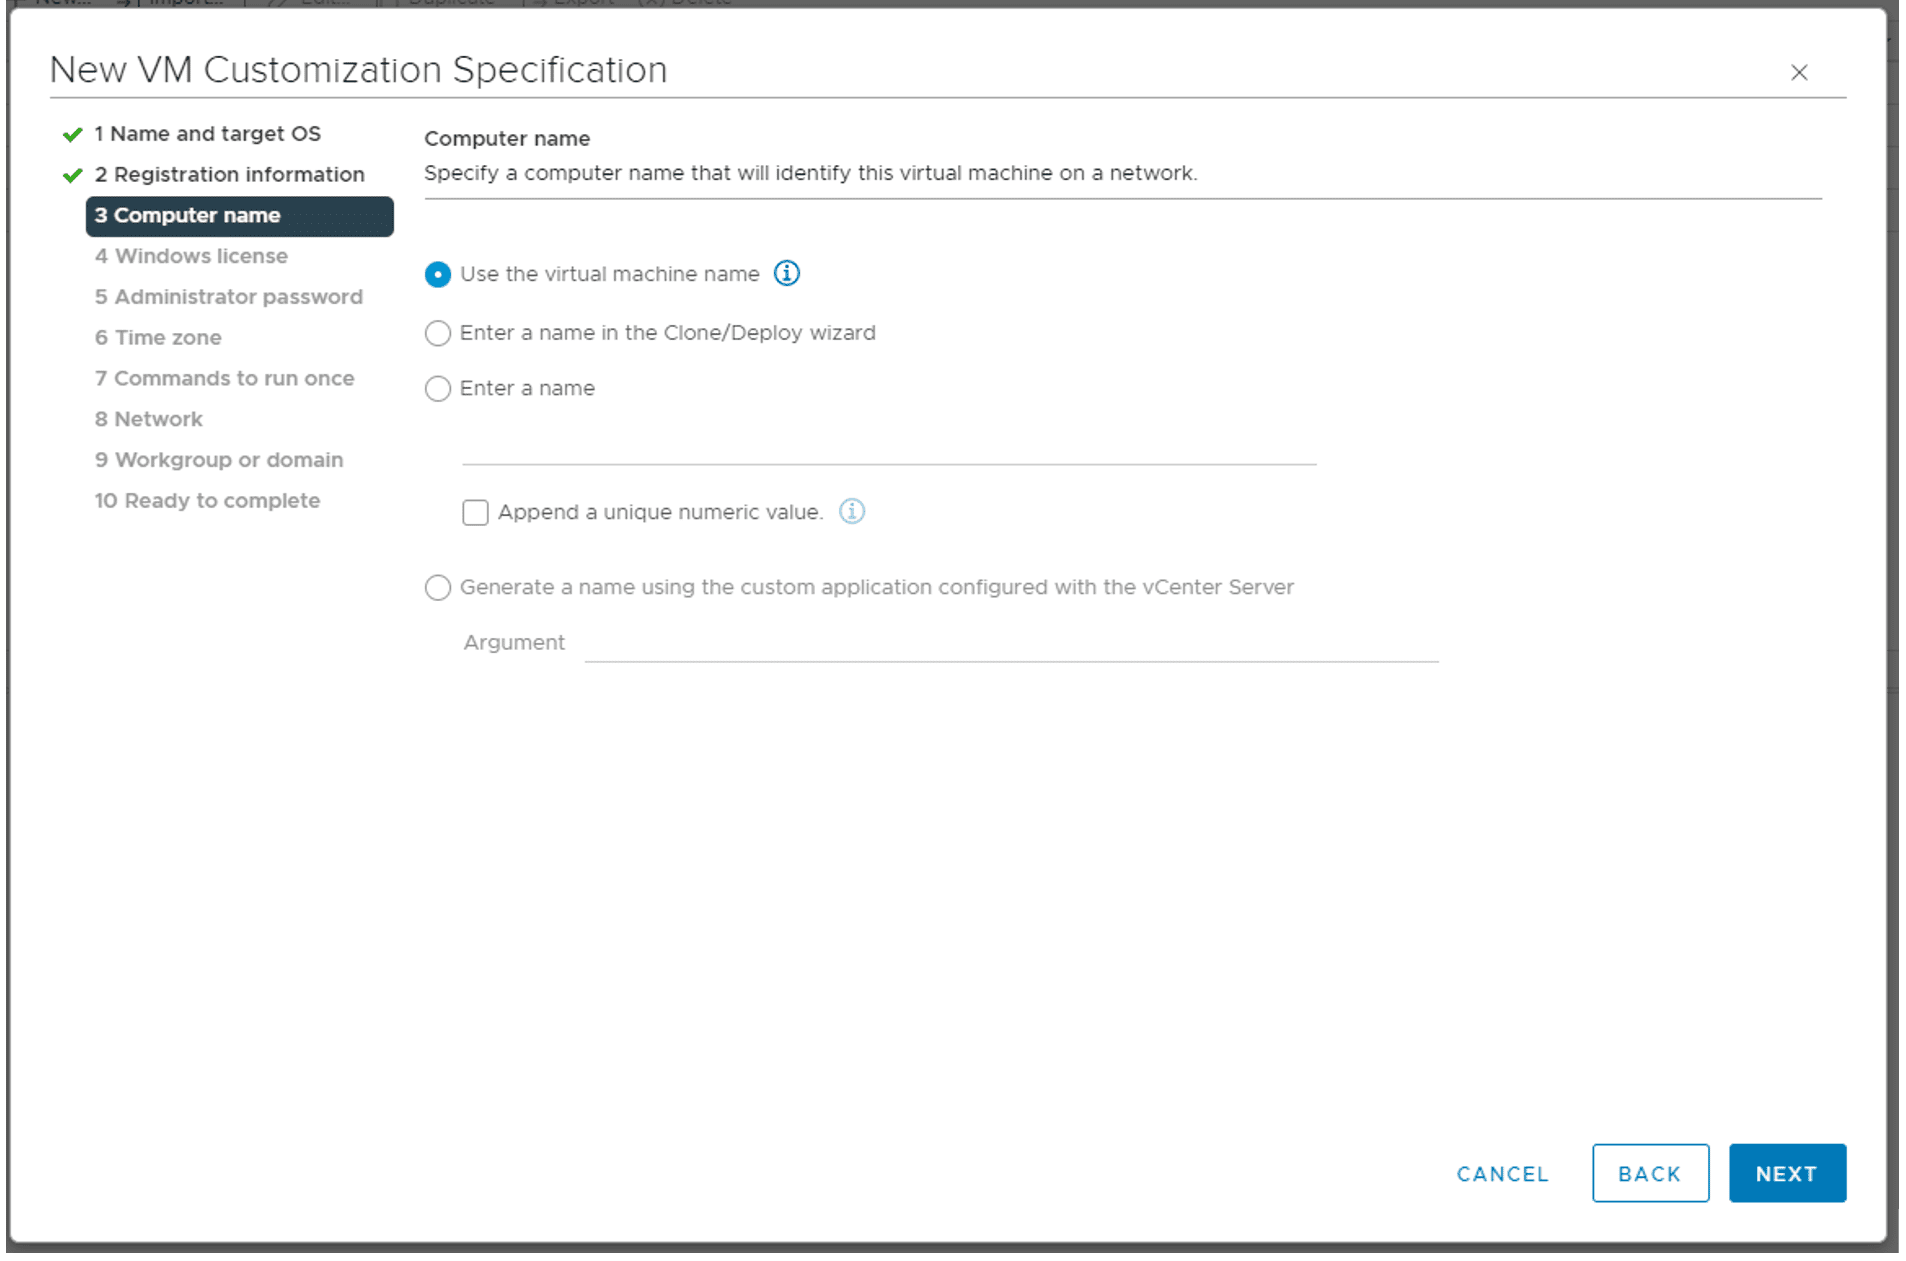
- Under Computer Name, specify a computer name that will identify this virtual machine on a network and click Next. Another option is to select Use the virtual machine name, which will give your guest operating system the same computer name as the virtual machine
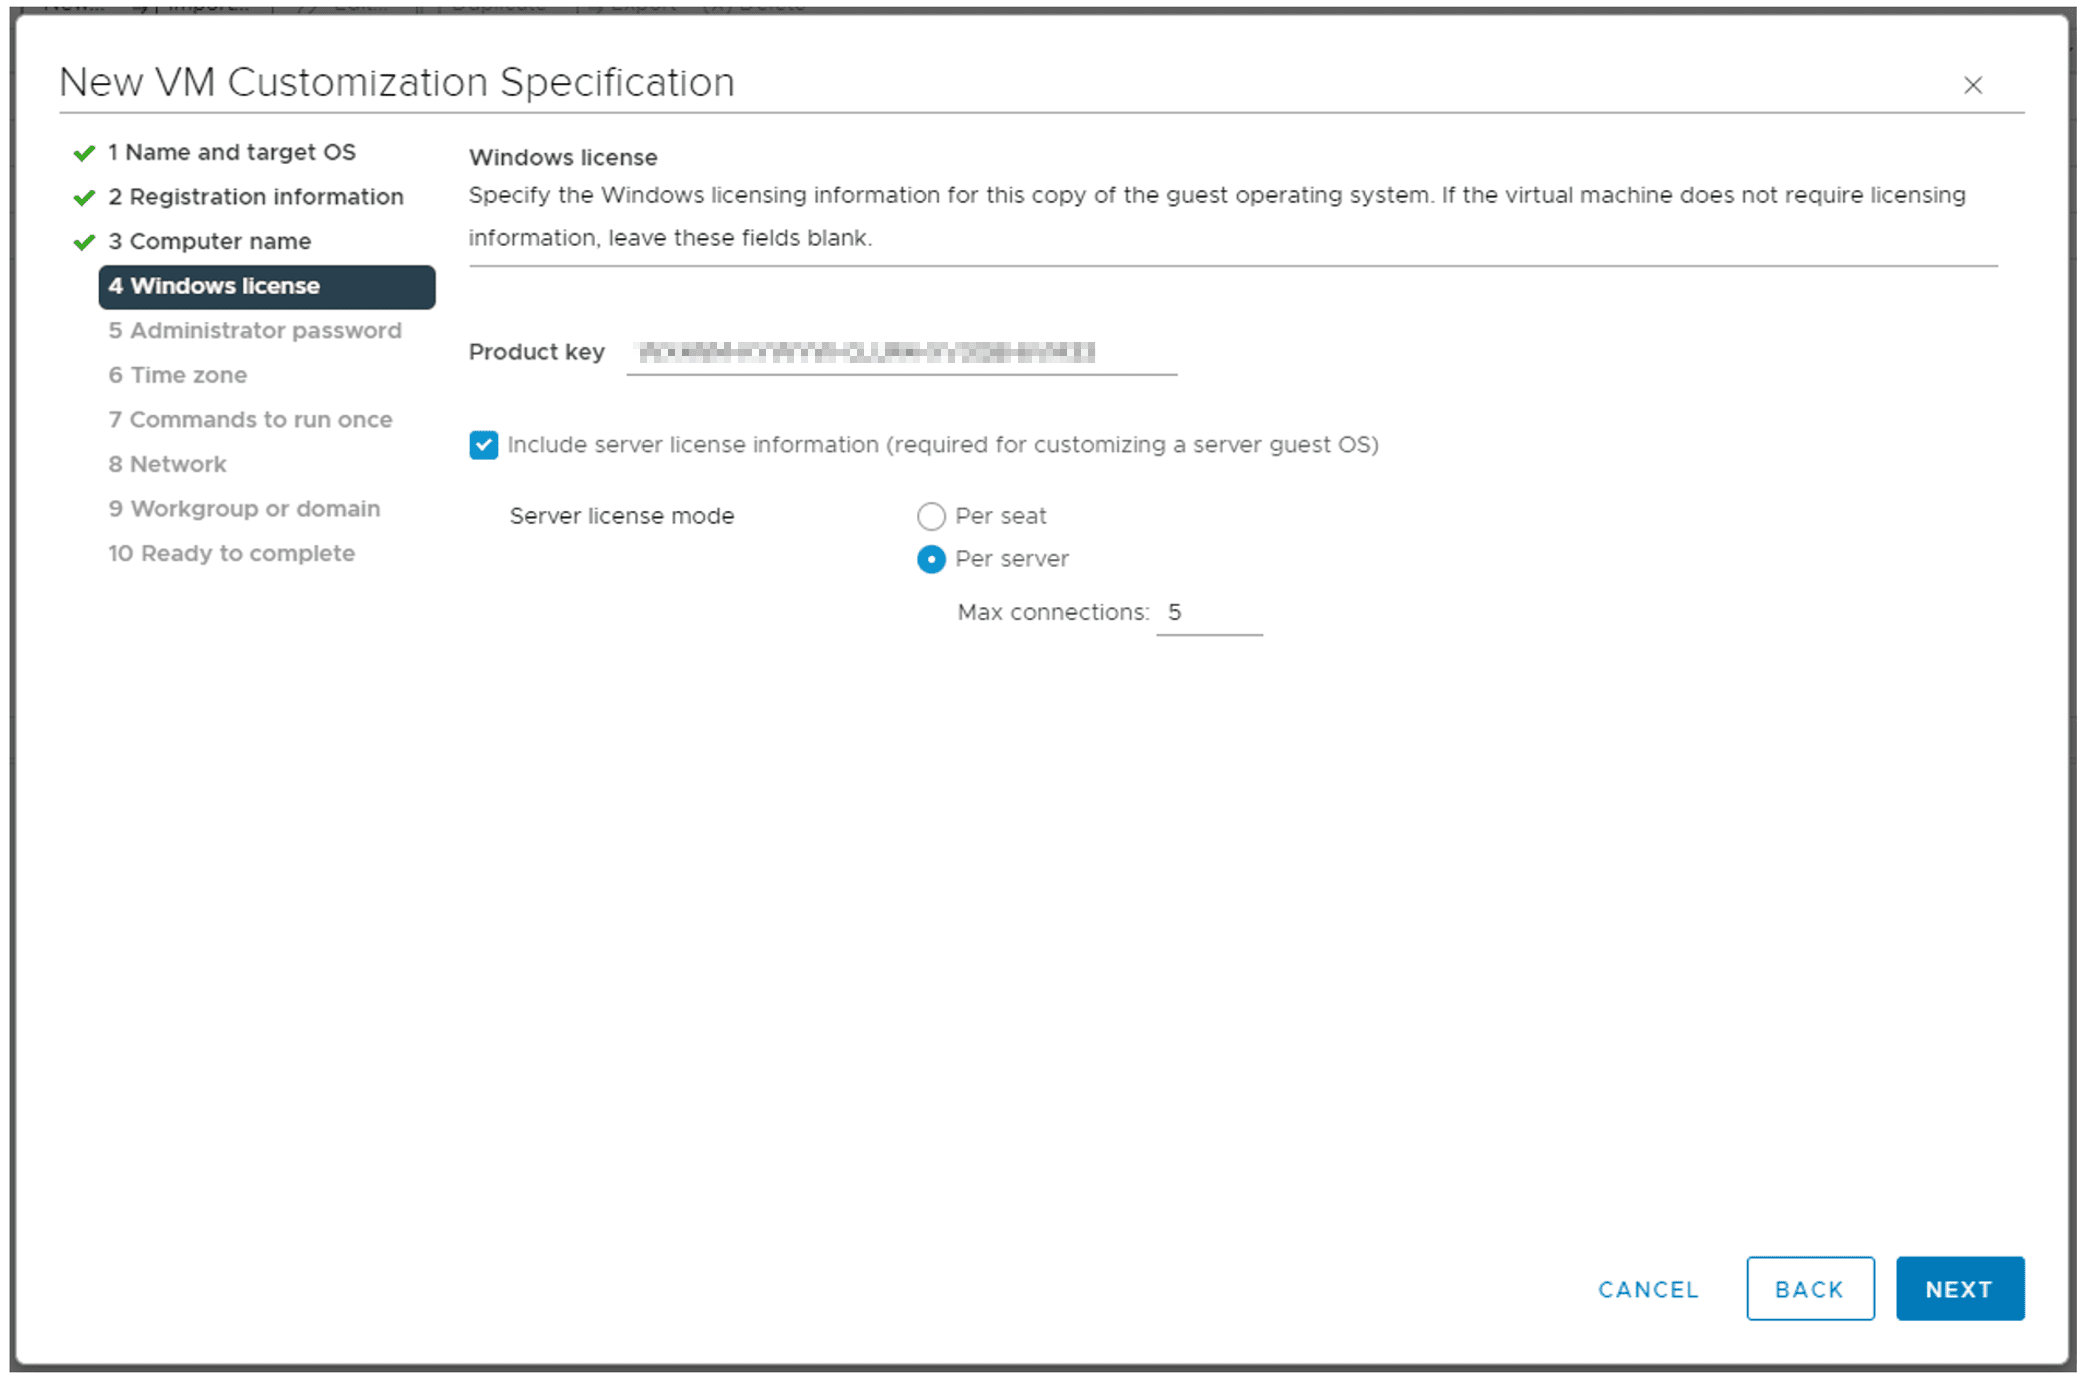
- Under Windows license, specify the Windows licensing information for the guest operating system, and then click Next
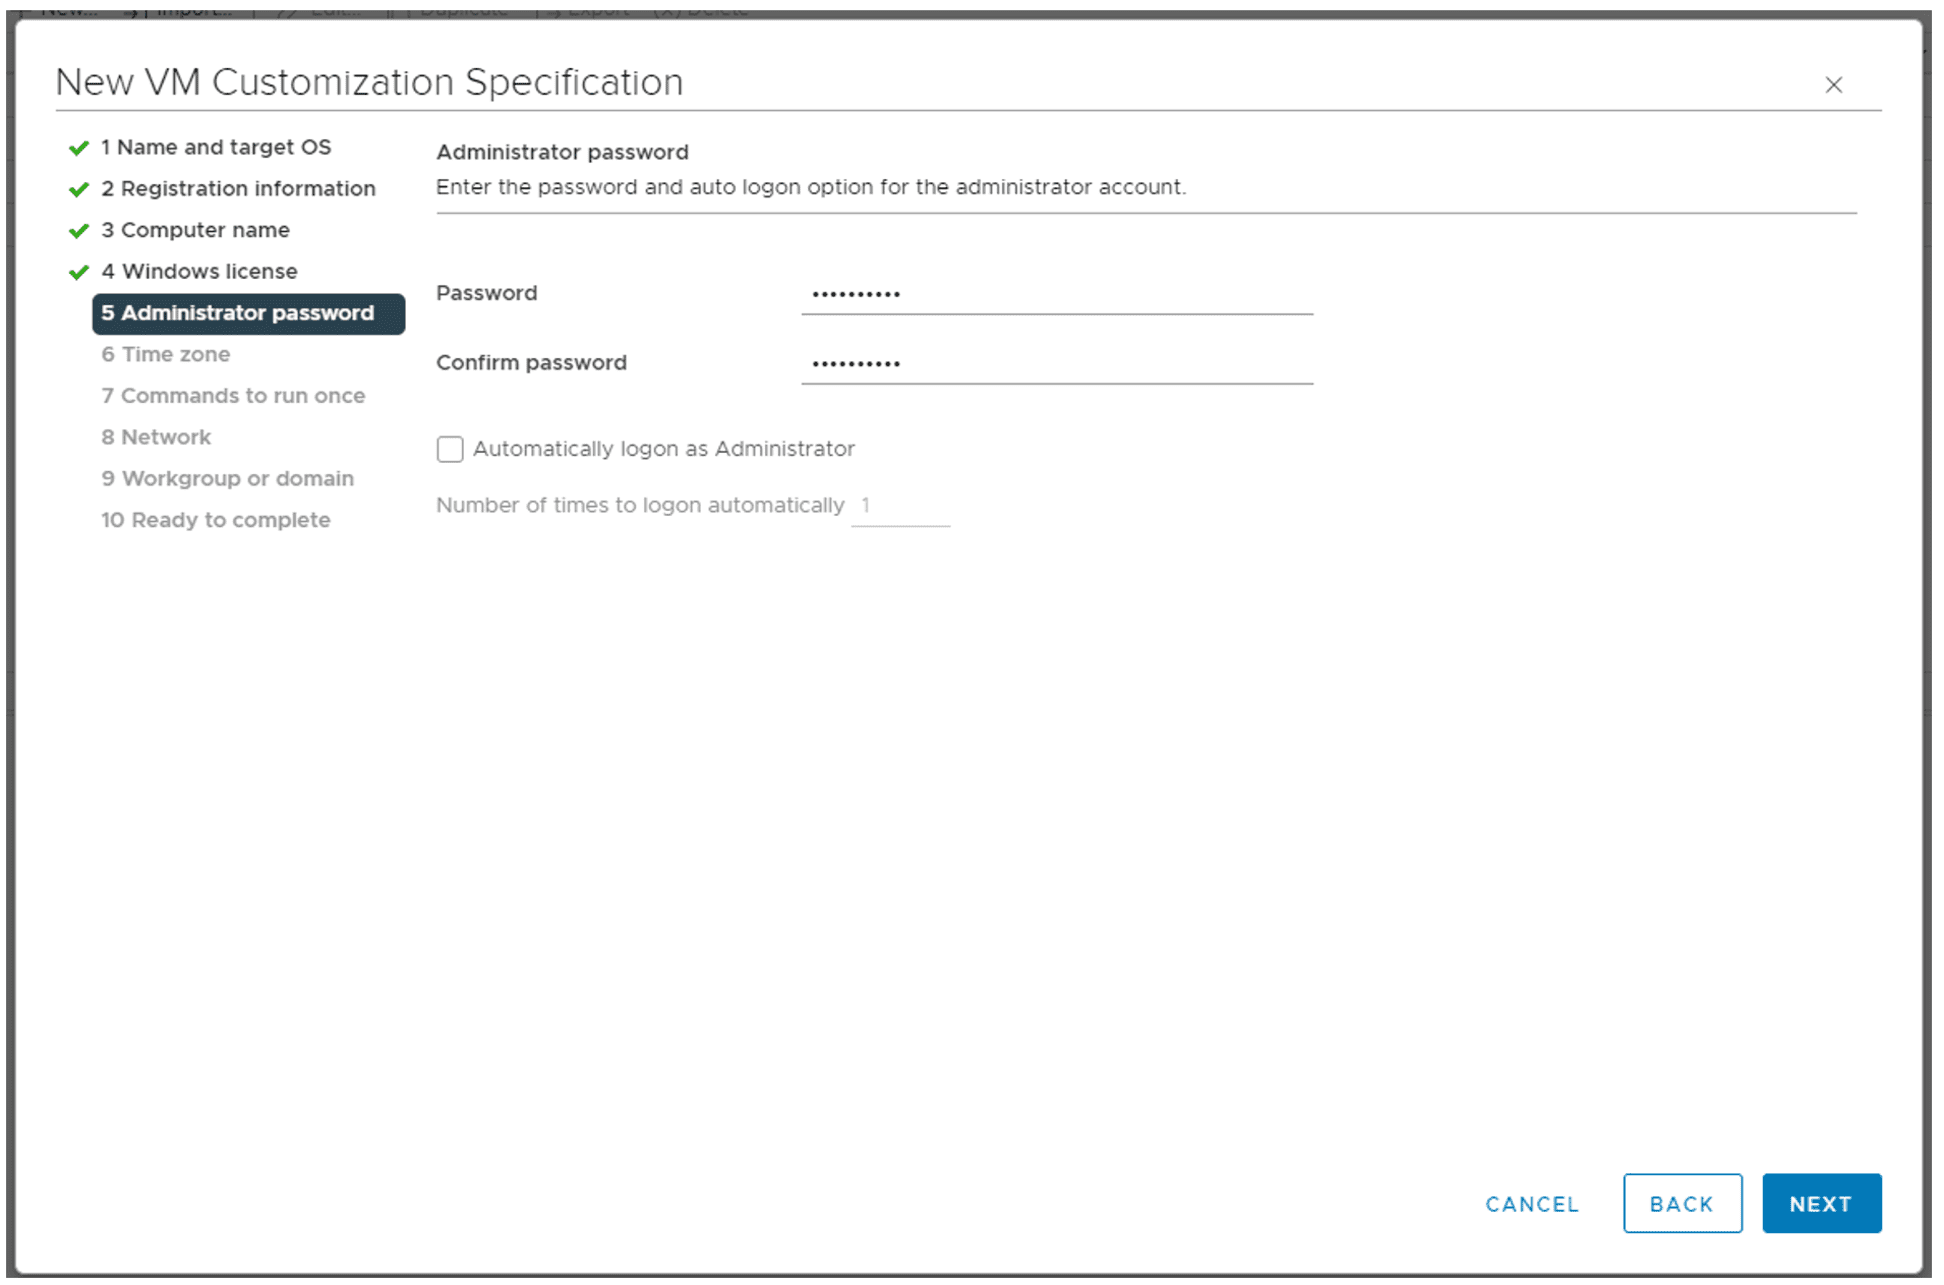
- Under Administrator password, enter the password and auto logon option for the administrator account and then click Next
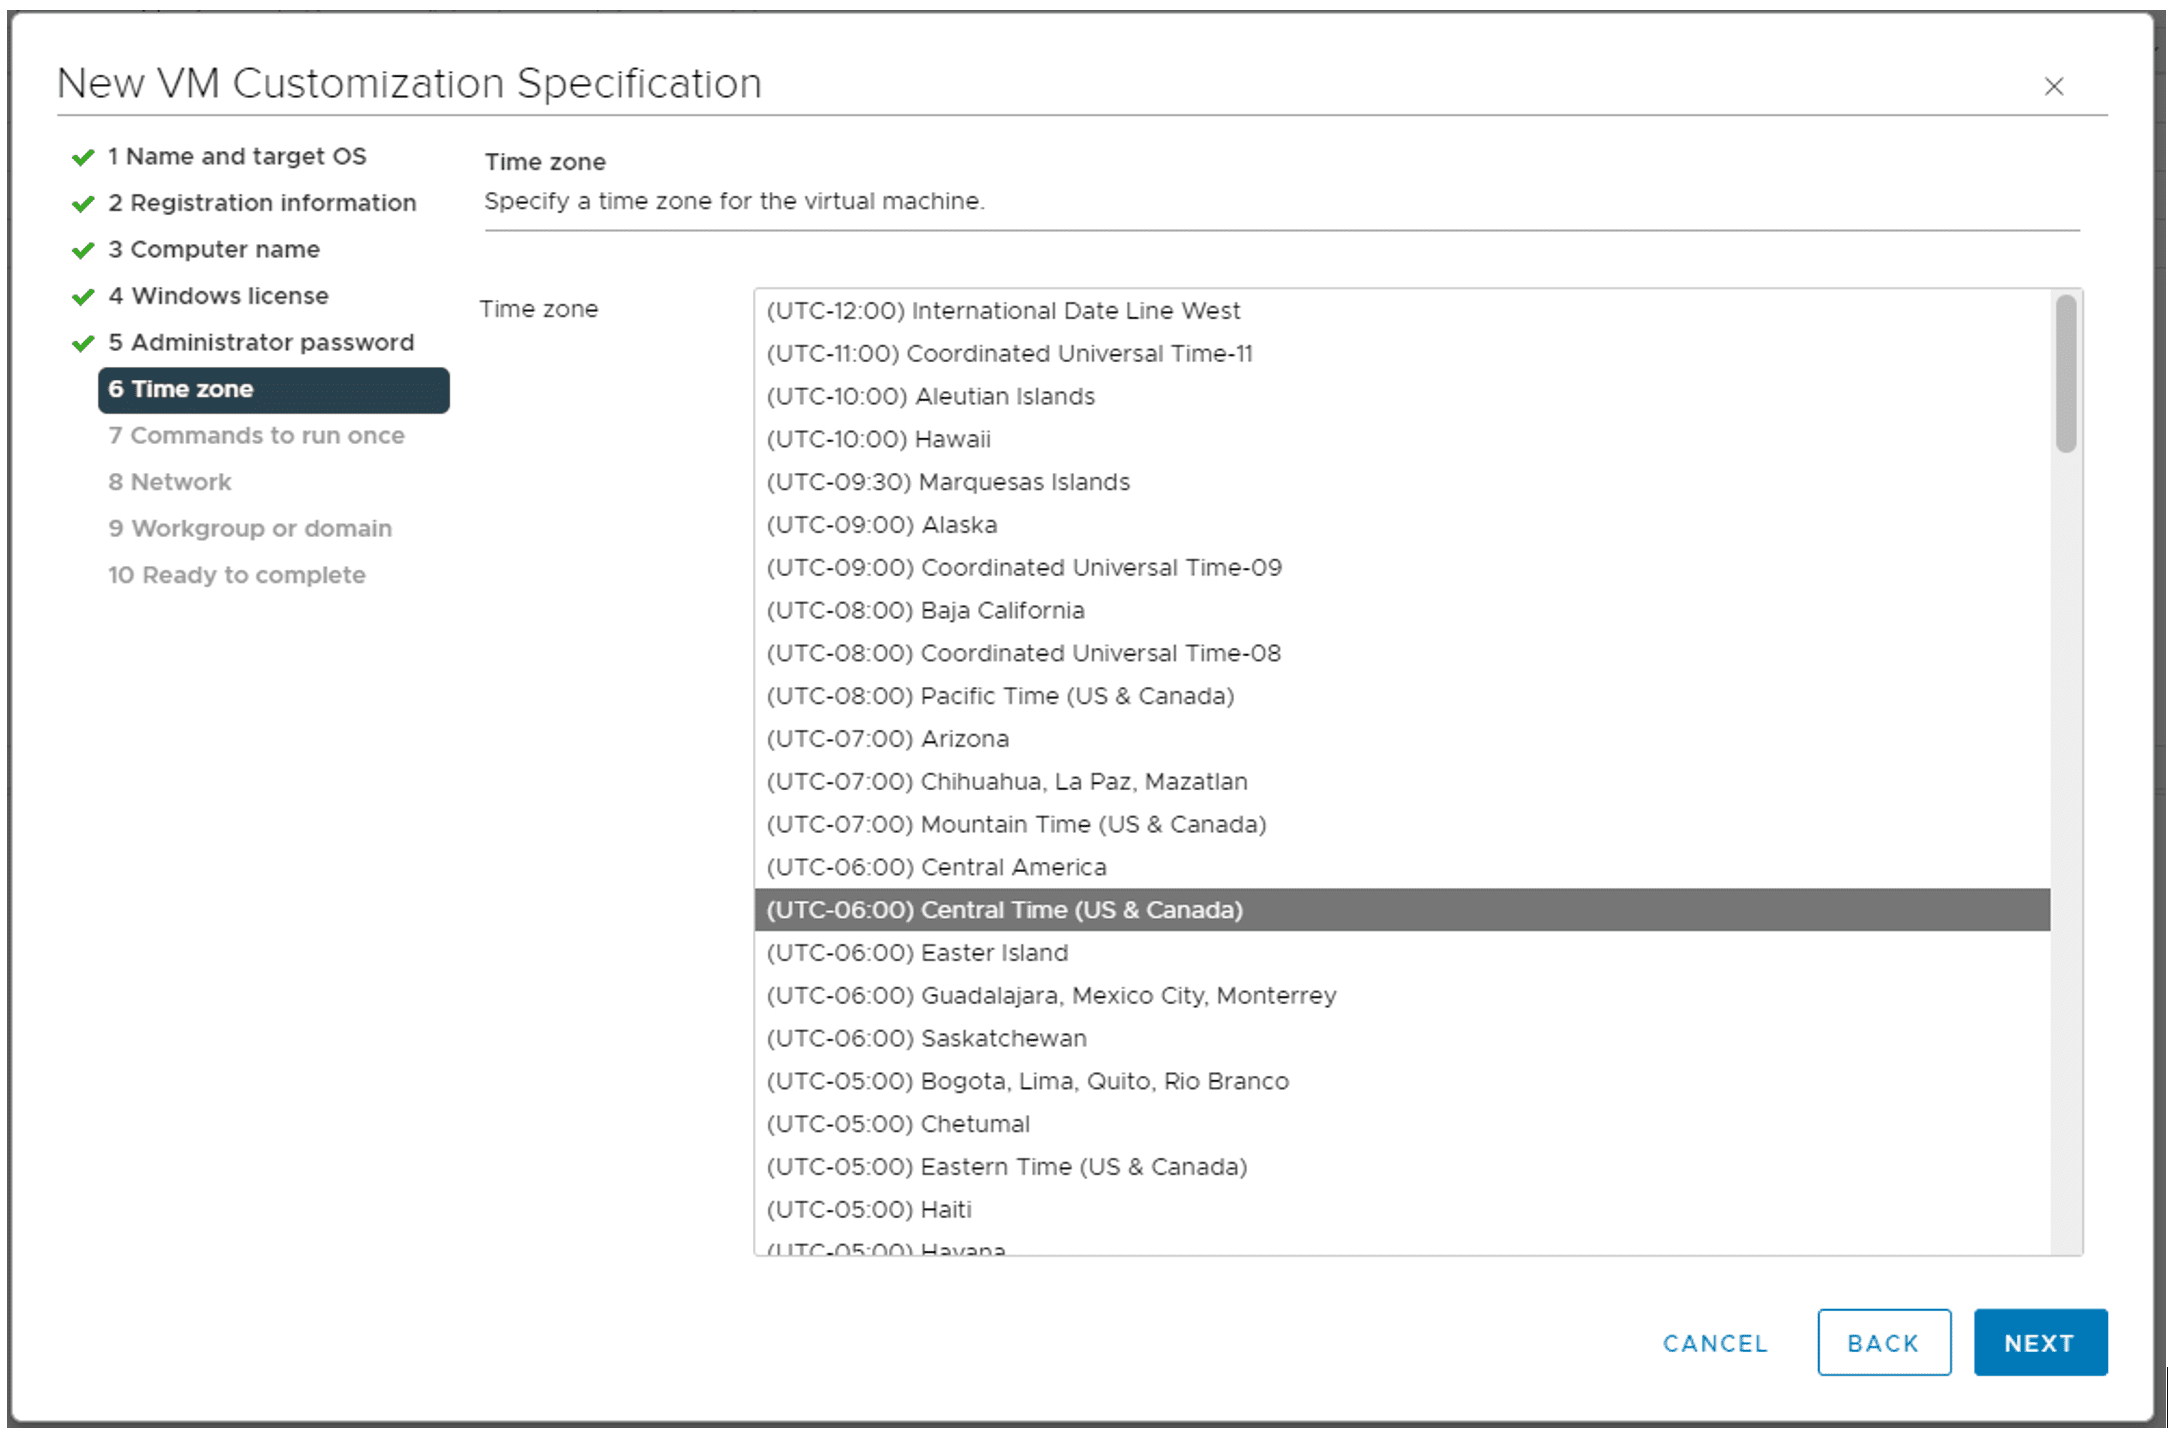
- Under Time Zone specify the time zone for the machine and then click Next
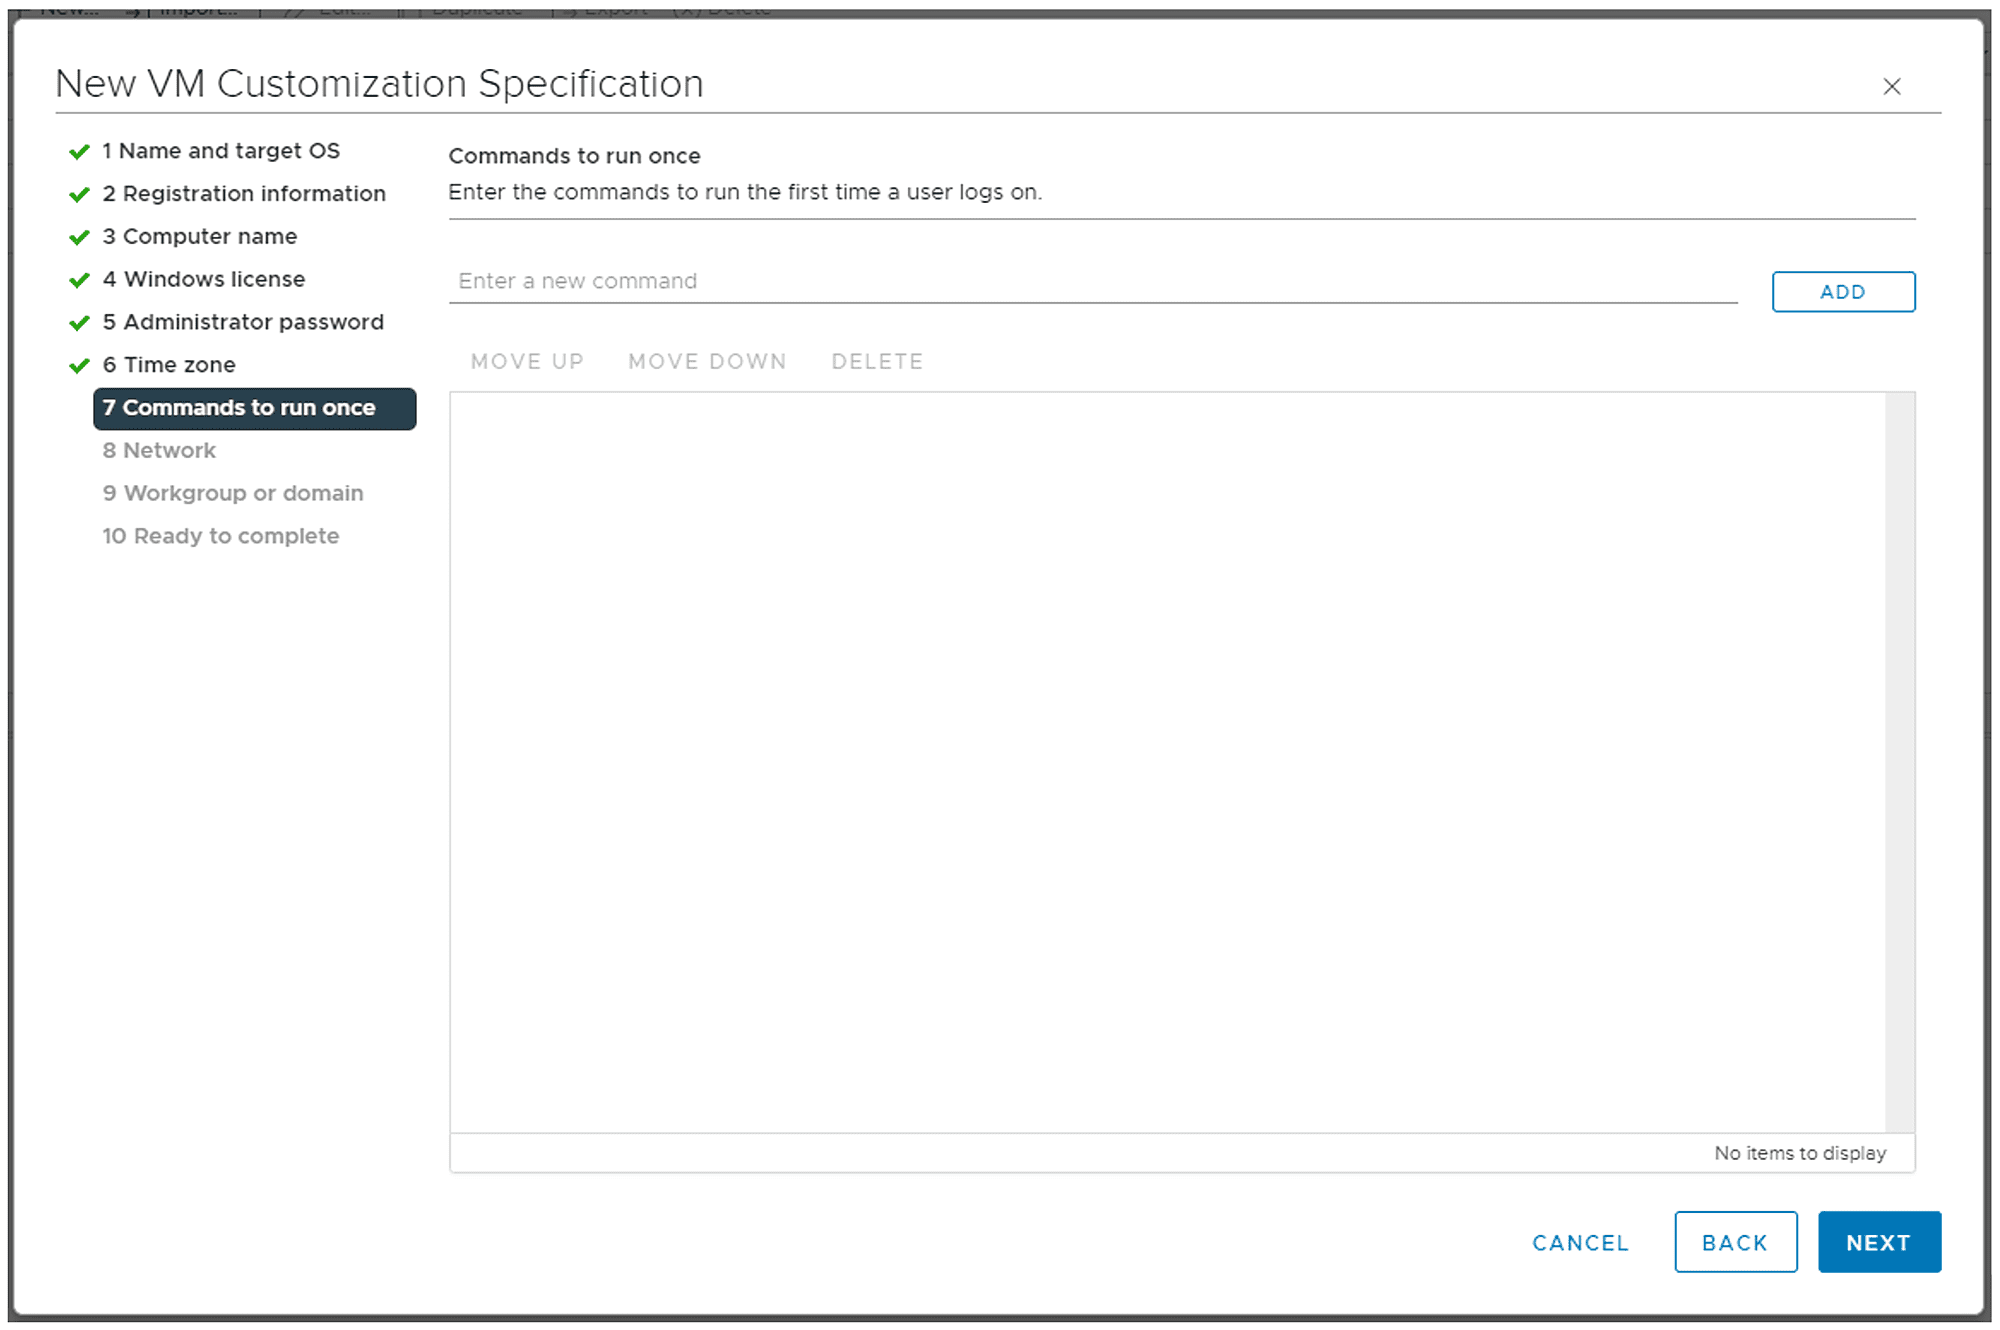
- Under Commands to run once, enter the commands (if any) to run the first time a user logs on, and then click Next
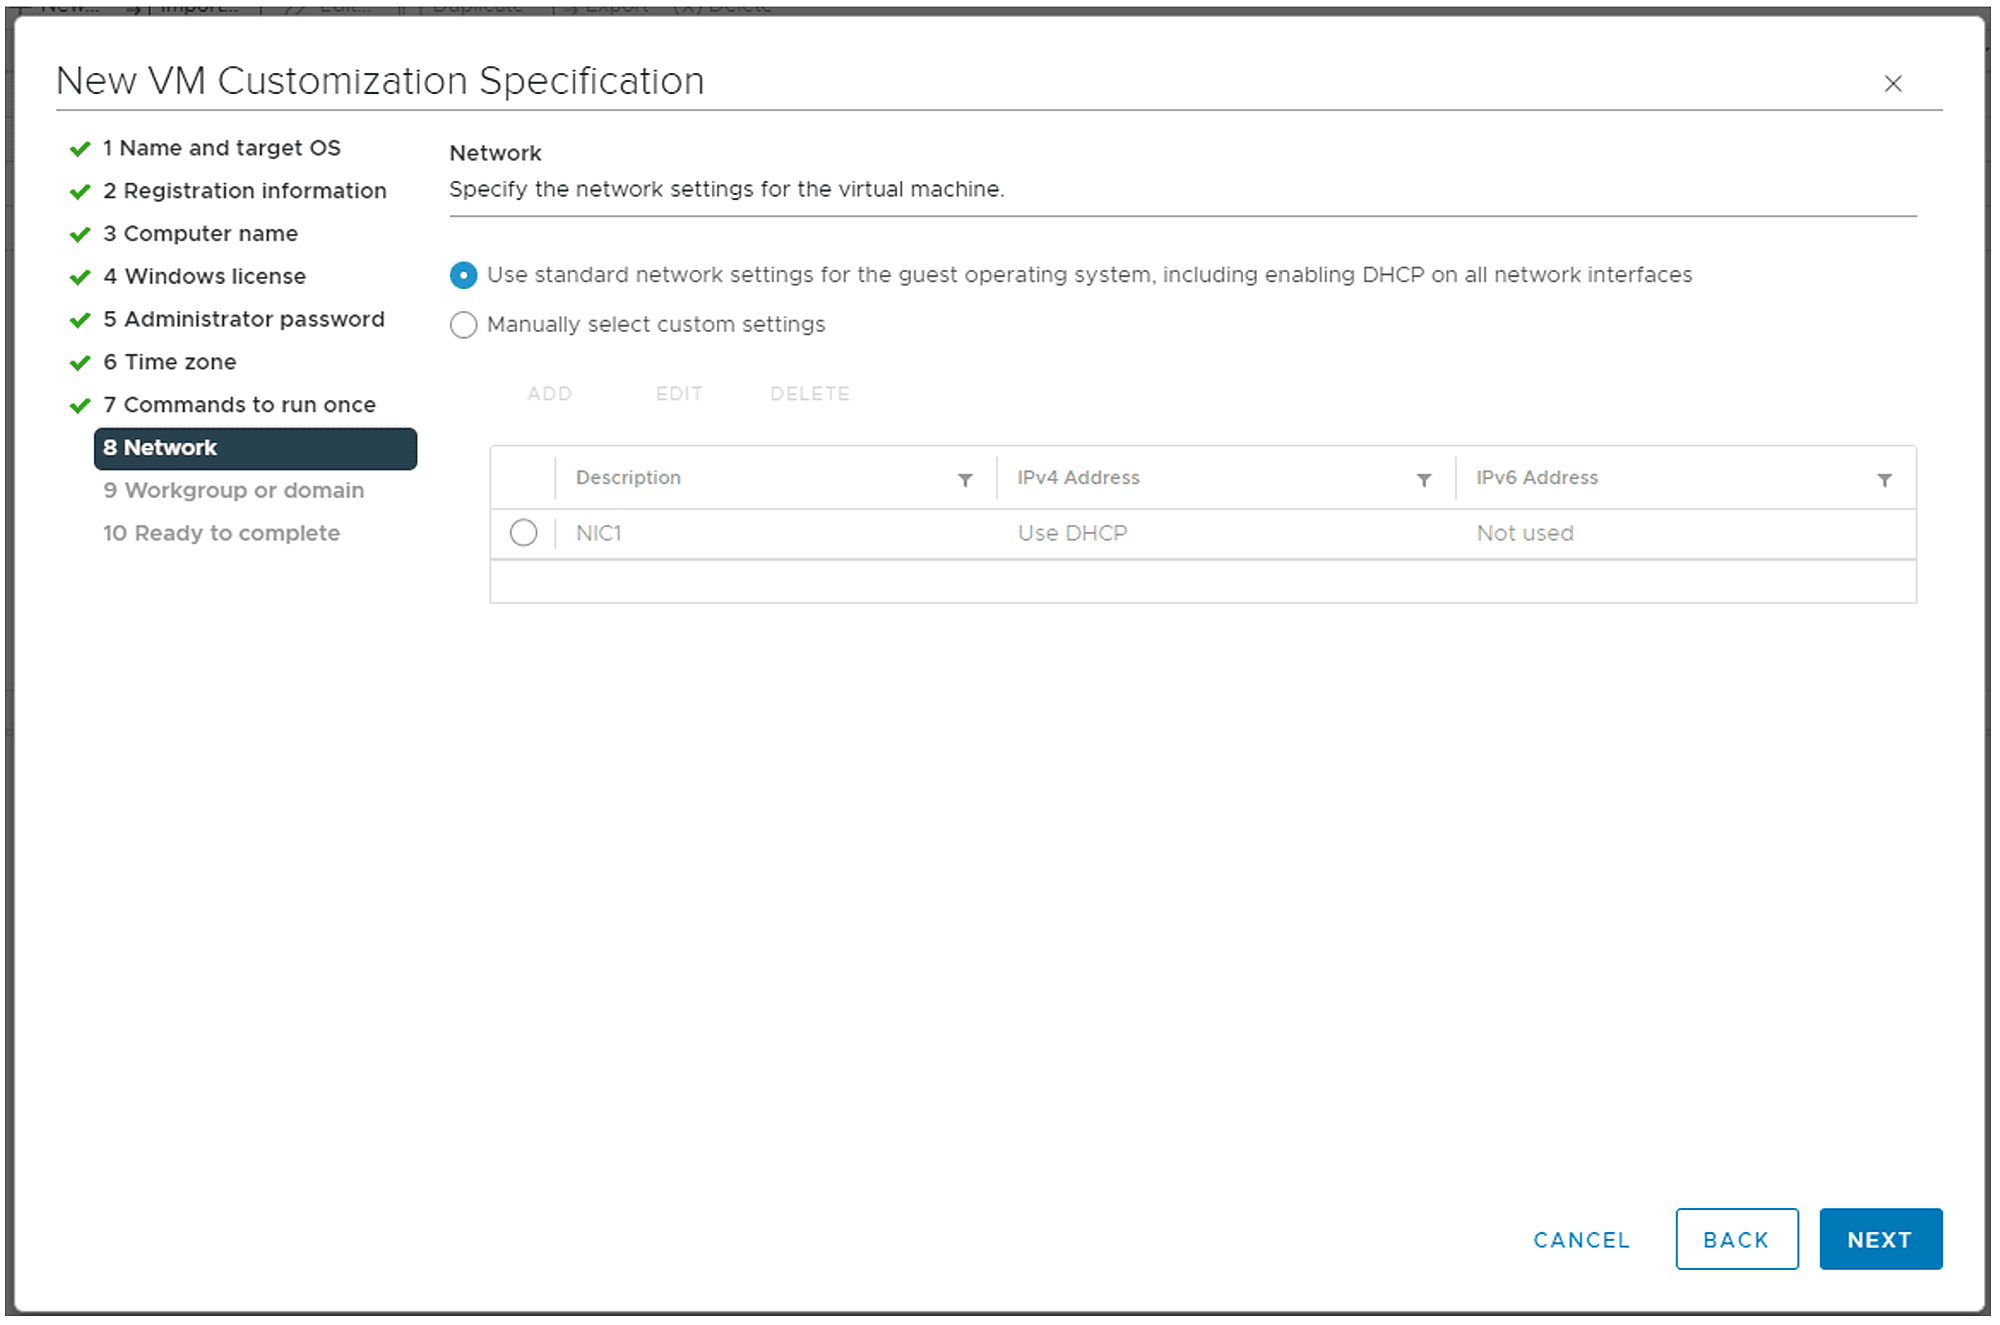
- Under the Network specify the network settings for the virtual machine and then click Next. You can select DHCP or static IP addressing
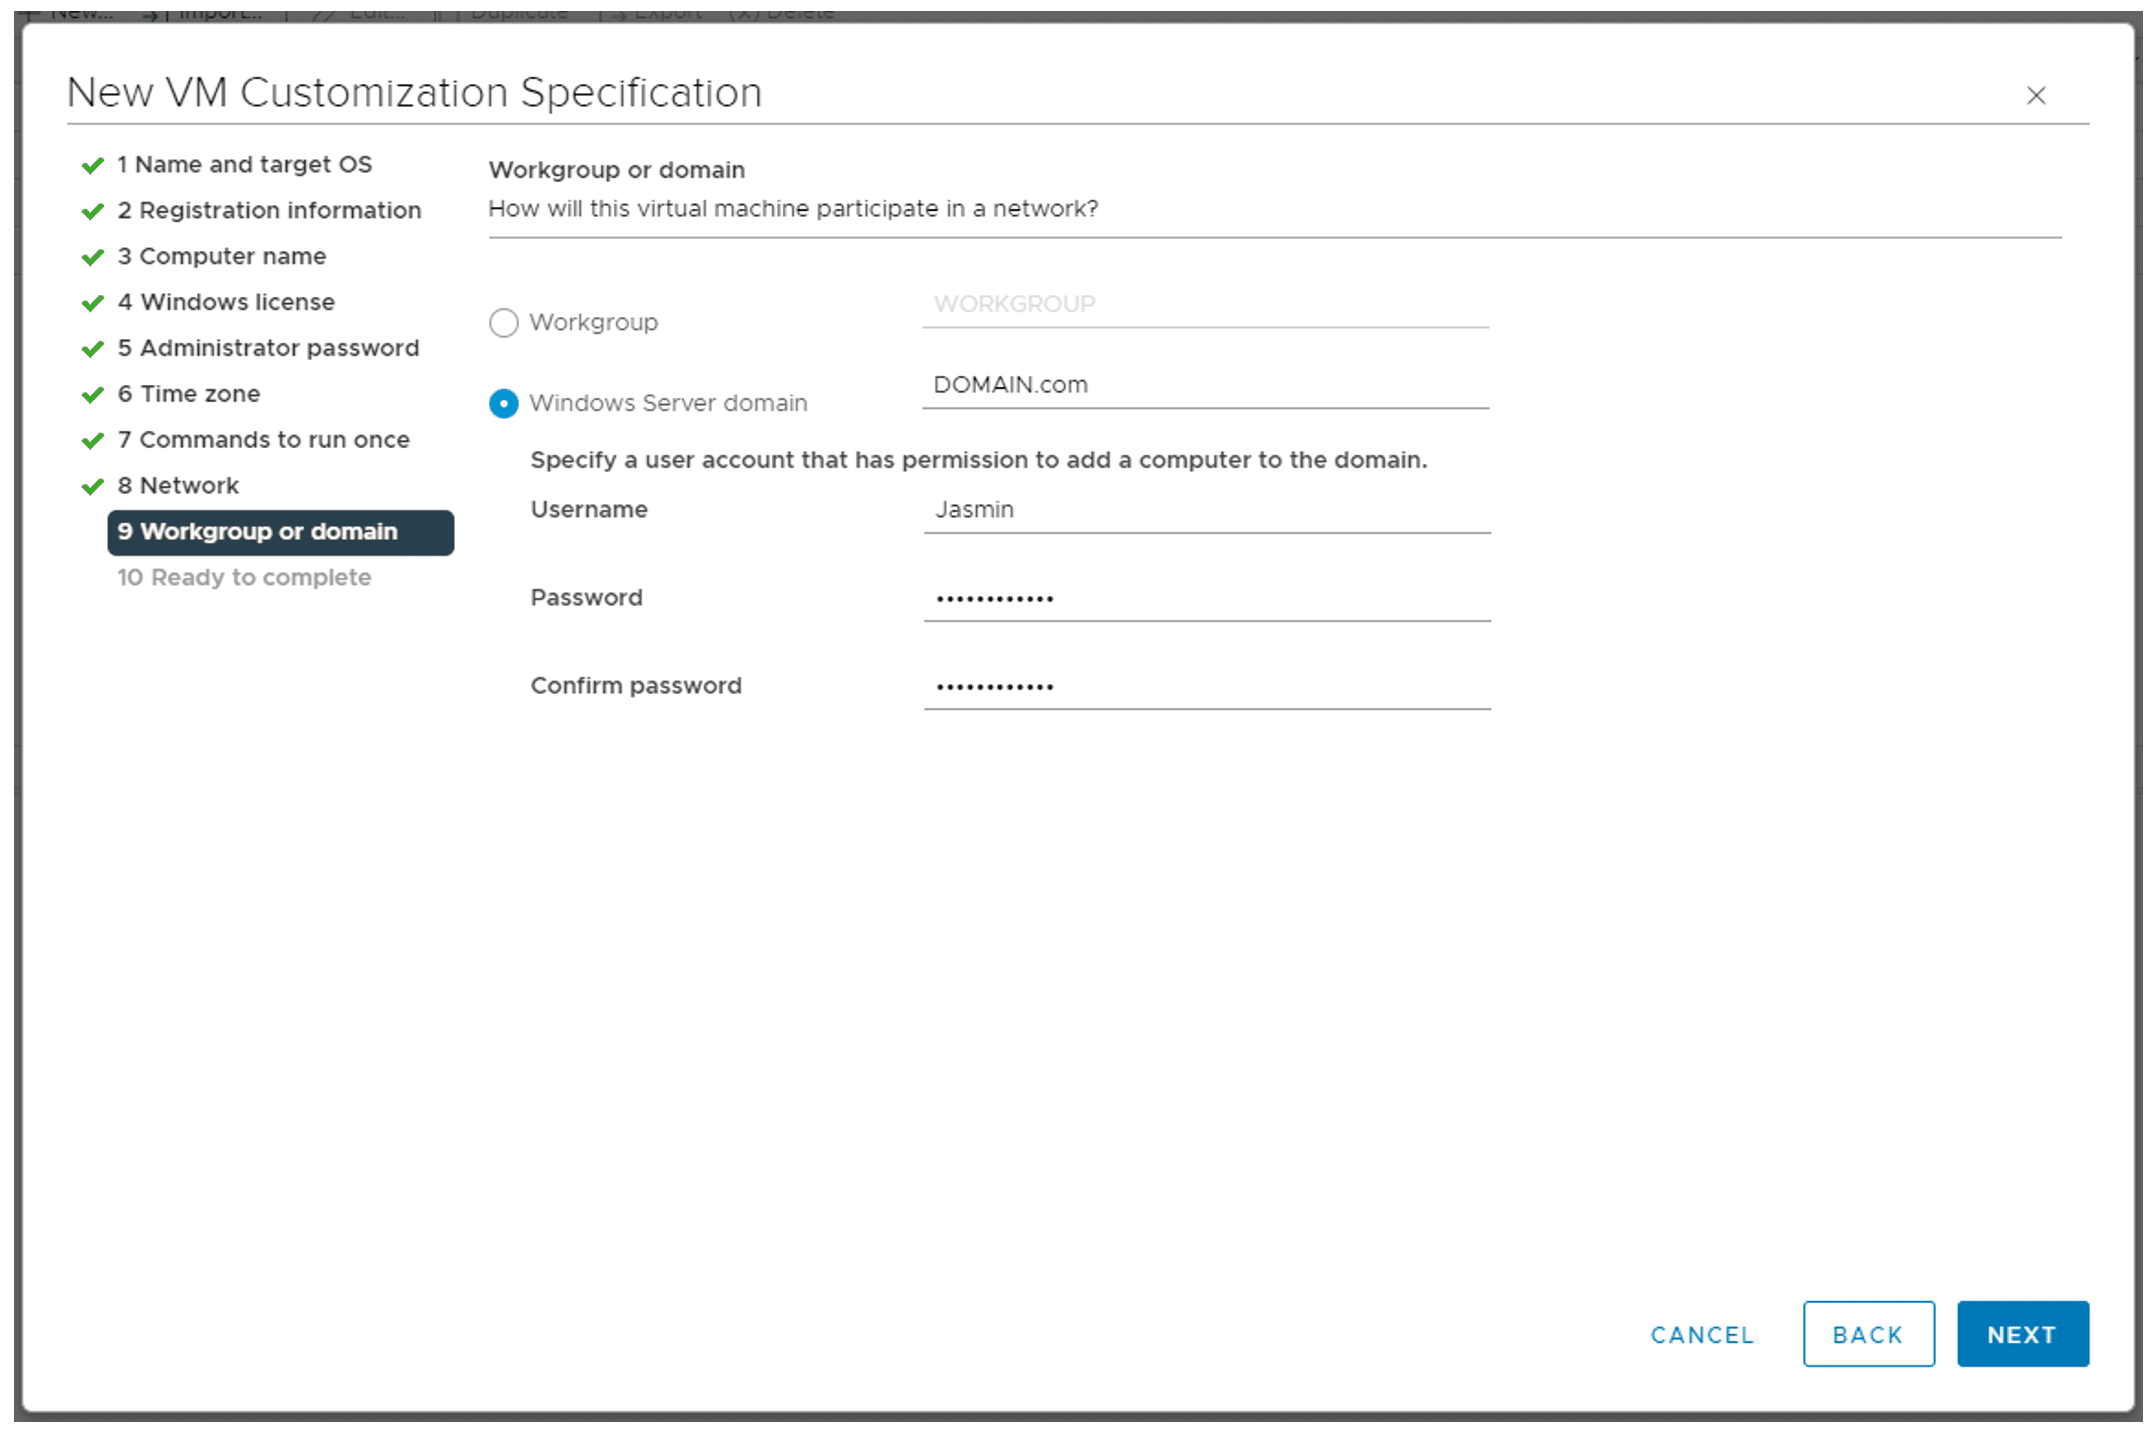
- Under Workgroup or domain, provide the name of the workgroup or domain that the VM should be assigned to, and then click Next. If you choose to specify a domain for the VM, you will also need to provide a domain account that has the necessary permissions to join the machine to the domain
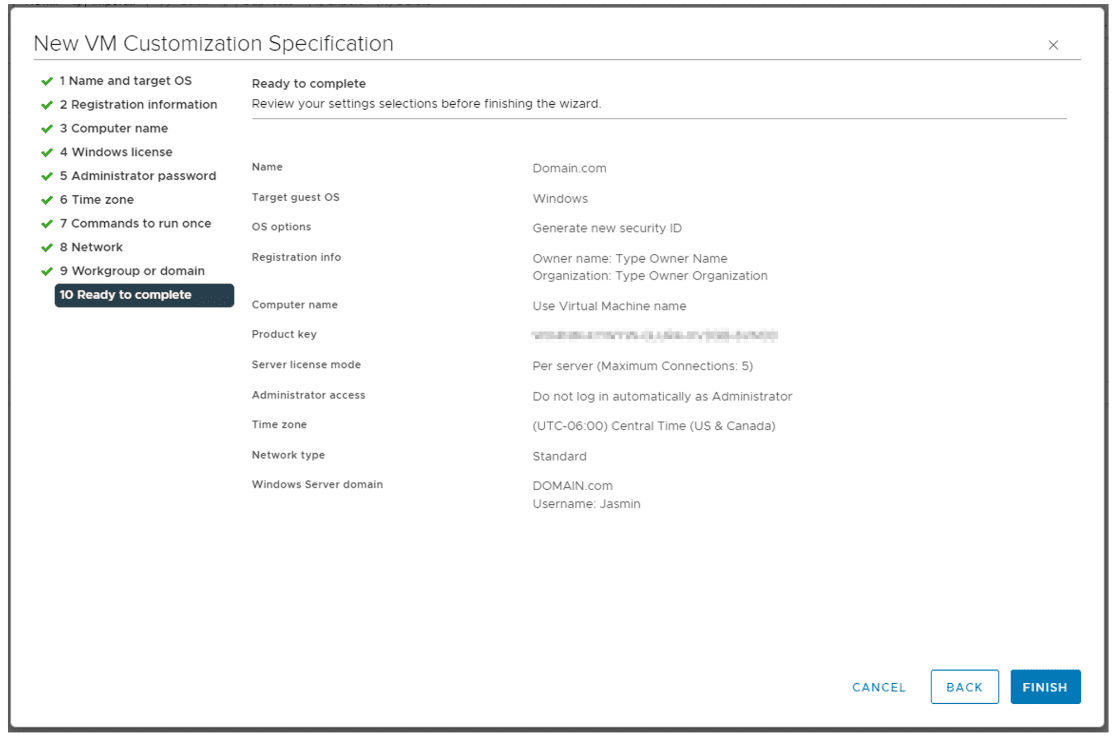
- Under Ready to complete, review your settings selections before finishing the wizard and click Finish

That’s it. You successfully created new customization settings template.
Step 2: Create a new VM based on the customization settings template
In the second step, you will create a virtual machine and apply the customization settings template you created in the previous section. You first start with the normal process of creating a VM and then apply the template starting from step 6.
- Login to your vCenter
- Create a new VM based on the VM template
- Select a name and folder and click Next
- Select a computer resource and assign the resources needed to your machine and then click Next
- Select a storage where you would like to save your virtual machine and then click Next
- Under Select clone options, select Customize the operating system and Power on the virtual machine after creation and then click Next
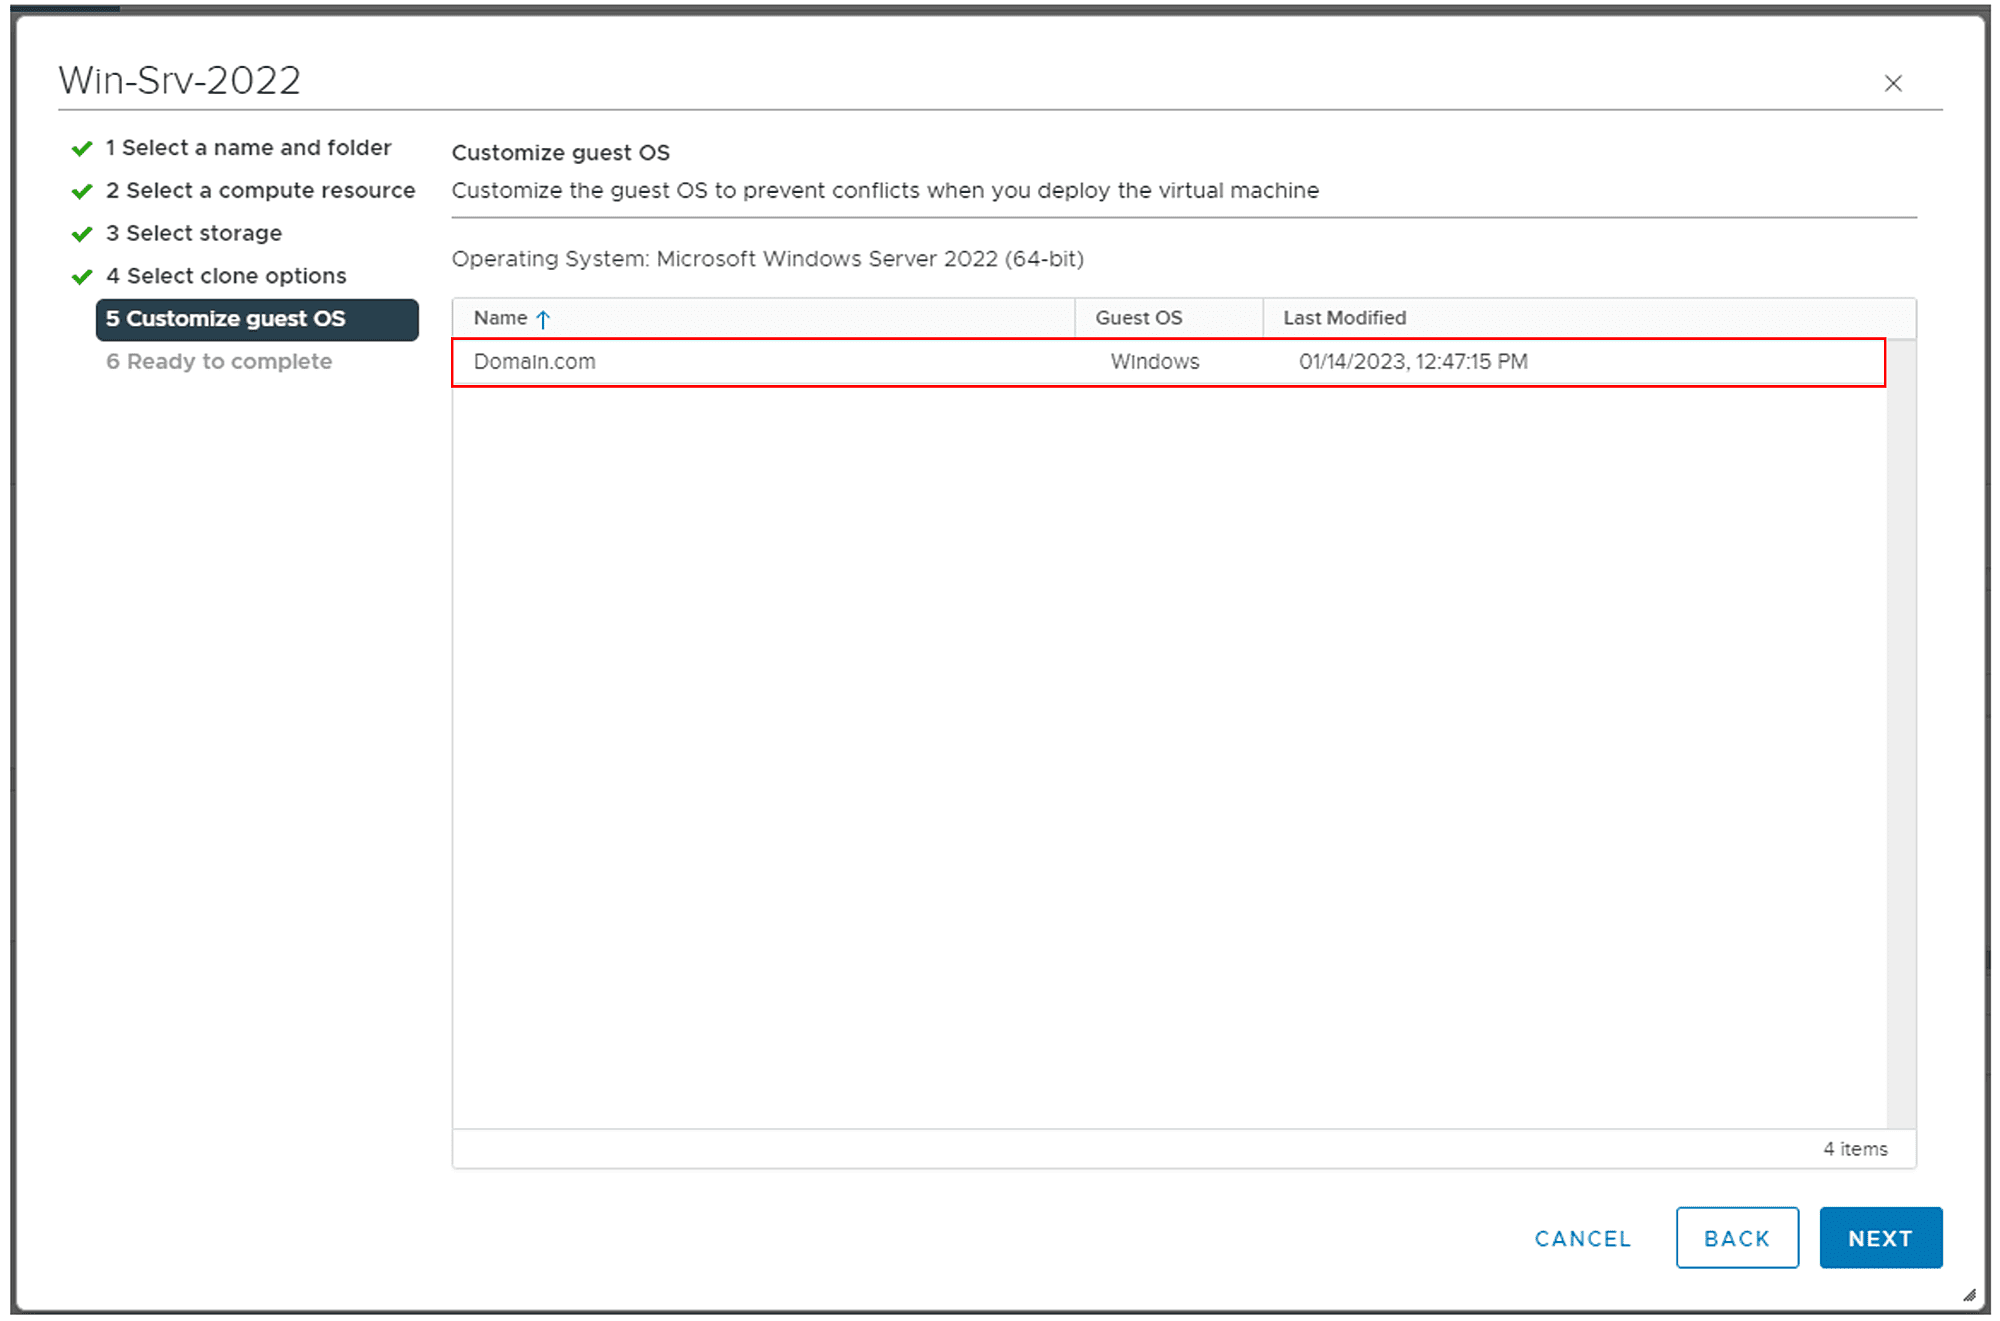
- Under Customize guest OS, select the customization settings template you created in the first step and then click Next
- In the Ready to complete step, review the settings and click Next
- Wait for the VM to be deployed with the predefined customization settings. The process of creating and automatically configuring the VM typically takes some time, although the duration may vary depending on the performance of your underlying host
Wrap up
When using VMware you can create a template with predefined settings and apply it during VM creation, This template includes different parameters such as computer name, domain name, local user account credentials, network, RDP, and timezone. This article covers two steps. In the first step, you create the template with customization settings, and in the second step, you apply the template to the VM.
Follow our Twitter and Facebook feeds for new releases, updates, insightful posts and more.