
Creating virtual machines and installing the required software can take more than an hour. If you were to do this for each VM individually, it would consume a significant amount of time. A more efficient and smarter approach would be to create a virtual machine, install the required software, capture it as a reference file, and then use the reference file to create new VMs. This method allows you to create several VMs within minutes instead of hours.
If there are several departments with different needs, you would simply need to create corresponding VM templates for each of them. By utilizing virtual machine templates in VMware, you can expedite the process of creating new VMs.
This article focuses on the preparation of a VM template and using it for VM creation.
Step 1: Create and prepare a virtual machine
First, create the virtual machine as you would typically do, allocating the necessary resources such as CPU, RAM, storage, network, and others. Next, install the operating system and required software within the virtual machine. Finally, perform Sysprep to reset the Windows SID in preparation for creating new VMs from the template.
If you were to use the same Windows SID for duplicate or cloned VMs, you would experience issues with AD and other components. It is highly recommended that each VM has a unique SID.

If you are wondering how to perform Sysprep, here is a brief overview:
- Open File Explorer and navigate to C:\Windows\System32\Sysprep
- Run sysprep.exe
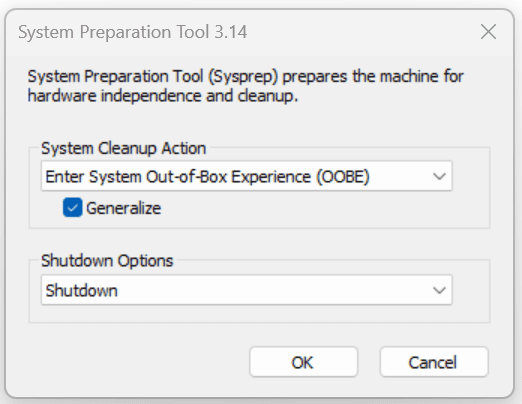
- Select Enter System Out-of-Box Experience (OOBE) under System Cleanup Action, and choose Generalize. Then, select Shutdown under Shutdown Options
- Click OK and wait for Sysprep to complete the procedure
- Once finished, your Windows will shut down
Please note that these steps assume a Windows operating system. The location of the Sysprep folder may vary depending on the version of Windows you are using.
Step 2: Convert the virtual machine to template
Once your virtual machine is ready, the next step is to convert it into a VM template. To do this, navigate to your VMware environment, right-click on the virtual machine you created in the first step, select Template, and then Convert to Template. You will need to click OK to confirm convert. The conversion process usually takes just a few seconds.

Step 3: Create a new virtual machine based on the template
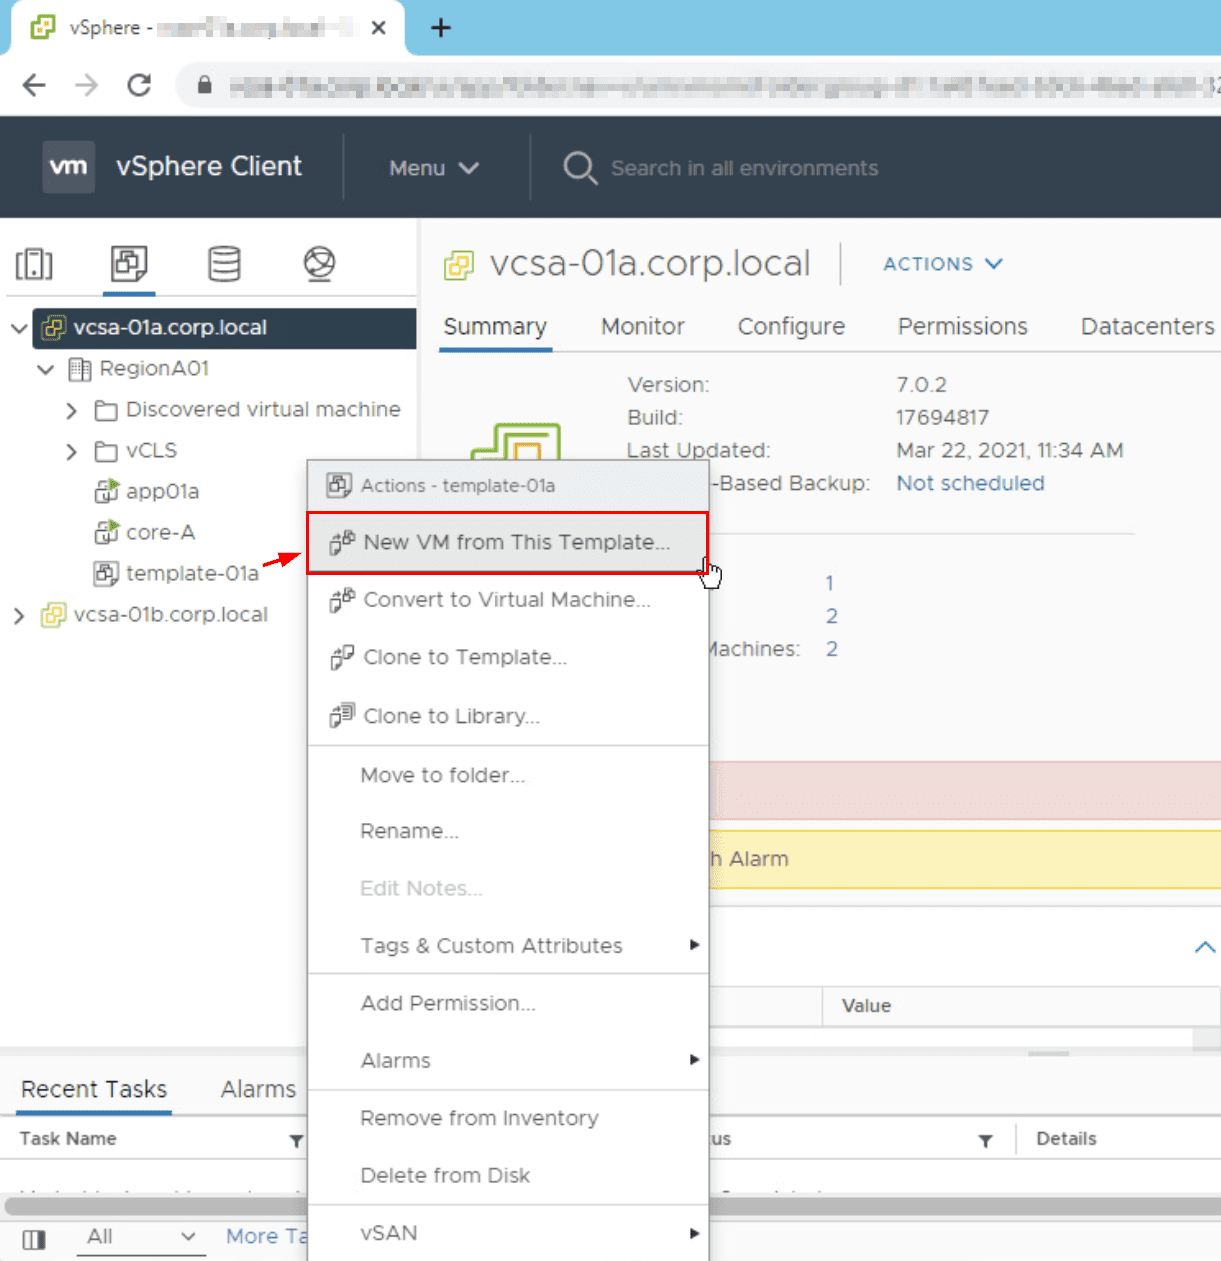
Now that your VM template is ready, you can proceed to create new virtual machines based on it. Navigate to your VMware environment, locate the VM template you created in the previous step, right-click on it, and select New VM from This Template. This will initiate the process of creating a new virtual machine using the selected template.
Don’t forget to patch your VM template
It is highly recommended to regularly update your operating system and applications to ensure that your VM template remains up to date. If you need to make any changes to your template, you will have to convert it back into a virtual machine, apply the desired modifications, and then convert it back to a template.
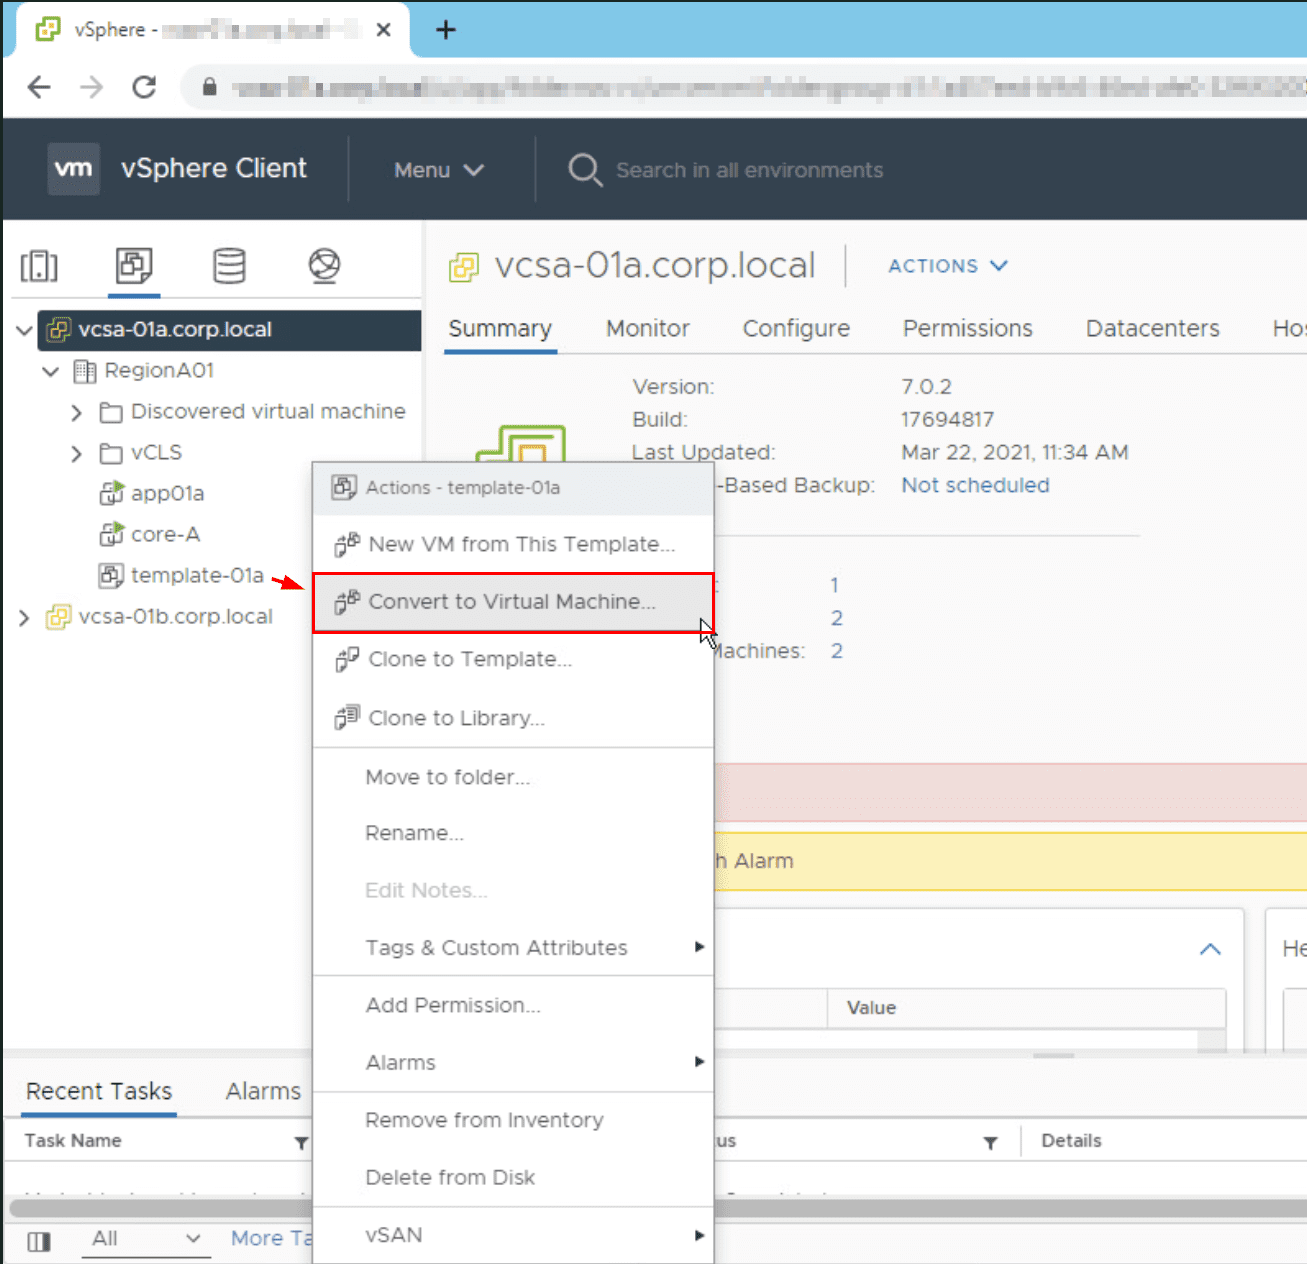
To convert your template to a virtual machine, navigate to your VMware environment, right-click on your VM template, and select Convert to Virtual Machine. The conversion process typically takes only a few seconds. Once you have finished making all the necessary modifications to your virtual machine, it’s time to convert it back to a template, as explained in the second step of this article.
Bonus: Combine VM template with Customization Specification
As you have a ready VM template, you can also apply customization settings to a new VM to further customize the guest operating system during the creation process. This allows you to set predefined user accounts, configure the timezone, define network settings, join OS to the domain, and much more. For more detailed information on creating a customization specification in VMware, you can refer to our article What is VMware VM Customization Specification and How to Use it?
Wrap up
If you frequently create new VMs within your organization and aim to expedite the process, utilizing VM templates, ideally in combination with customization specification templates, is highly recommended. By following the steps outlined in this article, including creating a VM, installing the guest operating system, installing the required software, and converting it into a template, you can significantly reduce the time required for provisioning new VMs.
To ensure comprehensive protection for your Virtual machines running on either VMware vSphere, Try BDRSuite today!
Follow our Twitter and Facebook feeds for new releases, updates, insightful posts and more.