
In the IT field, as we work as Sys Admins or Tech professionals, the command line interface (CLI) stands as the best friend to some and the worst enemy to others. While graphical user interfaces (GUIs) have undoubtedly revolutionized the way we interact with computers as a whole, the CLI remains a much more powerful tool for system administrators. For those tasked with managing and maintaining complex IT systems, proficiency in the CLI is an essential skill, providing unparalleled efficiency, automation, and control.
While it may be daunting to many that are not yet used to it, the CLI’s appeal lies in its direct, text-based nature. Unlike GUIs, which rely on mouse clicks and visual cues, the CLI empowers sysadmins to execute commands using concise text strings. This directness translates into increased speed and precision, allowing sysadmins to tackle tasks with greater agility and accuracy.
Moreover, the CLI’s versatility extends beyond mere efficiency. It serves as a powerful tool for automation, enabling sysadmins to streamline repetitive tasks and reduce the risk of human error. By scripting complex processes and automating repetitive actions, sysadmins can free up their time and focus on more strategic initiatives. We talked a lot about scripting on this blog, especially with PowerShell and PowerCLI to automate VMware environments. For instance, this blog explains how you can automate some tasks in a VMware SRM environment.
Beyond automation, the CLI grants sysadmins unparalleled control over their systems. It allows them to delve into the inner workings of their infrastructure, enabling them to troubleshoot problems effectively, optimize performance, and diagnose underlying issues. This deep-level control is crucial for maintaining system stability and ensuring the smooth operation of critical applications. As an example, there are a lot of tasks you can perform using the VMware command line tools like PowerCLI or esxcli that you cannot do in the vSphere client (web user interface).
The CLI will always be a cornerstone of sysadmin expertise. As systems grow more complex and demands increase, the ability to navigate the CLI confidently proves invaluable. By mastering this indispensable tool, sysadmins elevate their skillset and become indispensable guardians of their IT infrastructure. To make your life as a Sys Admin easier and allow you to work more efficiently, we will mention X tools in this article that will improve your productivity.

PowerCLI
In the world of VMware infrastructure administration, PowerCLI is a powerful tool to manage virtual SDDCs. It comes as a suite of PowerShell modules distributed by VMware. Its versatile capabilities make it an indispensable asset for sysadmins, DevOps engineers, and IT operations teams.
PowerCLI’s core strength lies in its ability to interact with VMware’s vSphere, vRealize Automation, and vCloud Director platforms using PowerShell, benefiting from its object-oriented nature. This seamless integration allows sysadmins to manage virtual machines, ESXi hosts, networks, and other components of their VMware infrastructure directly from the command line.
PowerCLI’s user-friendly interface and comprehensive documentation make it easy to learn and use, even for those with limited PowerShell experience. The tool’s extensive library of cmdlets, or PowerShell commands, provides a wealth of functionality, allowing sysadmins to tackle a wide range of tasks within their VMware environment.
Installation
Install-Module VMware.PowerCLI -Scope CurrentUser
Homebrew
Most of you probably already know about Homebrew but I will introduce it anyway as I will base the installation commands on the “brew” command. Homebrew is a packet manager for macOS or Linux that distinguishes itself by providing a straightforward and user-friendly way to install software. It’s entirely command-line based, which might sound intimidating at first, but fear not – it makes the process efficient and consistent.
Homebrew has a vibrant community, so if you run into issues or have questions, you will likely find help from other users.
Installation
/bin/bash -c “$(curl -fsSL https://raw.githubusercontent.com/Homebrew/install/HEAD/install.sh)”
fzf
Short for “fuzzy finder,” fzf is a versatile and powerful tool that enhances the command-line experience by providing an interactive and intuitive way to search, filter, and select data. It is a command-line fuzzy finder written in Go that enables users to interactively search through lists and choose options with ease. Its primary strength lies in its simplicity and effectiveness, making it a valuable addition to any developer’s toolkit.
The term “fuzzy” in fzf refers to its ability to perform fuzzy matching, allowing users to find items even if there are typos or slight variations in the search query. Note that it can be applied to various scenarios, including command history, process selection, and custom data sets. My personal favourite is to use it to switch Kubernetes contexts and namespaces with “kubectx” and “kubens” (more on these later).
Installation
brew install fzfA basic usage example is to use it to search for a command in your history:
history | fzf
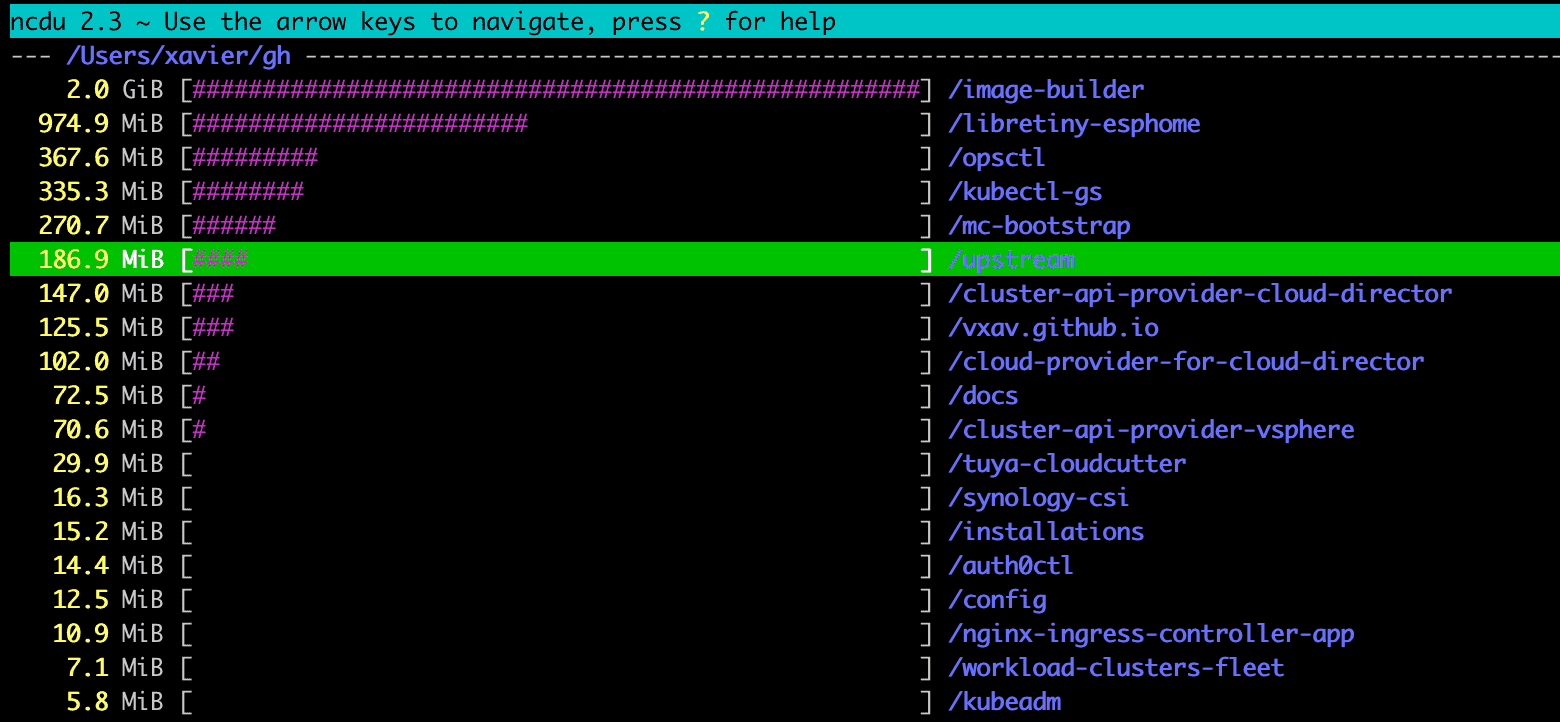
ncdu
When running out of disk space, looking for the noisy neighbor can be a rather long and tedious task if you rely on “df” and “du” only. “ncdu” is another fuzzy finder tool that will let you display the list of files in a specific directory with a visual clue as to how much space it takes. The best thing is that you can navigate through the folders to quickly hunt down the large files.
Installation
brew install ncduExample usage in the current directory
ncdu .
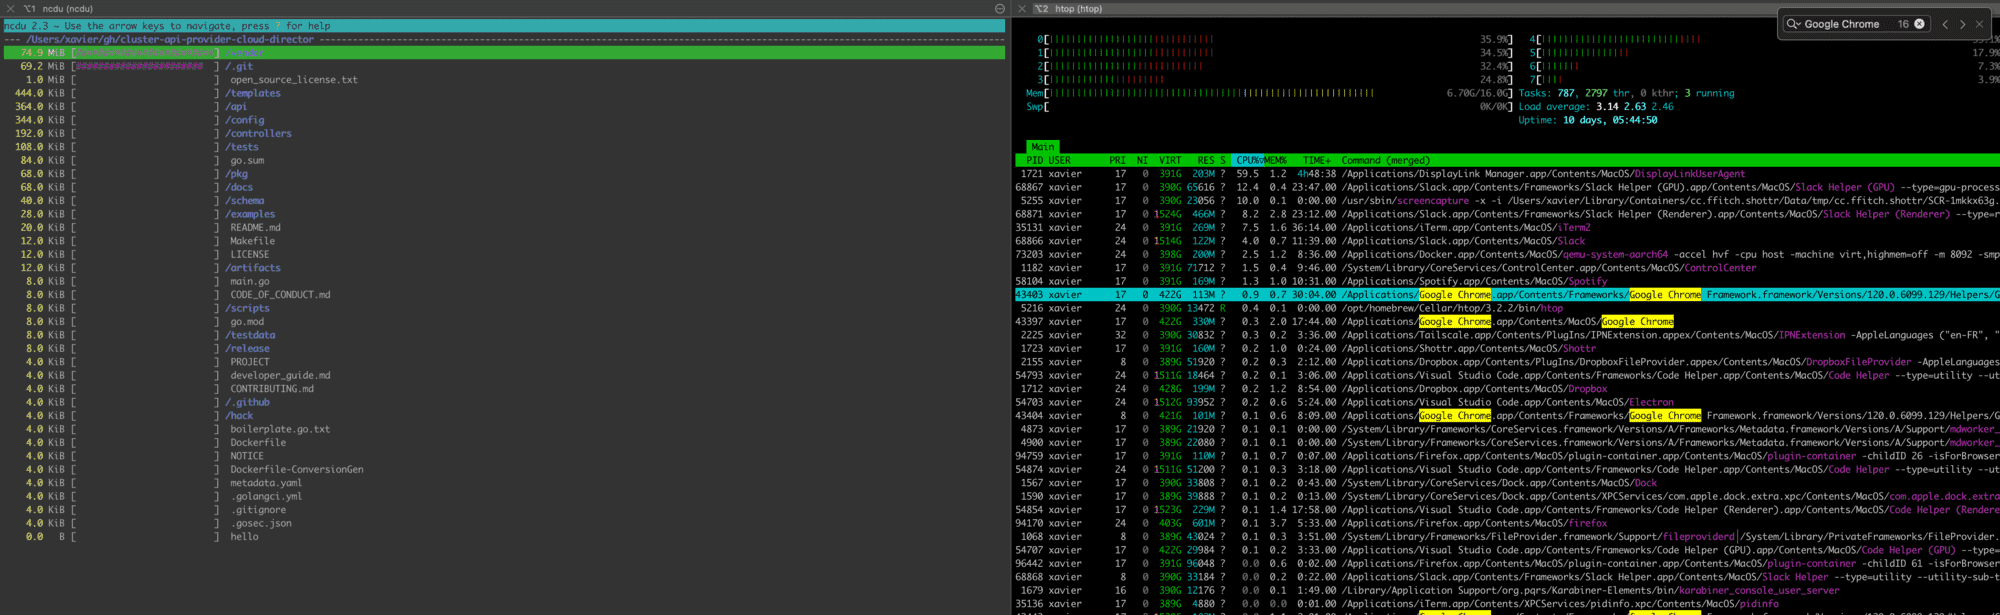
iterm2
If you are a macOS user seeking more power and flexibility from the native terminal, you should check out iTerm2. iTerm2 is a feature-rich terminal emulator designed to enhance your command-line interactions on macOS.
iTerm2 takes the concept of tabs to the next level. You can have multiple tabs open, each with its own set of split panes. This makes it easy to organize your work and switch between different tasks seamlessly. You also get search and autocomplete features, prompt customization, keyboard shortcuts for navigation and more.
The search feature with Cmd+F is particularly handy when you only want to look for a string in your overall shell (previous commands and outputs included).
Head over to https://iterm2.com/downloads.html
netcat
Do we still need to introduce “netcat”? I will anyway. Netcat is a network tool that lets you work with TCP and UDP ports. It is most often used to check if a TCP port is open when troubleshooting network communications but it can also be used to copy files over the network, to exchange messages with another computer over a specific port or even start a basic http server.
Installation
brew install netcatExample usage to check a TCP port
> nc -zv 192.168.1.233 6443
Connection to 192.168.1.233 port 6443 [tcp/sun-sr-https] succeeded!
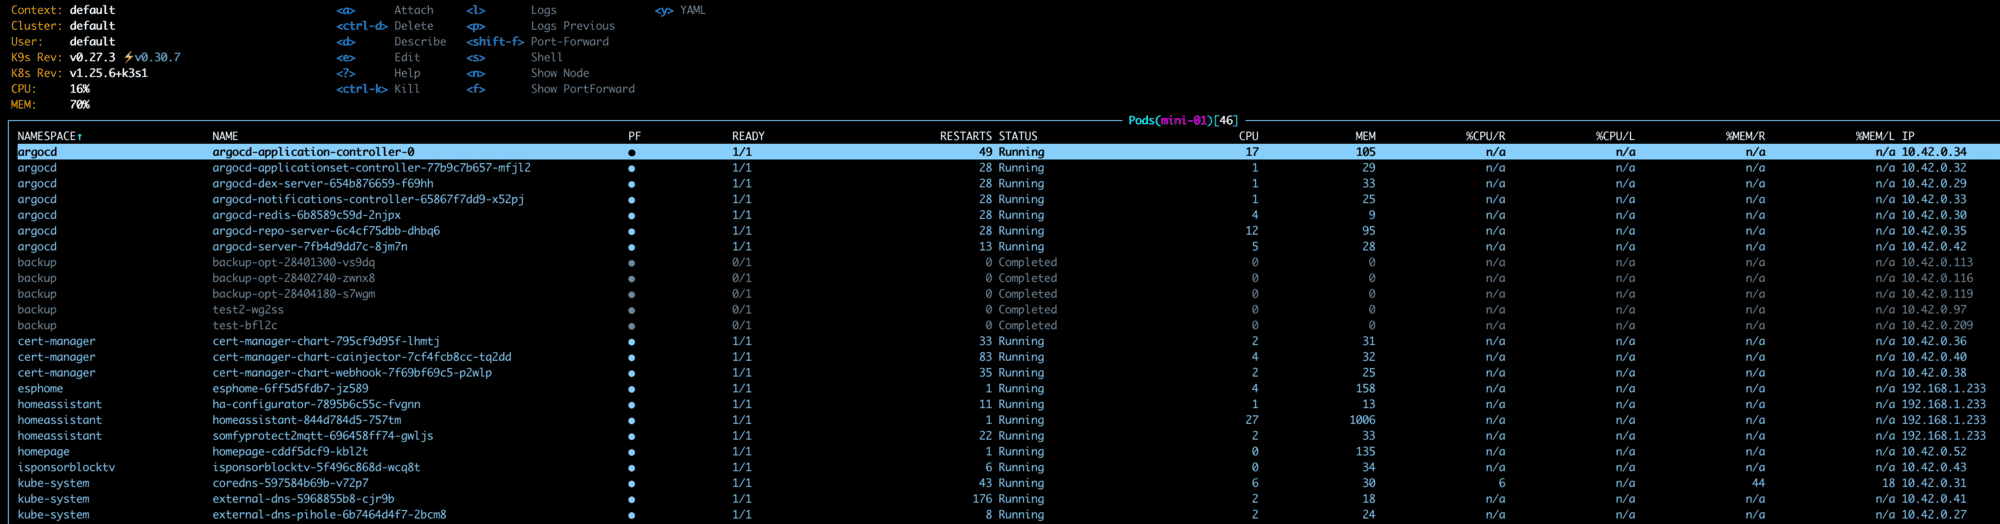
k9s
Many organizations running complex modern applications and cloud native workloads rely on Kubernetes for container orchestration and lifecycle. “kubectl” is the command line tool used by everyone to interact with the Kubernetes API server but it can sometimes not be the most efficient way to gather information about an environment, especially when tracking resource issues. In which case, a visual representation can offer a faster time to resolution.
Enters “K9s”, a visual dashboard in your terminal. With this tool, you can navigate between nodes, pods, namespaces and so on using keyboard shortcuts and interactive navigation.
Installation
brew install derailed/k9s/k9sUsage
k9s
asciinema
This tool is fun to use and can be very handy in educational contexts where you want to showcase something that is CLI only. It could be a new tool you developed or simply explaining how to do something without going to the trouble of a full screen recording.
Recording your terminal is as easy as it gets. To start, simply run asciinema rec demo.cast, to end press ctrl+d or type exit.
Installation
brew install asciinema
Kubectl plugins and tools
As I mentioned earlier, “kubectl” is the default cli tool to work with Kubernetes clusters. While it is already very extensive, you can expand its capabilities with third-party tools and plugins. Here are a few favourites:
Kubectx: Quickly switch contexts (great with “fzf”).
Kubens: Quickly switch Namespaces (great with “fzf”).
Kube-ps1: Customize the prompt to show the current context (Must have to avoid mistakes).
View-secret: Plugin to view the contents of a secret’s data without having to use “base64 decode”.
Neat: Clean up clutter from a Yaml manifest (CreationTimestamp, ResourceVersion…)
Stern: Tail the logs of multiple pods on Kubernetes and multiple containers within the pods.
Aliases and functions
Finally, I wouldn’t be doing my job if I weren’t enticing you to work out your own aliases and functions in your profiles. Whether that is PowerShell, Bash, Zsh and so on, there will always be something specific to your environment that you find yourself typing over and over again. In this case, look into customizing your profile to facilitate your life by reducing the number of characters you type everyday.
Wrap up
This list of tools only skims the surface of the ocean of amazing Open-Source projects available for free out there. If you haven’t found one that solves your current issue, there will likely be one just a Google search away from you.
Read More:
Virtualization Trends Series: Cloud native, a Prime citizen for Virtualization Workloads: Part 12
Follow our Twitter and Facebook feeds for new releases, updates, insightful posts and more.