
Azure blob storage is a robust solution that many organizations use for storing data in the hybrid data center. It provides many advantages over traditional infrastructure. However, let’s look at one of the core components of Azure Blob storage, the blob storage container. We will look at the steps to create and configure a container in blob storage to house your blob data.
Microsoft Azure Blob Storage
Azure blob storage is Microsoft’s object storage solution. It allows organizations to create large amount of unstructured data. Blob data is stored within containers. These provide scalable and secure data storage options for organizations that want to store apps or users.
What is an Azure blob container?
When you wish to start using Azure blob storage, you need to create a container. This allows you to begin uploading data to Azure blob storage. You can think of a container as a way to organize a set of blobs. It is like a traditional directory folder on a file system that can house other objects like folders and files.
Prerequisites
There are a few prerequisites to consider. These include the following:
- You need an Azure subscription or Azure free account to work with Azure blob storage
- You need to create an Azure storage account (you can do this with the Azure portal, Azure PowerShell, or Azure CLI)
Create an Azure blob container
The steps to create an Azure blob container are straightforward.

Choosing the Right Performance Tier
An in-depth look at the available performance tiers, including frequently accessed data and infrequently accessed data options. This part will guide you through selecting the best tier for your storage needs, balancing cost with access speed.
Creating Your First Blob Container
Once the storage account is created, we can create a container in Azure Blob Storage. Log into the Azure Portal and navigate to your storage accounts. Under Data storage click Containers. Then click + Container to begin the process to create a new Azure Blob storage container.

This will pop out a blade on the right side of the browser to create a new container. You will need to fill in:
- Name
- Choose from anonymous access levels
- Under advanced, you can choose Encryption scope and two other options, including Use this encryption scope for all blobs in the container and Enable version-level immutability support
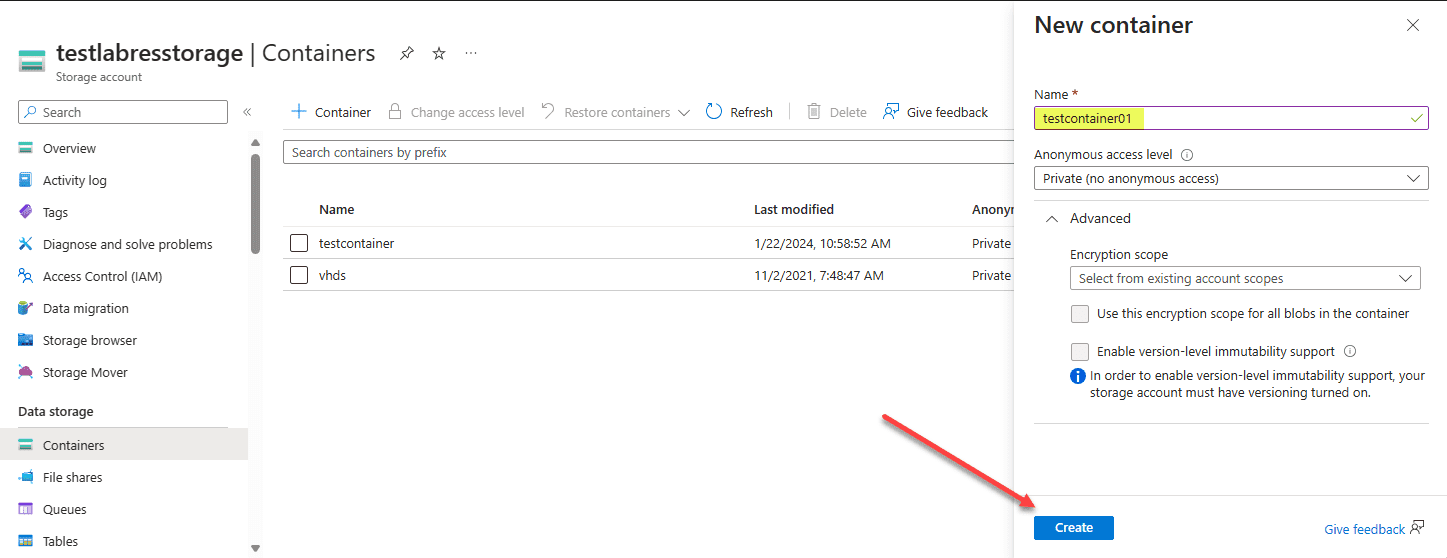
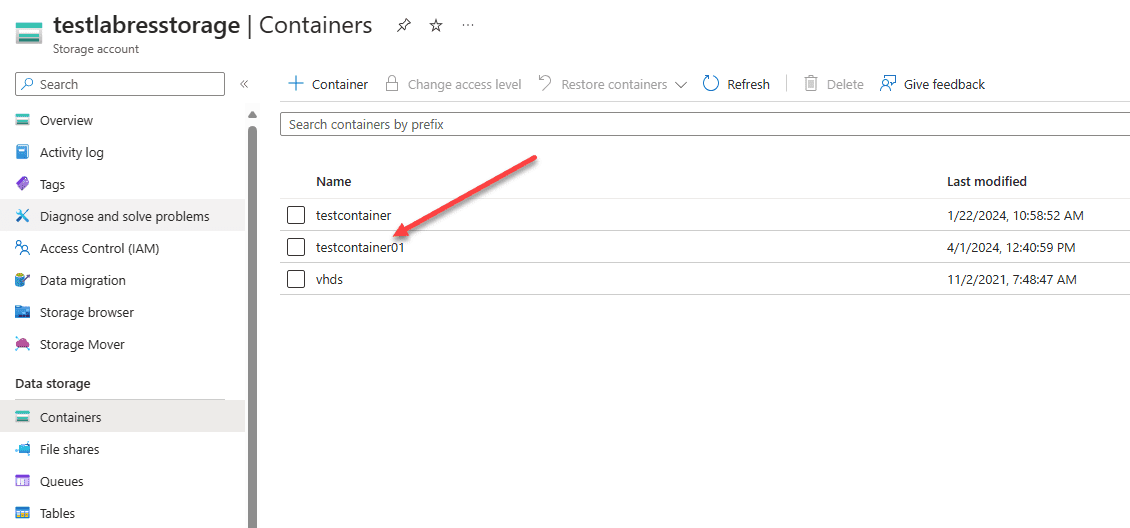
After you click Create, your new Azure blob storage account container is created.
Configuring Azure blob containers settings
After creating a container, you can configure the settings for better performance and security, as well as view the general properties. Among the configuration settings are access policies and Azure’s distributed access features like shared access tokens.
You can view the properties of an Azure blob container by clicking the elipse on the right-hand side of the container name.

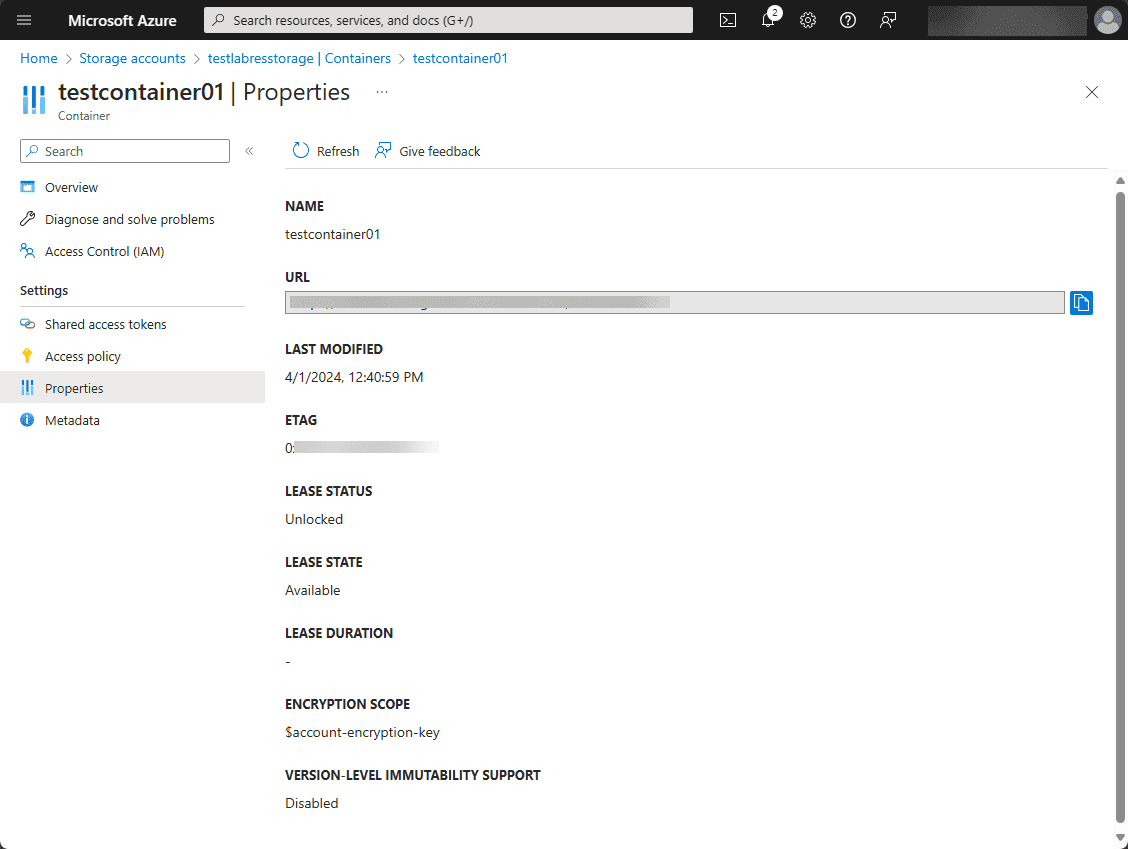
You will see the properties of the container you just created. You can find information like the name, URL, last modified date, etag, lease status, lease state, encryption scope, and version-level immutability support.
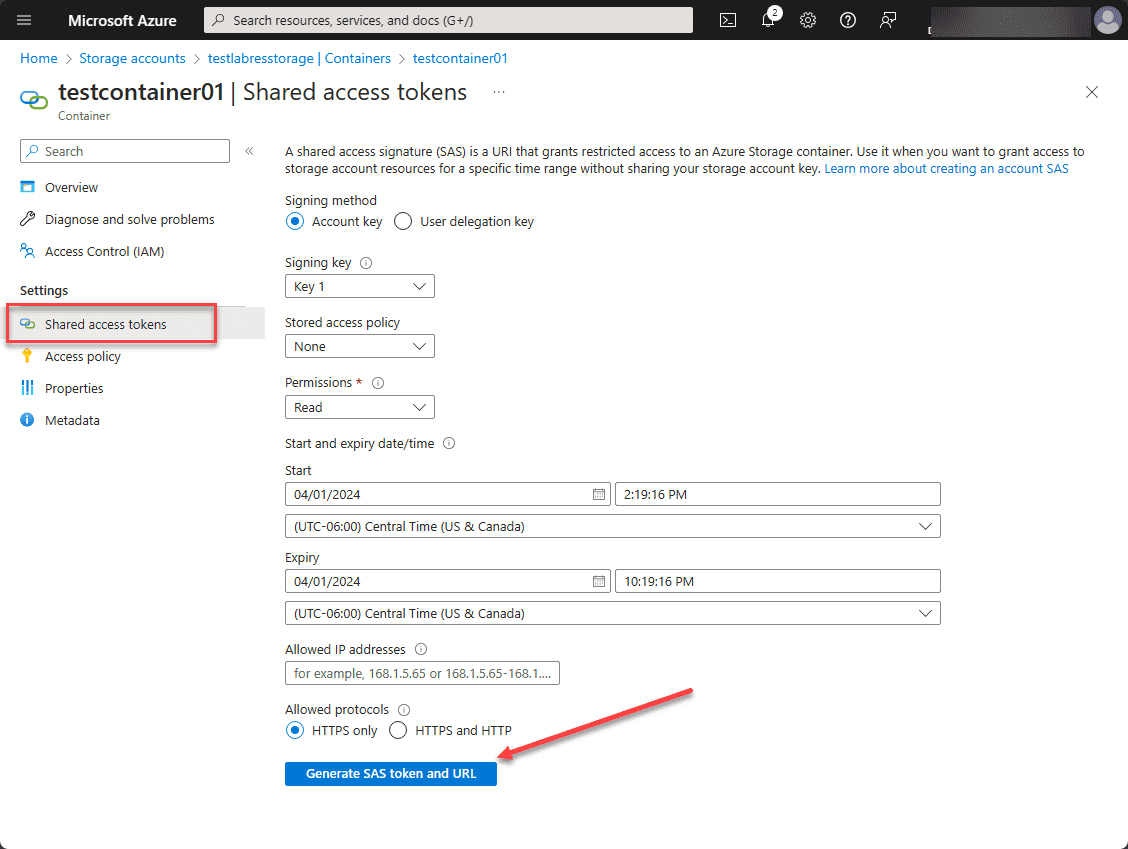
Shared access tokens
You can configure shared access tokens to grant restricted access to an Azure storage container. These provide just in time access without sharing your storage account key.
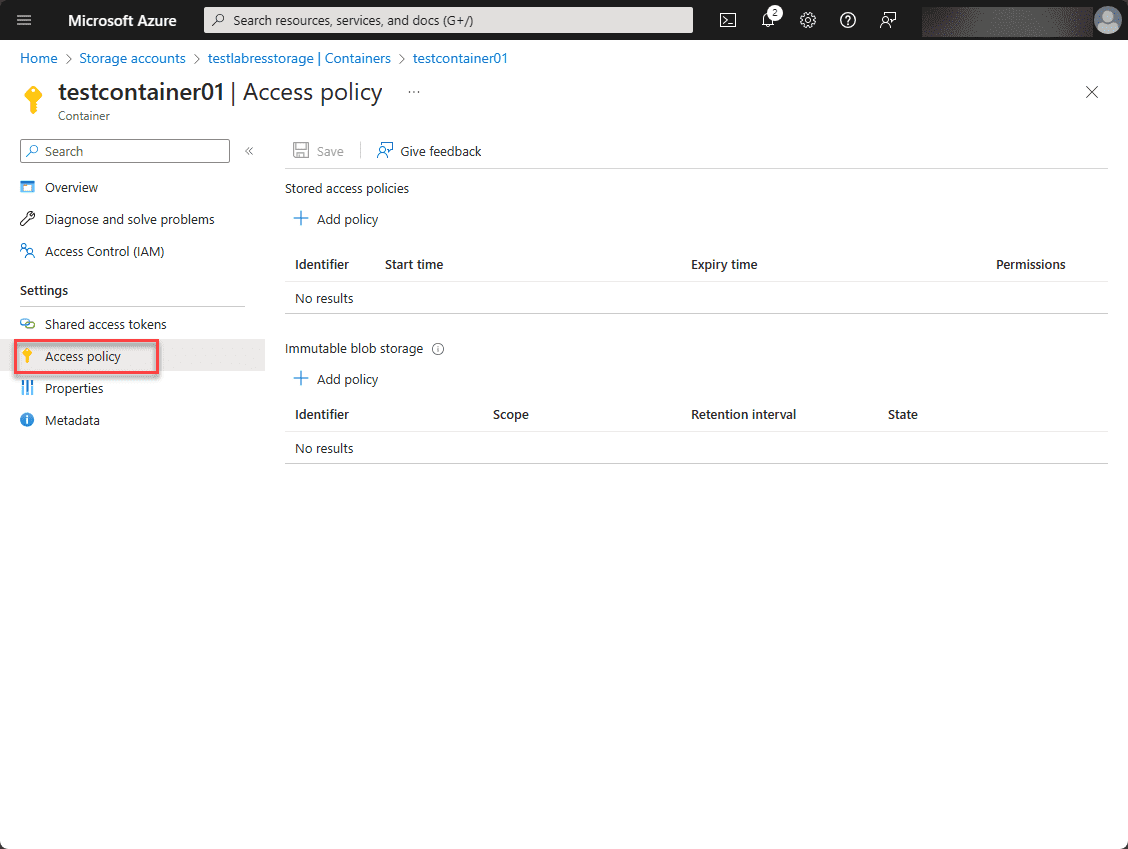
Access policy
You can also configure an access policy for stored access policies and immutable blob storage for your container.
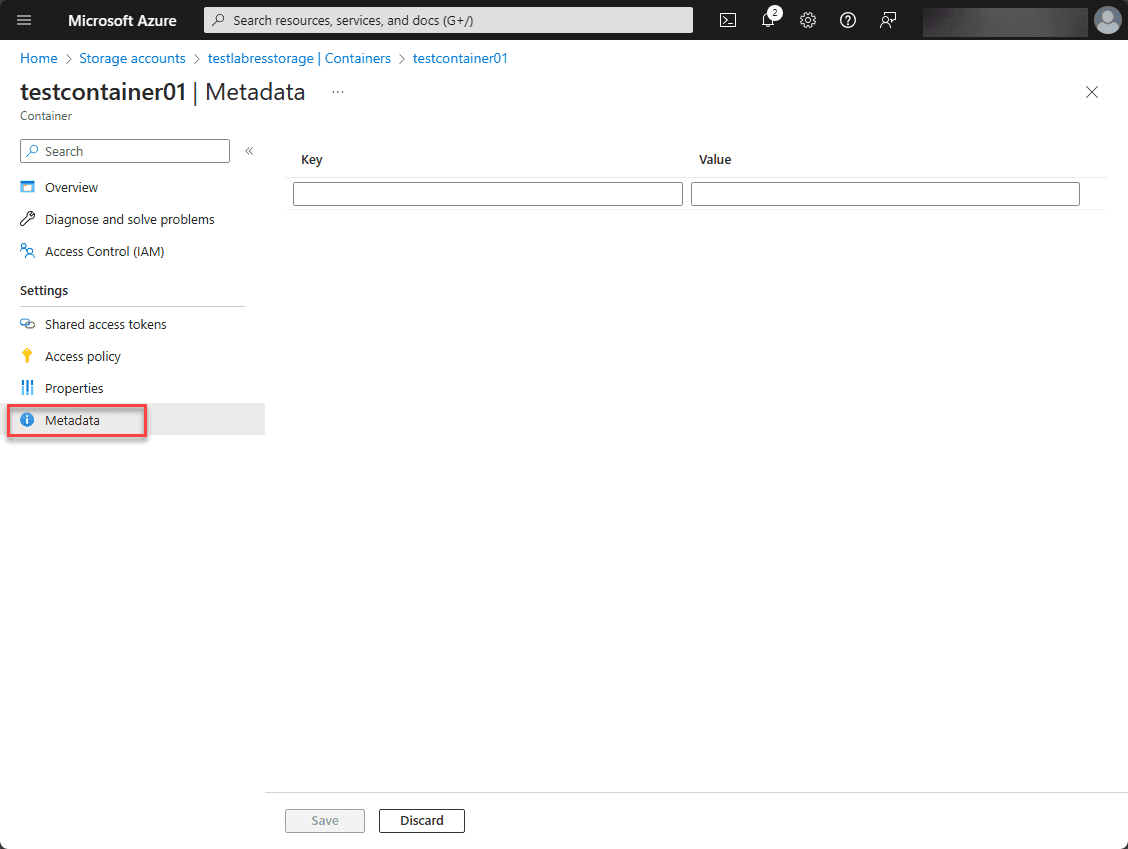
Metadata
You can add metadata to your Azure blob storage container as well. These are key-value pairs added to your container to add “data about data” to your storage container.
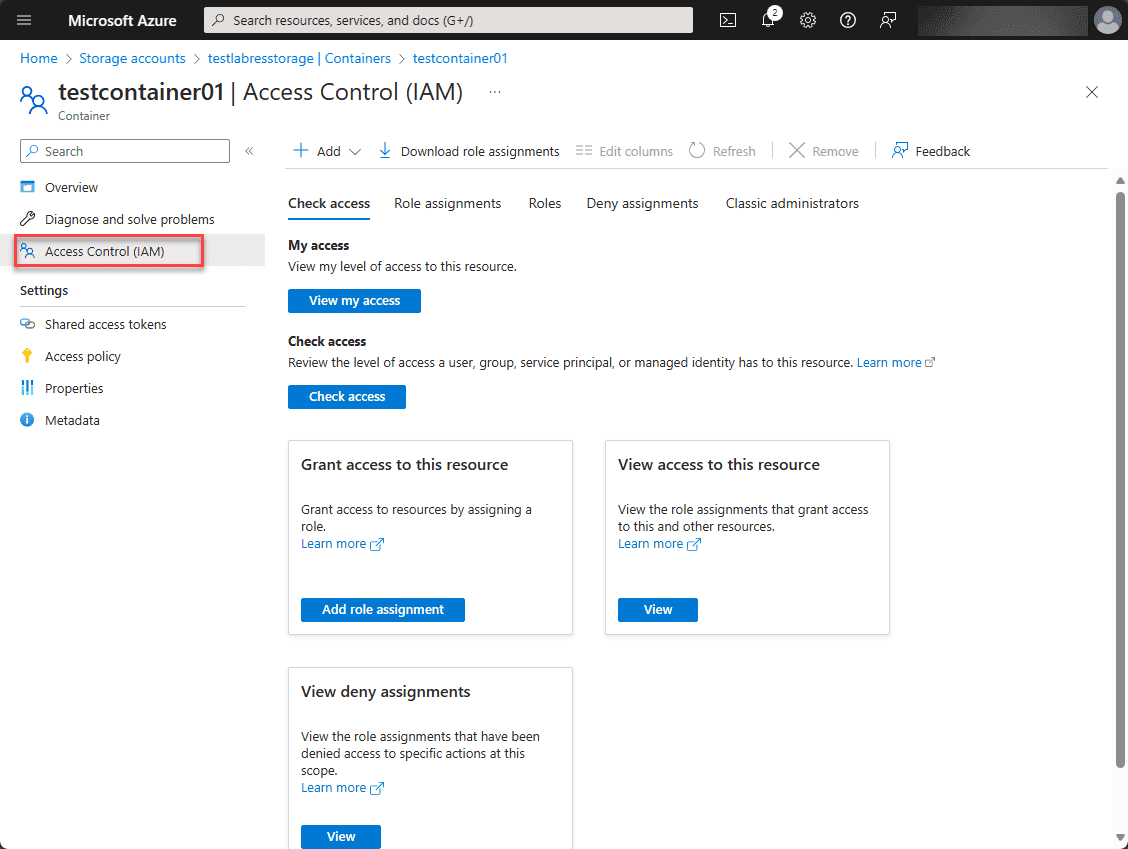
Access Control (IAM)
You can also use access control (IAM) roles to grant access to container resources or deny assignments. You can also check your current access levels.
Best Practices for Blob Storage Management
Note the following best practices related to blob storage management:
- Organize Blobs with Containers: Use containers to categorize and organize your blobs. Think of containers as top-level directories that can help you manage access and organize data
- Implement Access Policies: Use strict access policies with Shared Access Signatures (SAS) for access control to your blobs
- Use Lifecycle Management: Using lifecycle policies you can automate moving blobs to a cooler storage tier (for less frequently accessed data) or delete old blobs
- Utilize Blob Versioning: Enable versioning to maintain previous versions of blobs automatically
- Optimize for Performance: It is important to choose the right performance tier. You have the option of Premium, Hot, Cool, or Archive based on how frequently the data will be accessed
- Secure Your Data: Implement encryption for data at rest and in transit. Azure Storage provides automatic encryption for data at rest, but ensure you also use HTTPS to secure data in transit
- Monitor and Audit Activity: Use Azure Monitor and Azure Storage Analytics to track usage, performance metrics, and access patterns
- Optimize Costs with Reserved Capacity: Consider purchasing reserved capacity for Blob Storage. This can offer cost savings over pay-as-you-go pricing models
- Consolidate Accounts to Manage Costs: Consolidate your storage accounts where possible for better management. However, keep in mind the limits and scalability targets of a single storage account
- Use Azure Policy for Compliance: Implement Azure Policy to enforce rules and conventions for your storage resources. This can help ensure compliance with organizational or regulatory standards by auditing or blocking resources that don’t comply with your policies
Wrapping up
Creating the Azure blob container is the first step in using your Azure storage account and storing data in Azure blob storage. The process to create a new blob container is straightforward. It also enables the ability to use access policies, shared access tokens, and access control (IAM). Understand the role of the Azure blob container for the purposes of the AZ-104 exam and the configuration settings that can be implemented.
Read More:
Microsoft Azure Administrator: AZ-104: Manage Data by Using Azure Storage Explorer and AzCopy – Part 30
Microsoft Azure Administrator: AZ-104: Create and Configure a File Share in Azure storage – Part 31
Follow our Twitter and Facebook feeds for new releases, updates, insightful posts and more.