
Many storage options are available in the Azure storage account for storing files and other data. Creating an Azure file share in Azure storage is a great way to have a file share that is accessible and hosted in the cloud. Let’s take a look at how to create and configure a file share in Azure storage and the steps involved.
What are Azure files?
Azure files are fully managed file shares that exist in the Azure cloud. They can be reached using common protocols like Server Message Block, Network File System (NFS), and also using Azure Files REST APIs.
Also, it is important to note as a capability that they can be mounted simultaneously in the cloud and in on-premises environments by clients that exist in both places. It mimics connectivity traditionally used for on-premises file shares for a traditional file server. They are also cross-platform in nature. You can connect to Azure file shares using Windows, Linux, and macOS clients.
Another great feature of Azure files is that they can be used in conjunction with on-premises Windows file servers that can cache Azure files that are frequently accessed locally with a service known as Azure File Sync.
Features of Azure files
There are many features of Azure files that make them ideal for hybrid-connected infrastructure. Note the following benefits:

- Azure file shares are user-friendly. Once it’s set up on your computer, you can access files by navigating to the file share location. You can share files with others and across different devices and applications. You can do this using common sharing protocols
- Azure takes care of the heavy lifting for the file share. For those who manage the system, tools like PowerShell and Azure CLI are available to create and manage file shares, making administration straightforward
- Azure file shares are resilient and highly available. This means that organizations have to worry less about infrastructure for hosting files and their data. For developers, it’s easy to adapt existing applications to use Azure file shares because they can use the same programming tools and techniques they’re already familiar with, plus additional Azure-specific options
Setting Up Your Storage Account
Before creating an Azure file share, you must create a storage account. A storage account acts as a container for all your Azure Storage services. These include blobs, files, queues, and tables.
To create a storage account, navigate to the Azure portal and search for Storage accounts. Click + Create to begin the process of creating a new storage account.
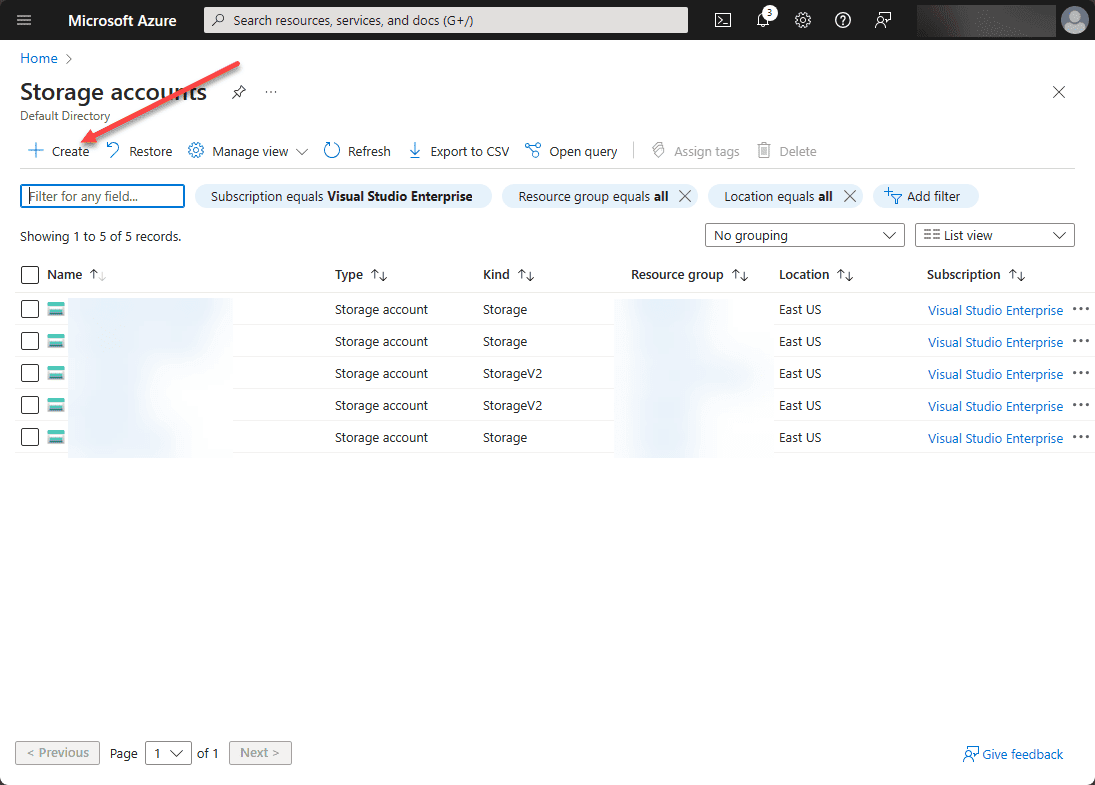
Make sure to select the appropriate performance tier and replication option. Options like locally redundant storage (LRS) or zone redundant storage (ZRS), storage account key, and other options provide configuration for durability and availability based on your needs.
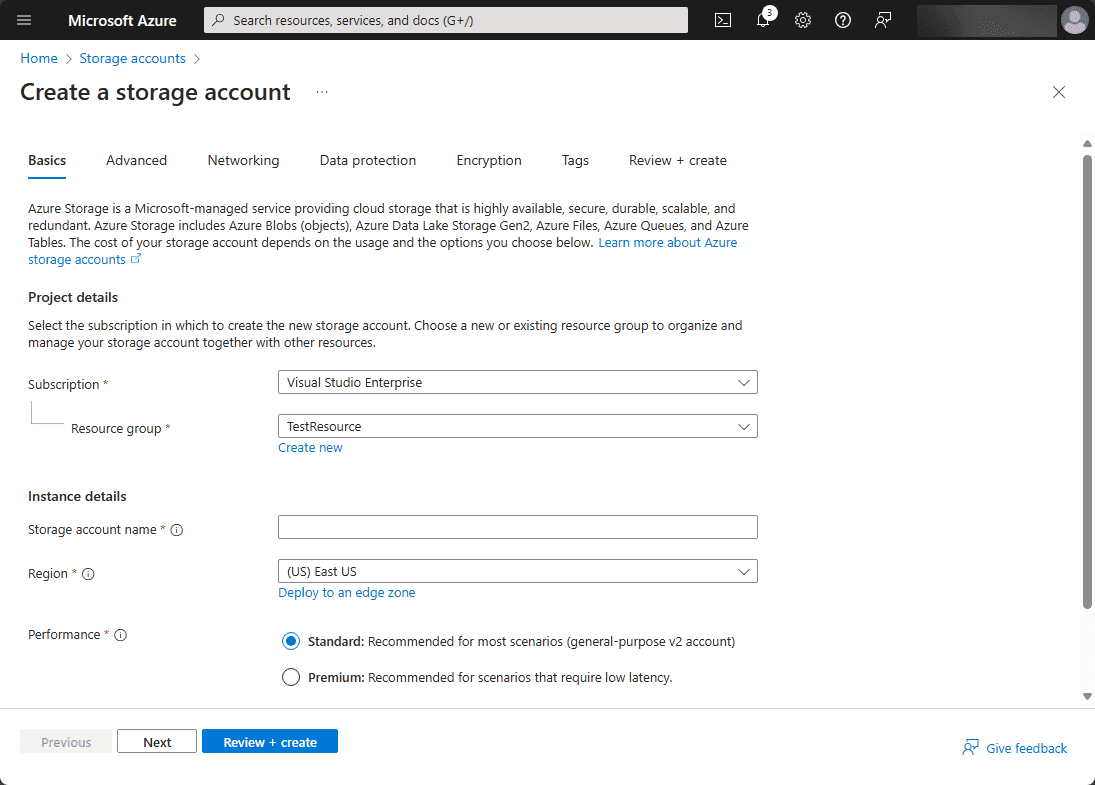
Finish out the new storage account wizard with the options that you need for your storage account.
Creating an Azure File Share
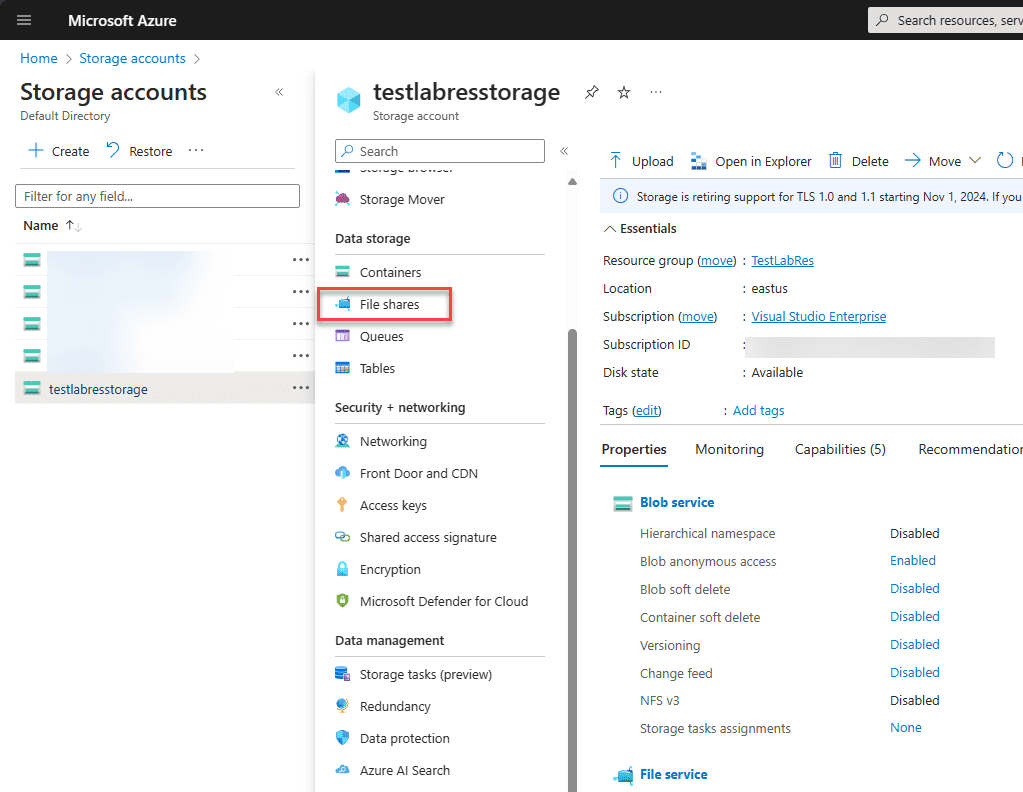
To create an Azure file share, you first need to create an Azure storage account. The storage account itself houses other storage resources in Azure. After you have created your storage account and storage account name, you can log in to the Azure Portal and navigate to Data storage > File shares.
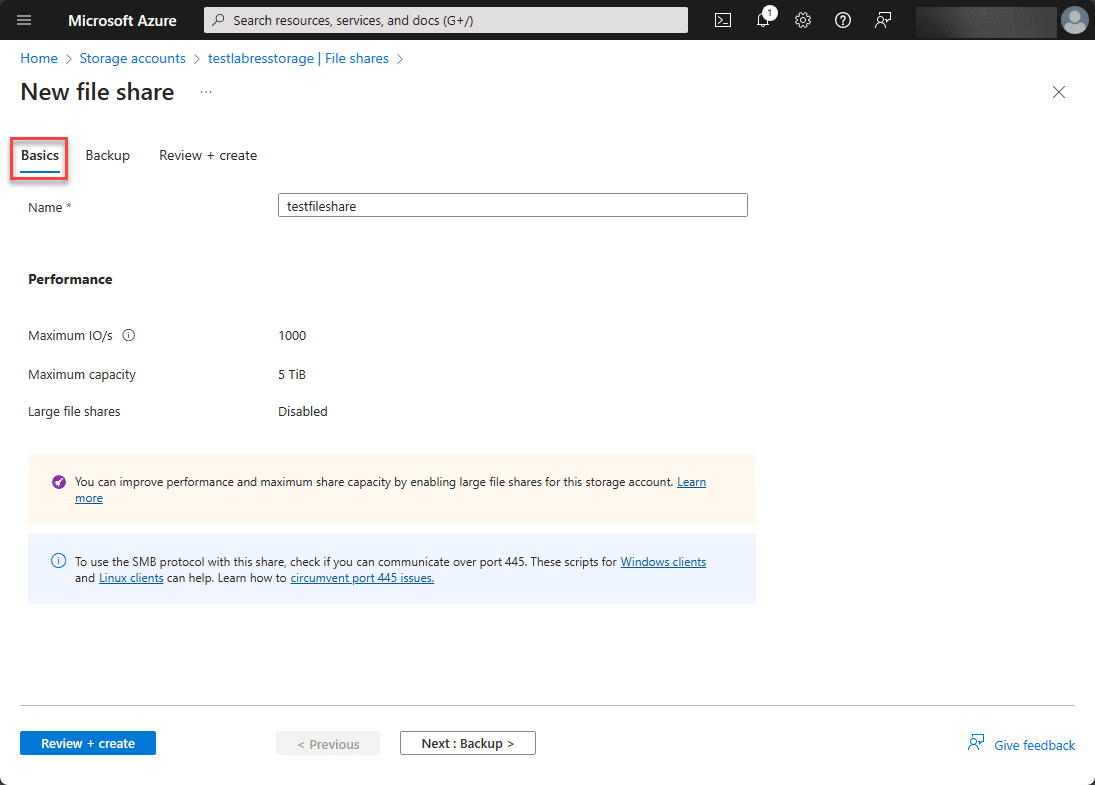
Click the + File share button at the top to begin the wizard to create a new file share.
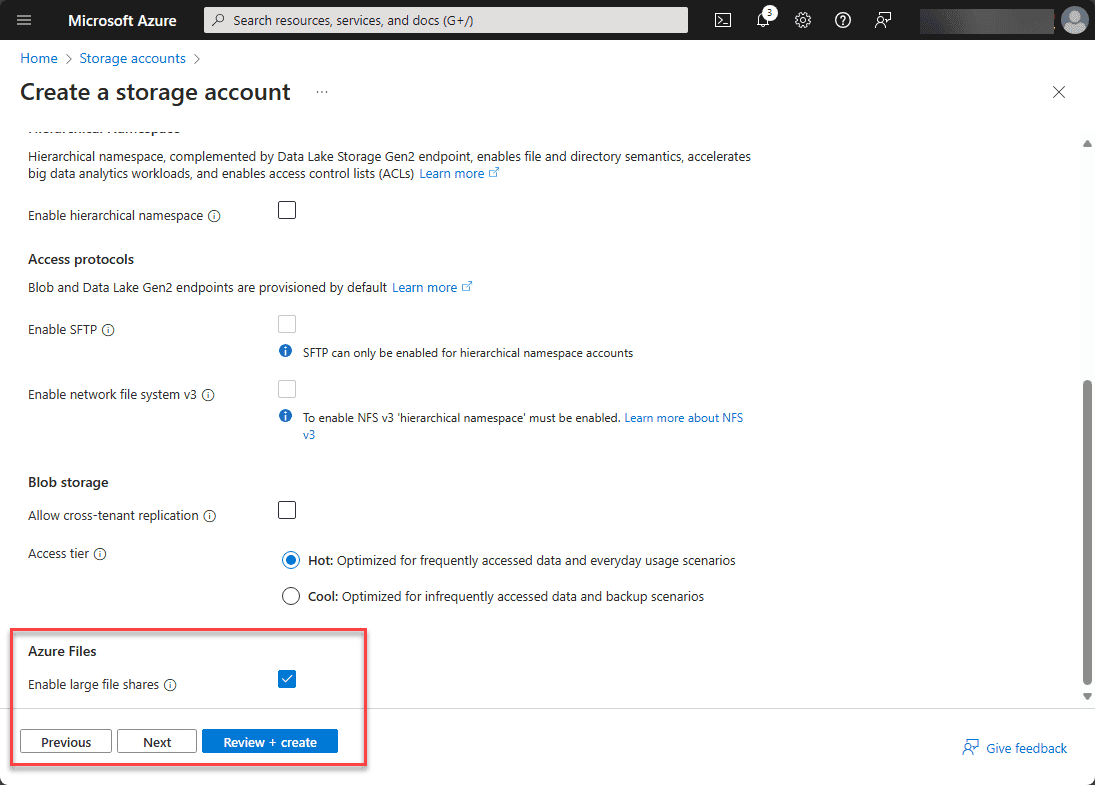
On the Basics tab, choose a name for the file share. You will also see the note about improving performance and maximum share capacity by enabling large file shares for this storage account.
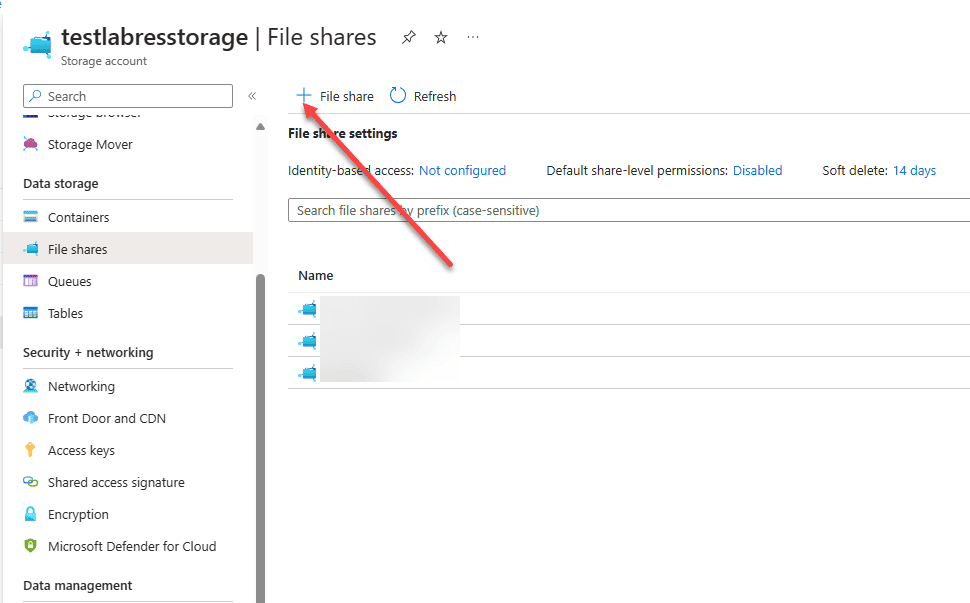
You can enable this option when you create a storage account or afterward. Note the configuration below:
Click Next: Backup > button.
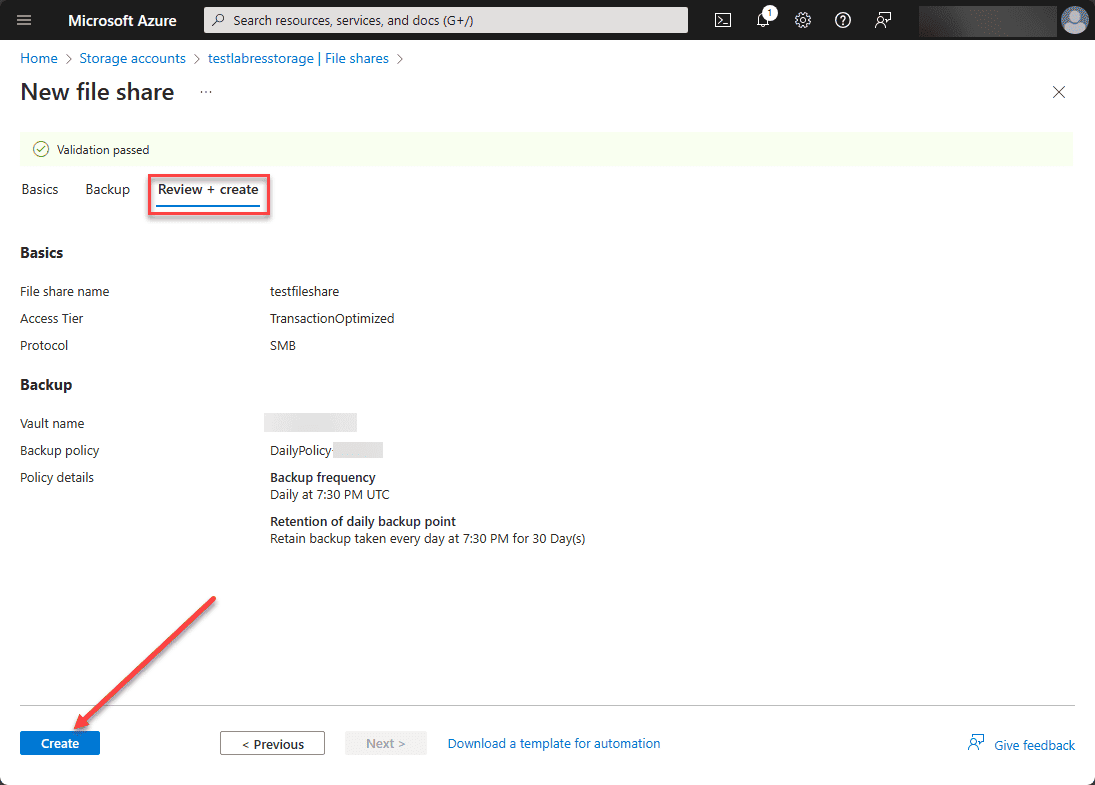
On the Backup tab, you will see that you can Enable backup (enabled by default), choose the vault name, and backup policy, and look at other details. Click Next: Review > button.
Finally, review the configuration information and click Create to create the Azure file share.
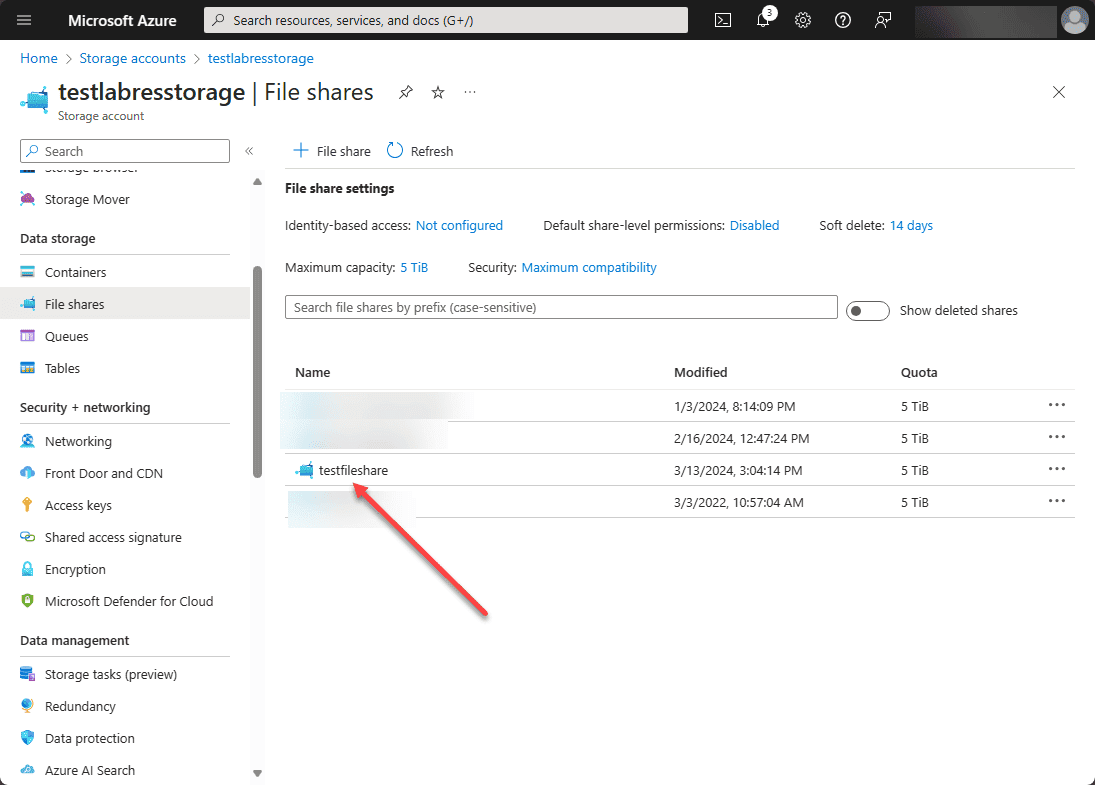
The SMB Azure file share is created successfully in the resource group and storage account. Refreshing the File shares now lists the new Azure file share.
Connecting to Azure file shares
Using the standard SMB protocol, you can connect to your Azure SMB file share. Azure file shares support Windows, Linux, and macOS operating systems for connecting.
For example, to connect a Windows machine to the newly created file share, we can navigate to the file share and click the Connect button at the top.

Choose your platform, then your drive letter, authentication method, and then show the script for running on your client.
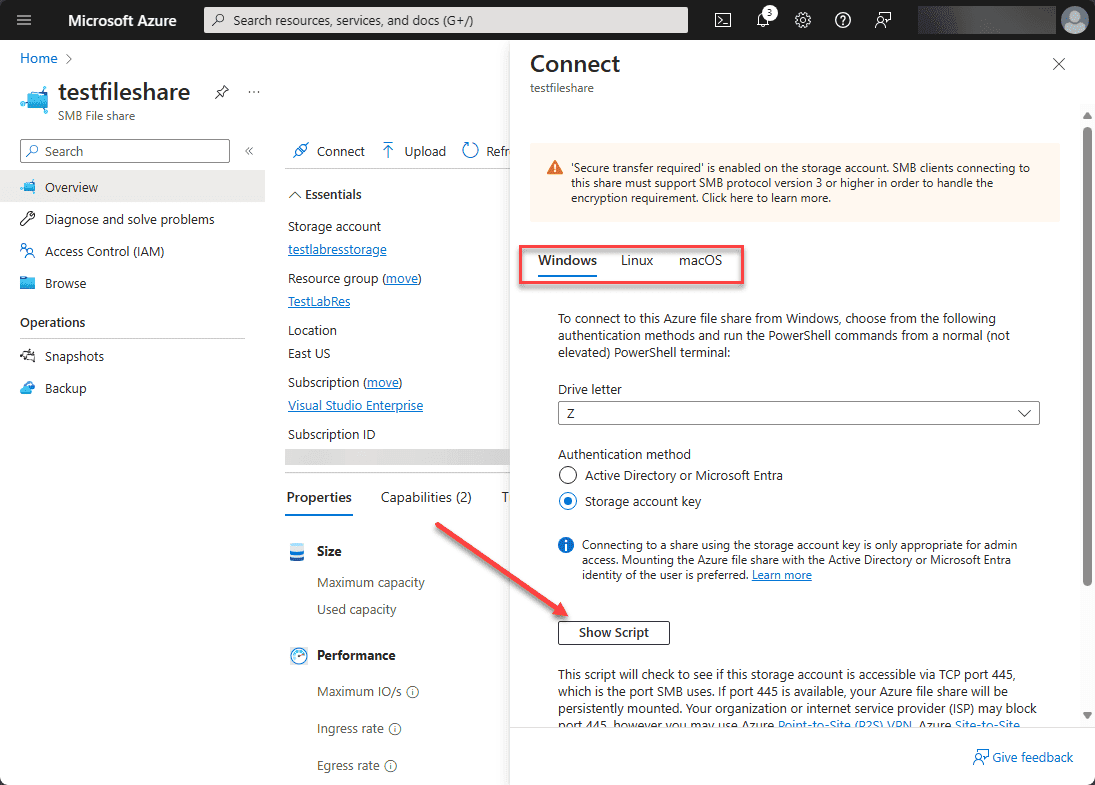
It will give you a script like the following that you will run on your client:
$connectTestResult = Test-NetConnection -ComputerName testlabresstorage.file.core.windows.net -Port 445
if ($connectTestResult.TcpTestSucceeded) {
# Save the password so the drive will persist on reboot
cmd.exe /C “cmdkey /add:`”.file.core.windows.net`” /user:`”localhost\testlabresstorage`” /pass:`” `””
# Mount the drive
New-PSDrive -Name Z -PSProvider FileSystem -Root “\\.file.core.windows.net\ ” -Persist
} else {
Write-Error -Message “Unable to reach the Azure storage account via port 445. Check to make sure your organization or ISP is not blocking port 445, or use Azure P2S VPN, Azure S2S VPN, or Express Route to tunnel SMB traffic over a different port.”
}
You will need to make sure that port 445 is able to communicate through firewalls to connect to the Azure file share. This is something that organizations may need to configure as SMB isn’t typically allowed through gateway firewalls or even at the ISP level.
Best Practices for Azure File Shares
Note the following Azure file share best practices:
- Secure Access: Use Azure Active Directory (Azure AD) and Access Control Lists (ACLs) to manage access permissions to your Azure file shares
- Network Security: Use Azure Private Link to make sure your file shares can be accessed only through a private network, enhancing security
- Backup and Recovery: Create regular backups of your Azure file shares to protect against data loss
- Performance Tuning: Choose the right performance tier (standard or premium) based on your performance requirements
- Data Redundancy: Select the right redundancy option (e.g., locally redundant storage, zone-redundant storage)
- Snapshots: Use snapshots to create read-only versions of your file shares at specific points in time
- Monitoring and Alerts: Enable Azure Monitor for file shares to track usage metrics and set up alerts for unusual activity or nearing space thresholds
- Encryption: Make sure data is encrypted at rest using Azure Storage Service Encryption and in transit by enforcing SMB 3.0 encryption or using HTTPS for REST API calls
- Cost Management: Monitor and optimize costs by reviewing your file share usage regularly and deleting unnecessary files combined with moving infrequently accessed data to a cooler storage tier
- Compliance and Policies: Apply Azure policies to manage compliance and governance across your file shares
Wrapping up
Azure file shares are an excellent solution for organizations to migrate file services to the cloud and extend their on-premises infrastructure with hybrid file storage. Understand the requirements of creating an Azure storage account and how to create a file share. For the AZ-104 exam, know how the Azure file share can be accessed from a client and how you can set up this connectivity.
Related Posts:
Microsoft Azure Administrator: AZ-104: Manage Data by Using Azure Storage Explorer and AzCopy – Part 30
Follow our Twitter and Facebook feeds for new releases, updates, insightful posts and more.