
Quick Bites:
- In this blog, you’ll discover the power of Microsoft 365 Power Automate, a tool streamlining tasks in your Microsoft 365 ecosystem
- Learn three easy ways to create flows: from scratch, using templates, or connecting seamlessly with your daily apps
- Explore practical examples like triggering emails on file deletion and automating attachment processes
- Understand the impact of upcoming Microsoft 365 changes on Power Apps and Power Automate, staying ahead of the curve
What is Microsoft 365 Power Automate?
Power Automate, formerly Microsoft Flow, is an online tool within the Microsoft 365 applications and add-ins, used for the creation of automated workflows between apps and services to synchronize files, get notifications, and collect data. Power Automate is a new enterprise system from Microsoft that allows us to integrate and synchronize all our data analysis and applications in an automated way, to increase productivity and business efficiency.
With the help of Power Automate, one can create many processes flows wherein repeated tasks are performed within Office 365 applications or with third-party applications. This may include data access between Office applications or can be API access to supported third-party applications, or even an automated task initiated from a local device such as computers.
Table of Contents
- How to use Microsoft Power Automate?
- Start from a blank
- Start from Templates
- Start from Connectors
- Conclusion
How to use Microsoft Power Automate?
Administrators can access Power automate from the Office 365 admin Center & can create flows in three different ways
- Start from blank – Start from blank lets you create a custom flow to meet your needs
- Start from templates – Start from templates lets you create flow from the premade templates published by Microsoft
- Start from connectors – Start from connectors lets you create flow from the application you use every day. Connectors are nothing but applications that are allowed to access the Power Automate process to create business flow templates
This blog details all the above three ways and provides you with sample flow creation using Microsoft’s popular templates. Since 100 templates and more no of connectors are used ( Both Microsoft and third-party connectors ), it is an administrator’s choice to choose the best way to create his Power Automate flow as per his Company’s requirement.

Start from a blank
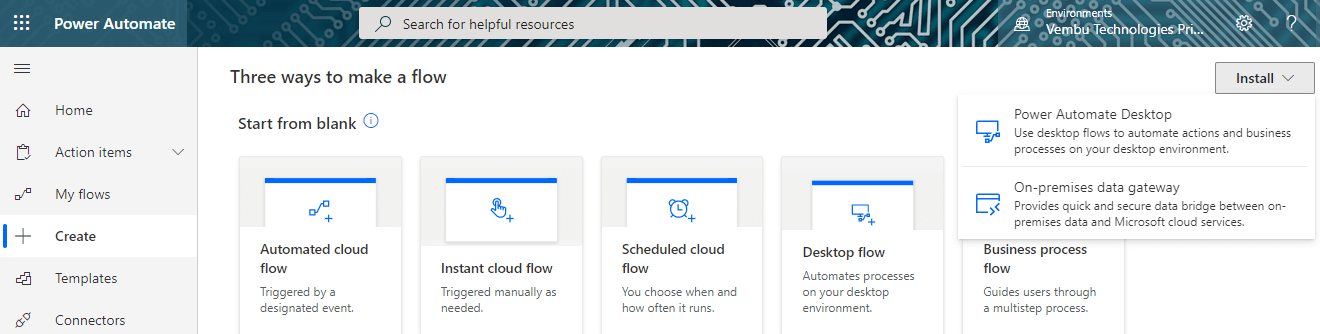
As this is a custom flow, you are offered to choose one of the five types of flows to create your custom templates to design your business process flow. They are
- Automated cloud flow – Triggered by a designated cloud event automatically
- Triggered cloud flow – Triggered manually as needed when a cloud event meet
- Scheduled cloud flow – User can choose when and how often the flow runs when a cloud event meet
- Desktop flow – Automate process on your desktop environment. Users need to download and install the package “Power Automate Desktop” tool and “On-Premises data gateway” tool to provide a quick and secure data bridge between on-premises data and Microsoft cloud services
- Business process flow – Guides users through a multistep process to provide a complex and multi-event meet requirements
The below screenshot shows these models, and one can choose any of them by clicking the individual icon on it.
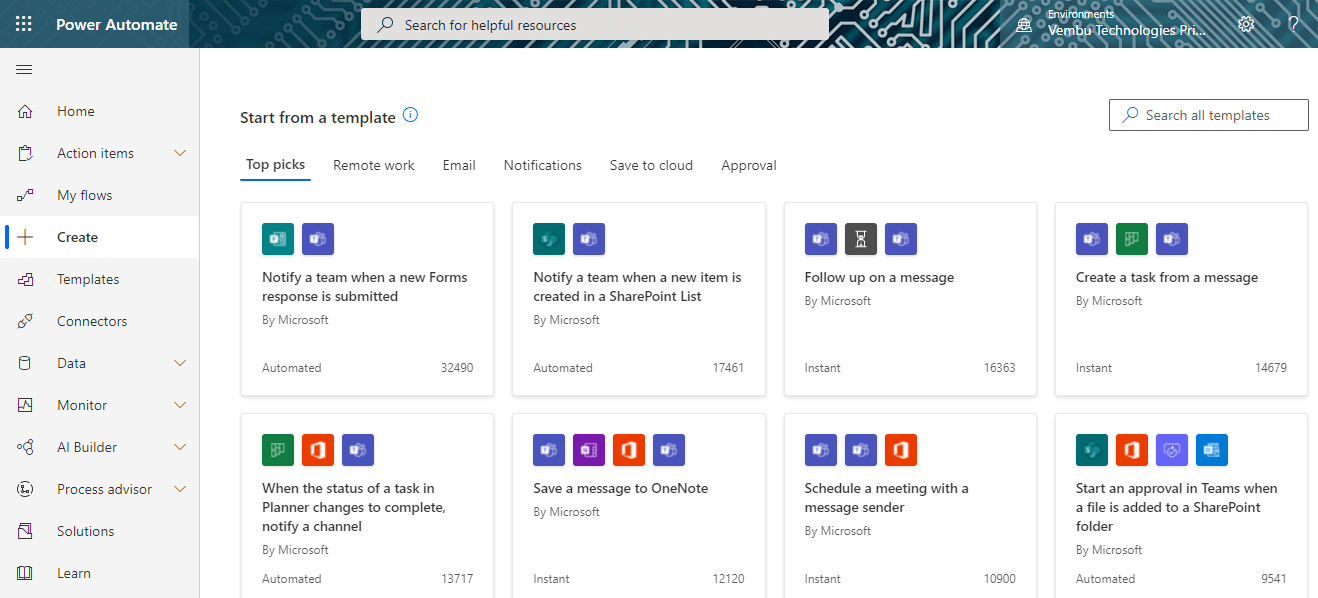
Start from Templates
Using Microsoft published templates, a user can create a flow. There are 1000s of templates published and can be accessed under the Power Automate home page → Template. Even you can get all the templates from the below URL :
https://india.flow.microsoft.com/en-us/templates/
( Please note the country name may vary based on your Microsoft 365 subscription country profile ). All these templates are categorized below screen which and to which will into the below groups.
- Featured
- Shared with me
- Remote work
- Approval
- Button
- Visio
- Data Collection
- Events and Calendar
- Mobile
- Notification
- Productivity
- Social Media and
- Sync
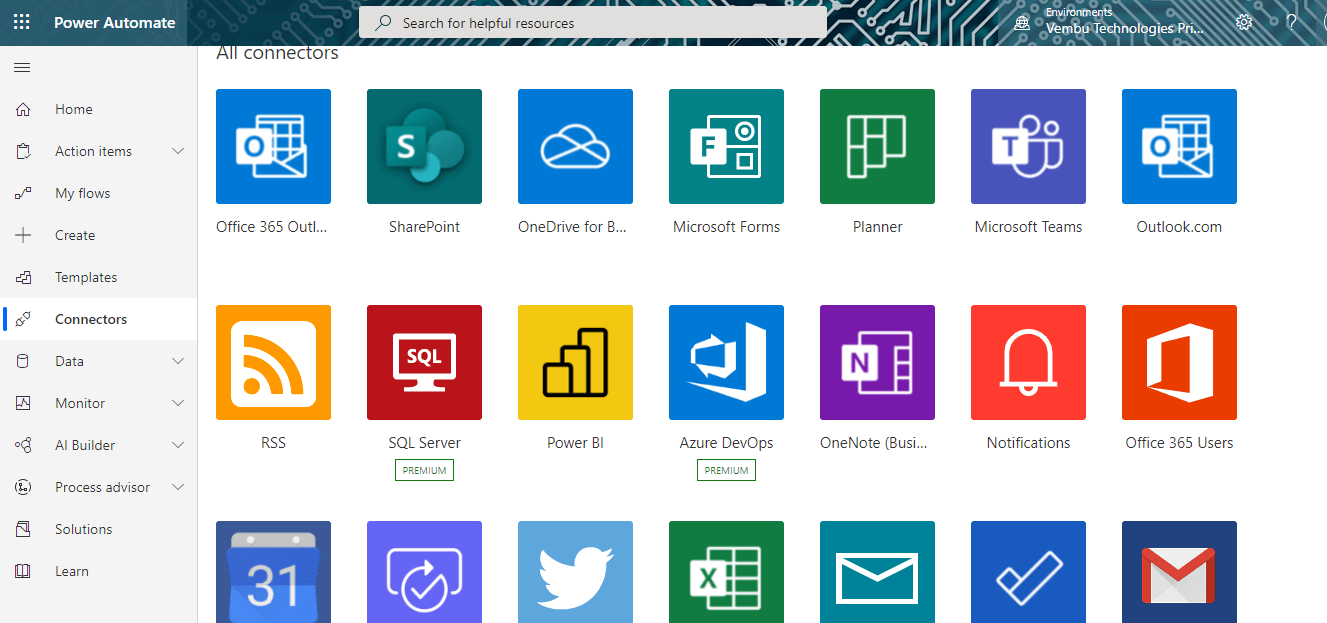
Start from Connectors
As per Microsoft documentation, A connector is a proxy or a wrapper around an API that allows the underlying service to talk to Microsoft Power Automate, Microsoft Power Apps, and Azure Logic Apps. It provides a way for users to connect their accounts and leverage a set of pre-built actions and triggers to build their apps and workflows. You can choose any of the listed connectors available under Connectors → All Categories. The below screenshot shows some of the connectors for reference. Based on your application requirement, you can choose the connector to build a process flow.
You can also access the all connectors page directly from the URL :
https://india.flow.microsoft.com/en-us/connectors/
( Please note the country name may vary based on your Microsoft 365 subscription country profile )
You can also filter the available connectors into Standard and Premium Connectors.
Standard Connectors – Users running the free or Office 365 license plans will only be able to access standard connectors.
Premium Connectors – Users running premium license plans can able to access both Standard and Premium connectors.
Check with your Microsoft 365 account licensing details before choosing these connectors.
Few examples of creating an automated Business process flow
Example 1: Building an automated cloud flow using a custom flow method
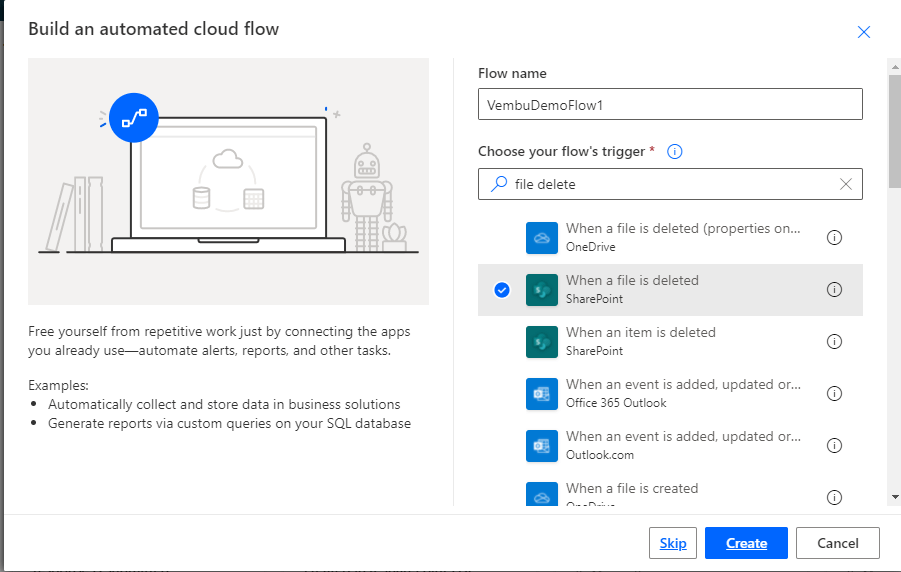
In this example, we will create an automated process flow wherein a file is deleted in a Sharepoint library and will trigger a mail to a Microsoft 365 Outlook-enabled user. This automated flow is created in the following steps.
- Choose Automated cloud flow in the Power Automate → Create page. This will open a new wizard, provide a Flow name in the Flow name box. In the “Choose your flows to trigger” search box, provide the search values “ file delete”, which will display all the file deleted operations on Microsoft services ( Ex A file delete in Sharepoint, A file delete in OneDrive, etc..). Choose the trigger element “When a file is deleted – Sharepoint” and select Create to proceed to the next step
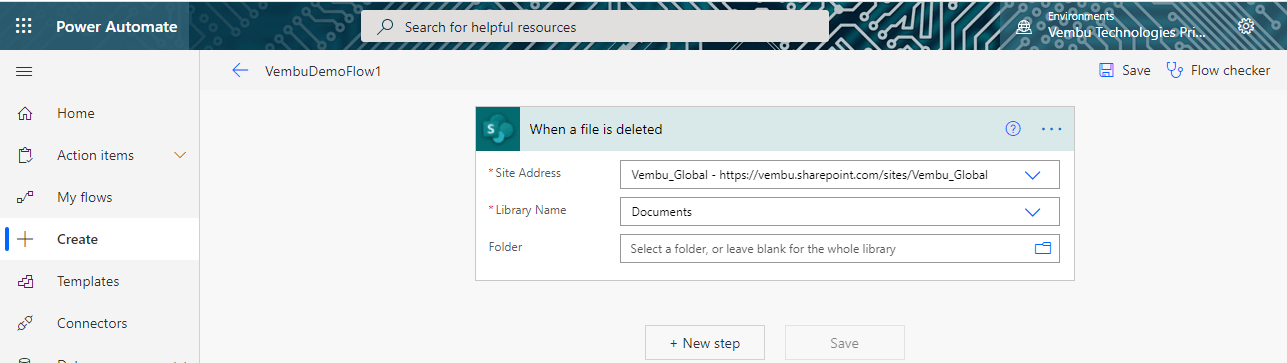
- In this step, provide the complete URL of your Sharepoint Site Address, and the Library name ( usually documents published in your Sharepoint Site ). You may select the folder, or leave it blank to choose the whole library. The below screenshot shows this step. Click New step to proceed further
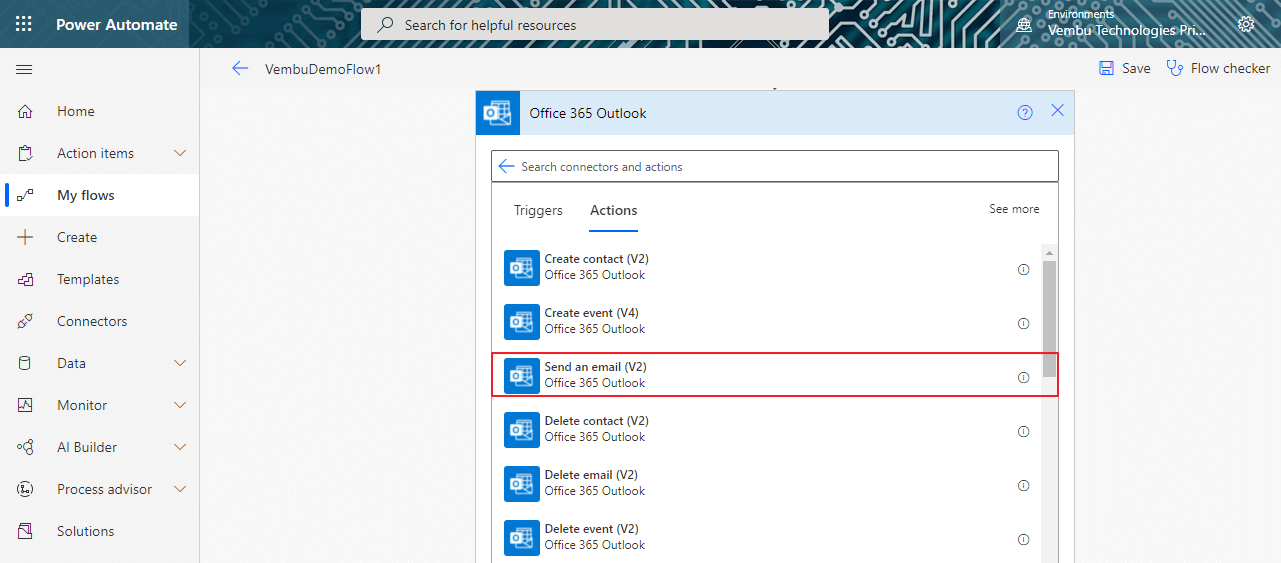
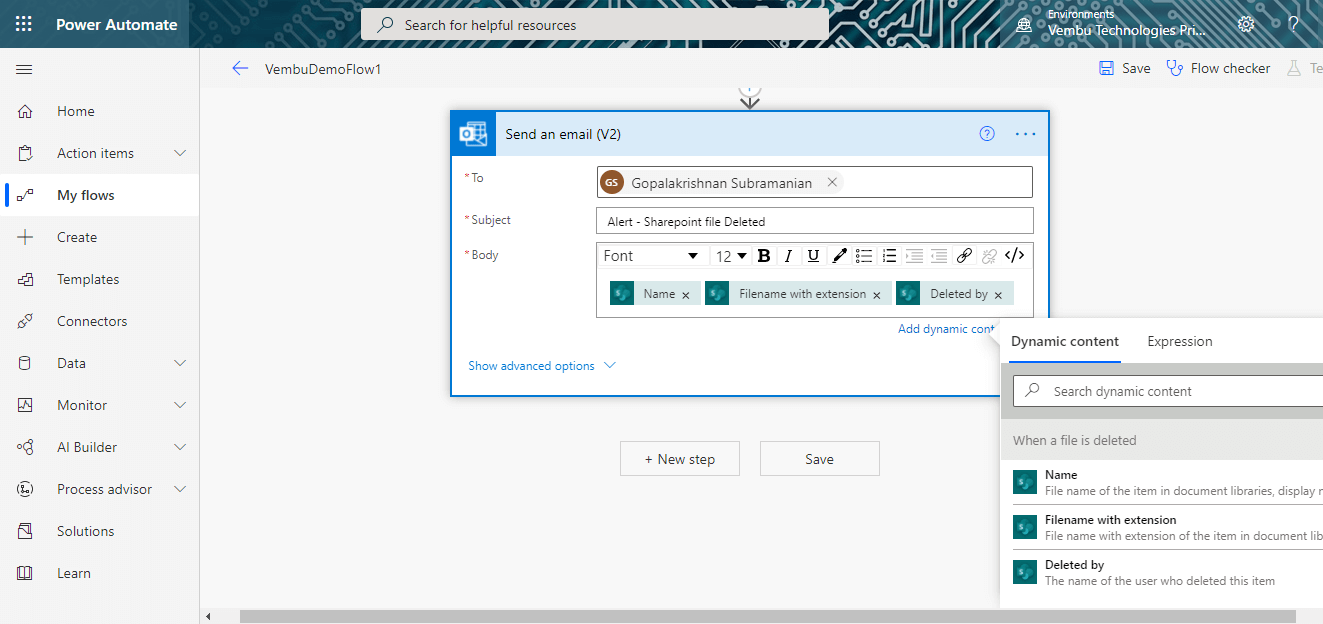
- In this step, choose the connectors for the action. Since we are going to send an email for file delete operation, Choose the Office 365 connector ( shown in the red box in the first screenshot below ), and choose the action “send an email” Office365 Outlook. ( Shown in the red box in the second screenshot below ). Further, you can add “To” Address, Subject, and Body message. Here you can add dynamic contents ie the document name which is deleted, The person name who deleted the file, etc. This will provide a clear email statement to you, whenever a file is deleted by your Organization SharePoint members. Click save to create a new flow
- Now your flow is ready, and it is recommended to test the flow by clicking the Test button on the top corner of the page ( Shown in the red box in the screenshot below )

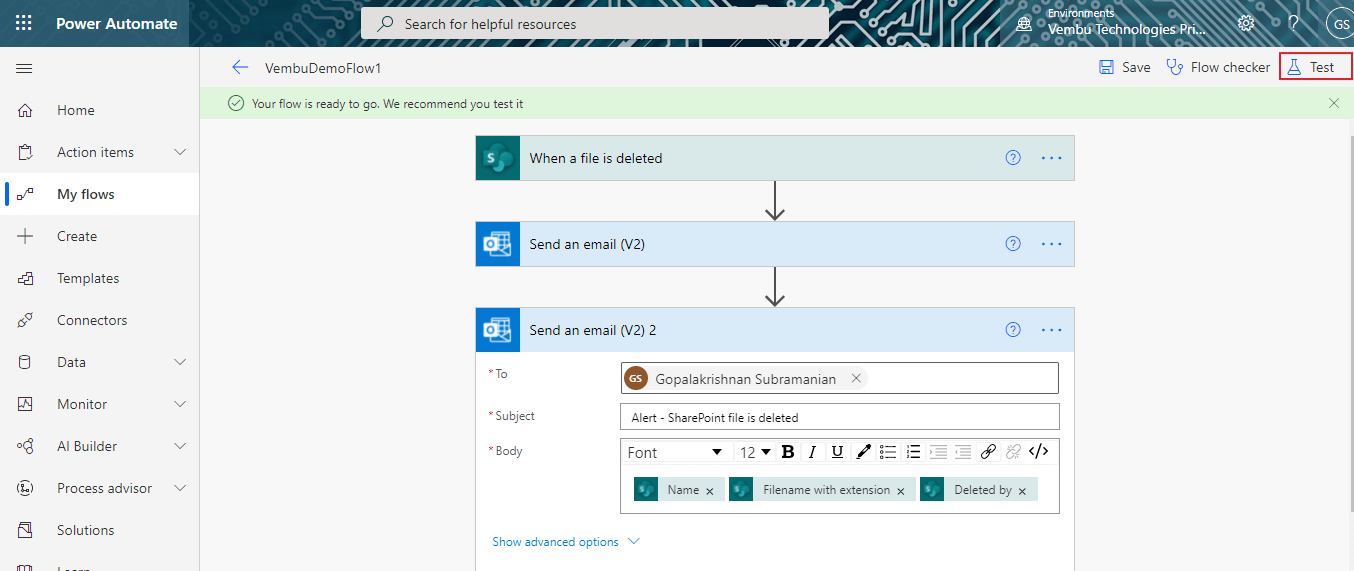
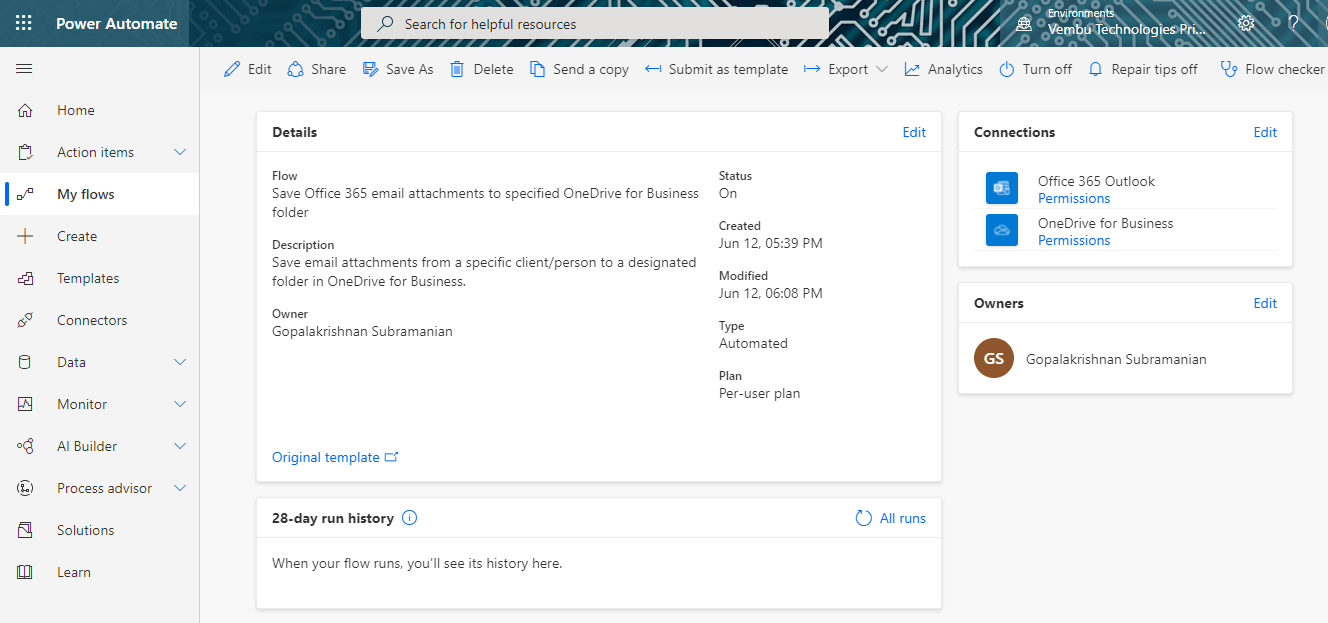
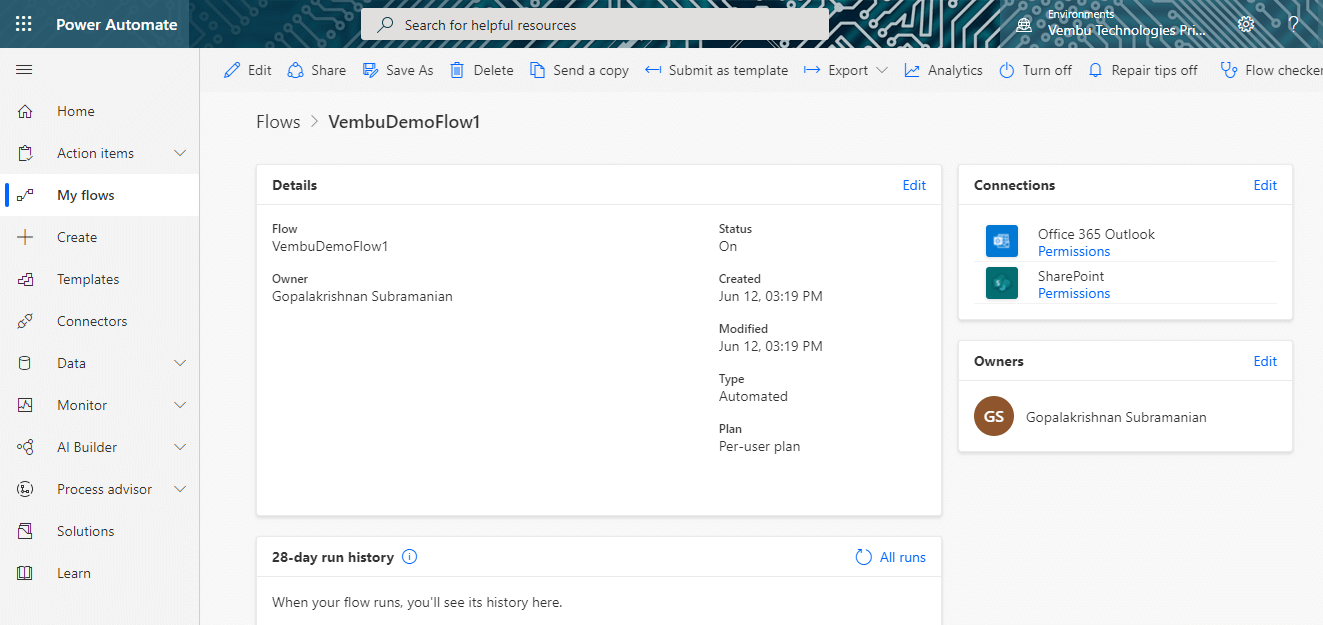
The below screenshot shows the details of the flow “VembuDemoFlow1”. You can edit all the parameters as and when required. Also, you can share, delete, make another copy, convert a template to reuse later, export as a zip file, historical run status and turn off the flow if not required.
Example 2: Creating an automated business process flow using OneDrive for the Business template.
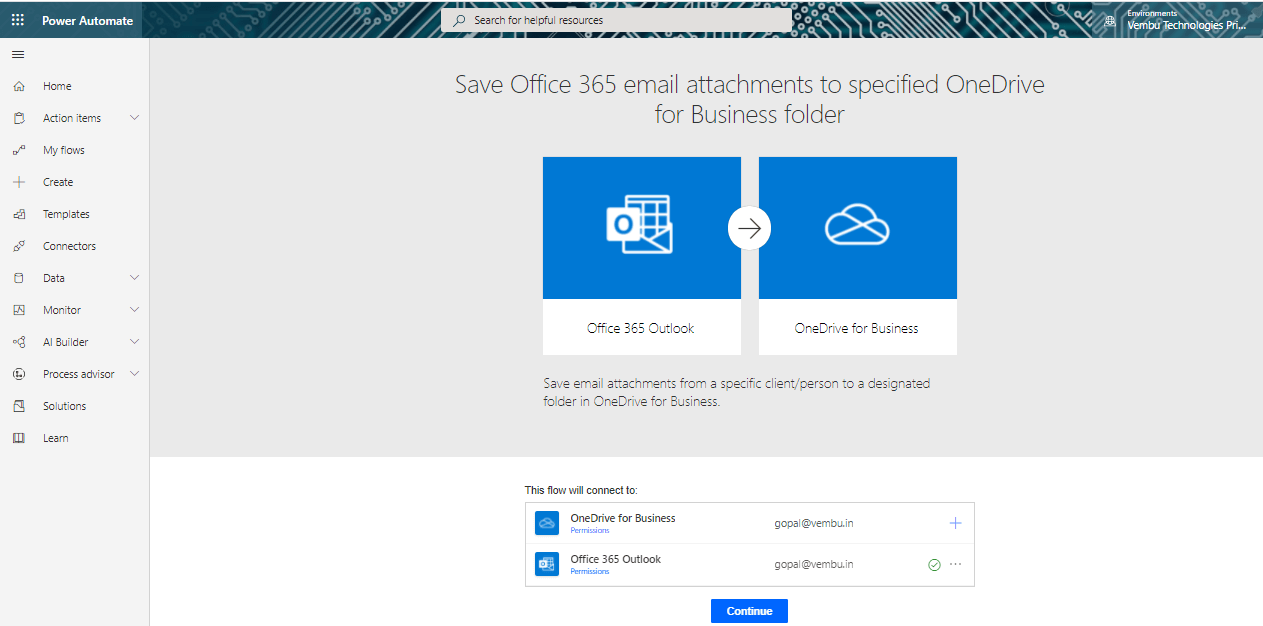
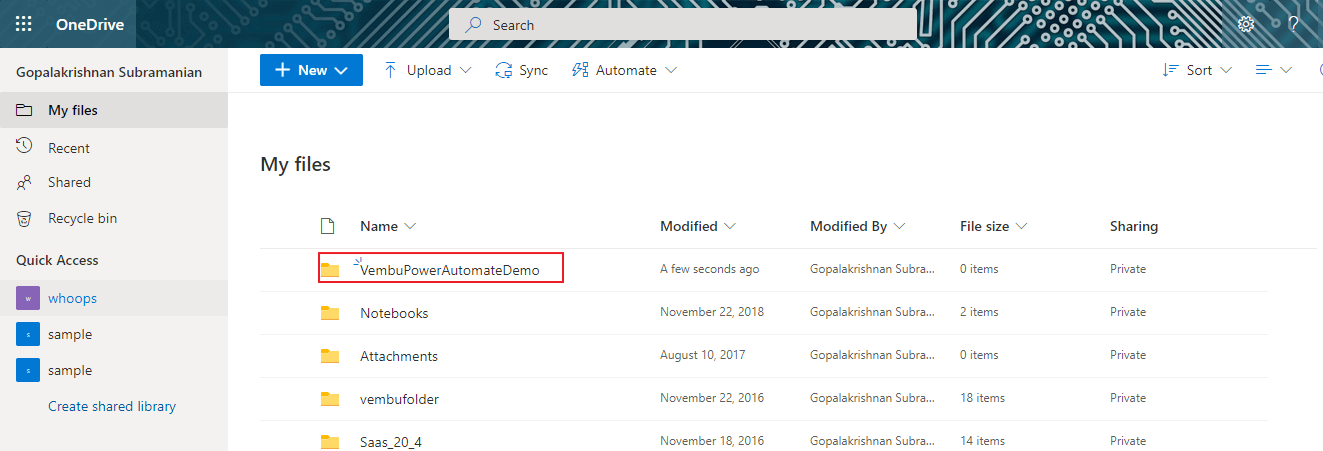
As said above, in this example we are creating a flow in Microsoft 365 Power Automate using a predefined template by the Microsoft Power Automate community. Using this template we are automating the process of saving a Person’s Office 365 mail attachment to a specified OneDrive for Business folder. Here I am automating the saving process of my Office 365 email attachment to one of my OneDrive for a Business folder called VembuPowerAutomateDemo. The below screenshots show those details.
My OneDrive folder location, shown in the red box in the below screenshot.
Click Continue to start the process. In the next screen choose your mailbox folder ( usually Inbox ) to monitor your emails with attachments. You may also use advanced options to filter your incoming emails based on the criteria provided.
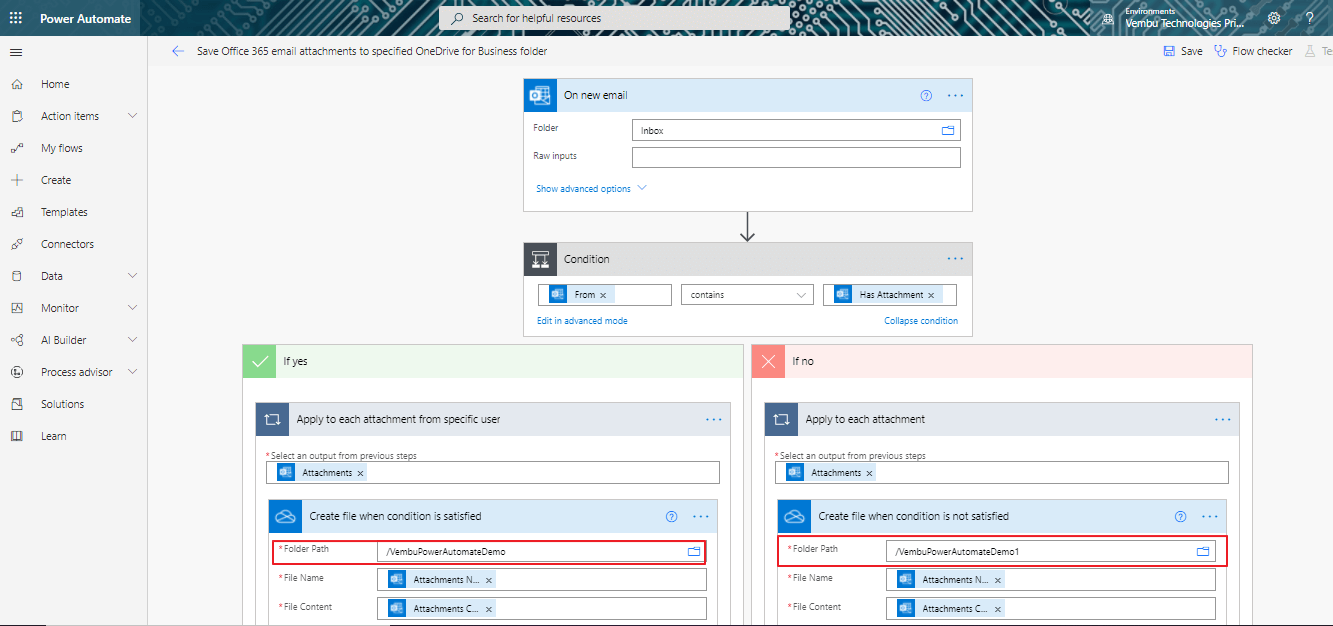
In the Condition box, choose the “Has Attachment” trigger from the available trigger lists.
The flow shows two conditions Yes and No, and has to provide inputs for both the conditions. So we are providing two folders paths for Yes and No to satisfy the conditions. In “Folder path location” we have to browse the full path of the Directory in the OneDrive storage as shown in the below screenshot.
Click save to create the flow, and it is recommended to test the flow by clicking the Test icon available on the right top of the page.
All the flows you created are available in the “ My flows” section. At any time, you can edit the flow you created after selecting the flow as shown in the screenshot. Also, you can share, delete, make another copy, convert a template to reuse later, export as a zip file, historical run status and turn off the flow if not required.
Update: A latest announcement from Microsoft says, there are few Microsoft 365 important changes ( deprecations ) that affects Power Apps and Power Automate .
Here are the few changes listed in the Microsoft announcement.
- Model-driven app controls deprecation (2023 Release Wave 1) – With the upcoming 2023 release wave 1 (public preview in February 2023 and GA in April 2023), these controls for model-driven apps will be deprecated; auto-complete, input mask, multimedia player, number input, option set, and star rating. This will be replaced by a set of new fluent controls which have better usability and accessibility
- Microsoft Dataverse (legacy) connector (CDS 2.0 connector) for Power Automate flows will be deprecated and replaced with another connector. Users will need to review their existing Power Automate flows to determine which ones need to be updated. By March 2023, no new flows can be created using the CDS 2.0 connector but existing flows will continue to work
- Power Apps for Windows 8 will be deprecated and replaced with a new app.Effective September 2022, Power Apps for Windows 8 will be deprecated. Microsoft will continue to provide security and other critical updates for the app until Sept 20, 2022. After Sept 20, 2022, Power Apps for Windows 8 will be removed from the Microsoft Store, and will no longer be supported
For more information on important changes related to Power Automate, please visit
https://learn.microsoft.com/en-us/power-platform/important-changes-coming
Conclusion
It’s a powerful cloud-based solution for users to automate activities and operations to save ample time and effort on tedious manual tasks. It guarantees improvement in workforce productivity by automating repetitive tasks that take up time within the day, employees can work smarter and improve overall business performance. Even a moderate knowledge person can create his custom template or use predefined templates and quickly create a business flow in a couple of minutes. However, it is easy for beginners, more difficult for more complex tasks. Most templates are useful when you automate sequential workflows ( X to Y to Z ), there are very limited or no workflows that support back step workflow processes. Power Automate is not suitable for long-lasting workflows because it can run without warning.
Download to try our 30-day free trial!
Download the full-featured 30-day free trial of our latest version Vembu BDRSuite and experience modern data protection for your Microsoft 365 environment.
Protect your Microsoft 365 account with BDRSuite Backup for Microsoft 365 now!
Follow our Twitter and Facebook feeds for new releases, updates, insightful posts and more.