
Introduction
Welcome to our blog on “Creating a Virtual Machine in a Proxmox Host Server”! If you are looking to harness the power of virtualization and maximize the efficiency of your server resources, you’ve come to the right place. In this comprehensive guide, we will walk you through the step-by-step process of setting up a virtual machine using Proxmox, a powerful open-source virtualization platform. Whether you are a seasoned IT professional or a curious individual looking to expand your knowledge, this blog will provide you with the essential insights and practical tips needed to create and manage virtual machines with ease. So, let’s dive in and explore the world of virtualization, starting with Proxmox as our host server.
Before creating a virtual machine in Proxmox host, it is essential to create a Storage ( storage location ) in the proxmox server to hold the VM creating files. It is also useful to create a resource pool under which you can organize the created VM in a meaningful way.
A resource pool consists of virtual machines, containers, and storage devices. It simplifies permission management by enabling controlled access for specific users to a defined set of resources using a single permission, rather than managing permissions individually for each resource. Resource pools are commonly employed alongside groups to grant permissions to members on a collection of machines and storage
Creating a resouce pool in the proxmox host server
- Login to Proxmox Web GUI using root user and its credential
- Choose “Datacenter” → Permissions → Pools
- Click Create
Below screenshot shows these steps.


Provide a name for the resource pool and a description in the comment section as below
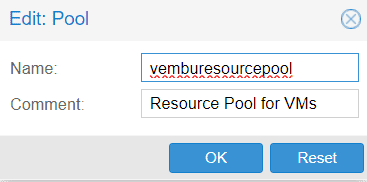
Click OK
Now a resouce pool is created, and can be used while creating a VM in the proxmox host server.
Creating a VM in the Proxmox host server
Login to Proxmox host server web GUI using root user and its credential.
Right click the proxmox host server, and select “Create VM” on the list. or click on the blue color “Create VM” on top of the main page. The below screenshot shows these two options.
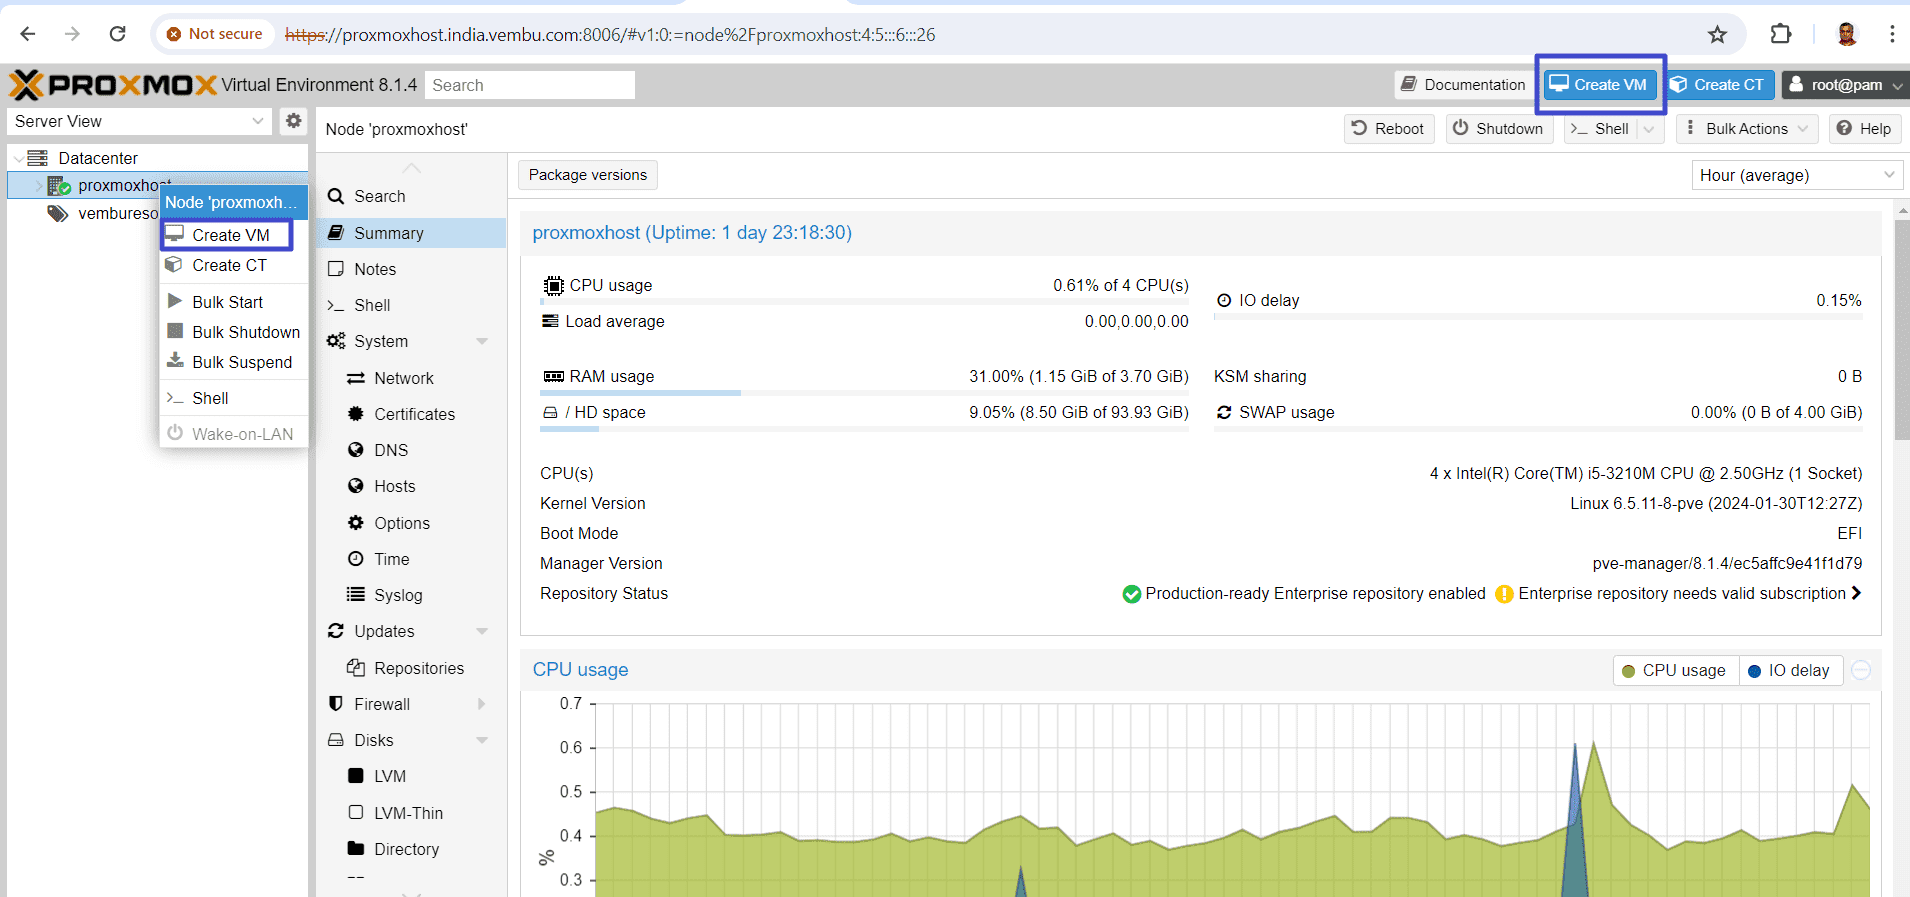
On clicking “Create VM” a new wizard opens up.
General
Under General tab, choose the proxmox host ( default if only one host available ), provide a name for the VM you created. Choose the resouce pool you created now.
After creating your VM, if you want it to start the VM automatically when the host system boots. you need to select the option Start at boot here.
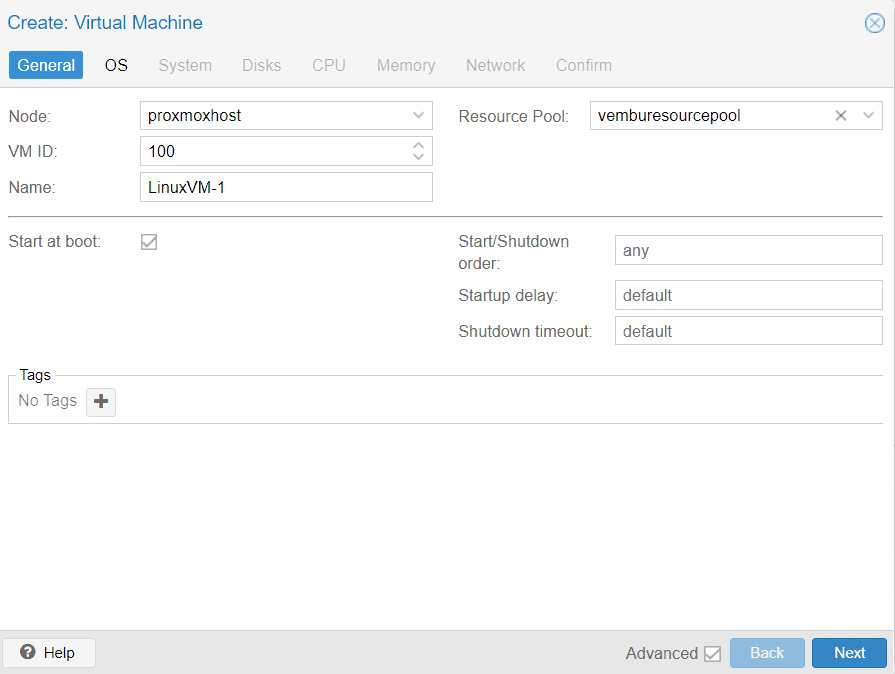
Start/Shutdown order – The number defines the start order priority. For example, set it
to 1 if you want the VM to be the first to be started. If you have multiple VMs you can set this order as per your choice.
Startup delay – Defines the interval between this VM start time and subsequent VMs start time. For example, set it to 100 if you want to wait 100 seconds before starting other VMs. This option will be useful in scenarios like, when you have a cluster of VMs and if one database VM needs to be ‘ON’ to access, for the applicaiton VMs to be ON and working fine.
Shutdown timeout – Defines the duration in seconds Proxmox VE should wait for the VM to be offline after issuing a shutdown command. By default this value is set to 180, which means that Proxmox VE will issue a shutdown request and wait 180 seconds for the machine to be offline. If the machine is still online after the timeout, it will be stopped forcefully. These are optional settings, if you don’t want to customize, let it be of default values.
Click Next to OS tab
OS
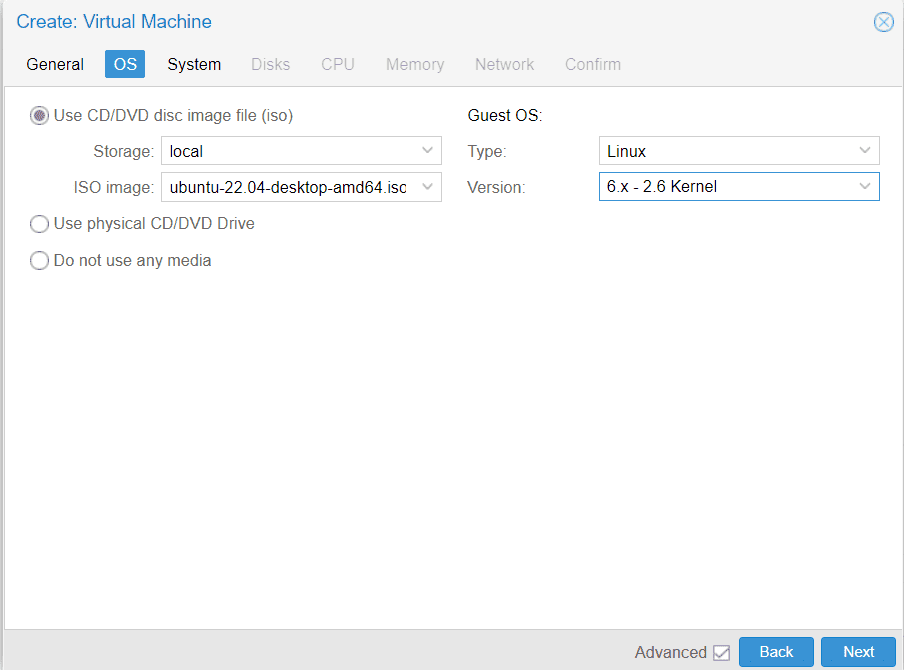
In this OS tab section, you will provide the details for the installation media. Either you can use the ISO image file or you can physically attach the CD/DVD media to the host server.
In case, if you select ISO media file, first you need to upload the ISO file into the local datastore and point to it as shown in the below image.
Also you need to provide the Guest OS information details such as OS type and its version. Currently the below OS are supported.
Linux, Microsoft Windows and Solaris. Under Microsoft Windows most of the versions are supported. From Windows XP to Windows 11and for server from 2000 to 2022 supported. Similarly for Linux, 2.4 kernel to 6.x kernel supported. Here we are choosing Linux 6.x kernel. The below screenshot shows this step
Click Next to System Tab.
System
Under System tab,
Graphic card – User can choose the various graphics card option ( depends on your dual/three/four monitors or VMware compatible ) or choose the default option.
Machine – Choose the machine type i440fx or q35 ( i440fx is the default ). This is nothing but defines the hardware layout of the VM’s virtual motherboard
BIOS : You can choose SeaBIOS or OVMF ( UEFI supported ). Default is SeaBIOS
SCSI Controller – Choose the SCSI controller hardware type from the various manufacturers list. Default is LSI model. Proxmox documentation says “It is highly recommended to use the VirtIO SCSI or VirtIO Block controller for performance reasons and because they are better maintained.” So here we have choosen Virtio SCSI controller type.

Click Next to Disks tab.
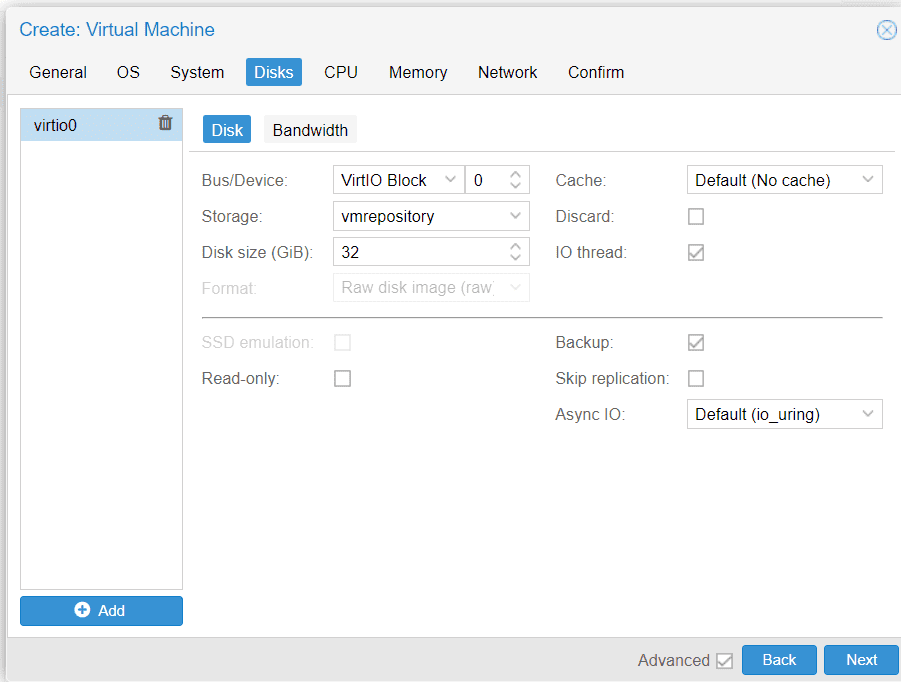
Disks
Bus/Device – The storage controller to be used. Since we use SCSI controller, select VirtIO Block for better performance.
Storage – Here choose the stroage we created ( as discussed in Part 3) where the VM related files are stored.
Disk size (GiB) – Choose the hard disk size for the VM in GiB. Default is 32 GiB, you can increase or decrease the size as per your need.
Cache – Setting the Cache mode of the hard drive will impact how the host system will notify the guest systems of block write completions. Default is “No cache”
Note : If you want the Proxmox VE backup manager to skip a disk when doing a backup of a VM, you can set the No backup option on that disk. Similarly If you want the Proxmox VE storage replication mechanism to skip a disk when starting a replication job, you can set the Skip replication option on that disk. Here we are selecting “Backup” option.
Below screenshot shows these settings
Click Next to CPU settings
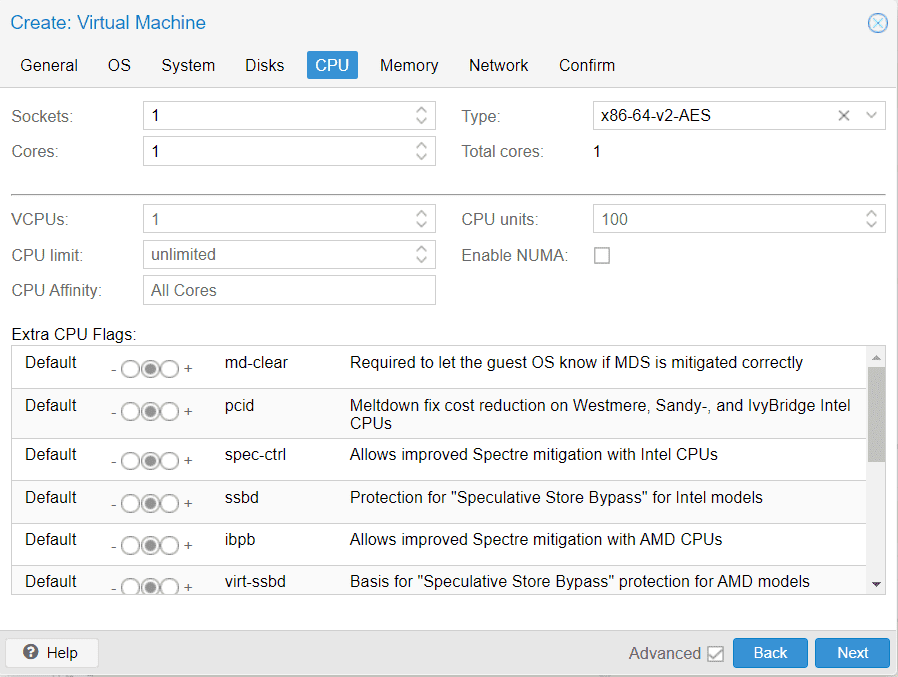
CPU:
Sockets & Cores – Here we will provide the details like Socket and Core for the CPU. Depends on the host server socket and core count, you can define this settings. By default 1 socket and 1 core is selected, and user can modify it depends on the VM workload.
Type – Here you can choose the CPU manufacturer type. You can choose any of the manfacturer series such as AMD, Intel and QEMU vendors.
You can also set extra CPU flags listed. Here we have selected all defaults. Below screenshot shows these settings.
Click Next to Memory
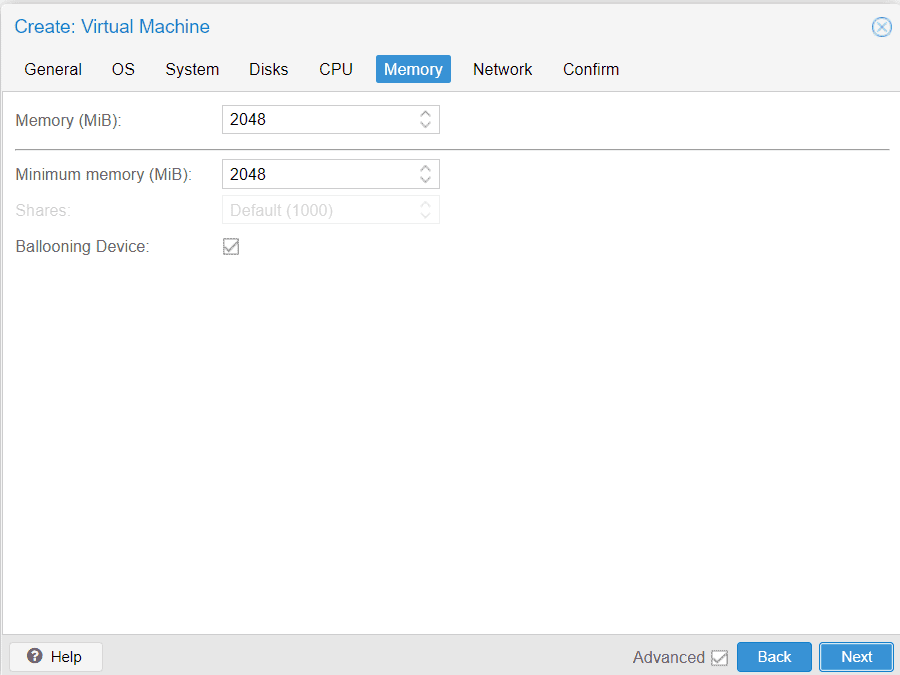
Memory
Memory (MiB) – Choose the RAM for the VM. Default is 2048 MiB. Users can increase or decrease the memory size depending on the VM usage.
Minimum memory – When setting the minimum memory lower than the memory allocated, Proxmox VE will make sure that the minimum amount you specified is always available to the VM. By default minimum memory is maintained same as the allocated memory. The below screenshot shows these settings.
Click Next to Network tab.
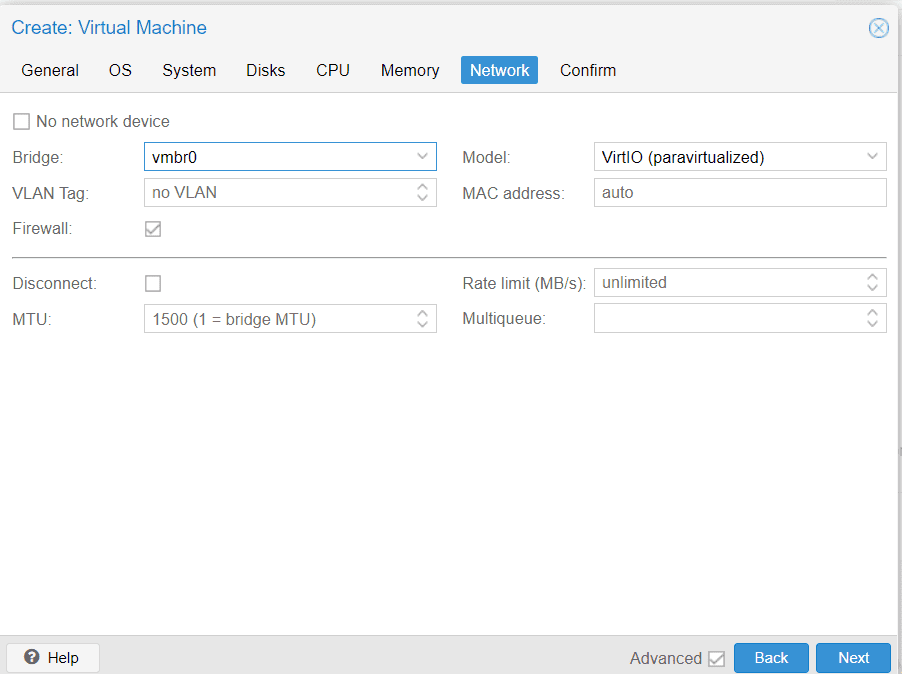
Network:
Proxmox VE utilizes a bridged networking model, allowing all VMs to share a single bridge as if virtual network cables from each guest were plugged into the same switch. To connect VMs to the outside world, bridges are linked to physical network cards and given a TCP/IP configuration. Here all are set to default
Click Next to Confirm
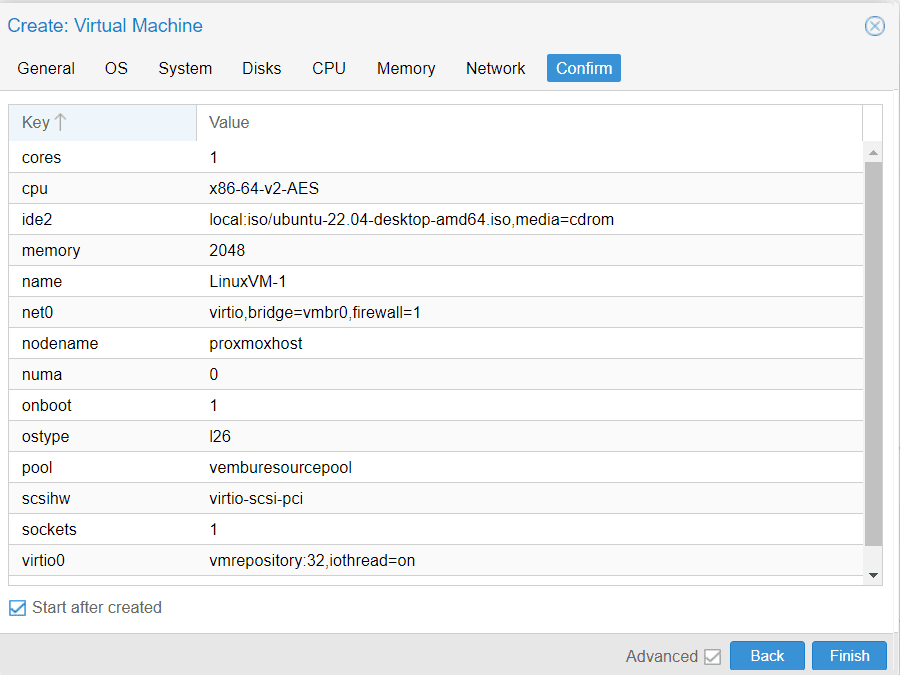
Confirm
Here you can view all the details you entered, upon confirmation by clicking Finish button, your VM creation process will start. Enable the option ” Start after created”, if you want to start the VM immediately after its creation.
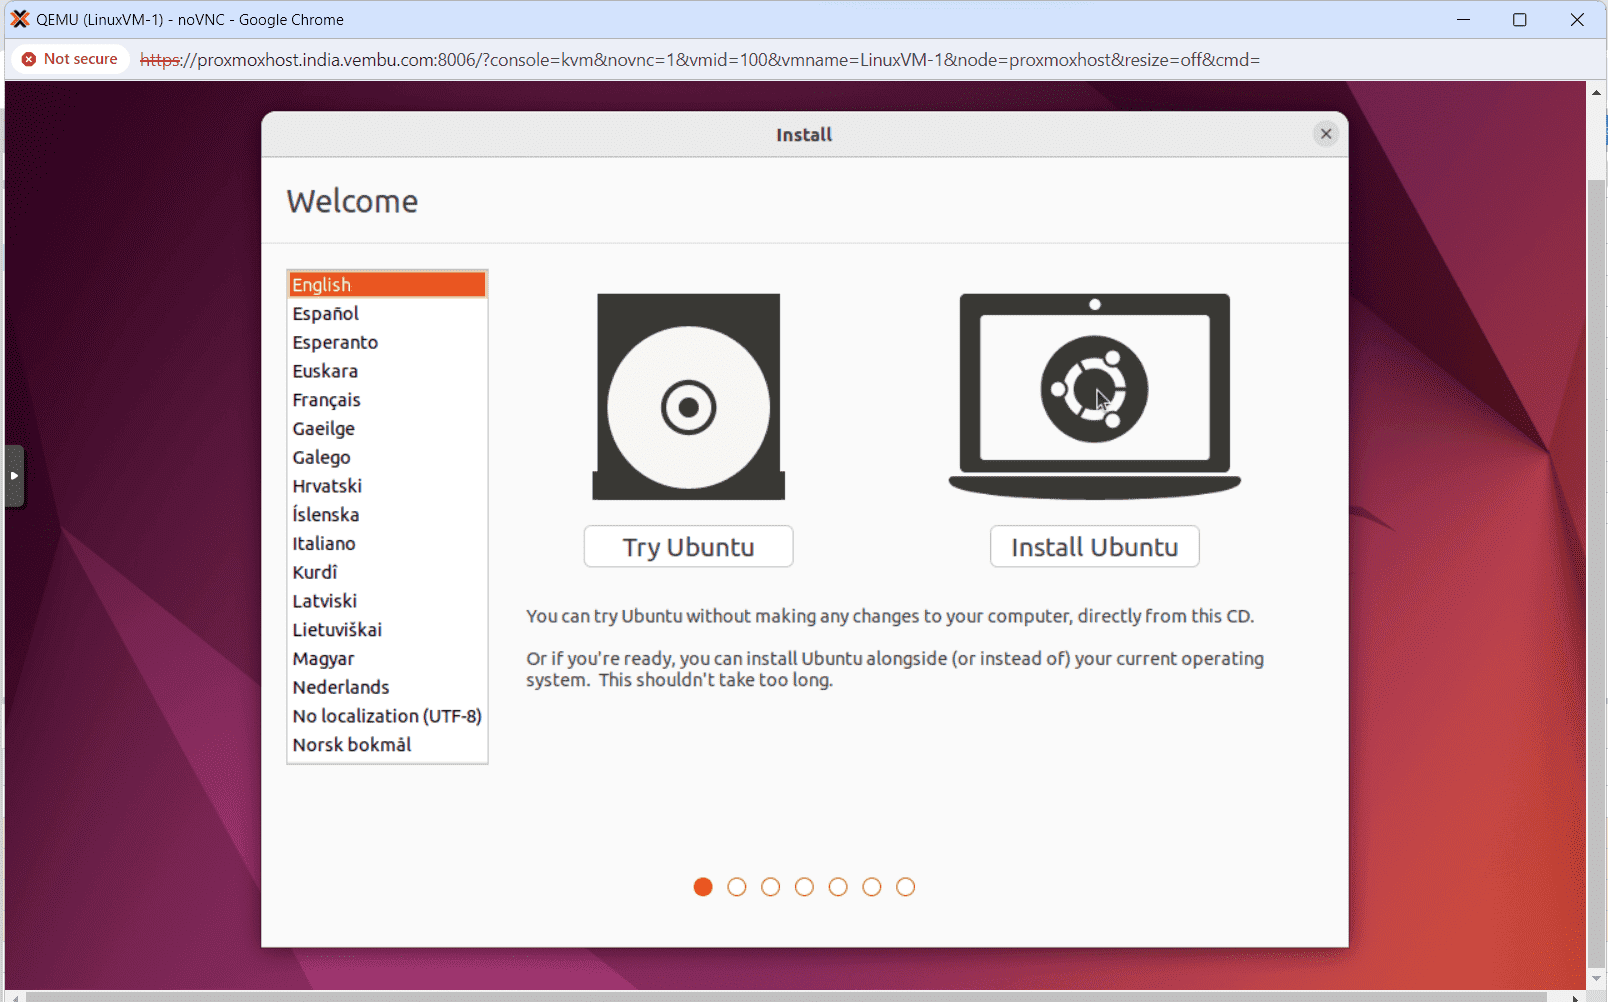
After clicking finish, a VM template will be created and it will start the Linux OS installation through the ISO file. On clicking the console of the VM, you will see the Ubuntu Linux OS installation wizard, as shown in the below image. Follow the installation instructions and install the ubuntu linux as a VM in the proxmox host server.
Conclusion
In conclusion, creating a resource pool and a virtual machine using Proxmox is a crucial step in effectively managing and optimizing the utilization of resources on a host server. This comprehensive guide has provided a step-by-step process, enabling you to harness the benefits of this powerful open-source virtualization platform. By leveraging Proxmox’s features, you can enhance the efficiency, flexibility, and scalability of your infrastructure, catering to the diverse needs of your organization.
Whether you are a beginner or an experienced user, this guide equips you with the knowledge to seamlessly establish a resource pool and a virtual machine, empowering you to take full control of your server environment.
Read More:
Proxmox Virtualization Series: Proxmox Disk Storage and File Systems – Part 3
Follow our Twitter and Facebook feeds for new releases, updates, insightful posts and more.