
Introduction
Welcome to the next blog post on our Proxmox Virtualization series, where we delve deep into the world of Proxmox host server disk storage and its file systems. Whether you’re a beginner or an experienced system administrator, understanding the intricacies of disk storage is crucial for efficient virtualization and server management. In this article, we will explore the fundamentals of Proxmox host server disk storage, shed light on the different file systems it supports, and guide you through the process of creating a new disk storage which will hold your VM created files.
In this blog, we are going to add a blank 1Tb disk to the Proxmox host, and create a file system on it to use as a storage repository to hold newly created VMs ( VMs and its files )
The Default disk layout of a Proxmox host server
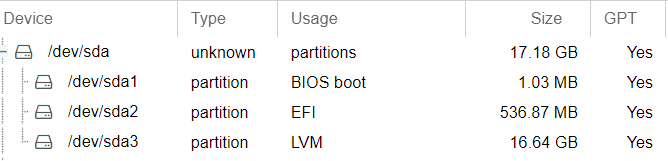
When you install a Proxmox server on the first hard disk ( /dev/sda in Linux terminology ), a default disk layout is created with 1 MB for BIOS Boot, 500 MB for EFI disk and a LVM disk with the rest of the storage capacity. Typically the default disk layout will be as in the below image for 17Gb disk.
Types of File systems and the tools supported in a Proxmox server
Generally, Proxmox supported storage file systems are classified into two types of file systems, namely file level storage and block level storage.

File level storage – File level based storage technologies allow access to a fully featured (POSIX) file system, typically it allows you to store content of any type in terms of file level.
Block level storage – Block storage is the technology that controls data storage and storage devices. If you simply take some data (like a file or a database entry), chop it into anywhere from a couple hundred to a few hundred thousand blocks and then store each block in a separate place, you have got a block storage system. These systems store the blocks on the underlying physical storage in a way that is most optimized for access and retrieval.
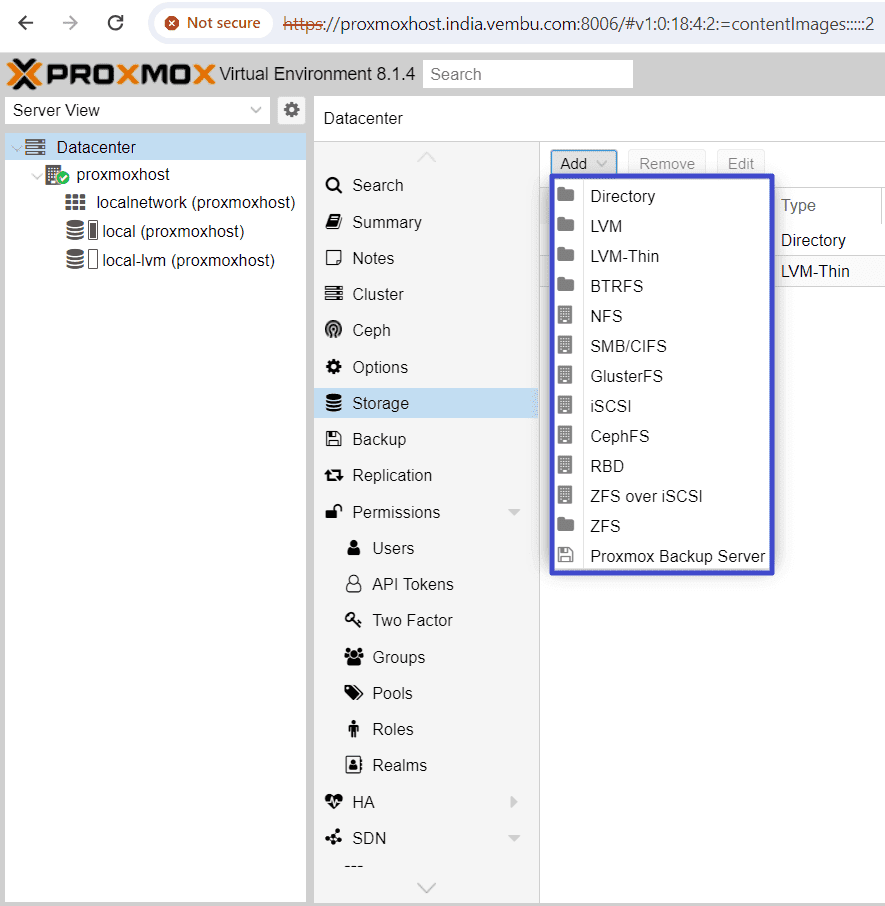
When you click on the Add button under Storage, you can view the supported file systems in Proxmox Host. The below screenshot shows this step, and the same file systems are briefly explained as per the order in the list.
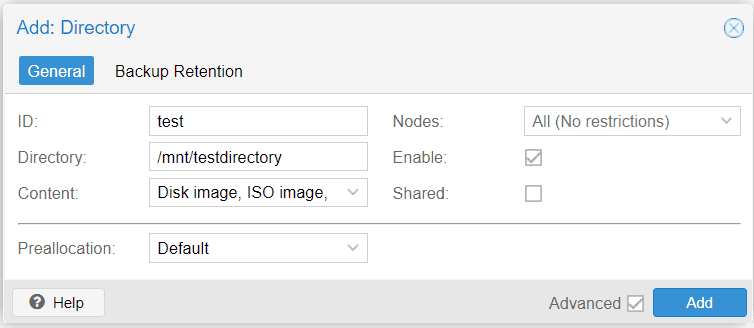
Directory – A directory is a file level storage, and so you can store any content type like virtual disk images, containers, templates, ISO images or backup files. Here you can create a directory by providing a unique name and the mount location. Thus a mounted location can be used as the storage location. The below screenshot shows an example of this type. The Directory location cannot be shared with other VMs and so you can’t take a snapshot.
LVM – LVM provides several advantages for managing hard drives on Linux systems. One key benefit is the ability to resize logical volumes easily. With LVM, you can dynamically adjust the size of logical volumes without the need to repartition the entire disk. This flexibility allows for efficient utilization of disk space and makes it easier to adapt to changing storage requirements. In addition, LVM supports volume group management, allowing you to aggregate multiple physical volumes into a single logical unit. This simplifies the management of storage resources by presenting a unified view of multiple disks or partitions. With LVM, you can seamlessly add or remove physical volumes from a volume group, expanding or shrinking storage capacity as needed.
Here you can create a volume group or use the existing volume group and provide a unqiue name for the LVM. An example of adding a new LVM shown below

LVM-Thin – This is nothing but thin provisioning. LVM normally allocates blocks when you create a volume. LVM thin pools instead allocate blocks when they are written, and hence the storage space is occupied only at the time of data write.
BTRFS – BTRFS is a modern copy on write file system natively supported by the Linux kernel, implementing features such as snapshots, built-in RAID and self healing via checksums for data and metadata. Starting with Proxmox VE 7.0, BTRFS is introduced as optional selection for the root file system only. Now BTRFS integration is currently a technology preview only.
NFS – Here you can use the NFS share directly as the storage, by providing the NFS server properties such as IP and mount Locaiton. So the backend can mount the NFS location automatically ( no need to add an entry in /etc/fstab ). NFS does not support snapshots.
CIFS – Similar to NFS, you can share CIFS (samba) share as the storage, by providing the CIFS server details such as IP, Username & Password and mount location.
GlusterFS – GlusterFS presents a scalable network file system, characterized by its modular design and ability to run on ordinary hardware. This innovative solution offers highly available enterprise storage at a fraction of the cost. Notably, GlusterFS can effortlessly scale to accommodate several petabytes of data and seamlessly serve thousands of clients.
You can configure a GlusterFS server as the storage by providing the details such as IP address of the server and volume name. You could also format a local disk with ZFS file system and use it as storage. The storage provides a file level interface, but no native snapshot/clone implementation
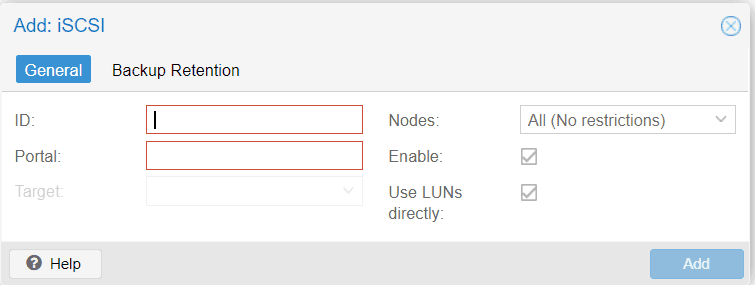
iSCSI – You can use any of the iSCSI target as the storage. iSCSI is a widely employed technology used to connect to storage servers.There are also open source iSCSI target solutions available. To use this backend, administrator should install iSCSI initiator package namely open-iscsi initiator in the proxmox host server. This is a debian package, and you need to install the package when you want to configure iSCSI storage.
You need to provide iSCSI target server IP (with port no optional) and a unique name.
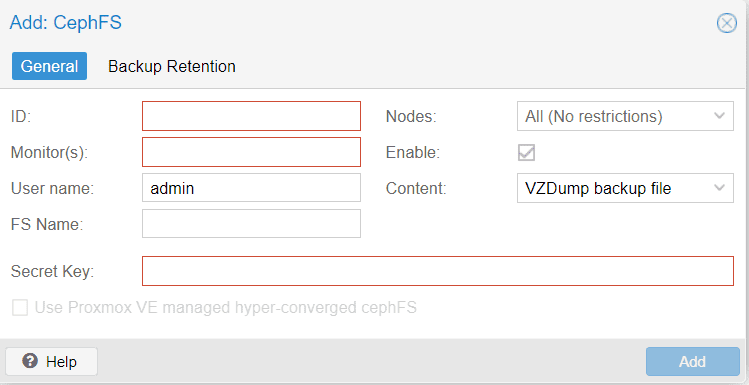
CephFS – CephFS implements a POSIX-compliant filesystem, using a Ceph storage cluster to store its data. As CephFS builds upon Ceph, it shares most of its properties. This includes redundancy, scalability, self-healing, and high availability. Here, the user needs to provide the fsname ( the name of the FS server) and its credentials.
RBD – RBD serves as a powerful tool for effortlessly handling rados block device (RBD) images, which find applications in the Linux rbd driver as well as the rbd storage driver for QEMU/KVM. These RBD images are essentially straightforward block devices, meticulously organized as stripes over objects and efficiently stored within a RADOS object store. RADOS block devices implement a feature rich block level storage and you get all the advantages like thin-provisioning, volume resize, full snapshot and clone capabilities, scalable upto exabyte level.

ZFS and ZFS over iSCSI
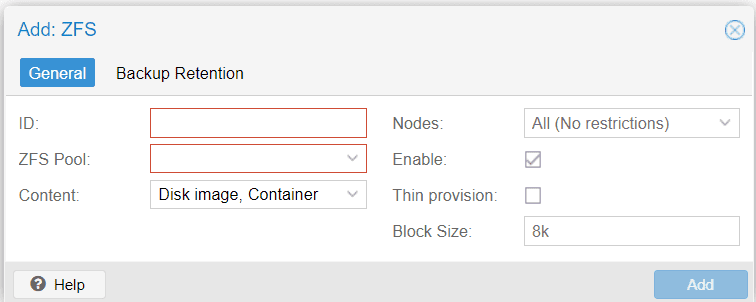
ZFS is probably the most advanced storage type regarding snapshot and cloning. The backend uses ZFS datasets for both VM images (format raw) and container data (format subvol). It is recommended to create an extra ZFS file system to store your VM images.
This ZFS over iSCSI backend accesses a remote machine having a ZFS pool as storage and an iSCSI target implementation via ssh. For each guest disk it creates a ZVOL and exports it as iSCSI LUN. This LUN is used by Proxmox VE for the guest disk.
Creating a ZFS disk storage to use for creating VMs in Proxmox host server.
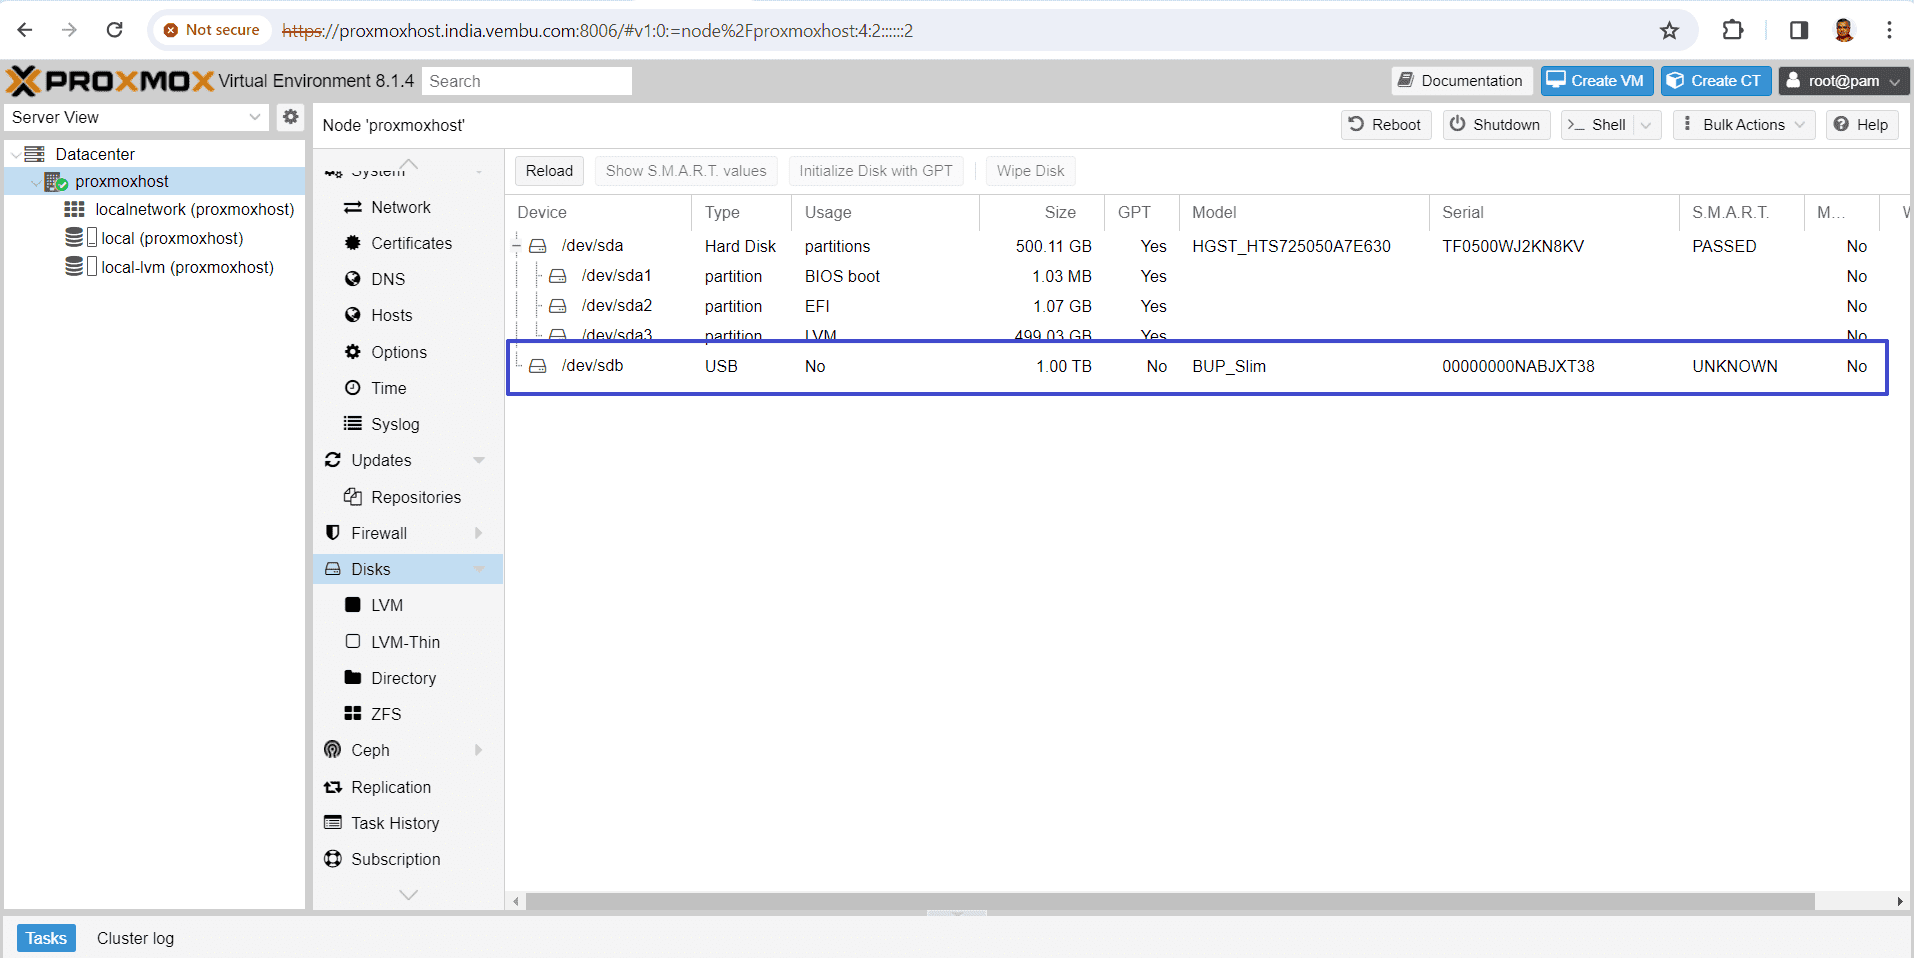
Now, we are going to add 1TB USB disk to the Proxmox host server, and create ZFS file system on it.
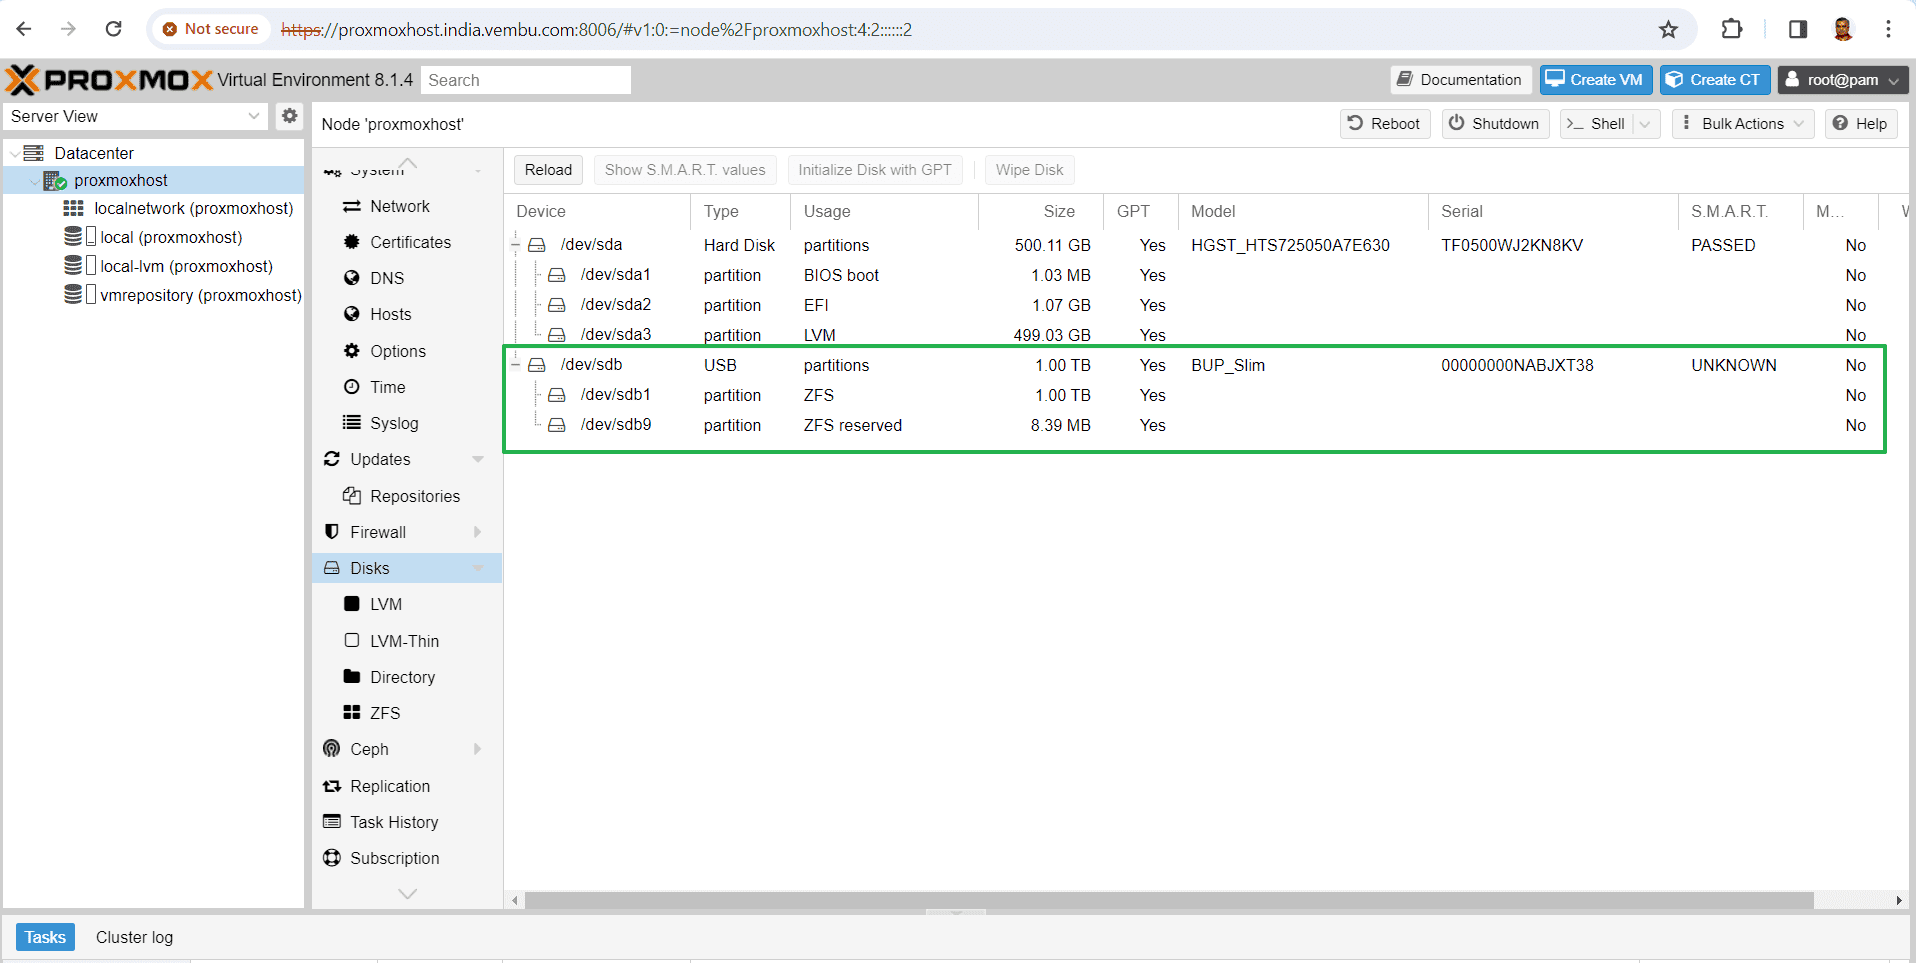
After adding a 1 TB disk to the host, you can see the second hard disk in the name of /dev/sdb. So you can see a new entry /dev/sdb in the disk layout. You can view the disk layout in the GUI as per the steps below.
Login to the Proxmox server GUI.
Choose the Proxmox host. Under the host choose disks. Here is the screenshot which shows the newly added disk entries in a blue box.
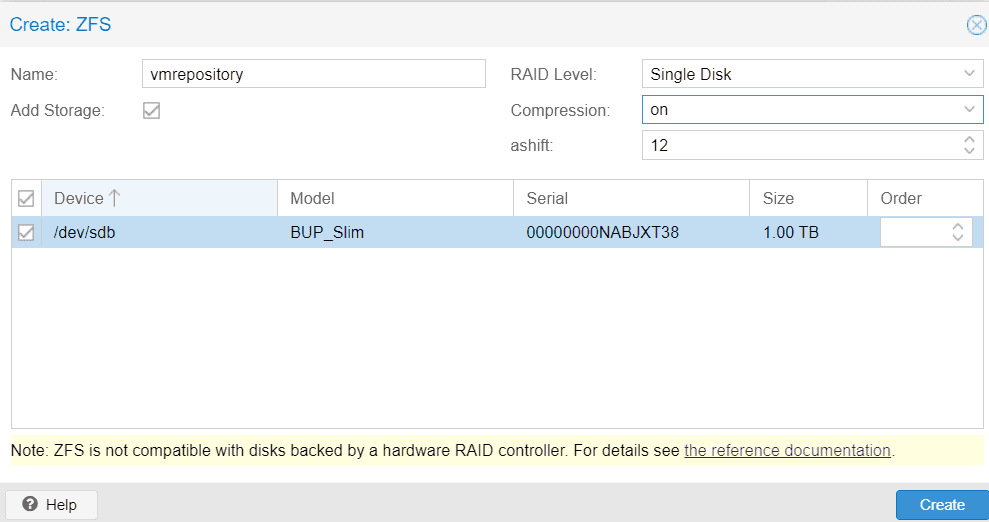
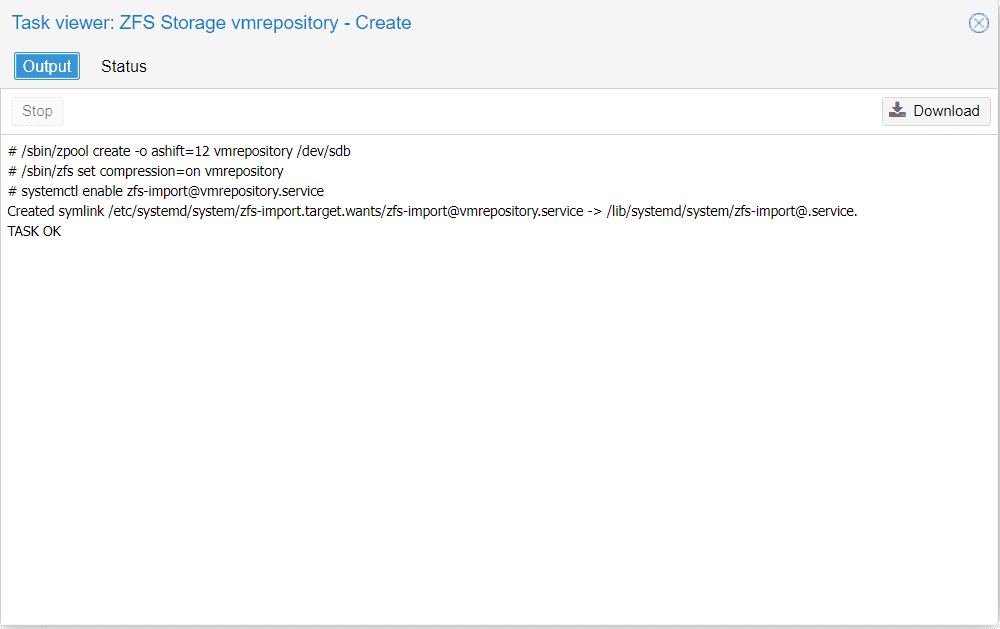
Choose ZFS under Disks, and click Create ZFS, and this will open a new box.
Provide a name for the ZFS file system, and choose the RAID level if you have multiple disks, or choose single disk. Set the compression ON (default value)
Choose the newly added empty disk and click Create
After few minutes, the file system creation commands are executed, and a new ZFS file system is created.
Now you can see a newly added disk layout as shown in the below image which shows the 1TB disk with ZFS, marked in green. ZFS offers significant advantages for organizations aiming to maximize enterprise features while working with limited-budget hardware. It enables the creation of high-performance systems through the utilization of SSD caching or even SSD-only setups. By doing so, ZFS eliminates the need for costly hardware RAID cards, as it effectively manages data with only moderate CPU and memory load. Moreover, ZFS simplifies system management, making it easier to maintain and operate the storage infrastructure efficiently. With these capabilities, ZFS provides an affordable yet powerful solution for enterprises seeking optimal performance without compromising their financial resources.
Conclusion
In conclusion, understanding Proxmox host server disk storage and its file systems is essential for effectively managing virtual machines and their supporting files. By grasping the concepts and functionalities of Proxmox, users can optimize their storage configurations and ensure seamless virtualization operations. Creating a disk storage specifically designed to accommodate VMs and their associated files plays a crucial role in maintaining the performance and reliability of the proxmox virtual environment.
With Proxmox’s flexible storage options and extensive features, users can tailor their disk storage solutions to meet their specific requirements. By harnessing the power of Proxmox, users can unlock the full potential of their virtualization infrastructure, resulting in improved efficiency, scalability, and overall productivity.
Follow our Twitter and Facebook feeds for new releases, updates, insightful posts and more.

Leave A Comment