
This blog will guide you through the deployment of Microsoft Windows Server 2016 core version. Paper converting machine company is constantly developing and applying new technology to improve design, maximize machine efficiency, reduce maintenance cost, and downtime. During the installation process, Windows Server 2016 comes in standard and datacenter editions and offers several types of installation for both editions: Desktop Experience (full GUI mode), Core (no GUI mode).We now will go through the installation and same configuration here.
After booting the server installation from an ISO file, you will have to choose the installation language and type. From the list of options, the one you need is a Windows Server 2016 Core Datacenter. We will choose the following options:
- Accept the license agreement
- Choose custom install
- Select the target hard disk drive on which we want to install Windows Server 2016 Core
- Proceed with the Installation
After the initial installation of Windows Server 2016 Core Datacenter, we will first be asked to change the Administrator password. Enter “Ok” here.


The main feature of Windows Server Core version is that, you can see the command line window after the boot session. It’s the main tool to configure and manage the Core server. To begin the server configuration, we need to enter the “Sconfig” command.

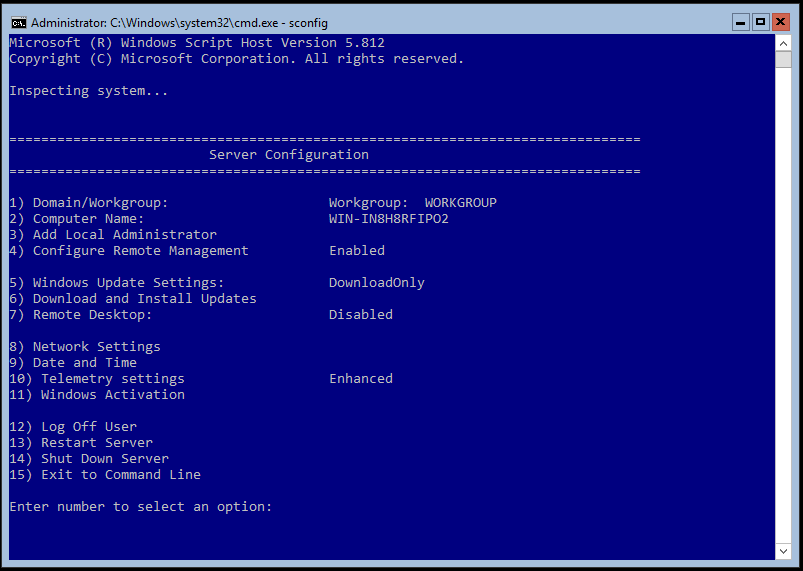
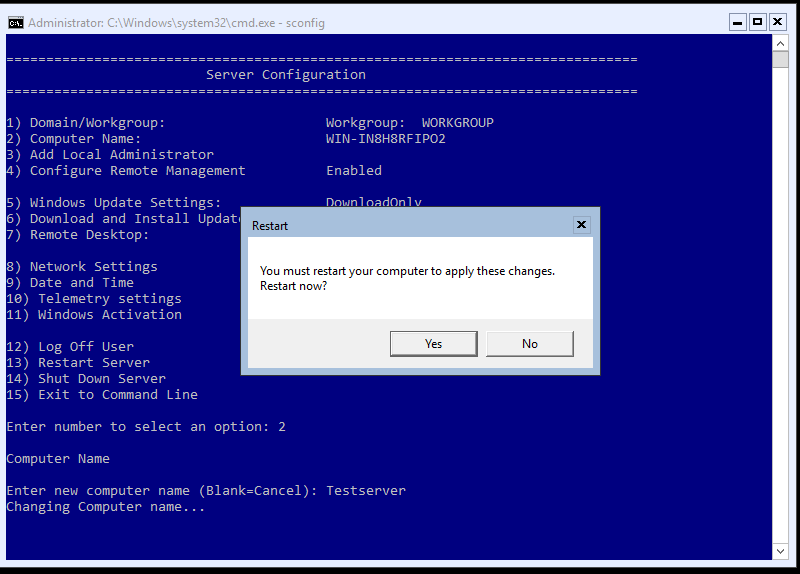
Change Computer name:
The current computer name will be displayed as the default server name.
- Type 2 and press ENTER to change the computer name
- Type a new computer name, and then press ENTER
- You are prompted with “the computer needs to be restarted in order to complete the operation successfully” Click OK
- You now will be prompted with “you must restart your computer to apply these changes. Restart now?” Click “Yes” to restart
Enabling Remote Desktop:
The current status of remote desktop settings is displayed in the default Server Configuration. You can configure the following Remote Desktop settings by accessing the Remote Desktop in option 7 of the main menu and following the instructions on screen.
- enable Remote Desktop for Clients running Remote Desktop with Network Level Authentication
- enable Remote Desktop for clients running any version of Remote Desktop

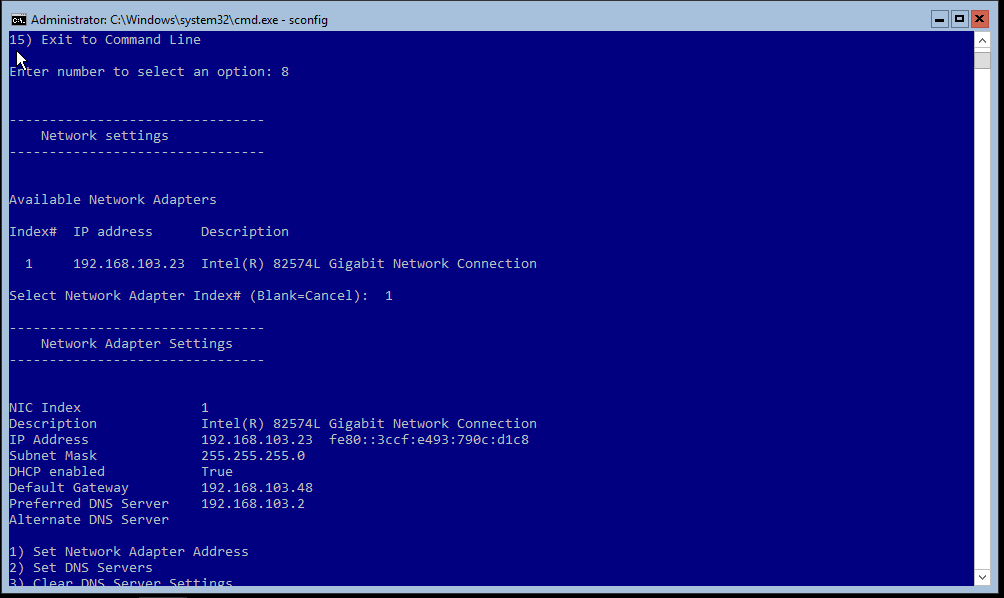
Network Settings:
You can configure the IP address to be assigned automatically by a DHCP server or you can assign a static IP address manually.
- Type 8 for configuring the settings and press ENTER
- You are presented with a list of available network adapters that are attached to the server
- Type 1, the index number of the adapter that you want to configure, and then press ENTER
- You are presented with the current configuration for the network adapter that you selected
- Type 1 now and press ENTER to configure the IP address for the selected network adapter
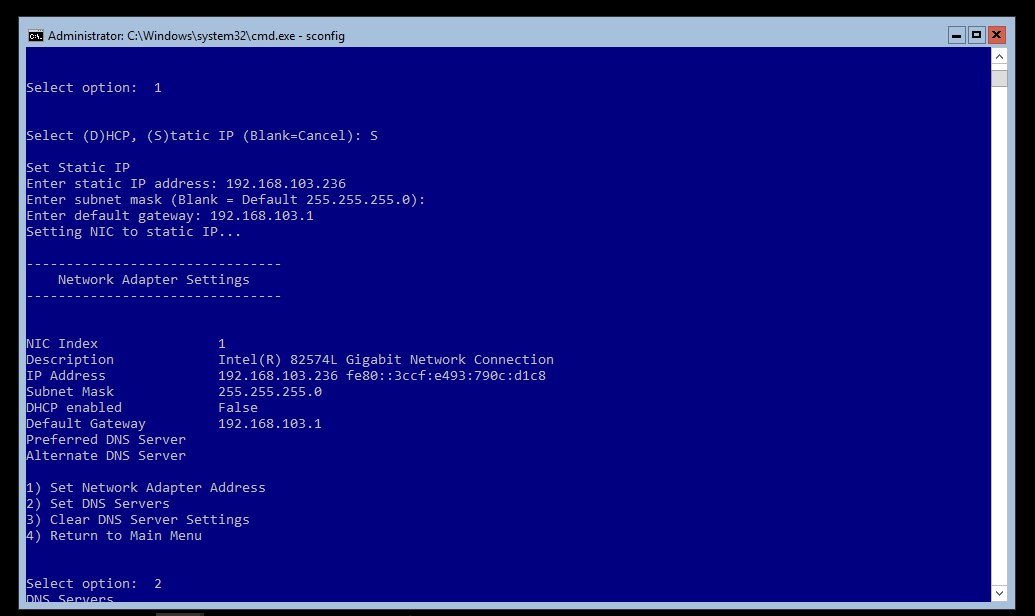
Select option: 1, Type S, and then press ENTER to manually assign a static IP to the network adapter.
- Type the static IP address, and then press ENTER
- Type the Subnet mask, and then press ENTER
- Type the default gateway, and then press ENTER
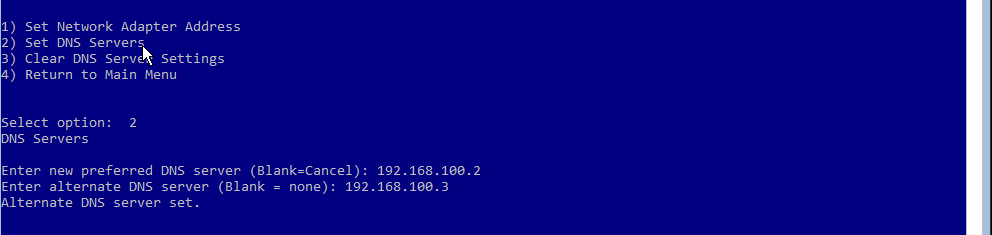
Select Option: 2 press ENTER.
Type the preferred DNS server, and then press ENTER.
You are prompted with “Preferred DNS server set.” Click OK.
Type the alternate DNS server, and then press ENTER.
You are prompted with “Alternate DNS Server set.” Click OK.
You can modify other settings at your discretion. Make sure the Windows license is activated.
ISCSI Shared Storage Connect:
You need to connect an ISCSI shared storage to your Windows Server 2016 Core server. First you’ve got to open the command prompt and open Microsoft ISCSI initiator by entering “iscsicpl” into the command line and connect your storage via the iscsi target storage server IP address.

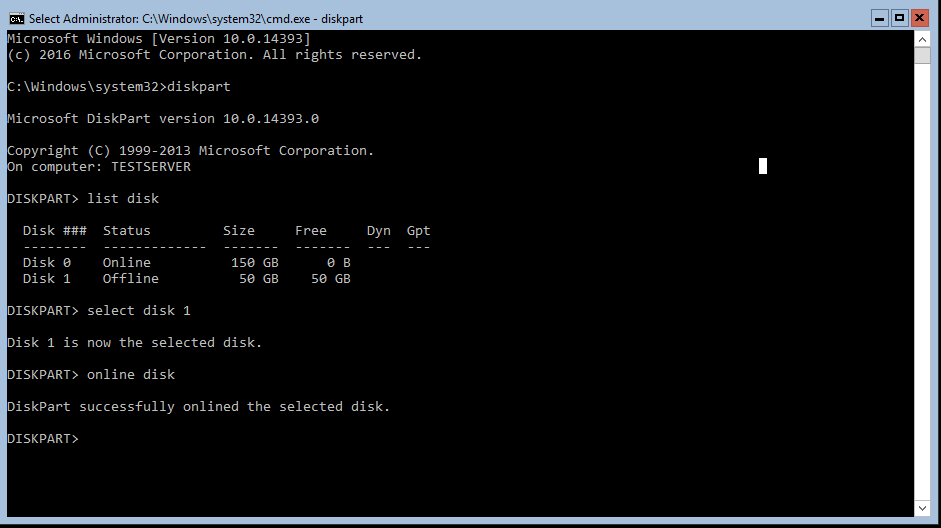
SCSI Storage Disk Format Steps:
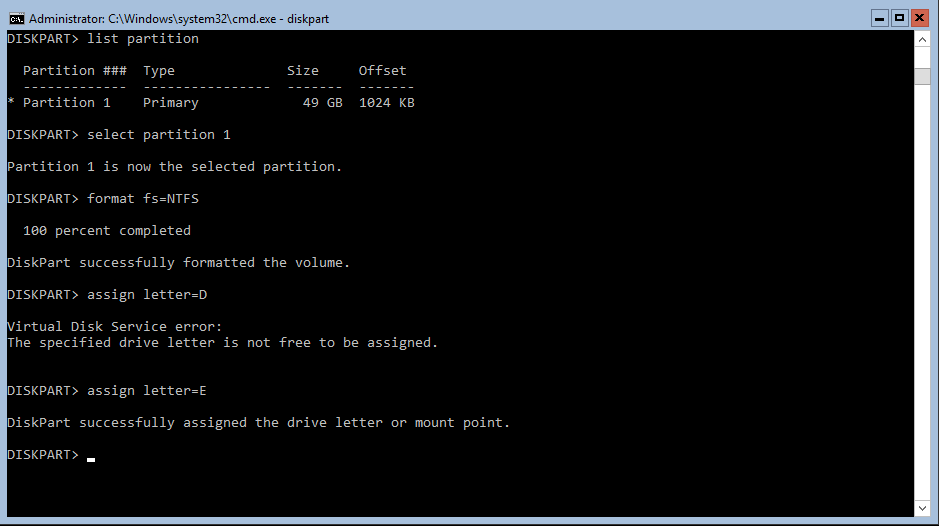
There are several commands to open the command prompt and type “diskpart” will come in handy in this case. Use “list disk” to see all the disks available on the server, “online disk” and “attributes disk clear” commands to bring the disk online and check if the partition is writable.
Next command is “list partition” to see available disk partitions under a server. Choose the partition you need with the “select partition 1”. The only few things left to do are to format the partition with “format fs=NTFS”, and assign a letter on the partition by entering “assign letter=E” command.
Conclusion:
As a result, you have the storage connected to your Windows Server 2016 Core.This blog will guide you through the deployment of Microsoft Windows Server 2016 Core version, covering the all steps from an initial installation and its configuration.