
In the last blog post in the VMware or Beginners, we discussed vSphere Trust Authority and learned about vSphere Trust Authority and how it works. In this second part, we will discuss installing vSphere Trust Authority.
How to install vSphere Trust Authority?
Before enabling the vSphere Trust Authority, we need to know the requirements.
In the physical ESXi hosts, you must install or have a supported TPM 2.0 chip, use EFI firmware, and enable Secure boot.
Check your ESXi host by running the following command: esxcli system settings encryption get


If you want to check all your ESXi hosts, use a PowerCli script, and you will get all the information about all the ESXi hosts in the Cluster.
Here is a script that will do that.
###################################
# Created by: Luciano Patrão #
# Date: 02-09-2023 #
# Check Cluster ESXi hosts TPM #
#################################### Connect to vCenter Server
$vTA = “vCenterUser”
$vTAPwd = “vCenterPassword”
$vCenter = “vCenter”try {
Connect-VIServer -Server $vCenter -User $vTA -Password $vTAPwd
Write-Host “##### vCenter is connected ###### ” -ForegroundColor DarkMagenta
} catch {
Write-Host “Failed to connect to vCenter: $_” -ForegroundColor Red
exit
}# Get all powered-on ESXi hosts and sort them
$esxHosts = Get-VMHost | Where-Object {$_.PowerState -eq “PoweredOn”} | Sort-Object# Loop through each ESXi host to get encryption settings
foreach ($esxHost in $esxHosts)
{
# Get the ESXCLI instance for the current host
$esxCli = Get-EsxCli -VMHost $esxHost -V2# Fetch and display the current encryption settings
$encryptionSettings = $esxCli.system.settings.encryption.get.Invoke()# Display the encryption settings
Write-Host
Write-Host “##### Getting TPM settings for ESXi host $esxHost ###### ” -ForegroundColor DarkYellowswitch ($encryptionSettings.Mode)
{
“None”
{ Write-Host
Write-Host “—-> TPM is disabled for the ESXi host ” -ForegroundColor Red -NoNewline
Write-Host “$esxHost ” -ForegroundColor DarkMagenta -NoNewline
Write-Host ” <----" -NoNewline -ForegroundColor Red Write-Host $encryptionSettings } "TPM" { Write-Host Write-Host "----> TMP is enabled on the ESXi host ” -NoNewline -ForegroundColor Green
Write-Host “$esxHost” -ForegroundColor DarkMagenta -NoNewline
Write-Host ” <----" -NoNewline -ForegroundColor Green Write-Host $encryptionSettings } } } # Disconnect from all vCenter Servers try { Disconnect-VIServer -Server $vCenter -Force -Confirm:$false Write-Host Write-Host "##### vCenter is diconnected ###### " -ForegroundColor DarkMagenta } catch { Write-Host Write-Host "Failed to disconnect to vCenter: $_" -ForegroundColor Red exit }
The above script gives you an output like this:

Since the server doesn’t have the Secure boot enabled, we need to reboot the server and change the Bios settings.
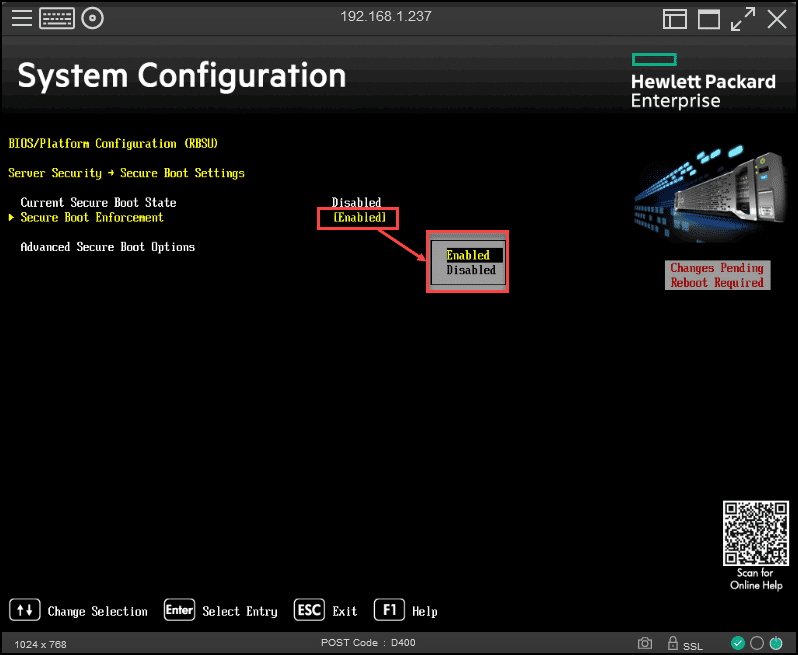
If any of the settings are disabled or not present, you need to enable them in your physical server BIOS. The following examples are from an ESXi server HPE DL360-G9.
The next image is to enable the Secure Safe Boot.
The next is to enable the check if the TMP chip exists in the server and if it is enabled.
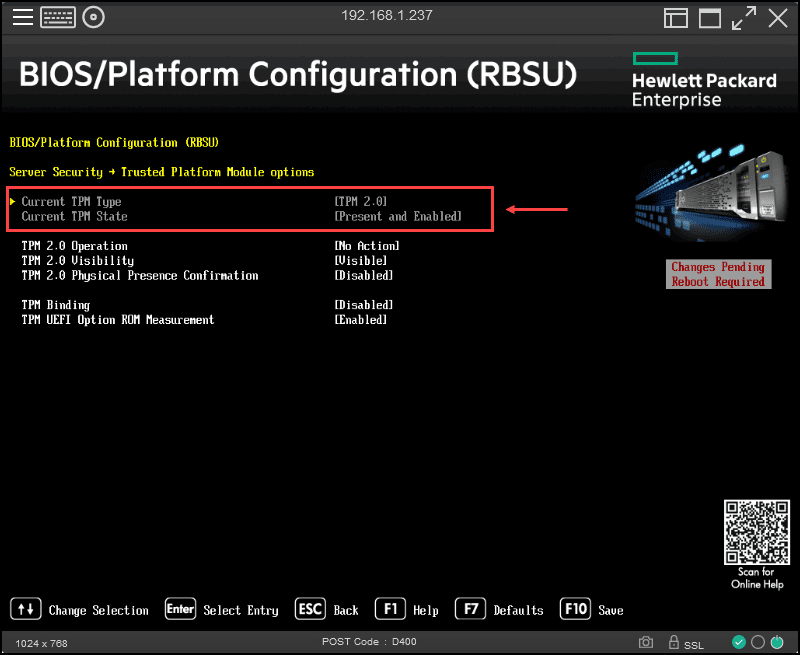
Important note: If you want to add a TPM 2.0 chip to an ESXi host that the vCenter Server manages, you need to disconnect it from the vCenter and reconnect.
Note: Since the following changes and settings need physical hardware, we cannot perform them in our vSphere nested environment. I will need to use my physical homelab for most of the tasks.
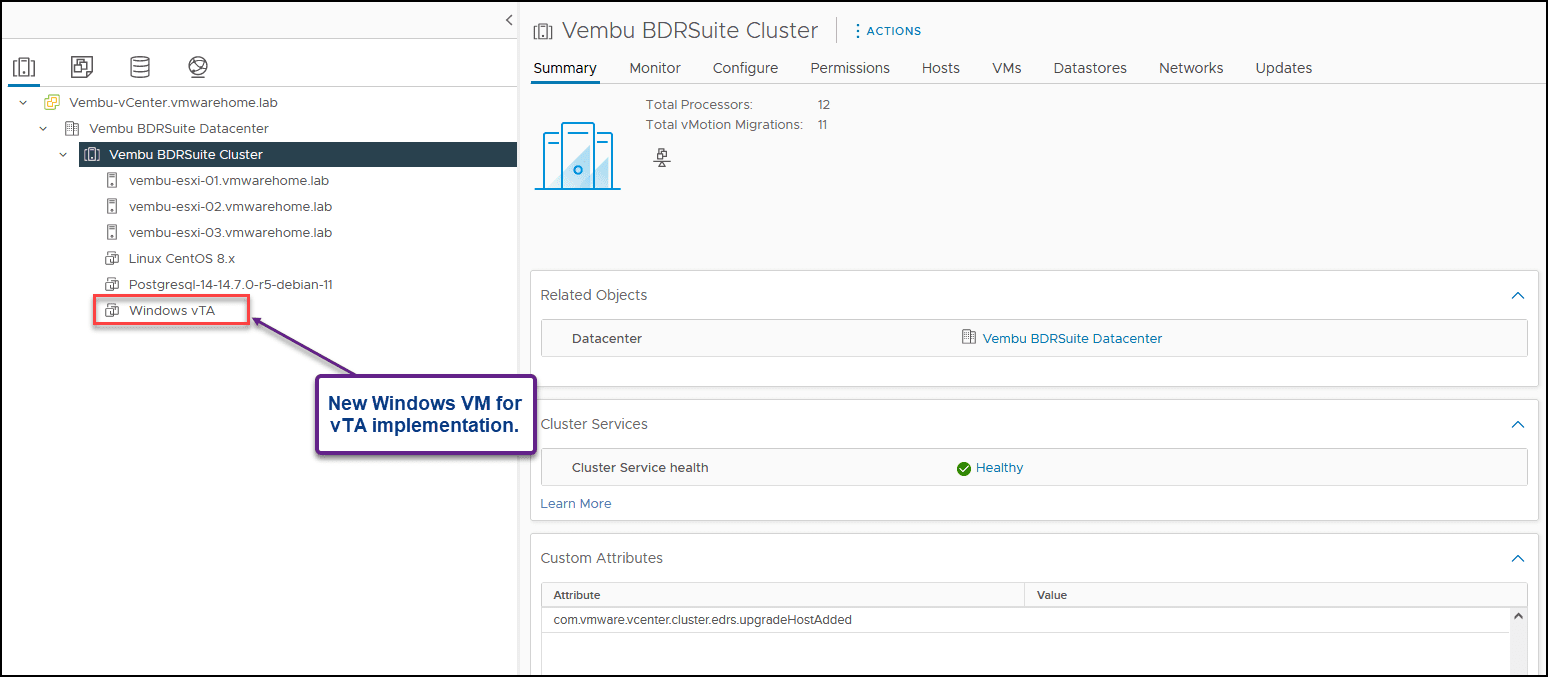
First, we must create or use an existing workstation to set up and install the necessary software.
For our case, I created a new Windows Server VM to use as our vTA workstation.
Note: Since we have learned how to create a VM and install a Windows Operating System, it is unnecessary to explain it again.
Next, we will install PowerCLI 12.1.0, or the latest version, in Powershell with the command Install-Module VMware.PowerCLI -Scope CurrentUser.
Run the command Get-Module -ListAvailable VMware* to check if PowerCli modules are installed.
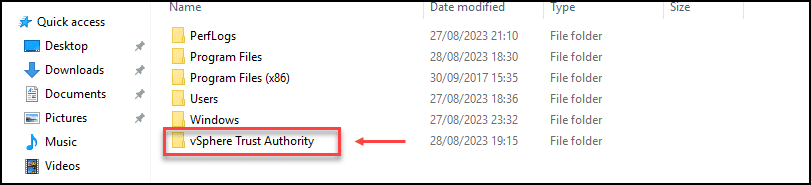
Next, make a folder on your workstation where you can save the files you send from the Trust Authority.
For this case, I created a folder called vSphere Trust Authority.
After we set up our vTA workstation, we will enable vSphere Trust Authority in vCenter.
You must add a user to the vSphere TrustedAdmins group to turn on the vSphere Trust Authority. This user becomes the administrator of the Trust Authority. Most tasks for setting up vSphere Trust Authority are done with the help of the Trust Authority administrator.
As a best practice, the Trust Authority administrator should not be the same user as the vCenter Server administrator. Having a separate user will make your environment safer. You must turn on a Trust Authority administrator for both the Trusted Cluster and the Trusted Authority Cluster.
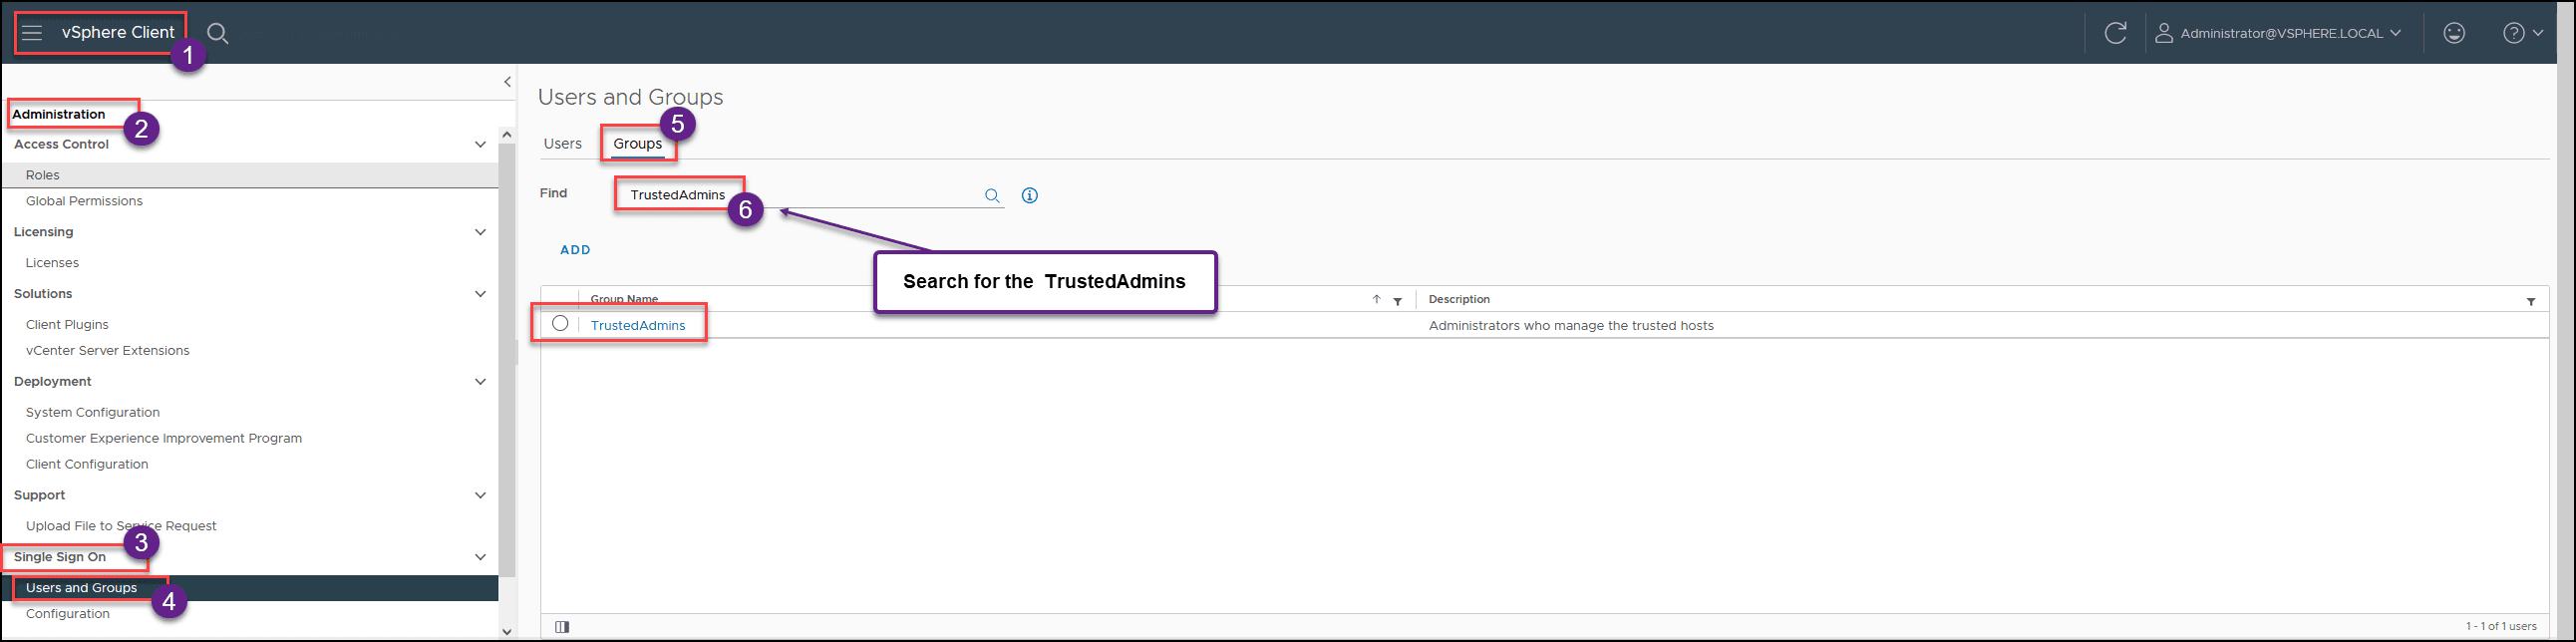
Login to vCenter, then go to Administration, Single Sign On tab, and select User and Groups.
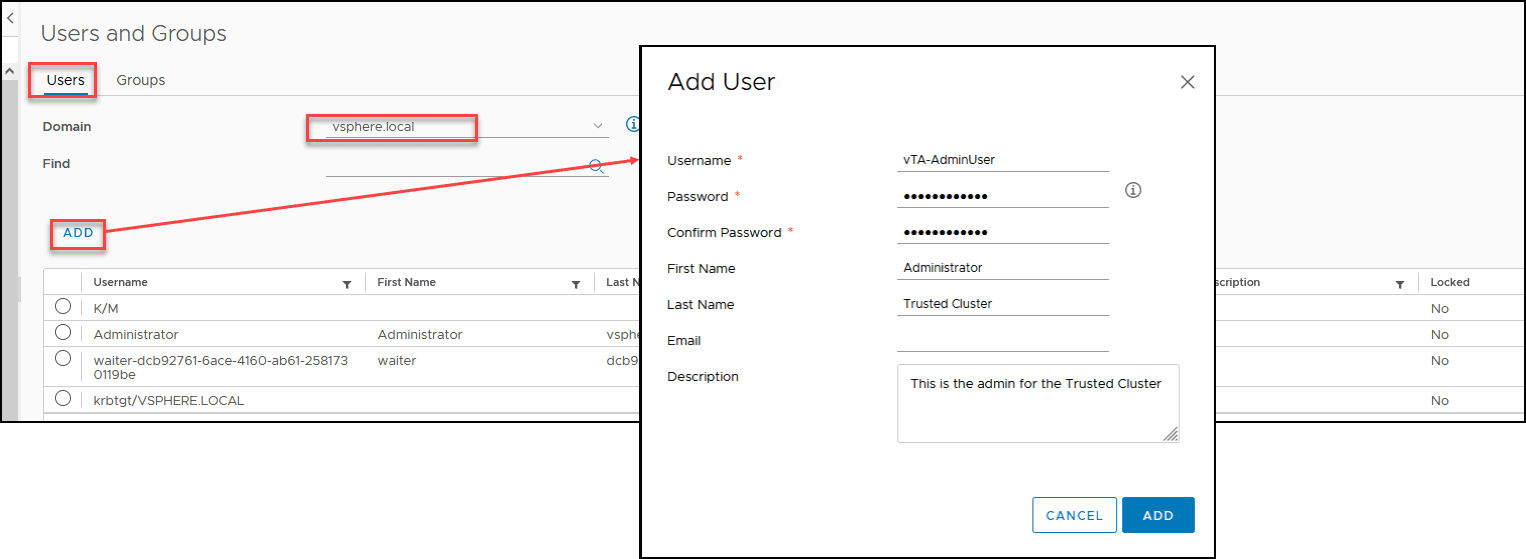
First, we will create a new user for Trust Authority Cluster Administrator. In the User and Groups, select Users, click Add, and create your user. For our case, we created one called vTA-AdminUser and one vTA-AdminCluster.
Note: Do not forget to select the proper vCenter local domain. If is the default, it is vsphere.local. Select your customized local domain if you have created a different domain when installing your vCenter.
Then, in the second step, select the Groups option. We need to find the group TrustedAdmins you try to find in the group list, or just filter with the group name, and it will find the TrustedAdmins group, then click on the group.
Add the new user you created in the previous step inside the group.
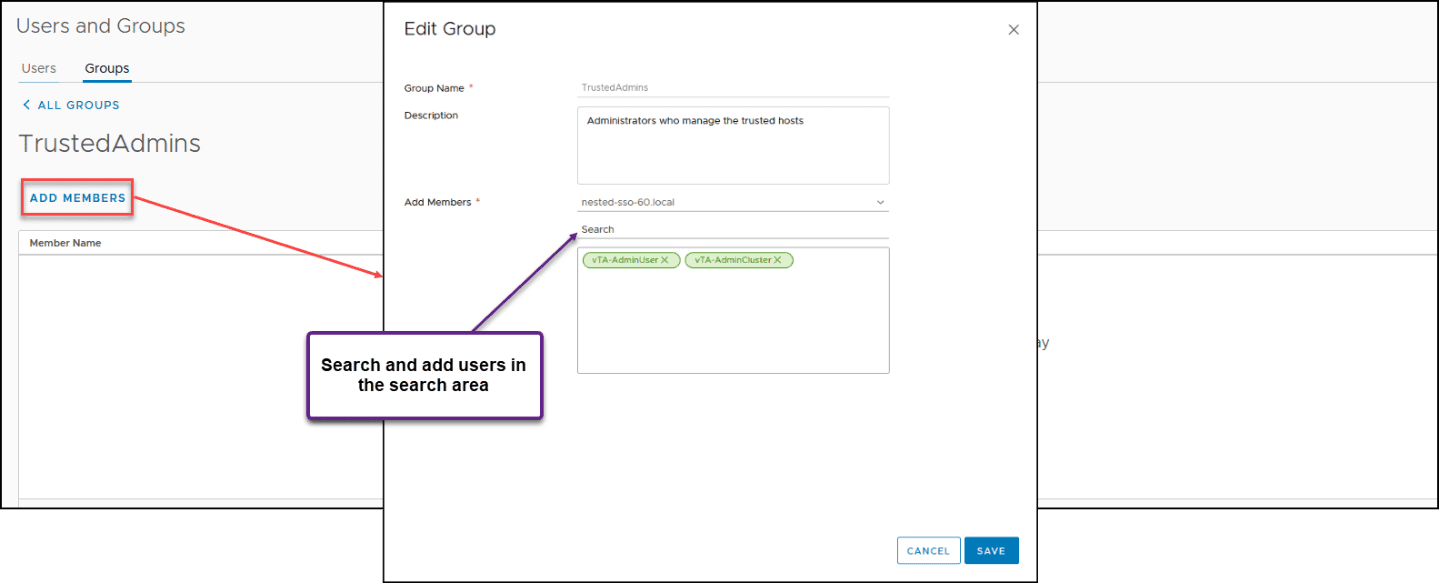
Do steps 1 and 2 for the second user we need for the Trusted Cluster Administrator.
Now, we have the two vTA administrators added to the TrustedAdmins group.

After we have created our Groups and users set, we now need to enable Trust Authority State in the vSphere Trust Authority Cluster.
Let’s go back to our Windows Workstation and do some in the vCenter using PowerCLI commands.
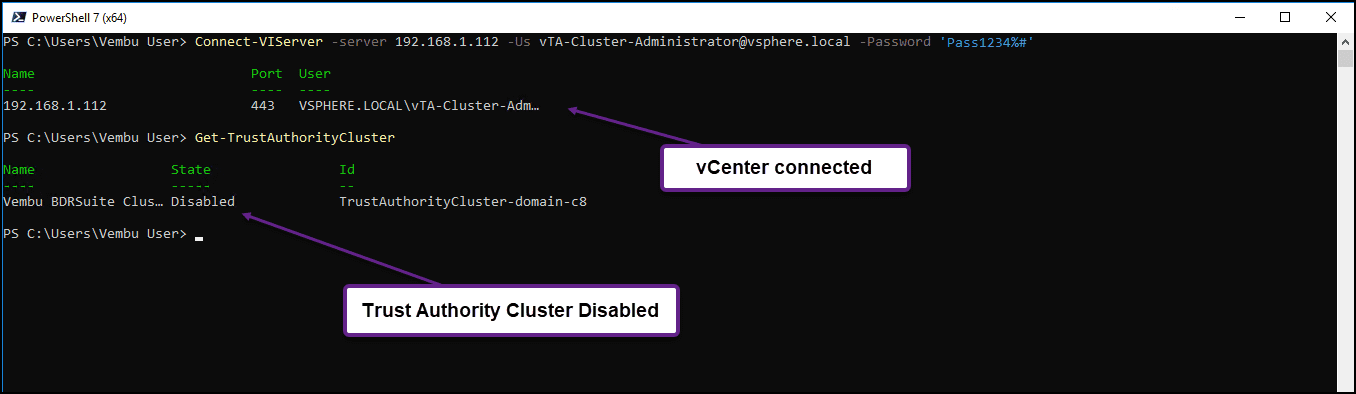
Start by connecting your vCenter using the Authority Administrator user that we created before with the following command: Connect-VIServer -server TrustAuthorityCluster_VC_ip_address -User trust_admin_user -Password ‘password’
In our case is: Connect-VIServer -server 192.168.1.112 -Us vTA-AdminCluster@vsphere.local -Password ‘Pass1234%#’
Note: If you get the error “The SSL connection could not be established, see inner exception”, run the command Set-PowerCLIConfiguration -InvalidCertificateAction:Ignore to bypass this error and try again to connect to your vCenter.
After you have a successful connection, run the following command to check the vTA Cluster state(should be disabled): Get-TrustAuthorityCluster
As we can see, the Trust Authority Cluster is disabled.
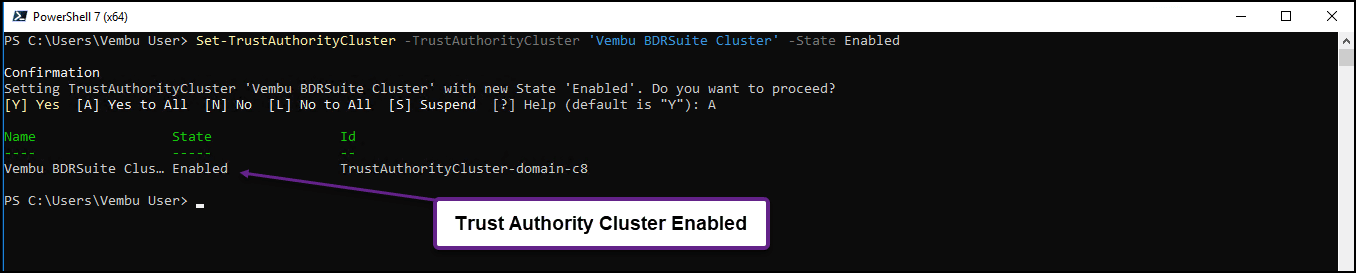
Now we need to enable with the command: Set-TrustAuthorityCluster -TrustAuthorityCluster ‘ClusterName’ -State Enabled
For our Cluster is: Set-TrustAuthorityCluster -TrustAuthorityCluster ‘Vembu BDRSuite Cluster’ -State Enabled
Now we have a Trust Authority Cluster.
In the first article discussing vTA, I emphasize the importance of building trust within the vSphere Trust Authority Cluster. To achieve this, it is necessary to gather details regarding the ESXi hosts and vCenter Server of the Trusted Cluster. These details are then exported as files, which can be securely transported and kept confidential when importing them into the Trust Authority Cluster.
Our next step is to collect information about ESXi Hosts and vCenter Server to Be Trusted.
For that, we need to create the following for the ESXi host:
- TPM CA certificate file (.zip file extension)
- ESXi image file (.tgz file extension)
- vCenter Server principal file (.json file extension)
Note: The next steps will be done in our physical homelab and not in the nested environment.
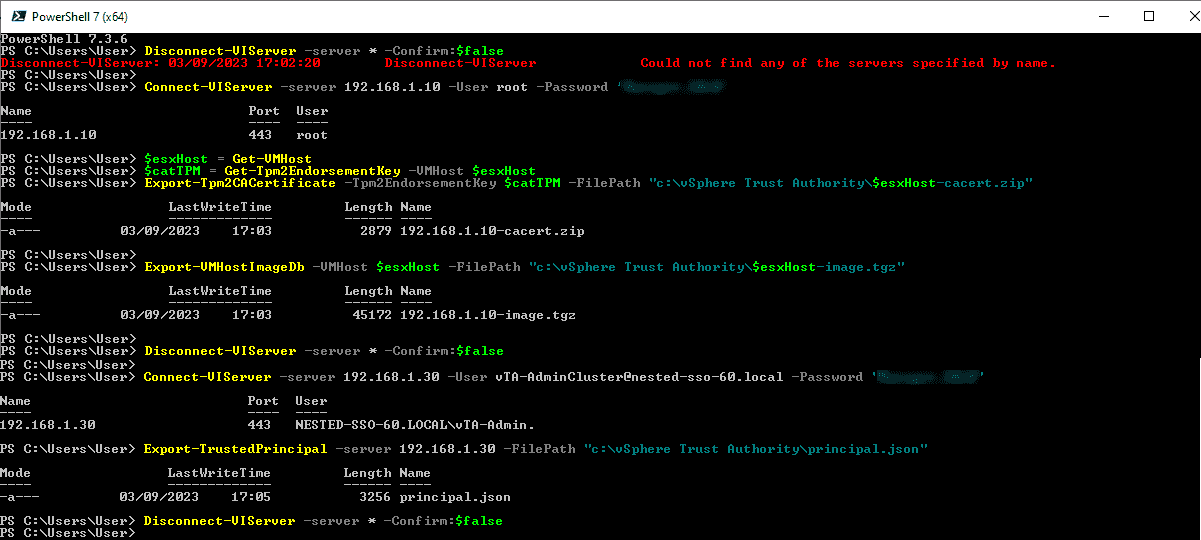
First, disconnect any connection you may have to a vCenter or a ESXi host: Disconnect-VIServer -server * -Confirm:$false
Then, using root user, connect to the first ESXi host of your Trust Authority Cluster: Connect-VIServer -server “ESXihostIPNAME” -User root -Password ‘ Pass1234%#‘
Then you need to export the TPM certificate and ESXi host image with the following commands:
Note: Add your path before the name of the files. If you remember, we created a folder in our vTA workstation called vSphere Trust Authority.
- $esxHost = Get-VMHost
- $catTPM = Get-Tpm2EndorsementKey -VMHost $esxHost
- Export-Tpm2CACertificate -Tpm2EndorsementKey $catTPM -FilePath ” c:\vSphere Trust Authority\$esxHost-cacert.zip”
Export-VMHostImageDb -VMHost $vmhost -FilePath “c:\vSphere Trust Authority\$esxHost-image.tgz”
Repeat for each ESXi version in the cluster that you want to trust. Use a different file name for each version so that you do not overwrite a previously exported file, or use the $esxHost to create a unique file for each export.
Finally, we need to export the vCenter Server principal file from our vCenter.
Connect-VIServer -server 192.168.1.30 -User vTA-AdminCluster@nested-sso-60.local -Password “vCenterPassword”
Export-TrustedPrincipal -server 192.168.1.30 -FilePath “”c:\vSphere Trust Authority\principal.json”
The next image shows the steps and the result of our exports.
And with the export of ESXi and vCenter files, we finish this second part about vSphere Trust Authority.
In the third part, we will import the trusted host information from the files we exported in this article, and we will also discuss how to create the Key Providers.
Read More:
VMware for Beginners – What is vSphere Trust Authority: Part 17(a)
Follow our Twitter and Facebook feeds for new releases, updates, insightful posts and more.