
Introduction of a Series of Blog Posts on the Future of IT Automation
Welcome to our 2nd blog post about GitHub Copilot and Azure, where we’re diving into the world of AI-powered coding with GitHub Copilot! If you’re eager to enhance your coding experience in Visual Studio Code (VSCode), you’re in the right place. GitHub Copilot is not just another tool; it’s like having a pair of extra hands ready to assist you in your coding journey. In this post, we’ll guide you through every step to get GitHub Copilot up and running in VSCode. Whether creating a new PowerShell script or refining (or documenting!) existing code, Copilot is here to streamline your workflow. Let’s embark on this exciting journey together!
Setting Up GitHub Copilot in VSCode
Before we dive into the coding magic, let’s get GitHub Copilot up and running in Visual Studio Code. Here’s a detailed step-by-step guide on how to set it up:
Step 1: Install Visual Studio Code
First, if you haven’t already installed Visual Studio Code, go to the official website to download and install the latest version. This will ensure you get the best experience possible with Copilot.
Step 2: Install GitHub Copilot
Now, let’s add Copilot to your VSCode setup:
- Open VSCode and navigate to the Extensions view by clicking the square icon on the left sidebar or pressing Ctrl+Shift+X
- Search for “GitHub Copilot” in the Extensions view
- Hit the “Install” button next to GitHub Copilot
- Post-installation, sign in with your GitHub account. This is a key step for Copilot to offer personalized suggestions based on your coding style and repositories


Step 3: Activate GitHub Copilot
After installation, you’ll need to activate GitHub Copilot using your GitHub account. Follow the on-screen prompts to complete the activation process.
GitHub Copilot will now be active and ready to assist you in your coding endeavors.
GitHub Copilot supports various programming languages so that you can use it for a wide range of projects.
Creating Your First PowerShell Script with Copilot
Now that GitHub Copilot is up and running, let’s put it to use by creating a PowerShell script. Here’s how to do it while adhering to best practices:
Step 1: Create a PowerShell Script Using Copilot
Let’s create a simple PowerShell script that uses GitHub Copilot to assist us. Open Visual Studio Code and create a new file with a .ps1 extension so that Visual Studio Code knows that we are going to create a PowerShell script. You immediately see the following :

Now, for this example, we are going to delete a storage account. So let’s ask GitHub Copilot :
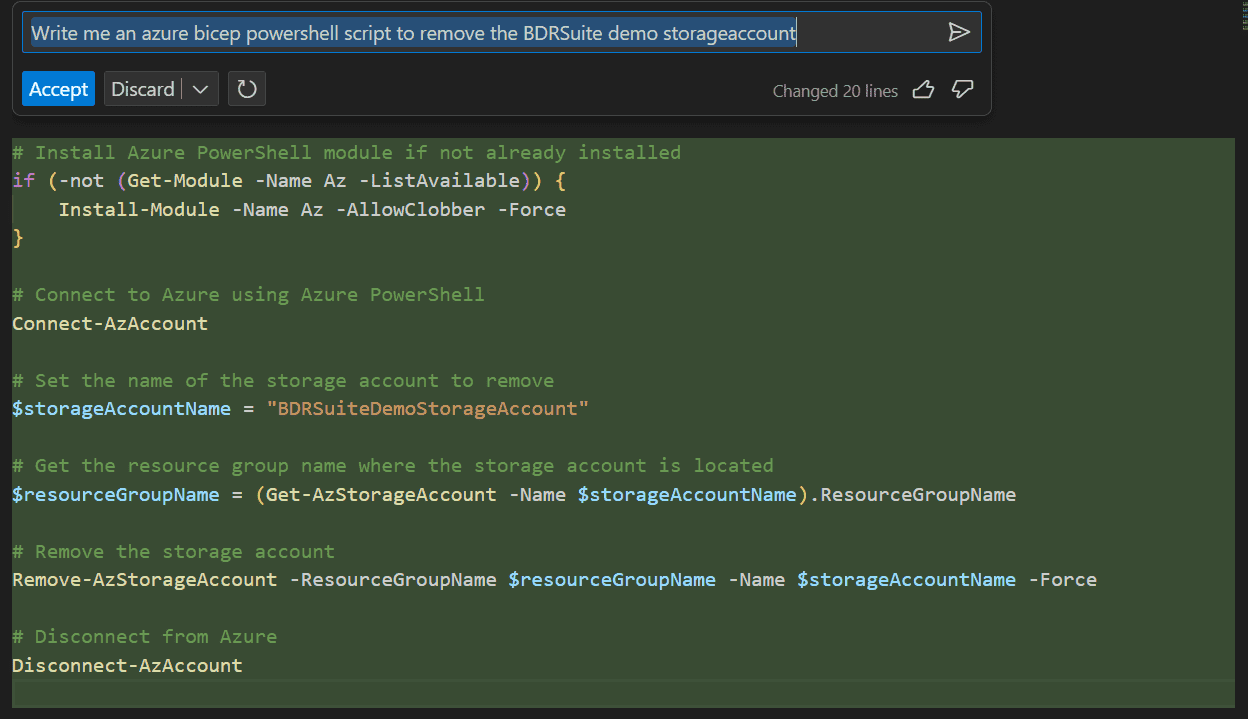
As you see, you can easily “ask” Visual Studio Code to create – for example – a demo storage account. Let’s accept this code.
Step 2: Make adjustments
Although GitHub Copilot can create scripts, it would be even better if we could specify specific changes to existing code. For example, we would like to change the Bicep code first to check if the demo storage account exists; otherwise, it creates a message.
This is how to do that :
First, select the specific part of the code you want to change (in this example lines 15 and 16) and press control-I :
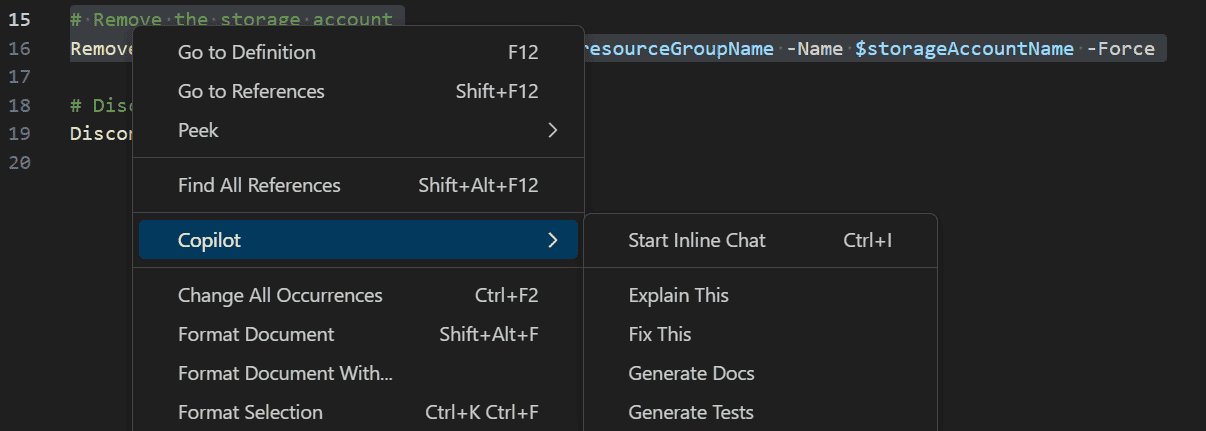
Choose Start Inline Chat
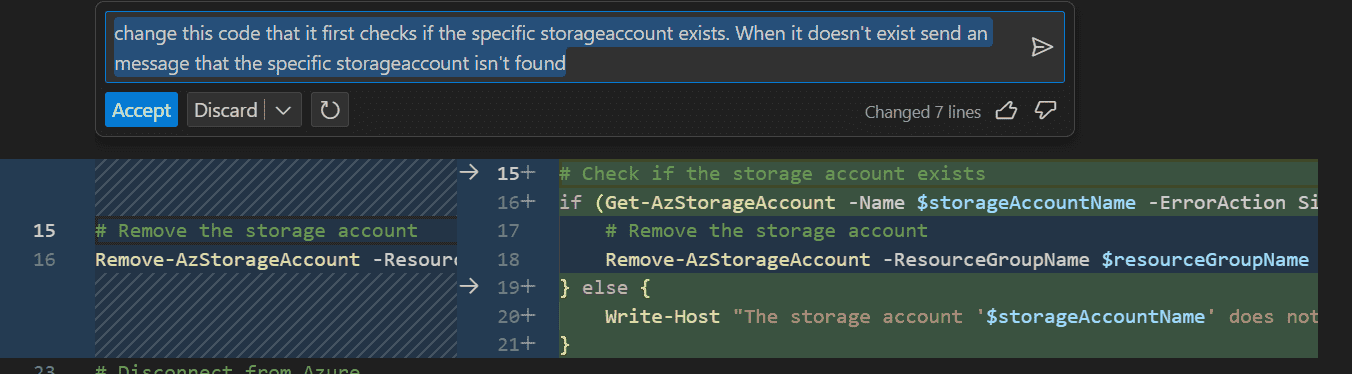
Notice that I’ve asked the GitHub Copilot that I would like first to check if the storage account exists; when it doesn’t, it will send a message to the terminal. Notice the old code to the left and the newly created code to the right. Let’s accept this. We now have the following new code :

Step 3: Explain the magic
Even greater, let’s ask Copilot to explain the newly created code. Select the newly created code, press control+i, and Choose Explain this.
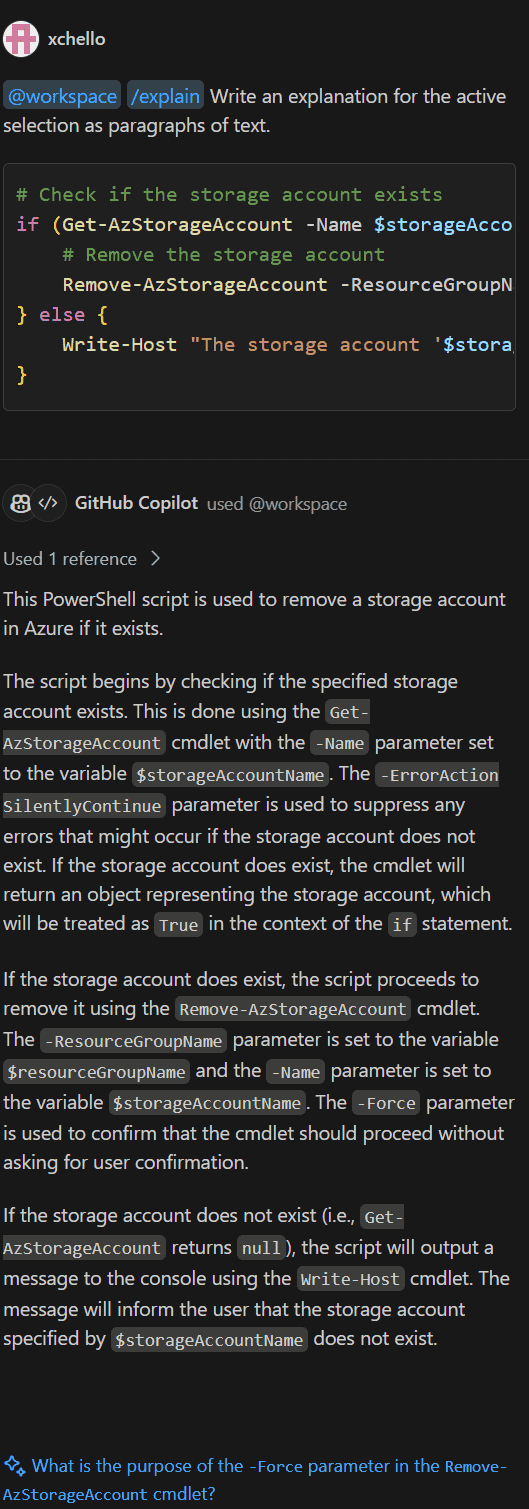
You notice that Copilot explains the code using normal language and helps you understand it! Copilot helps you to get better at coding!
Step 4: Run the code
In Visual Studio Code you find the “play” button next to the name of your newly created Powershell script. Press this button to execute your script. See how easy it is to create and run Azure Bicep scripts!

Step 5: Document your code in a nutshell!
I have explained how easily you can create new code to manage and maintain your Azure environment. But what about existing code. Copilot can even help you with that! Just open your existing code, select it, choose control+I and choose for Document. Let’s use our storage account demo script to demonstrate this. Select all the code and see what happens:
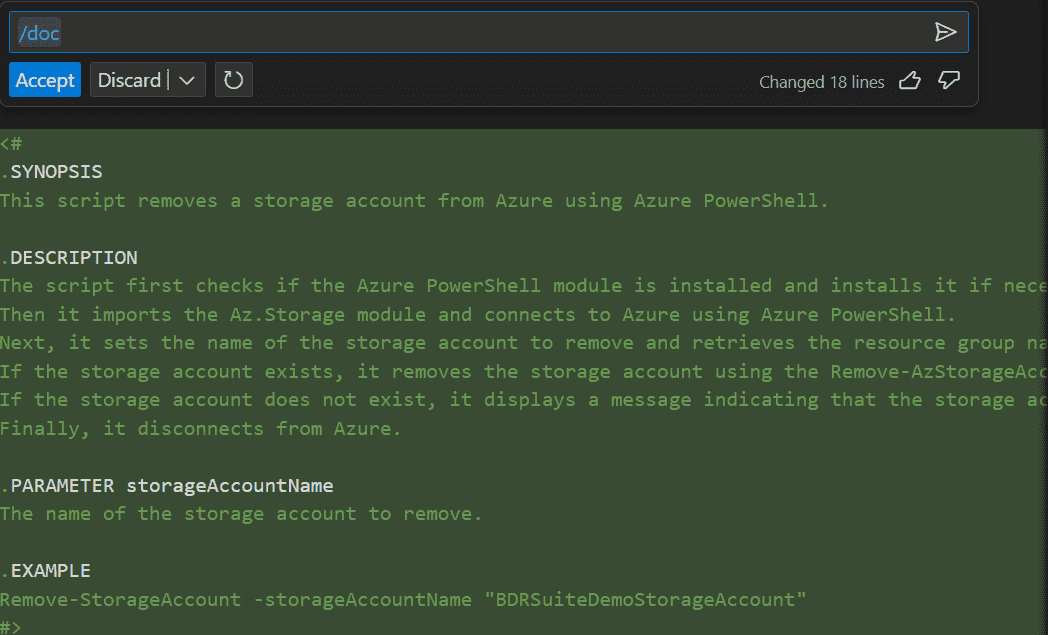
When we accept this, we see our inline Documentation for this demo script:
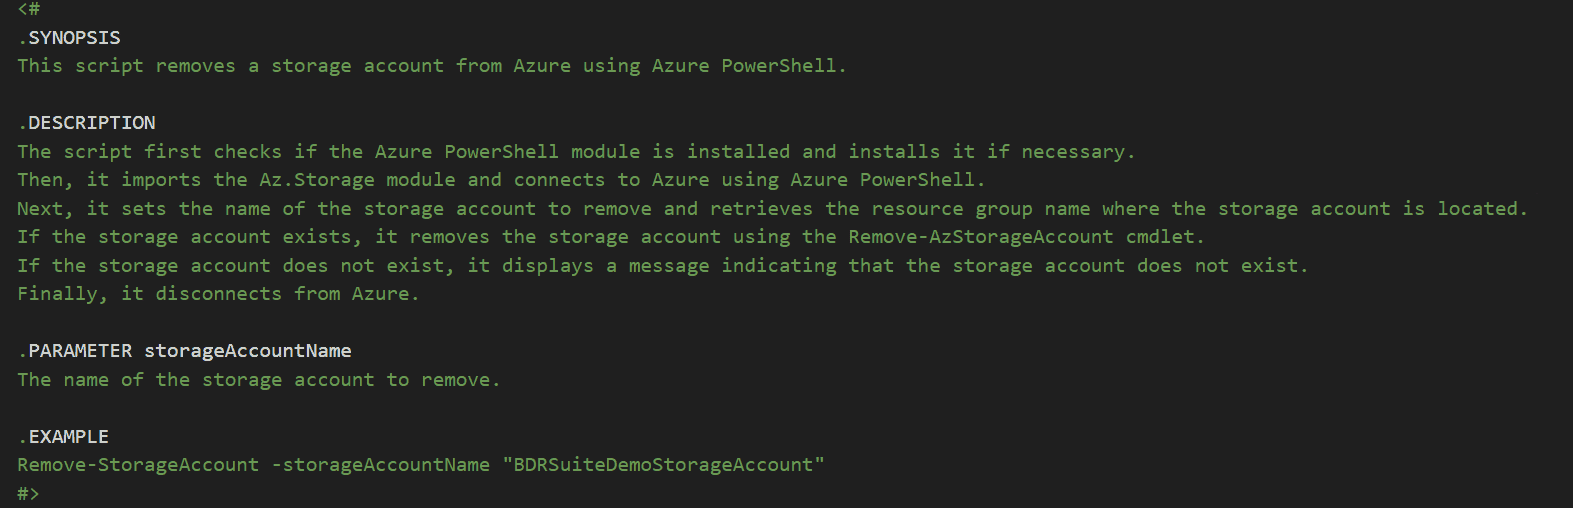
This is a game-changer! Document your existing scripts within seconds!
Conclusion
GitHub Copilot is a game-changer for developers. It streamlines coding, reduces errors, and significantly boosts productivity by providing AI-assisted coding. By following the steps outlined in this guide and incorporating best practices, you can easily harness the power of Copilot to create efficient PowerShell scripts and deploy Azure Bicep templates. So, don’t hesitate to explore this remarkable tool and discover how it can transform your development workflow. Embrace the future of coding with GitHub Copilot!
Follow this blog post series; the next post will be about exploring advanced capabilities. I will delve into more advanced aspects of GitHub Copilot, including optimizing scripts and integrating GitHub Copilot into broader development processes.
Follow our Twitter and Facebook feeds for new releases, updates, insightful posts and more.