
Introduction
Resizing a disk in an AWS EC2 instance, whether it’s the root volume or a data volume, can be necessary for several reasons:
- Increased Storage Needs: As your application or workload grows, you might need more storage space to accommodate additional data, files, databases, or other resources. Resizing a disk allows you to meet these increased storage requirements
- Running Out of Space: When your existing disk becomes nearly full, it can impact the performance and functionality of your application. Resizing the disk prevents potential downtime or reduced performance due to lack of available storage
- Improving Performance: Some workloads can benefit from having more available space on a disk. This is because file systems can become fragmented over time, leading to slower read and write operations. Resizing the disk can help alleviate fragmentation issues
- Data Backup and Retention: Increasing disk size allows you to retain historical data, backups, and snapshots for a longer period without worrying about running out of space
- Application Upgrades: Certain software upgrades or updates might require additional storage space to complete successfully. Resizing a disk ensures that you have enough space to carry out these operations without interruption
- Database Growth: Databases often require more storage over time as they accumulate data. Resizing the disk holding your database files prevents issues related to running out of space, which can lead to database corruption or downtime
- Future Scalability: When designing your infrastructure, you may anticipate future growth. Resizing disks preemptively ensures you have the resources in place to handle that growth without major disruptions
- Elasticity: One of the key benefits of cloud computing is the ability to scale resources up or down based on demand. Resizing disks aligns with this principle, allowing you to adjust storage resources according to your application’s changing needs
- Cost-Efficiency: Resizing disks can also be cost-effective. Instead of provisioning a new instance with a larger disk, which might involve additional configuration and management, you can simply resize the existing disk
- Avoiding Data Migration: Resizing a disk can be quicker and simpler than migrating data to a new instance with a larger disk. This can save time and effort in managing and maintaining your infrastructure
Overall, resizing a disk in an AWS EC2 instance provides flexibility, scalability, and the ability to ensure optimal performance and availability for your applications and workloads.
Step by step procedure to increase the root disk size in EC2 Linux instance
In this article, we will look at how to increase the root disk size in EC2 instance step by step. For this purpose, we have already created an EC2 instance with standard root volume size of 8 GB. The instance name is demo-ec2-01 and it is running Amazon Linux OS image.


Click on the EC2 instance and in the next screen, choose the “storage” option to check the disks attached.
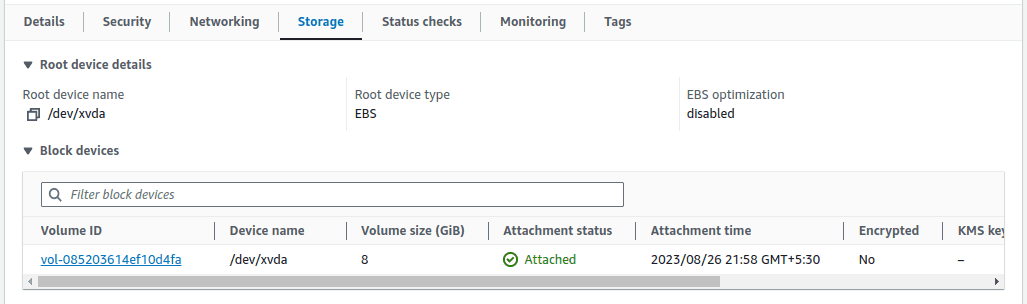
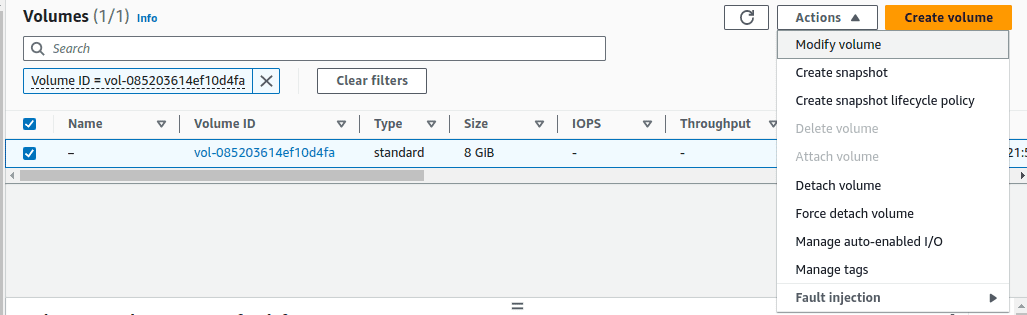
In this screen, you could find the volume name and the root device details. Click on the Volume ID and in the next screen, select the volume ID and under actions select “Modify Volume”
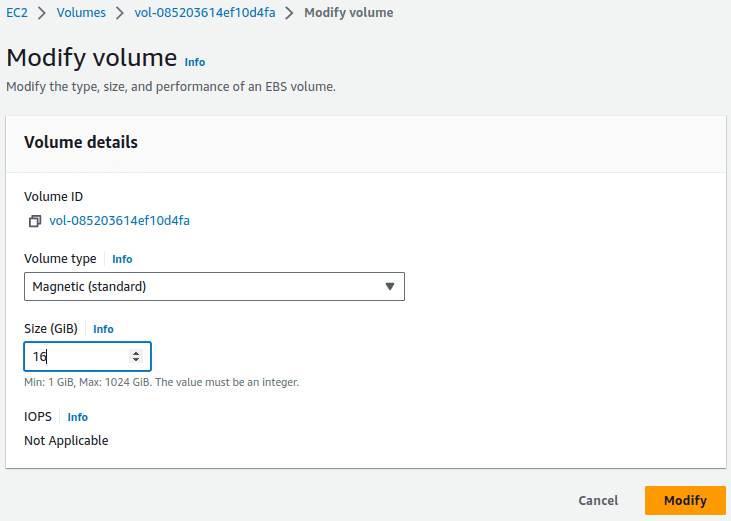
In the next screen, you will find the details of the volume like volume type and disk size. Here you can increase the disk size. Right now, the disk is of size 8 GB and we will increase to 16 GB. Click on modify. This will trigger the modify process.
Once you click “Modify” the volume modification process starts. You can track the volume modification process below. In this example, the volume state is showing as “in-user – modifying”.
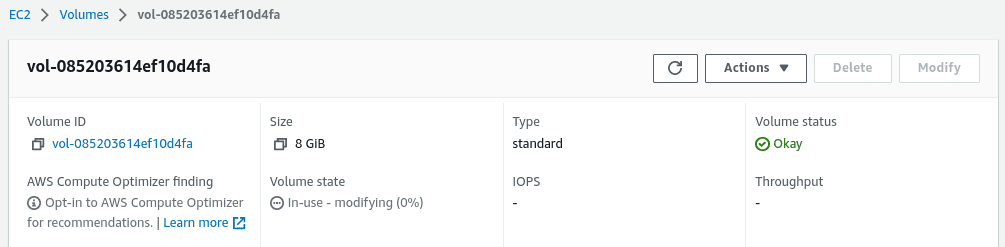
After the volume is modified, the volume state changes to “in-use”.

After the disk is resized in the AWS console, the file system has to be extended in the EC2 instance. Login to the EC2 instance using SSH and check the disk details using the fdisk command.
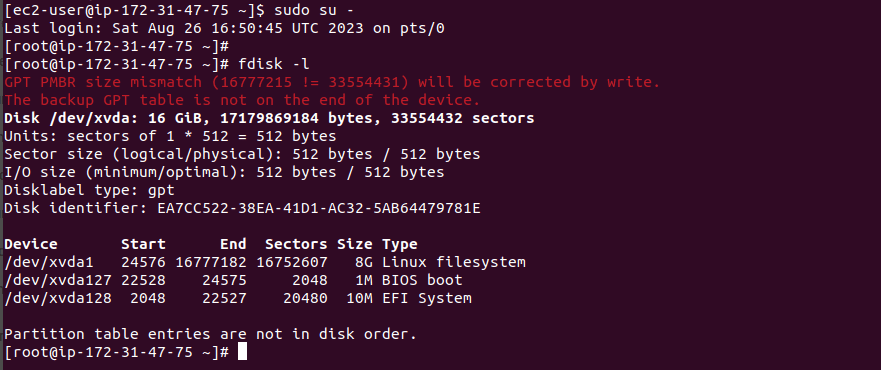
The disk “/dev/xvda” is of size 16 GB, but the partition “/dev/xvda1” is of size 8 GB only. The partition should be resized now to utilize the entire disk size of 16 GB. The filesystem in the partition “/dev/xvda1” is of size 8 GB. The partition “/dev/xvda1” is mounted on the root directory “/”. The current size of the filesystem is 8 GB which can found with the below command.

The below command lists all the partition sizes for the disk.
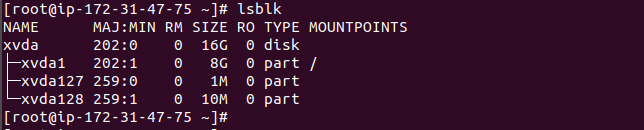
The partition “/dev/xvda1” is the first partition of the disk “/dev/xvda”. Now increase the partition size of “/dev/xvda1” from 8 GB to the latest size of 16 GB.

The growpart command increases the size of the partition to use the all the available space of the disk. In the above command “/dev/xvda” is the disk name and the number 1 is the partition number to increase the size. The partition size is now same as the disk size.

But still the file system is not resized. We can see that the filesystem is of size 8 GB only. Now a file system resize is required.

To check the filesystem type used in “/dev/xvda1”, run the following command. The file system type on “/dev/xvda1” is XFS filesystem.

As the file system type is XFS, increase the file system using the below command.
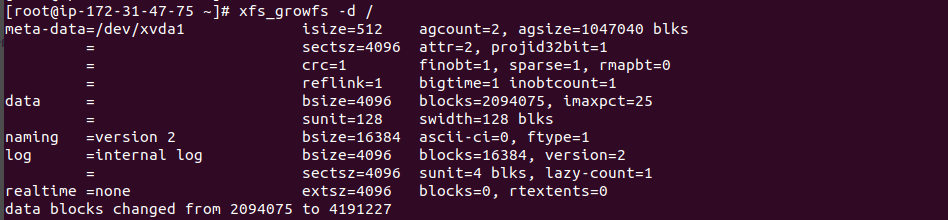
Now, check the filesystem size using the below command. You can find that the filesystem size is now 16 GB.

In this demo, we have seen the step by step procedure to increase the root disk size of the Linux EC2 instance. By using this procedure you can increase the root disk size any time and update the same for the Linux filesystem.
Related Posts:
AWS for Beginners: EC2 instance connect for SSH connectivity without public IP – Part 46
Follow our Twitter and Facebook feeds for new releases, updates, insightful posts and more.