
Read on:
Microsoft Azure for Beginners: Understanding Azure Terminologies – Part 1
Microsoft Azure for Beginners: How to Create an Azure Virtual Machine – Part 2
Microsoft Azure for Beginners: What is Azure Governance – Part 3
Microsoft Azure for Beginners: What is Azure PaaS – Part 4
Microsoft Azure for Beginners: Cloud Adoption Framework – Part 5
The last article (Microsoft Azure for Beginners: How to Create your First Azure Bicep Template – Part 6) covered the basics of Azure BICEP. This article looks at the concept of modules within Azure BICEP.
Why do we need modules?
Modules in BICEP are used to divide up a BICEP template to make it more readable. Modules can be called several times and in different ways. An advantage of using BICEP in combination with modules is that the templates become much easier to read, and a lot of time can be saved. To achieve the same with an ARM template, you had to use nested templates (templates within templates).
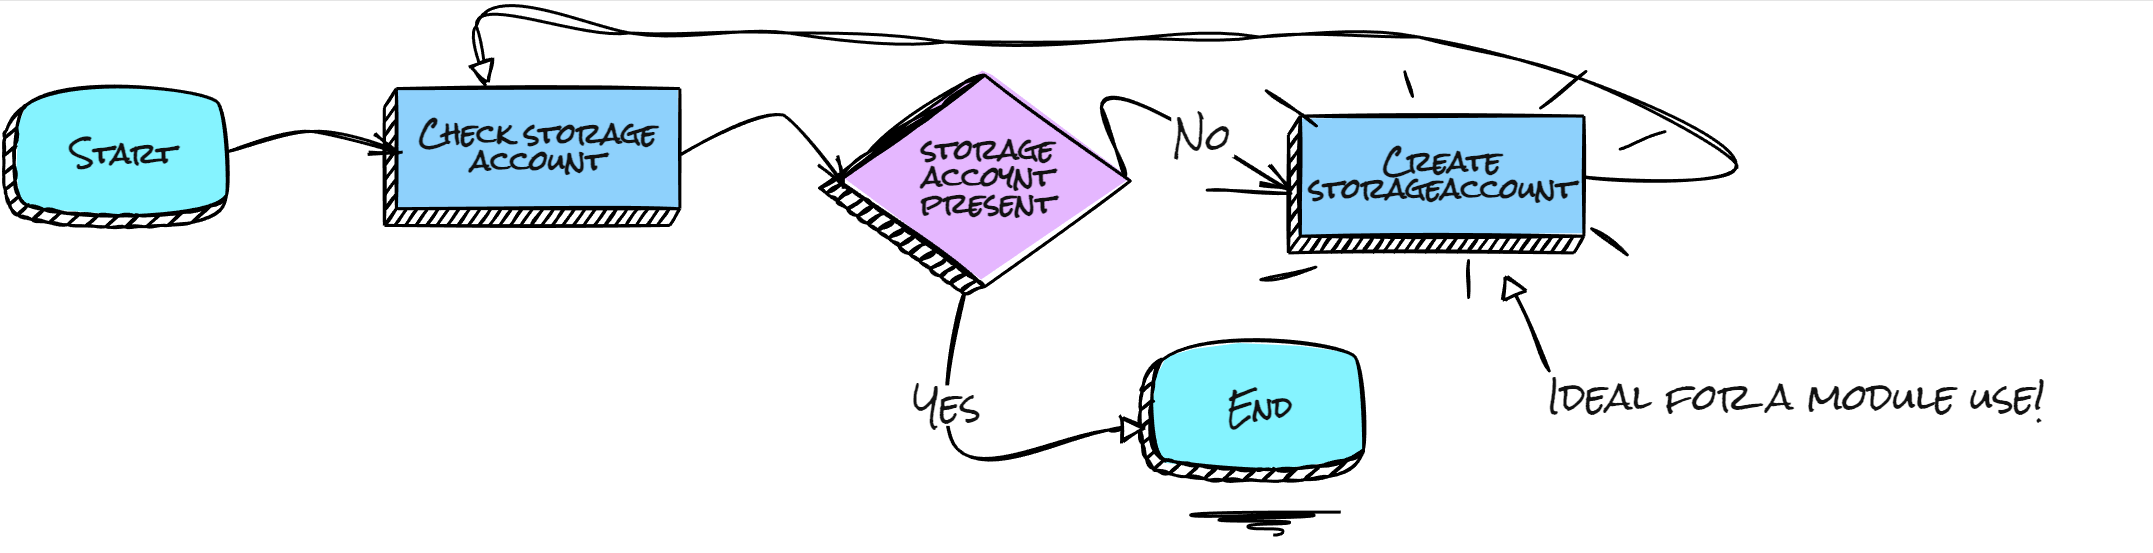
Another reason to use modules is to use them in conjunction with conditional deployments. An example is deploying a resource if one or more conditions are met (or not). For example, a storage account will be deployed when it does not exist. The code to deploy a storage account is in a module.

What else do we need to know?
A module is nothing more or less than a separate piece of BICEP code. So you don’t need any new knowledge for this. Even existing code can easily be converted to a module. So every BICEP template is potentially a module, the way you call it determines whether it is a module or not.
Demo time!
I want to explain the use of modules through an example. This example will create a module that deploys a storage account.
As a first step, we will create one mStorageAccount.bicep file. (To make it extra clear that it is a module, I use the letter m at the start of the filename)
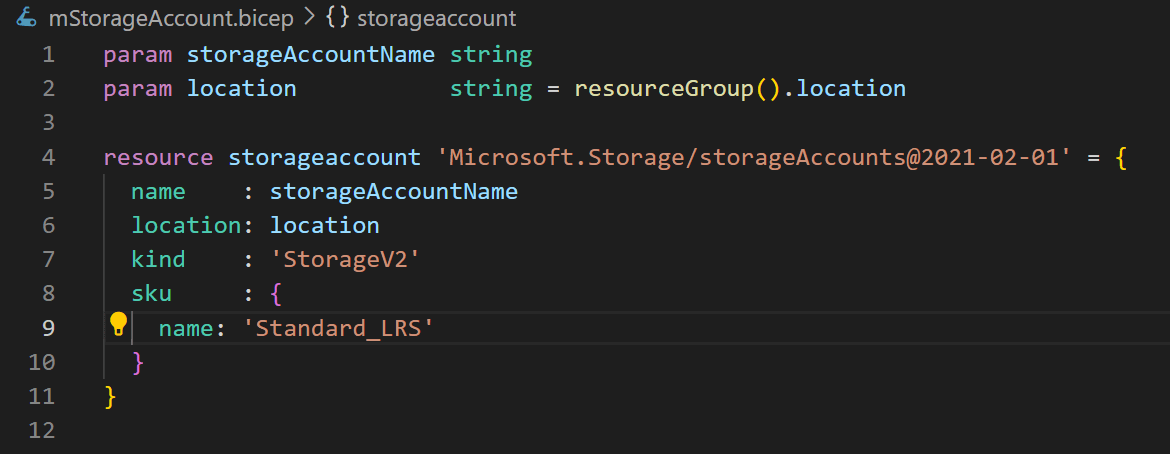
Note: The above BICEP code creates a V2 Storage account, based on a Standard_LRS SKU with 2 parameters. The name of the storage account and the location. The 1st two lines define the use of the parameters. We use the location of the resource group in which it is deployed as the location for the storage account.
A module is BICEP code called as such in a template file. So let’s create a main.bicep file. The main.bicep file is the template file we are going to use to invoke a storage account in this case.
In our case, our main.bicep looks like this:
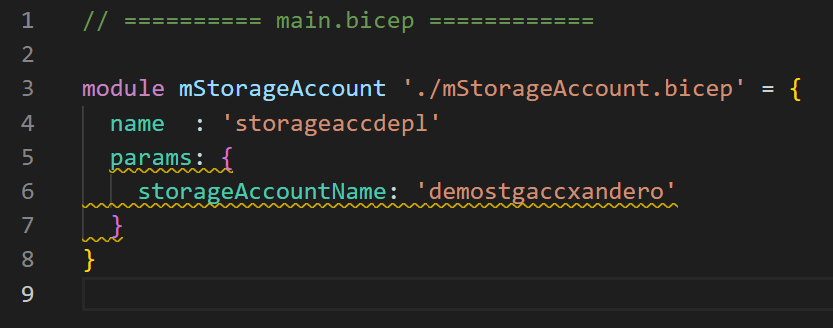
We use the module command to define a module, specifying the location of the BICEP file. We then use the storage account name as a parameter to perform the deployment.
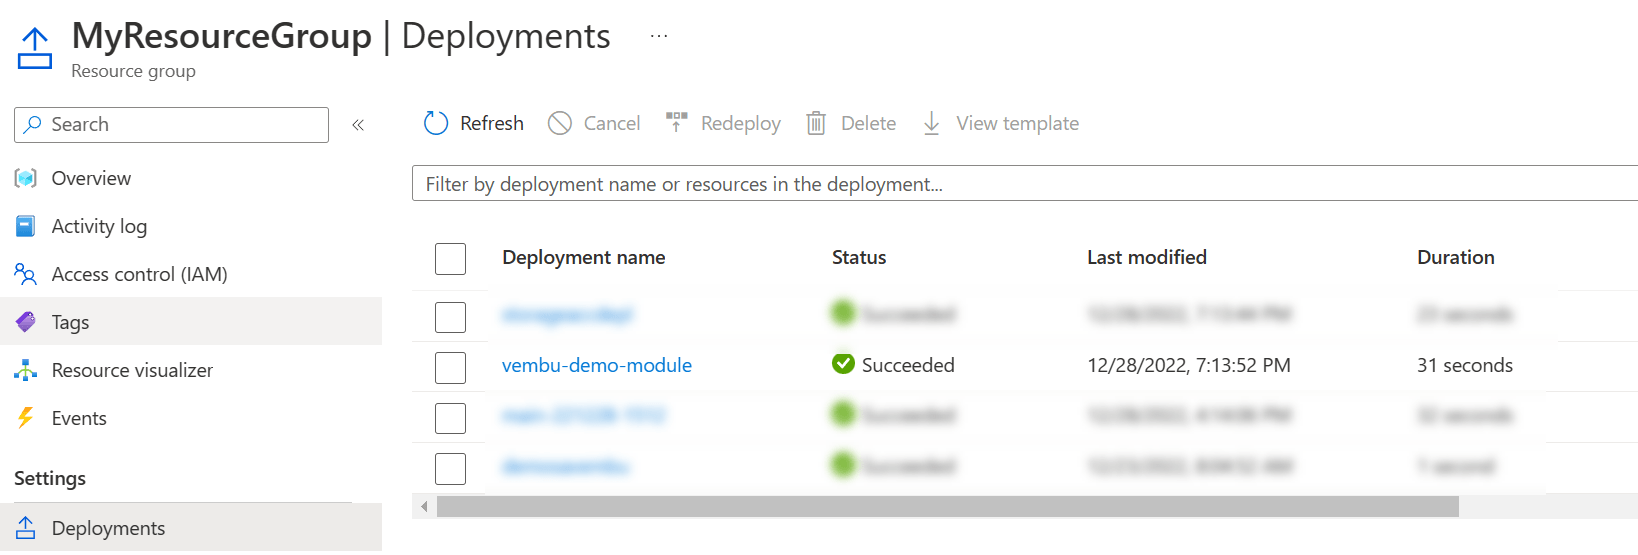
We see that the storage account has been created :
We have now created a module and used it as such. Now let’s look at conditional calling of modules and loop deployments
Loop deployments
Suppose we want to create (multiple) storage accounts with an increasing number in the storage account name.
To do this, we slightly modify the way we use the module:
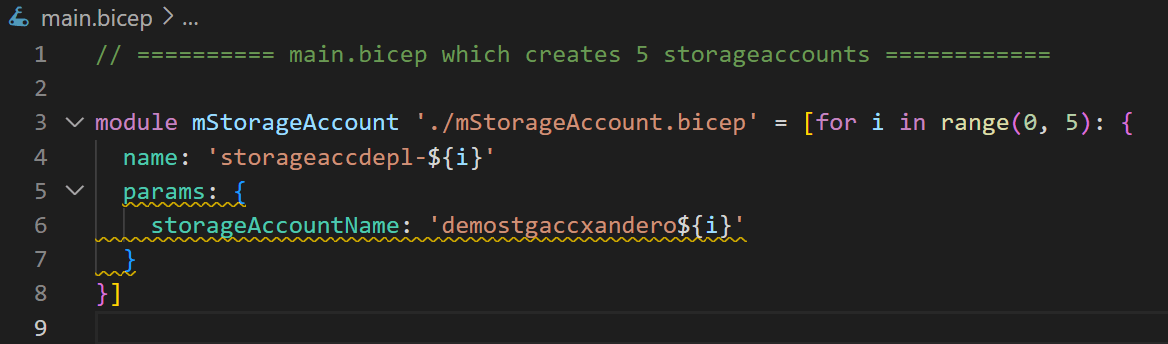
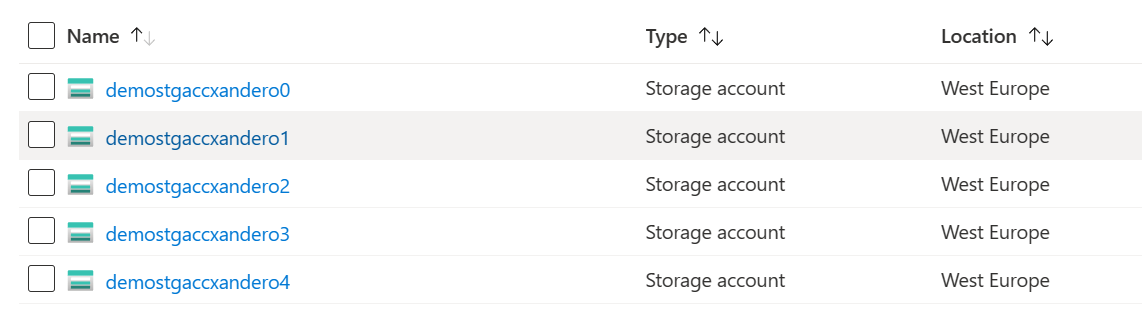
If we deploy the template file now, there are 5 storage accounts created :
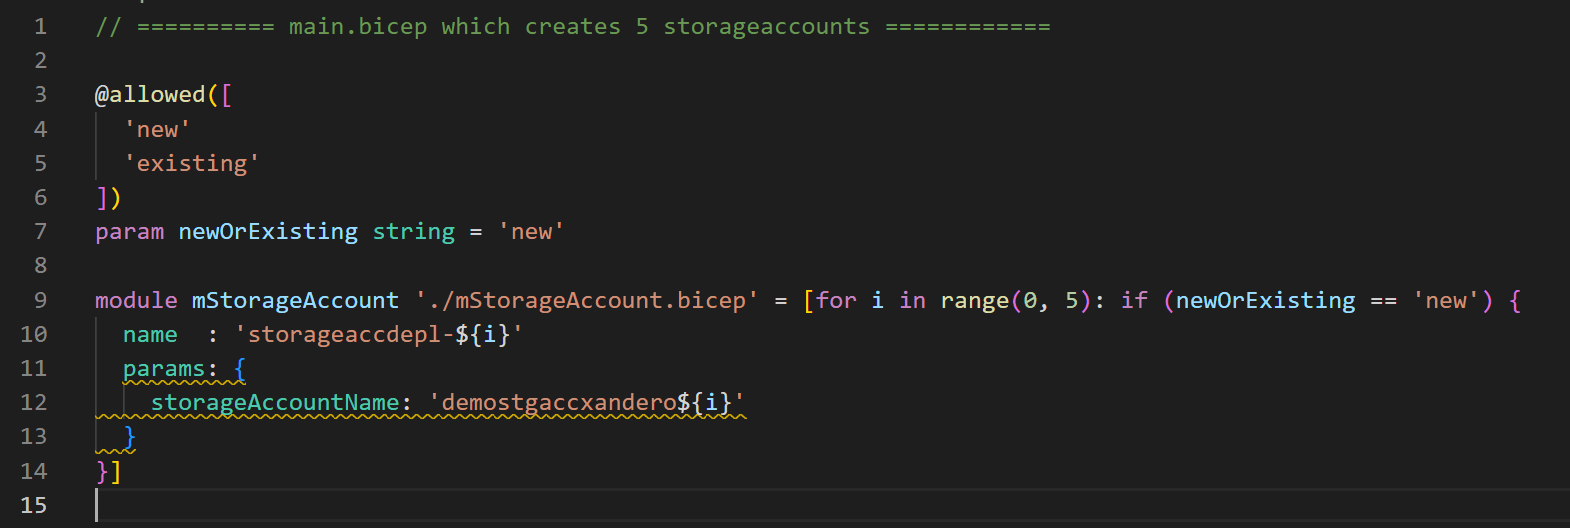
Conditional Looping
In this example we are combining the previous example with conditional looping. The parameter newOrExisting will be used to decide whether a storage account needs to be created or not. Only when the parameter equals new, a new storage account will be created.
Thank you for your interest and attention. I hope the benefit and use of modules in BICEP has now become clear. I hope you enjoy creating new modules!
Follow our Twitter and Facebook feeds for new releases, updates, insightful posts and more.

Leave A Comment