
Introduction :
The Microsoft Authenticator app helps you sign in to your accounts if you use two-factor verification. Two-factor verification helps you to access your accounts more securely, especially while viewing sensitive information. Because passwords can be forgotten, stolen, or compromised, two-factor verification is an additional security step that helps protect your account by making it harder for other people to break in. This type of authentication sign-in will be useful if your Azure account is managed by more than one Azure Administrator.
You can enable this method for any of your Azure accounts at any time. In this blog, we are providing you with the help of screenshots of how to add the Microsoft authentication application as your default sign-in method. At the initial stage, when you register an Azure account ( free trial or pay as you go subscription ), this authentication can’t be enabled, and it is recommended to set up this Microsoft authentication sign-in process before providing the access to your other Azure Administrators.
You can use the Microsoft Authenticator app in multiple ways, including:
- Provide a prompt for a second verification method after you sign in with your username and password
- Providing sign-in without requiring a password, using your username and your mobile device with your fingerprint, face, or PIN generated by the Microsoft authenticator app
Prerequisites:

Before you can use the Microsoft Authenticator app, you must:
Download and install the Microsoft Authenticator app on your Mobile device. You can download and install the Microsoft authenticator app for Android or iPhone mobile devices from Google Play and Apple’s app store respectively.
Add your work/school, personal, and third-party accounts to the Microsoft Authenticator app. For the detailed steps, see Add your work or school account, Add your accounts, and Add your non-Microsoft accounts.
Setting up the Microsoft Authenticator app from the Security info page in the Azure portal
Login to your Azure portal with an administrator account, and go to the My account portal → Security info or choose the below URL :
https://mysignins.microsoft.com/security-info
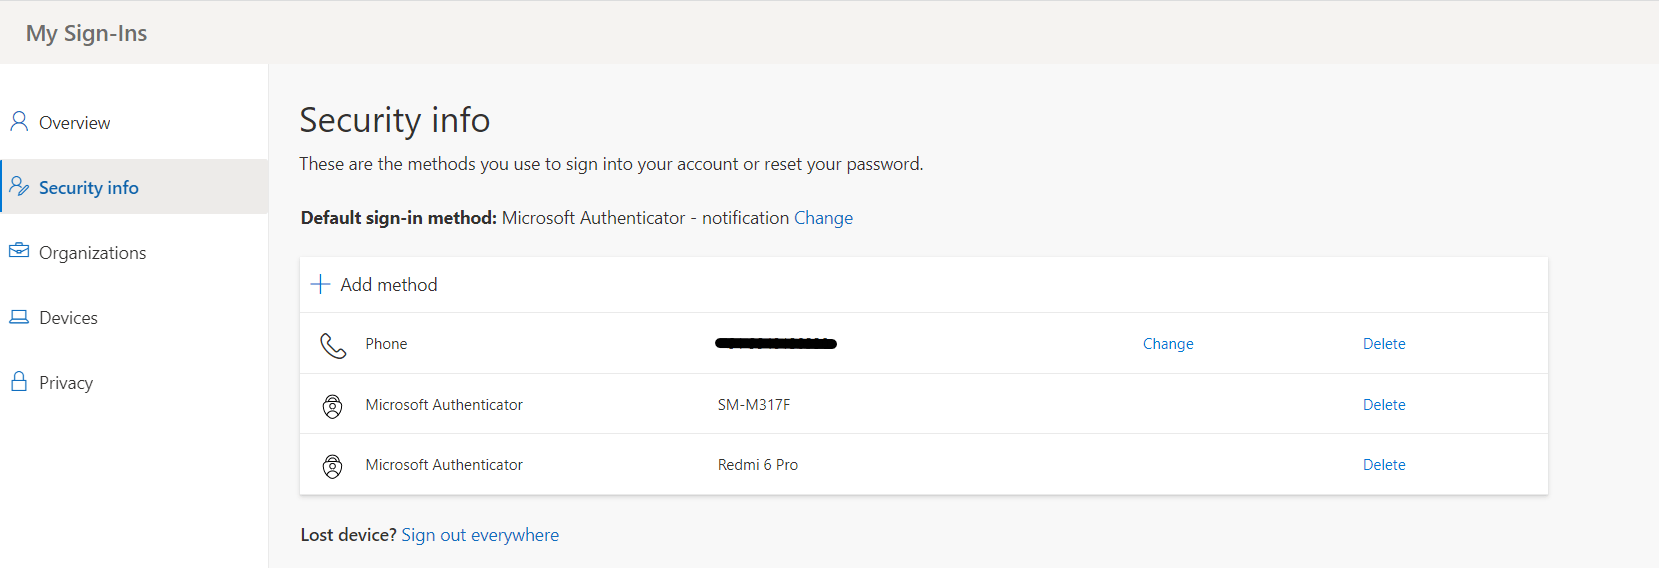
The below screenshot shows this page. Note that we already have two devices added for this authentication. For a fresh azure account, you may not see the device’s details. Click Add method + button.
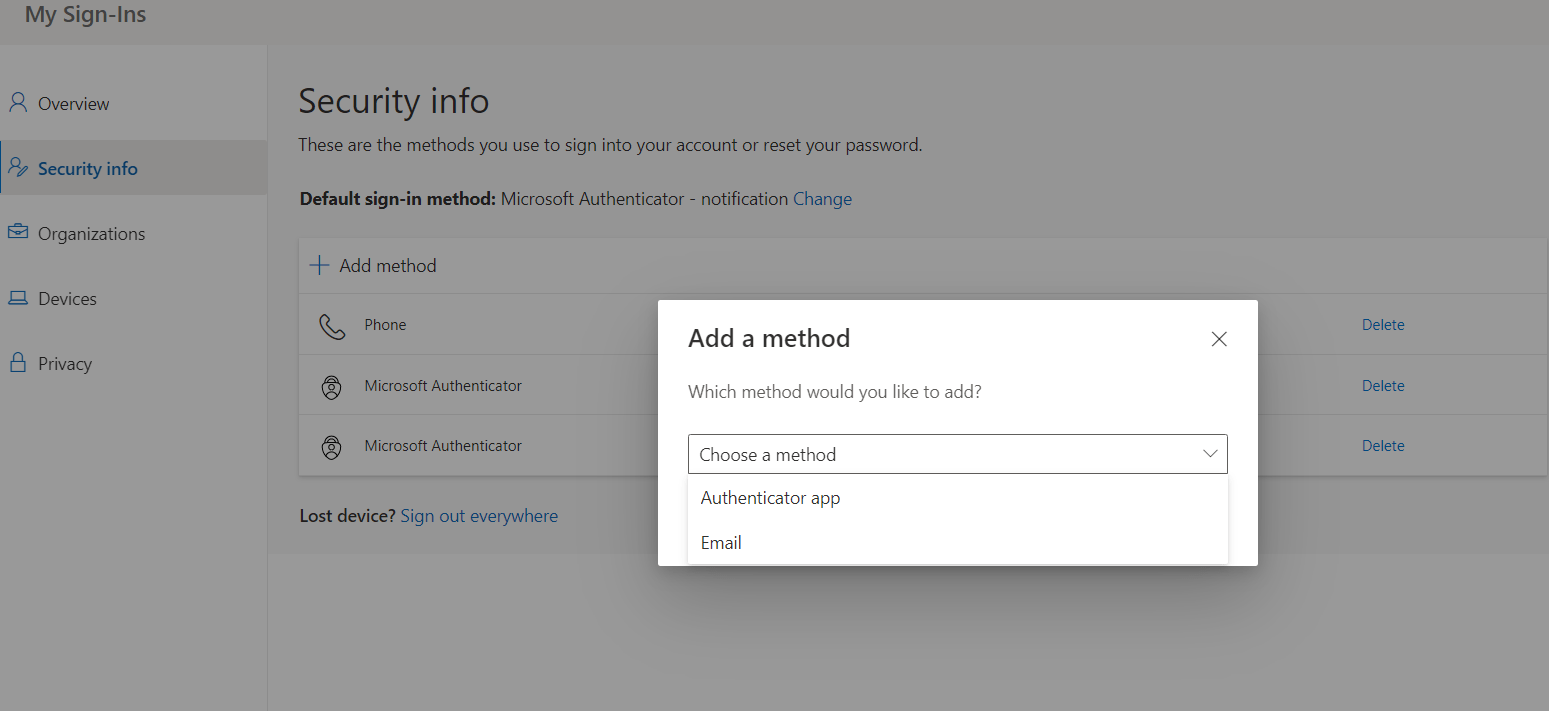
And choose the method “Authenticator app” from the drop-down list.
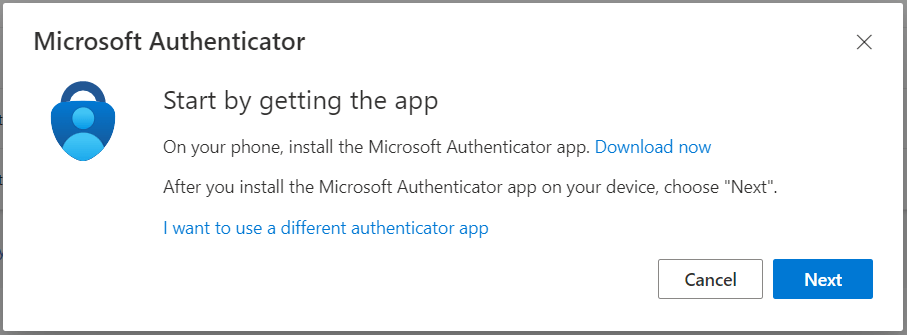
On the next screen, you are instructed to download the Microsoft Authenticator App on your mobile device. After you install the Microsoft Authenticator App on your device, click Next
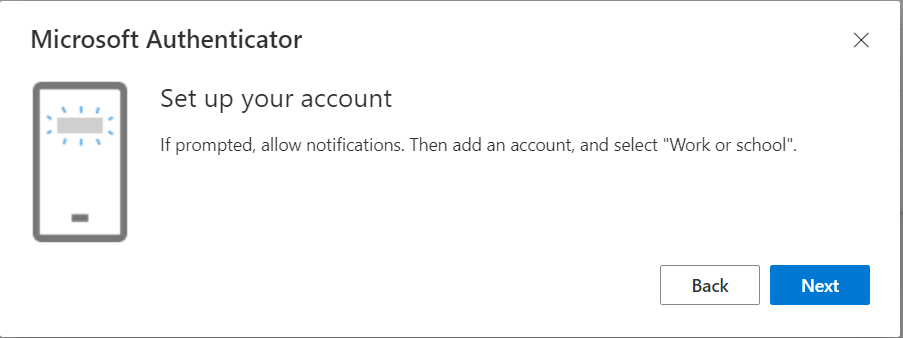
On the next screen, you will see the Setup your account prompt, click Next to proceed.
In this step, on your mobile device open the Microsoft Authenticator App, and Add your account by selecting the “work or school account” option. In this step, you may be required to sign in using your administrator credentials on your mobile device. Choose the “QR code sign-in” method to proceed to scan the QR code image from your mobile device.
Click Next, to go to the QR code scan step on your computer.
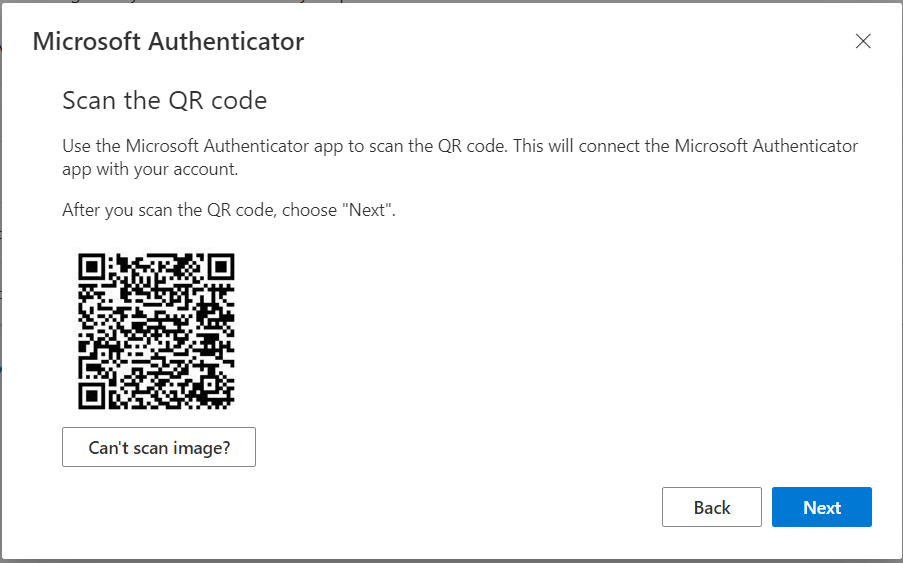
Scan the QR code
In this step, the user needs to scan the QR code shown on the page ( as shown in the screenshot ) using his mobile device after installing the Microsoft authenticator App.
After installing the app, you will get the “Microsoft Authenticator” icon on your mobile device. Open the Microsoft Authenticator application and scan the QR code image generated on your Azure portal. ( Below screenshot shows a similar image )
After scanning the shown QR code, your mobile device will be registered, and you can see the approval notification as shown below.
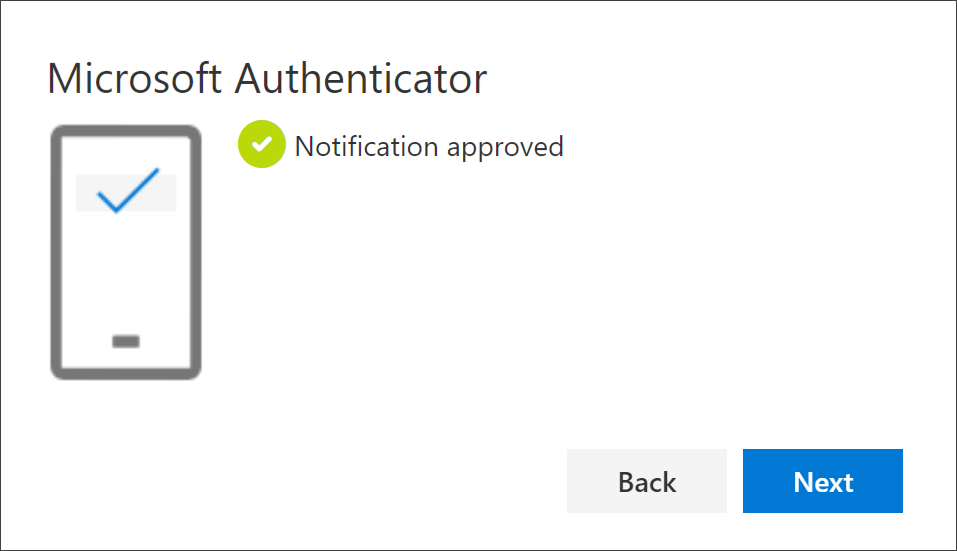
After adding the device, the administrator can verify his mobile device on the security info page.
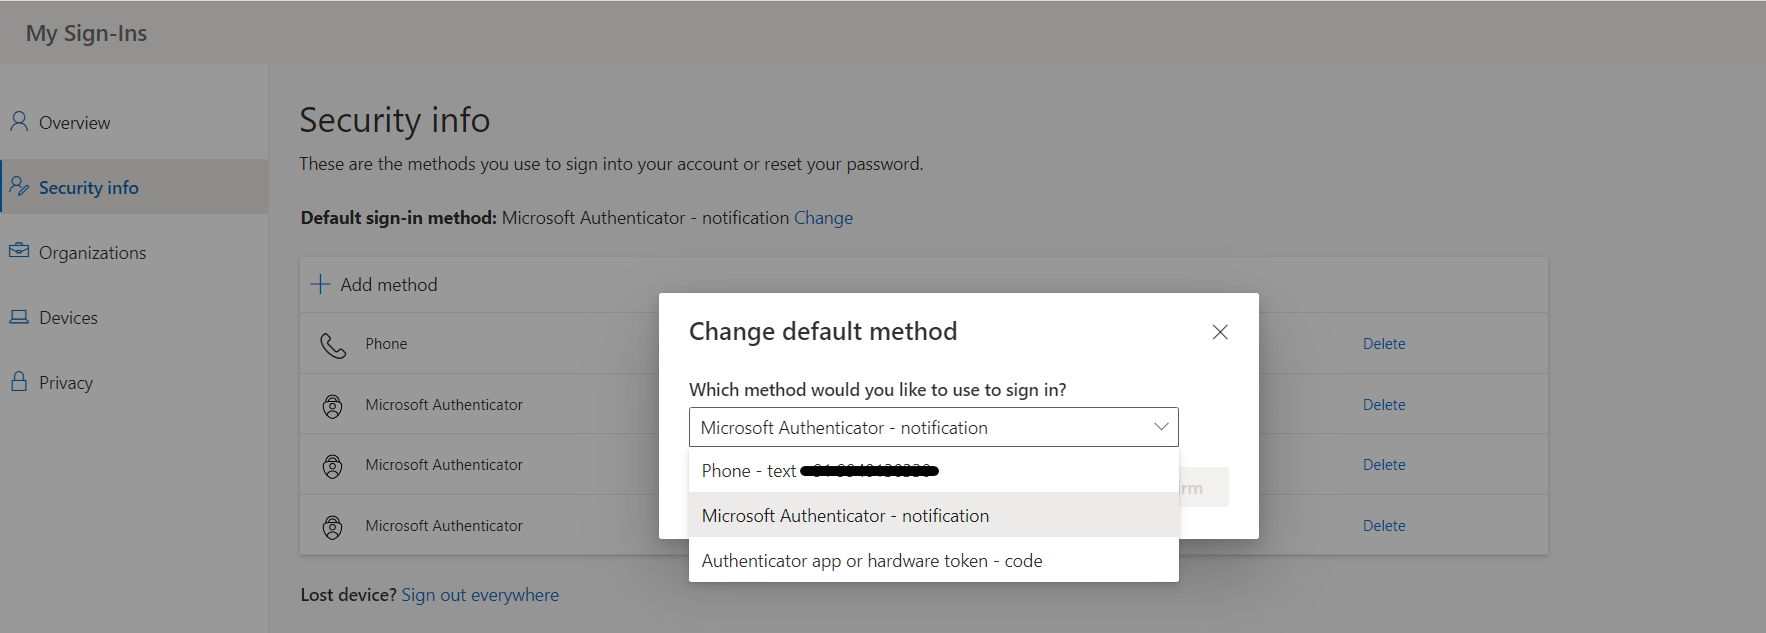
Change your default security info method
On the Security info page, make sure your Default sign-in method will be selected as “Microsoft Authenticator – notification”. Else you can change the notification from the drop-down list by choosing the option “ Microsoft Authenticator – notification”. This setting is shown in the below screenshot.
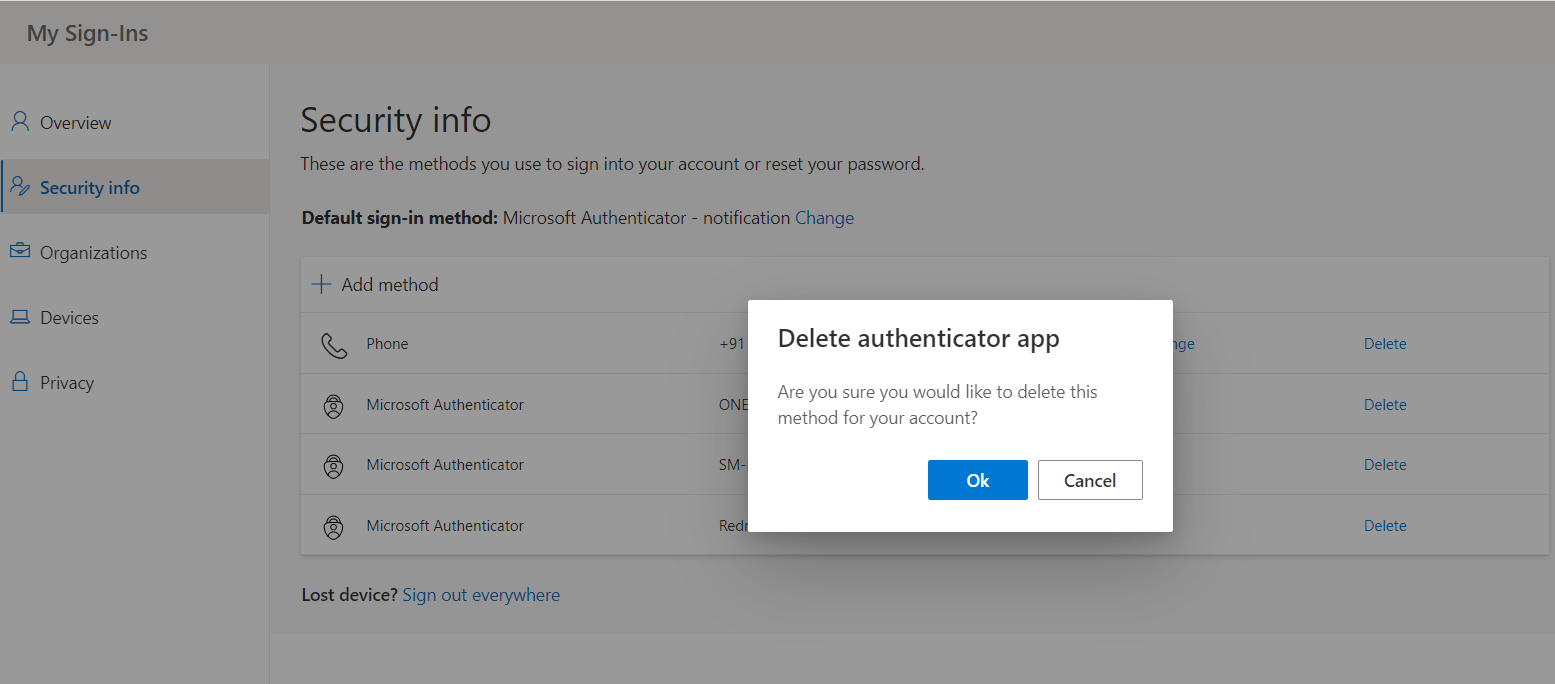
Deleting your authenticator app from your security info method
If you don’t want to use the authenticator app method, and want to use only the conventional method of providing an administrator username and password to login to your Azure portal, you can very much delete the Microsoft Authenticator method any time. You can delete the respective registered mobile devices associated with the Microsoft Authenticator method one by one.
After choosing the delete button, you will be notified to confirm the delete process to disable the authenticator app sign-in. After the authenticator app is deleted, it’s removed from your security info and it disappears from the Security info page. If the authenticator app is your default method, the default changes to another available method.
Click OK to initiate the delete operation.
Additional security info methods
As per Microsoft documentation, you have additional options to configure your sign-in methods. The options include:
Mobile device text: Enter your mobile device number and get a text code you’ll use for two-step verification or password reset. For step-by-step instructions about how to verify your identity with a text message (SMS), see Set up security info to use text messaging (SMS).
Mobile device or work phone call: Enter your mobile device number and get a phone call for a two-step verification or password reset. For step-by-step instructions about how to verify your identity with a phone number, see Set up security info to use phone calls.
Security key: Register your Microsoft-compatible security key and use it along with a PIN for two-step verification or password reset. For step-by-step instructions about how to verify your identity with a security key, see Set up security info to use a security key.
Email address: Enter your work or school email address to get an email for a password reset. This option isn’t available for two-step verification. For step-by-step instructions about how to set up your email, see Set up security info to use email.
Security questions: Answer some security questions created by your administrator for your organisation. This option is only available for password reset and not for two-step verification. For step-by-step instructions about how to set up your security questions.
Conclusion :
The Authenticator app can help prevent unauthorised access to accounts and stop fraudulent transactions by pushing a notification to your smartphone or tablet. It not only works for accounts protected by Azure Multi-Factor Authentication but also works with Microsoft accounts, Google, and any other provider that supports OATH one-time passcodes. Currently, the only limitation is You can’t set up Microsoft Authenticator if you already have five authenticator apps or hardware tokens. In this case, you may need to add other authentication services such as Google Authenticator App.
Follow our Twitter and Facebook feeds for new releases, updates, insightful posts and more.