
Implementing a resource lock is one safety mechanism that can be used within an Azure subscription to prevent incidents from taking out critical infrastructure. You must also understand these for the AZ-104 resource locks exam questions. Let’s better understand Azure resource locks, what they are, how they work, and how to create them.
What are Azure Resource Locks
Using an Azure resource lock, you can prevent users from modifying or deleting the following: Azure subscription-level objects, resource groups, and resources. When you have resources locked, this overrides or takes precedence over user permissions that may be able to modify or delete.
There are two primary types of locks you can implement:
- locks that prevent deletions
- locks that prevent modifications
Within the Azure portal and Microsoft Entra, these are called “Delete lock” and “Read-only lock“. When working through command-line interfaces, these are known as “CanNotDelete” and “ReadOnly.”
The CanNotDelete lock level allows authorized individuals to read and modify a resource but they can’t delete it. The ReadOnly lock limits users to only reading a resource, preventing them from deleting or updating it. This type of lock amounts to giving all authorized users the same level of permissions as granted by the Reader role.

A great use case for protecting resources is protecting a storage account. Microsoft recommends locking all of your storage accounts with a resource lock. Locking the storage account prevents accidental or malicious deletion of the storage account, resulting in a loss of data.
Resource locks vs Role-Based Access Control
It’s important to note that these management locks differ from role-based access control (RBAC) in Azure. Rather than assigning permissions to specific users or roles, resource locks enforce restrictions uniformly across all users and roles, restricting the abilities to modify or delete.
Inheritance
Resource locks are also inherited and applied to users based on the most restrictive resource lock defined in the environment.
Unexpected results
Keep in mind that with resource locks configured, there may be unexpected results for operations, even if these are programmatic in nature, such as sending a post request operation to the API, to modify or delete resources.
Permissions needed to create resource locks
You need to be one of the following to apply a resource lock in the environment:
- Global administrator
- User access administrator
- Owner
You can also be a part of a role that has the following permissions assigned:
- Microsoft.Authorization/*
- Microsoft.Authorization/locks/*
Creating resource locks
Let’s look at creating resource locks in the Azure Portal and see how this can be done.
Implementing Read-Only and Delete Locks
Let’s see how a read-only lock prevents unwanted changes and how delete locks safeguard against accidental resource loss.
Navigate to your resource groups and select a resource group to edit. Navigate to Locks > +Add.
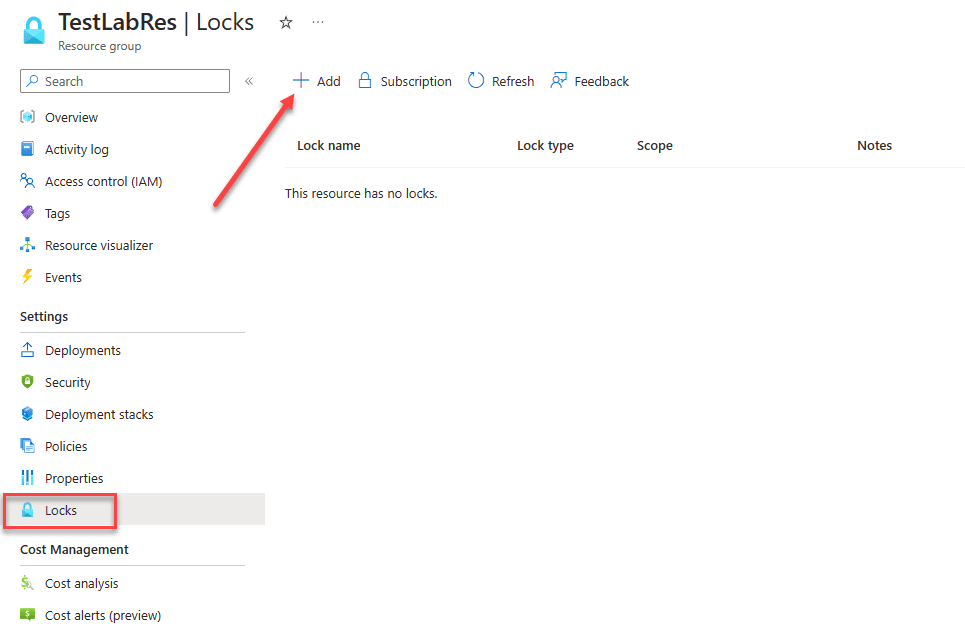
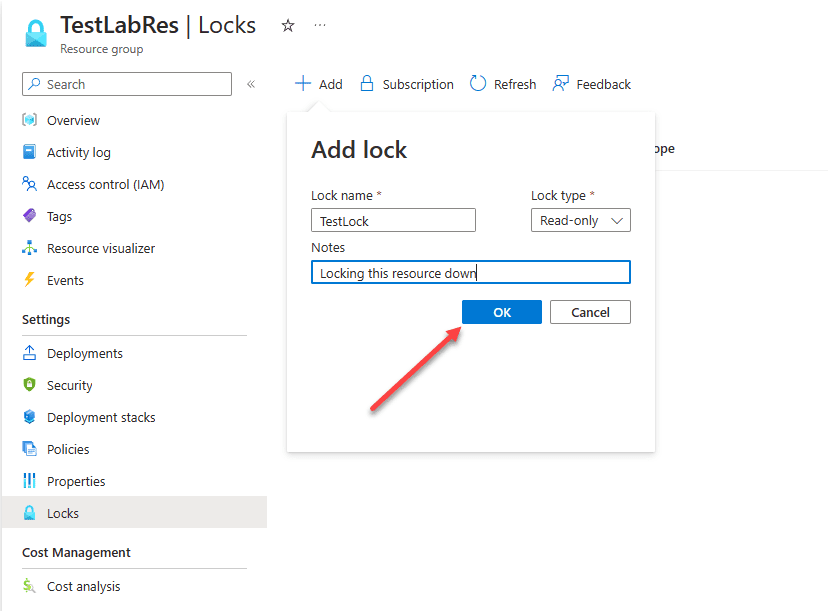
When you click the +Add button, it will launch the Add lock dialog. Here you will need to populate the following:
- Lock name
- Lock type
- Notes (optional)
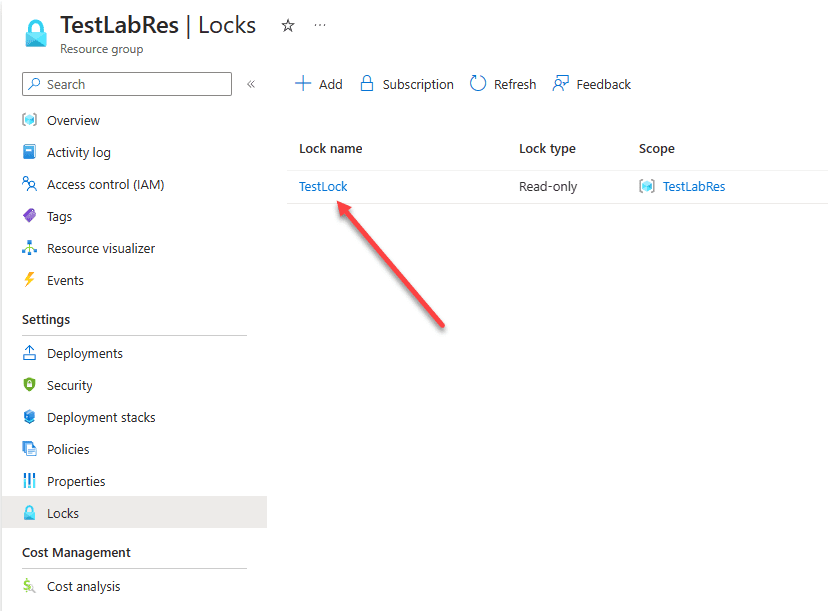
Now, we have successfully created a resource lock on the TestLabRes resource group of type Read-only. It means that users will not be able to modify or delete any resources contained in that resource group.
Testing the read-only lock
Now that we have the read-only lock level in place, let’s look at an example and attempt to delete a storage account contained in the resource group.
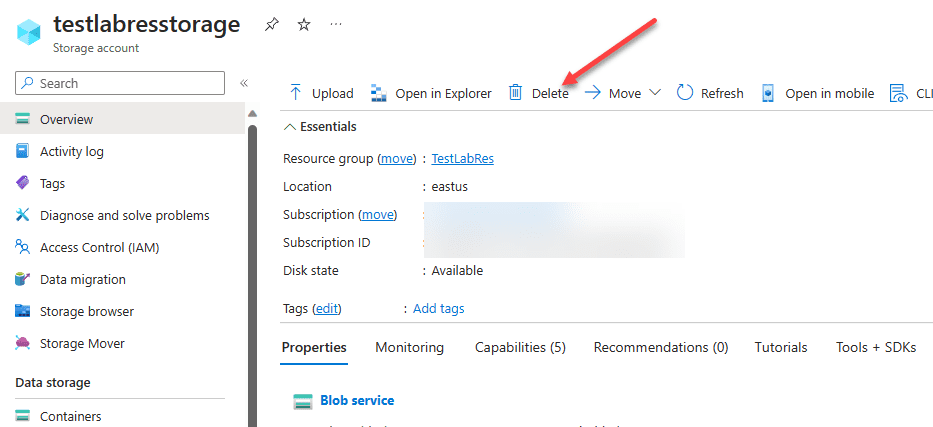
Before we can even get to the point of verifying the delete operation, the blade gives us the following message:
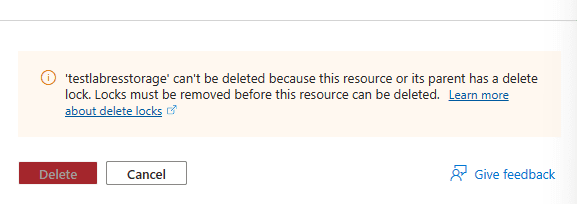
As we can see the resource lock is an effective way to lock down resources and protect these from being modified or deleted in any way.
Getting and creating resource locks with PowerShell
We can also effectively use PowerShell to get and create resource locks.
To get existing resource locks in the environment, we can use the Get-AzResourceLock cmdlet. Note the following syntax:
Get-AzResourceLock
[-LockName]
[-AtScope]
-ResourceGroupName
[-ApiVersion]
[-Pre]
[-DefaultProfile]
[]
For example, we can get a resource lock by using the following:
Get-AzResourceLock -LockName “MyResourceLock” -ResourceName “MySite” -ResourceType “microsoft.web/sites” -ResourceGroupName “TestLabRes”
To create a new resource lock, we can use the New-AzResourceLock cmdlet. Note the following syntax:
New-AzResourceLock
-LockName
-LockLevel
[-LockNotes]
[-Force]
-Scope
[-ApiVersion]
[-Pre]
[-DefaultProfile]
[-WhatIf]
[-Confirm]
[]
For example, if we want to create a new resource lock, we can use the following:
New-AzResourceLock -LockLevel CanNotDelete -LockNotes “Your lock notes” -LockName “MyResourceLock” -ResourceName “MySite” -ResourceType “microsoft.web/sites”
Wrapping up
We have taken a look at the resource lock and how it can be used to safeguard resources in your Azure environment. It is a great security mechanism to prevent accidental modification or deletion of critical components like storage accounts. They are relatively easy to configure and start working immediately. Be sure to understand these for the AZ-104 exam, what they are, how to use them, and what they do.
Follow our Twitter and Facebook feeds for new releases, updates, insightful posts and more.

Leave A Comment