
Read on:
Beginners’ Guide for Microsoft Hyper-V: Manage Hyper-V on Windows Server Core – Part 50
We have looked at running Hyper-V nested virtualization on-premises in one of our previous blog. However, we can also configure Hyper-V nested virtualization in Microsoft Azure. It allows admins to install a Windows Server in Microsoft Azure and run VMs underneath the Azure virtual machine. So, let’s consider Hyper-V nested virtualization in Microsoft Azure for beginners and see how this is configured.
What is nested virtualization?
We have explored the notion of nested virtualization with Hyper-V previously. However, we looked at this in the context of an on-premises Hyper-V host running nested virtualization for a guest VM running Windows Server Hyper-V. This capability is excellent for running development labs and other POCs where you need multiple Hyper-V hosts but does not have the physical hosts to run these, or you want to take advantage of checkpoints, etc.
In Microsoft Azure, you will notice that you can’t create “checkpoints” as such natively with the Hyper-V that runs behind the scenes in Azure. However, using nested virtualization in Azure brings the on-premises Hyper-V functionality back to the table for solving various challenges, such as checkpoints.
In addition, you can create a Hyper-V container with Docker running in Hyper-V on Azure with nested virtualization. It will allow easily moving development environments on-premises with local Hyper-V servers to servers in Microsoft Azure.

It will also provide a way for developers and others to have segmented test environments to run these in an isolated way, so these don’t impact other development happening on the server.
Requirements for Hyper-V nested virtualization in Azure
The requirements for nested virtualization in Microsoft Azure come down to the type of Azure virtual machine created in the Azure portal. Unfortunately, Microsoft’s documentation on which VMs support nested virtualization is elusive and difficult to find.
Initially, when Microsoft announced nested virtualization in Azure back in 2017, it was made available for the following virtual machine sizes:
- Dv3 and Ev3
However, according to this official Microsoft link, the list of supported Azure VM offerings for nested virtualization has grown. Furthermore, the requirement for nested virtualization seems to revolve around Azure VMs running on Intel processors with Hyper-Threading technology.
- D_v3
- Ds_v3
- Dv4
- Dsv4
- Ddv4
- Ddsv4
- E_v3
- Es_v3
- Ev4
- Esv4
- Edv4
- Edsv4
- F2s_v2 – F72s_v2
- FX4 – FX48
- M
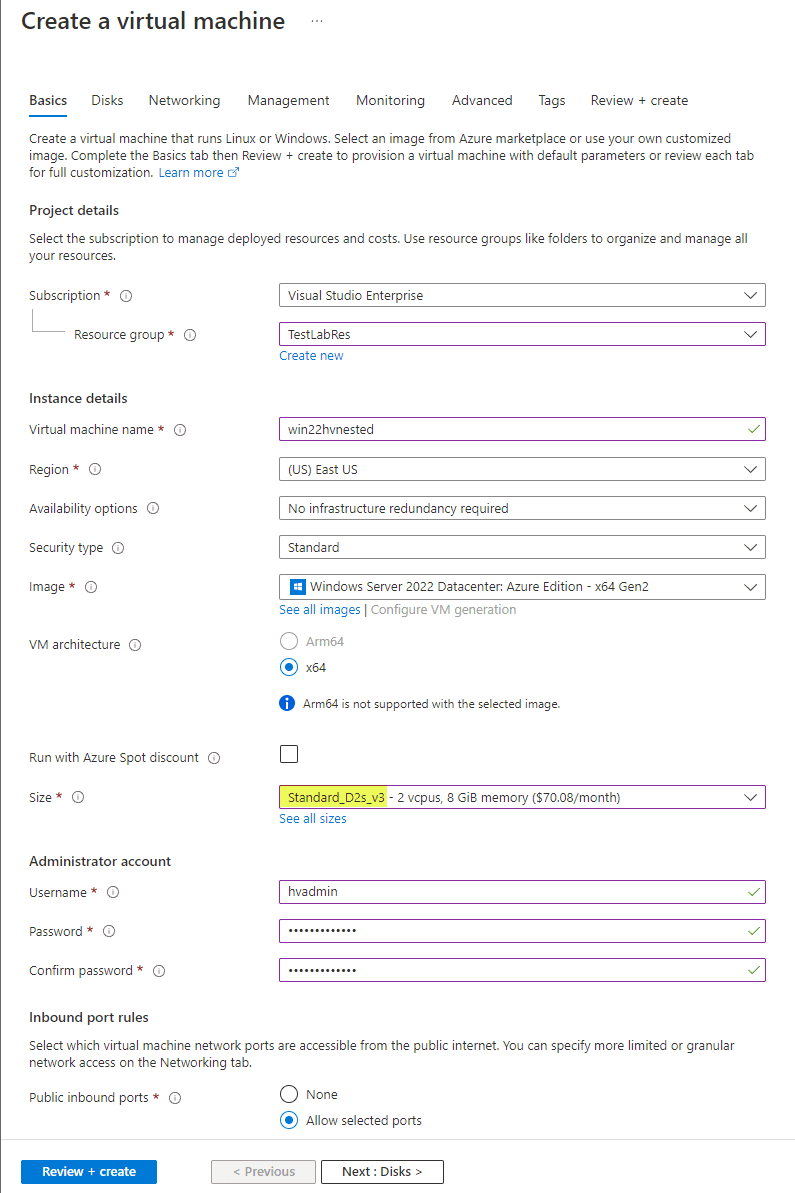
Creating an Azure Virtual Machine for Nested Hyper-V
Below, we are creating a new Azure Virtual Machine. Make sure the virtual machine is supported for nested virtualization in the list above.
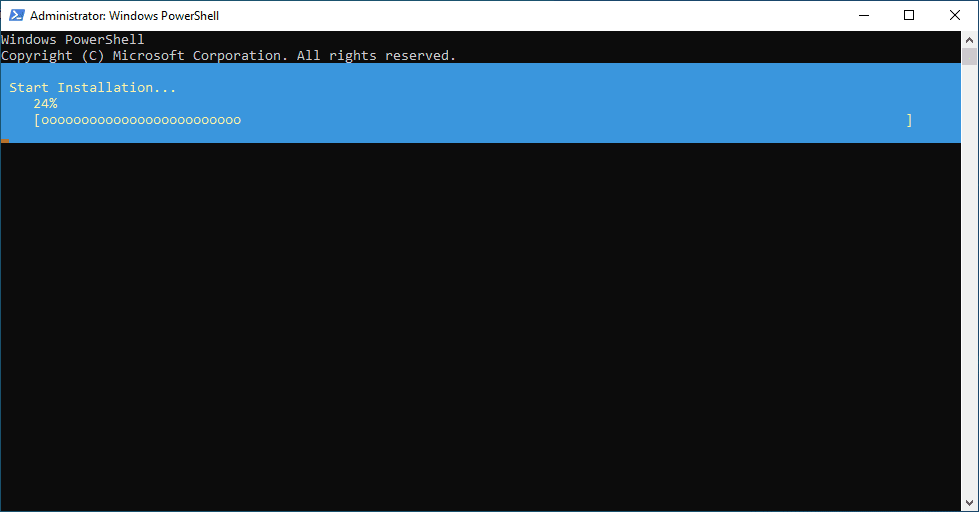
Install Hyper-V
After deploying the new Azure virtual machine, we can install the Hyper-V role in the VM. The familiar PowerShell command (> Install-windowsFeature -Name Hyper-V -IncludeManagement Tools -Restart) can install the role and the required management tools.
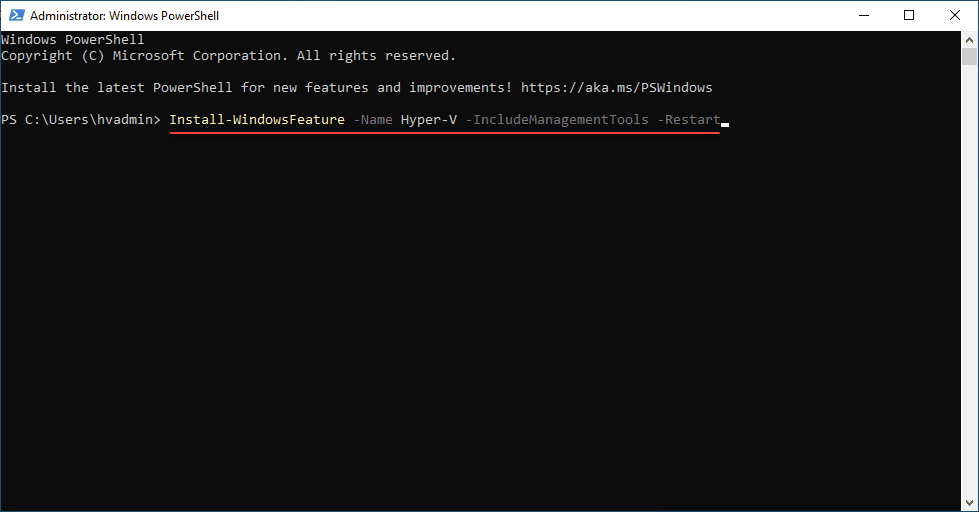
The new Hyper-V role installs, and the Azure virtual machine will automatically reboot after the role installation finishes.
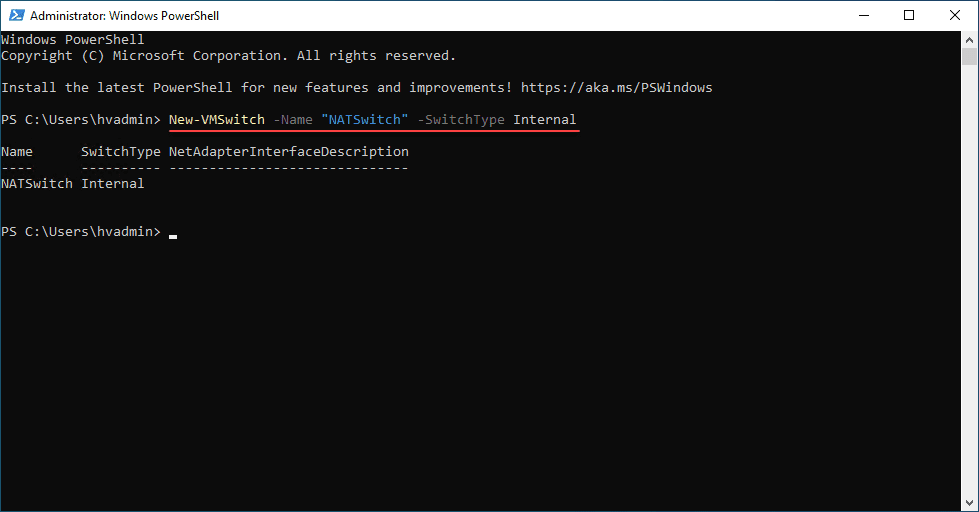
NAT’ed networking
Creating a NAT virtual switch is one of the easiest ways to allow virtual machines to have network connectivity and Internet access. With NAT’ing, the traffic of the virtual machines connected to the NAT virtual switch is translated to the IP address of the Hyper-V host.
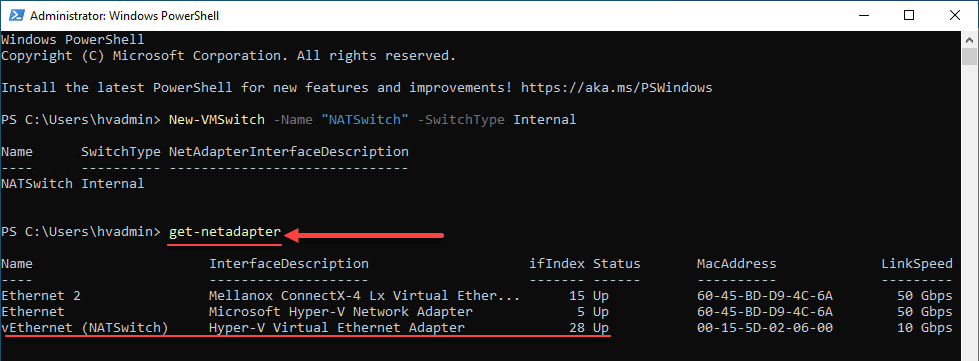
Below, we are creating a new virtual switch configured with NAT. We name the switch and set the switch type.
Next, we need to get the interface index of the new NAT internal virtual switch. To do that, we can use the PowerShell cmdlet “get-netadapter“.
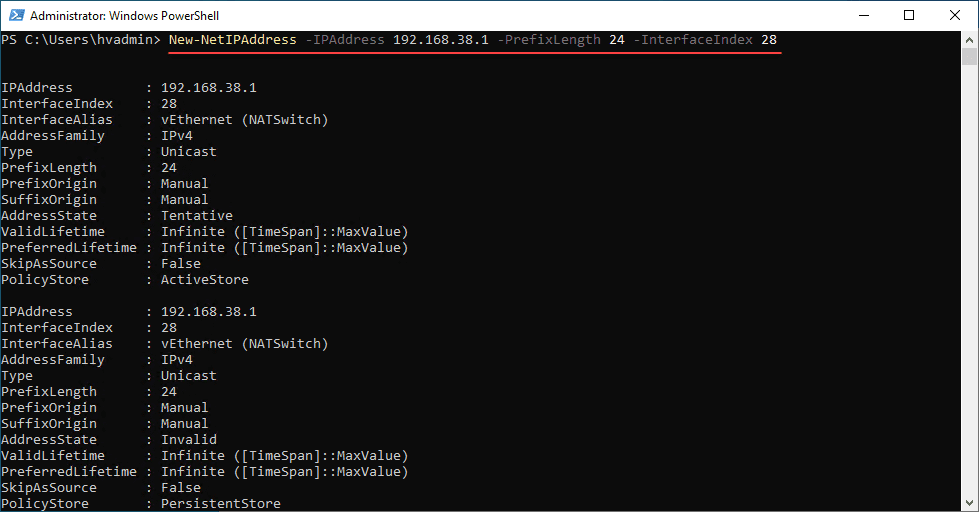
Now that we know the interface index, we can create a unique IP address for the Hyper-V host on the new internal virtual switch.
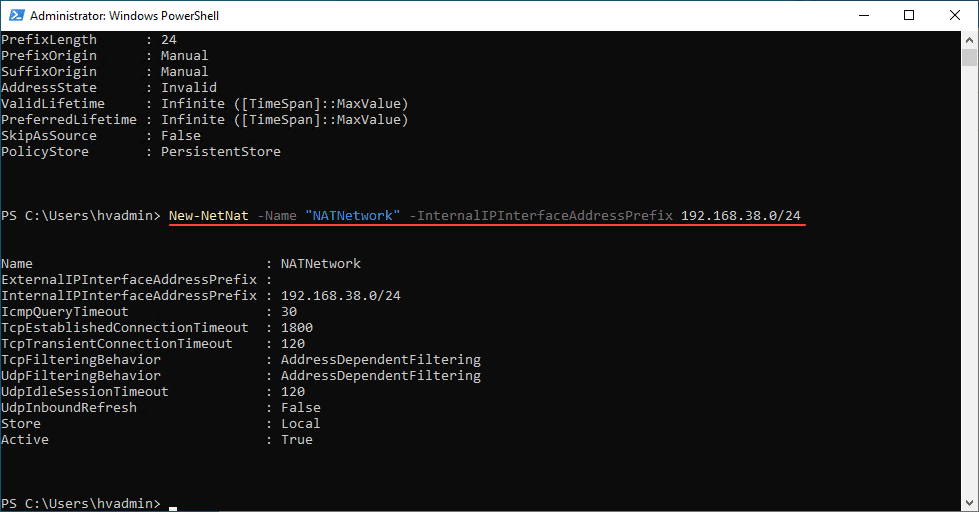
Finally, we create a new NAT’ed network to provision IP addresses for the nested virtual machines connected to the NAT internal virtual switch. It must be the network address of the IP address used above for the Hyper-V host.
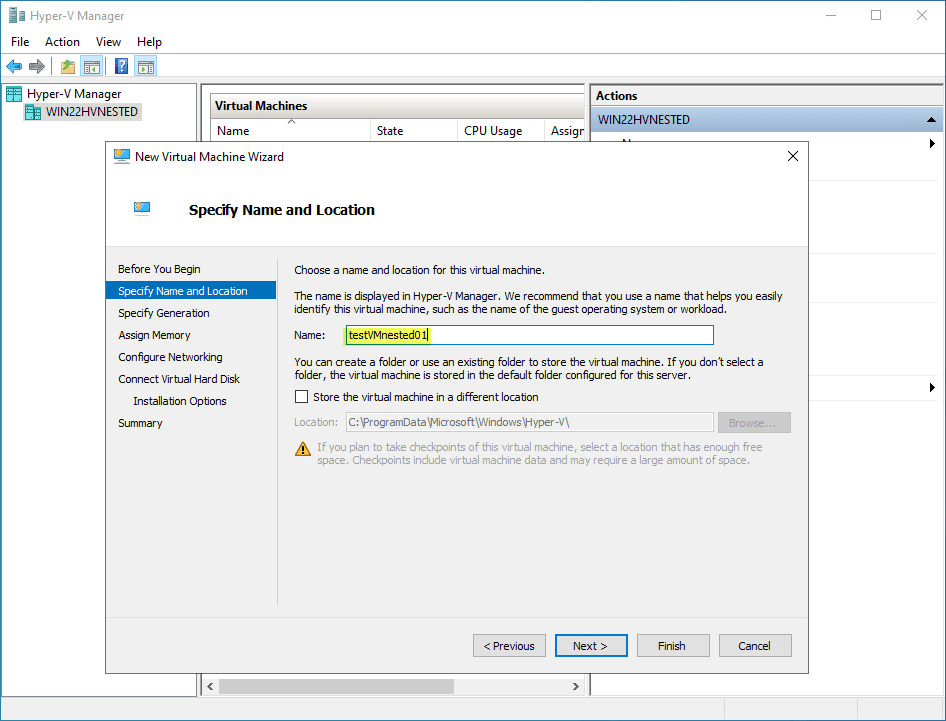
Create a new nested virtual machine in nested Azure Hyper-V
Now that we have the networking configured for connecting our nested virtual machines to the network, we can create our nested virtual machine in the nested Azure Hyper-V. Below, we are creating a new virtual machine using Hyper-V Manager on our Windows Server virtual machine in Azure running nested virtualization.
Skipping ahead a few steps, on the Configure Networking screen, we select the NAT network switch created earlier for virtual machine connectivity.

Firewall changes
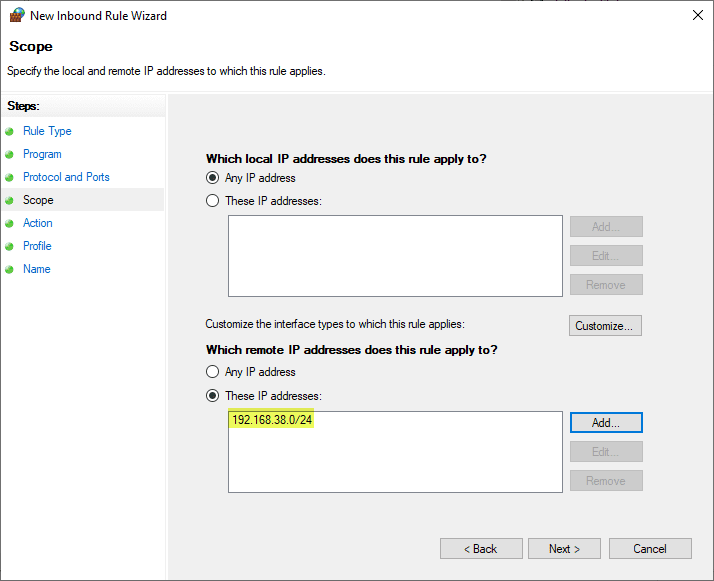
At this point, you will want to either turn off the Windows Firewall to ensure proper connectivity or add an exception to the local firewall to allow the NAT network to have connectivity to the Hyper-V host. Then, create a new custom rule allowing the internal NAT subnet to connect to the Hyper-V host.
Hyper-V nested virtualization in Microsoft Azure FAQs
What is nested virtualization? Nested virtualization is running a hypervisor on top of another hypervisor. In this case, we are running Hyper-V on a guest virtual machine inside another Hyper-V host.
Can you configure nested virtualization in Microsoft Azure? The primary requirement is choosing an Azure virtual machine supported for nested virtualization. These specific virtual machines are Intel-based and have hyper-threading enabled.
What are the benefits of nested virtualization in Azure? Running nested virtualization in Azure provides many interesting use cases, such as running Docker containers inside Windows Servers hosted in Azure. It can also enable developers to configure isolated sandbox environments without disrupting other developers and their work.
Wrapping up
Nested virtualization opens many exciting use cases in on-premises Hyper-V and with Hyper-V running in an Azure VM. Configuring nested virtualization in Microsoft Azure is not too difficult. It provides an easy way to leverage the cloud for virtual machines while maintaining the same look and feel of on-premises Hyper-V. In addition, it enables developers and others to use native Hyper-V technologies, such as checkpoints.
Follow our Twitter and Facebook feeds for new releases, updates, insightful posts and more.

Leave A Comment