
Quick Bites:
- This blog provides a step-by-step guide on importing OVA files into Hyper-V, highlighting the challenges and necessary steps
- It covers converting OVA files to VHD format using tools like qemu-img, preparing the Hyper-V environment, creating and configuring the new virtual machine, and testing the imported VM
- Additionally, it addresses common issues and troubleshooting tips to ensure a smooth import process
If you have worked in a VMware vSphere environment, you have likely worked with OVA and OVF files for quickly importing virtual appliances in the environment. However, many use Hyper-V in production or lab environments and may want to import the same OVA or OVF files into Hyper-V. This post will look at how to import OVA into Hyper-V, making it easy to transfer and test virtual appliances in your Hyper-V environment.
Table of Contents
- What are OVA files?
- The Challenges of Importing OVA Files into Hyper-V
- Step 1: Converting OVA to VHD Format
- Step 2: Preparing Your Hyper-V Environment
- Step 3: Creating a New Virtual Machine
- Step 4: Configuring the Imported Virtual Machine
- Step 5: Testing the Imported Virtual Machine
- Troubleshooting Common Issues
- Wrapping up
What are OVA files?
Before diving into importing OVA files into Hyper-V, it’s essential to understand what OVA files are and how they relate to virtualization. OVA, an acronym for Open Virtual Appliance or Open Virtualization Archive, is a file format that packages and distributes pre-configured virtual machines. OVA files are archives containing the virtual machine’s disk images, configuration files, and other relevant data.
The primary purpose of OVA files is to streamline the deployment of virtual appliances, simplifying the process of setting up and testing various solutions. Virtual appliances are pre-packaged software solutions in virtual machines ready for deployment in a virtualization environment. Using OVA files, developers can ensure that users have a consistent and hassle-free experience, regardless of the underlying hardware or software configuration.
OVA files are primarily associated with VMware vSphere environments, as VMware’s virtualization products natively support them. However, OVA files can also be used with other virtualization platforms like VirtualBox, KVM, and Hyper-V with some additional steps. For example, importing OVA files into Hyper-V involves converting the OVA file to a compatible format, preparing the Hyper-V environment, and configuring the imported virtual machine.
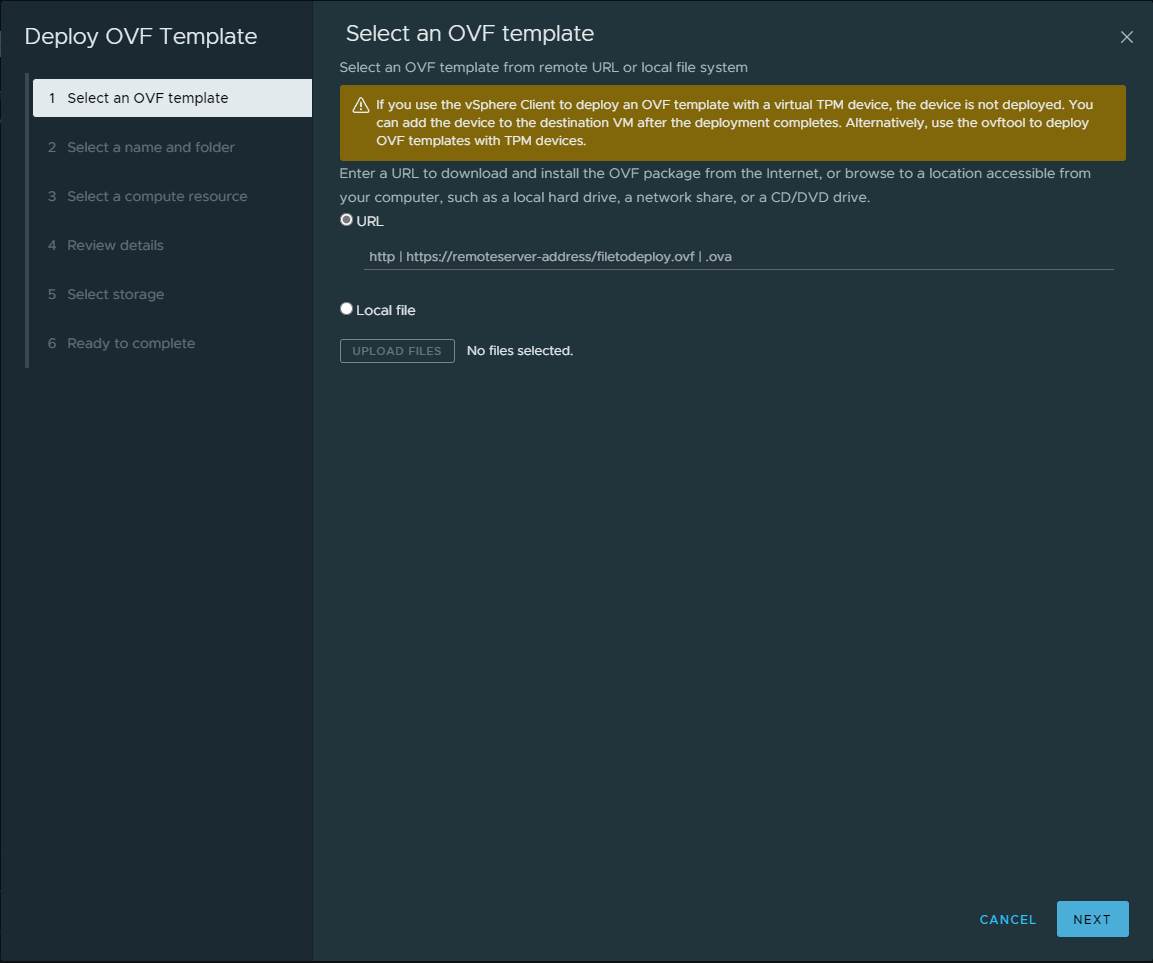
Below, you see the native wizard to import an OVA appliance in VMware vSphere using the vSphere Client.

The Challenges of Importing OVA Files into Hyper-V
Hyper-V doesn’t natively support importing OVA files, which creates some hurdles when attempting to import an OVA file. However, with the right tools and patience, you can overcome these challenges and import OVA files into Hyper-V. Let’s examine the process step-by-step. First, let’s consider the steps required to utilize OVA files in Hyper-V. These include the following:
- Convert the OVA to VHD
- Prepare your Hyper-V environment
- Create a new virtual machine
- Configure the imported virtual machine
- Test the imported virtual machine
Step 1: Converting OVA to VHD Format
Before you can import an OVA file into Hyper-V, you’ll need to convert it into a format that Hyper-V can recognize. The most common format for Hyper-V virtual machines is VHD (Virtual Hard Disk). Several tools can perform this conversion, including the qemu-img utility which is free to download.
With qemu-img.exe, you can point the tool to the OVA file you want to convert and then specify the destination file as a VHDX. For example, below, we are converting a freely available Linux OVA appliance to a VHDX disk.

Once you have the VHD or VHDX disk format, you can directly import the VHD into Hyper-V.
Step 2: Preparing Your Hyper-V Environment
Once you’ve converted the OVA file into a VHD format, it’s time to prepare your Hyper-V environment. First, ensure that your Hyper-V host is running properly and that you have enough resources to allocate to the new virtual machine. Verifying your network settings and storage configuration is essential to prevent any issues during the import process.
Step 3: Creating a New Virtual Machine
With the VHD file and your Hyper-V environment prepared, you can now create a new virtual machine to house the imported OVA file. First, in the Hyper-V Manager, select “New” and then “Virtual Machine.” Next, follow the New Virtual Machine Wizard, providing the necessary information such as name, generation, memory, and network settings.
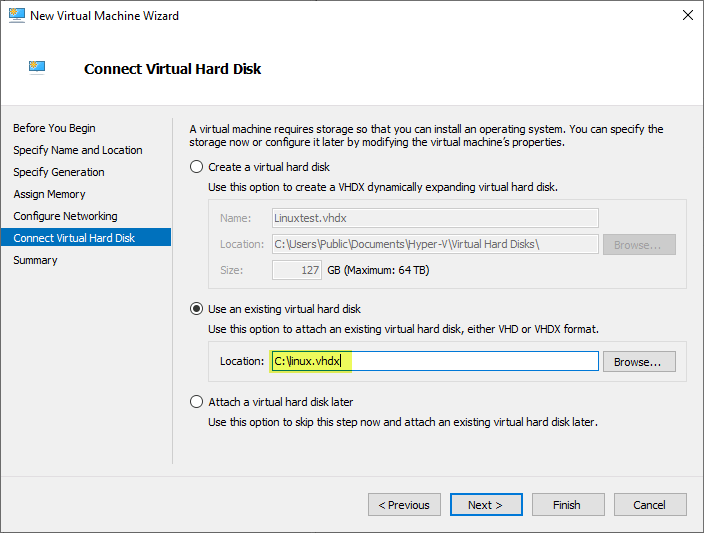
When you reach the “Connect Virtual Hard Disk” step, choose the “Use an existing virtual hard disk” option and browse to the location of your converted VHD file. Finish the wizard, and your new virtual machine will be created with the imported OVA file’s contents.
Step 4: Configuring the Imported Virtual Machine
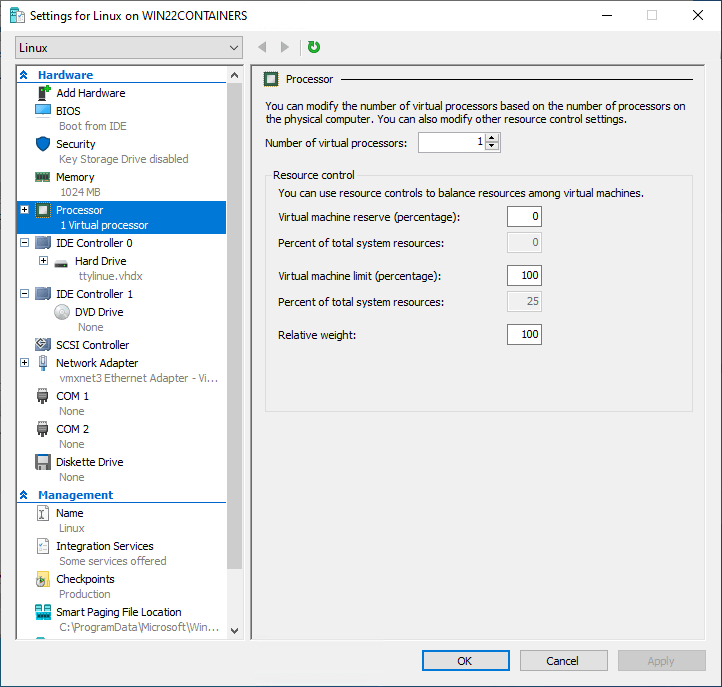
After creating the new virtual machine, you’ll need to configure it based on the requirements of the virtual appliance. This may involve adjusting the virtual machine’s settings, such as CPU, memory, and network adapters, to match the original OVA file’s specifications. Additionally, you may need to install Hyper-V Integration Services to improve the virtual machine’s performance and compatibility.
Step 5: Testing the Imported Virtual Machine
Once you’ve configured the virtual machine, testing its functionality is crucial. First, start the virtual machine and verify that the operating system boots and the applications function. This step is important to ensure that the import process is successful and that the virtual appliance performs as expected in the Hyper-V environment.
Troubleshooting Common Issues
You may encounter issues when importing OVA files into Hyper-V. Here are some common problems and potential solutions:
- Incompatible Virtual Hardware – Despite Hyper-V’s flexibility, some OVAs may have hardware configurations that Hyper-V doesn’t support. In such cases, you must modify the virtual machine’s settings to use compatible hardware options available in Hyper-V.
- Unsupported Guest Operating Systems – Hyper-V supports many guest operating systems but may not support every OS found in OVA files. If this happens, you could consider using alternative virtualization platforms like VMware or VirtualBox that support the specific OS.
- Performance Issues – If you experience performance issues with the imported virtual machine, ensure sufficient resources are allocated, and you have installed Hyper-V Integration Services. Verify that your Hyper-V host has the necessary hardware resources to support the virtual appliance.
Wrapping up
While directly importing OVA files into Hyper-V isn’t natively supported, as shown, there is a way to convert the OVA file into a native Hyper-V virtual hard disk format, such as VHD or VHDX. By converting the OVA file to a compatible VHD format, preparing your Hyper-V environment, and properly configuring the imported virtual machine, you will likely be able to use the OVA appliance in your Hyper-V environment.
However, there are times when the process may not go smoothly and may require troubleshooting and configuration changes. Regardless, you can likely use OVA appliances in your Hyper-V environment with a few tweaks and configuration.
Read More on the Series:
Hyper-V Mastery: A Step-by-Step Guide for Beginners to Elevate Your IT Skills and Boost Your Career
Beginners’ Guide for Microsoft Hyper-V: How to Export and Import Hyper-V VM’s – Part 26
Beginners’ Guide for Microsoft Hyper-V: What is Azure Arc VM Management – Part 30
Beginners’ Guide for Microsoft Hyper-V: Hyper-V P2V Conversion – Part-55
Beginners’ Guide for Microsoft Hyper-V: Hyper-V AVHDX Files – Part-56
Beginners’ Guide for Microsoft Hyper-V: Hyper-V Clone VM – Part-52
How to export and import VMs from Hyper-V
Follow our Twitter and Facebook feeds for new releases, updates, insightful posts and more.

Leave A Comment