
Quick Bites:
- The blog provides a detailed guide on enabling DKIM (DomainKeys Identified Mail) for a custom domain in Office 365
- DKIM is an email authentication method that uses public-key cryptography to verify that emails are not altered during transit and come from the claimed domain
- To set it up, you need to publish two CNAME records in DNS and enable DKIM signing in Office 365. The process is essential for preventing email spoofing and phishing, ensuring secure email delivery
- The blog also explains how to verify the DKIM configuration through test emails
Introduction
What is DKIM?
DomainKeys Identified Mail is an email authentication method designed to detect forged sender addresses in email, a technique often used in phishing and email spam. DKIM allows the receiver to check that an email claimed to have come from a specific domain was indeed authorized by the owner of that domain.
DKIM (DomainKeys Identified Mail) is an email security standard designed to make sure messages aren’t altered in transit between the sending and recipient servers. It uses public-key cryptography to sign an email with a private key as it leaves a sending server. Recipient servers then use a public key published to a domain’s DNS to verify the source of the message, and that the body of the message hasn’t changed during transit. Once the signature is verified with the public key by the recipient server, the message passes DKIM and is considered authentic.
Table of Contents
- Enabling DKIM for a custom domain
- Step 1: Publish two CNAME records for your custom domain
- Step 2: Enable DKIM signing for your custom domain in Office 365
- Conclusion
Office 365 usually setup SPF and DKIM records for your initial domain, when you sign up for the Office 365 service. But it is not the case when you want to add the domain to use the Office 365 service. Administrators need to enable the DKIM service manually, and hence along with the SPF record for the newly added domain, administrators can set up the domain for safe mail delivery.
Enabling DKIM for a custom domain
Enabling DKIM for a custom domain can be accomplished in two steps. They are :
- Publish two CNAME records for your custom domain in DNS
- Enable DKIM signing for your custom domain in Office 365
In our case, we are adding a custom domain vembudesk.com in Office 365 and enabling the DKIM for the custom domain vembudesk.com in Office 365 security and compliance center.
Step 1: Publish two CNAME records for your custom domain

For each custom domain, you need to create two CNAME records in your domain registrar DNS. The below entry shows these two records to be added to your DNS
Hostname: selector1._domainkey
Points to address or value: selector1-< domainGUID >._domainkey.< initialDomain >
TTL: 3600Hostname: selector2._domainkey
Points to address or value: selector2-< domainGUID >._domainkey.< initialDomain >
TTL: 3600
Where:
For Microsoft 365, the selectors will always be “selector1” or “selector2”.
Domain GUID is the same as the domain GUID in the customized MX record for your custom domain that appears before mail.protection.outlook.com. For example, in the following MX record for the domain vembudesk.com, the domain GUID is vembudesk-com:
vembudesk.com. 3600 IN MX 5 vembudesk-com.mail.protection.outlook.com
The initial domain is the domain that you used when you signed up for Microsoft 365. Initial domains always end in onmicrosoft.com. In our case the initial domain name is vembu.onmicrosoft.com.
So, the DNS CNAME record will be,
Hostname: selector1._domainkey
Points to address or value: selector1-vembudesk-com._domainkey.vembu.onmicrosoft.com
TTL: 3600Hostname: selector2._domainkey
Points to address or value: selector2-vembudesk-com._domainkey.vembu.onmicrosoft.com
TTL: 3600
The below screenshot shows these entries in our domain registrar DNS

Step 2: Enable DKIM signing for your custom domain in Office 365
By default, DKIM signing for your custom domain is not enabled automatically when you add the custom domain in Office 365 Admin Center → Settings → Domains. Users can verify the DKIM status for each domain in the Office 365 protection center. Or can visit the below URL directly to verify your DKIM status for the custom domain you added.
https://protection.office.com/dkimv2
DomainKeys Identified Mail (DKIM) – Security & Compliance (office.com)
And your added domains are listed, as shown below
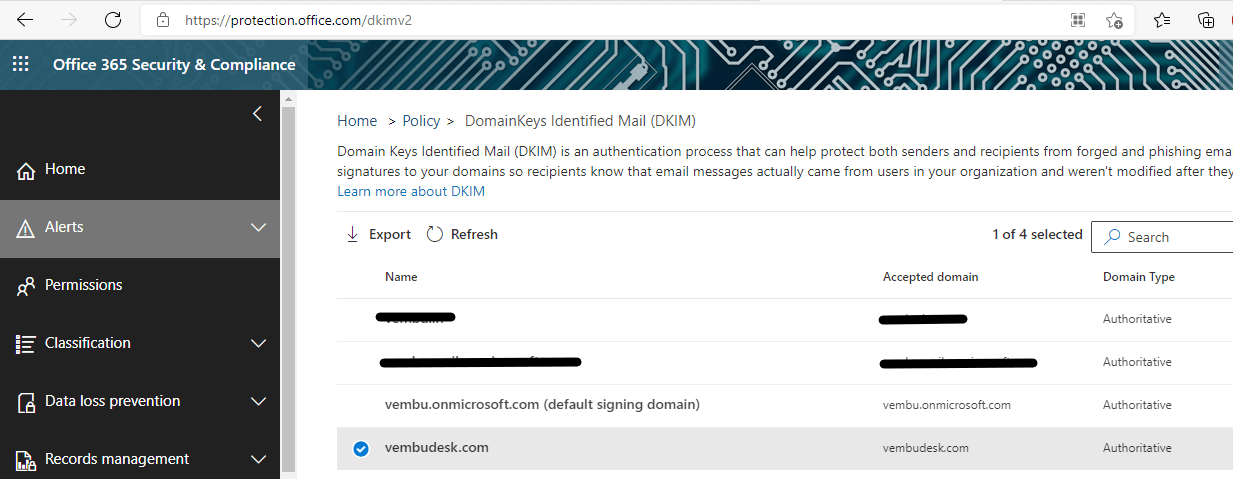
On clicking the newly added domain, Initially, you will get the message that “ No DKIM keys saved for this domain” After adding the above two CNAME records, you can enable the DKIM using Powershell as shown below.
- First login to your Office 365 account in the PowerShell using the command
- Run the below command to enable the DKIM signing configuration for the domain
Connect-ExchangeOnline -UserPrincipalName
The below screenshot shows this command, and this will open a password dialog box as shown below, put the password and click sign in
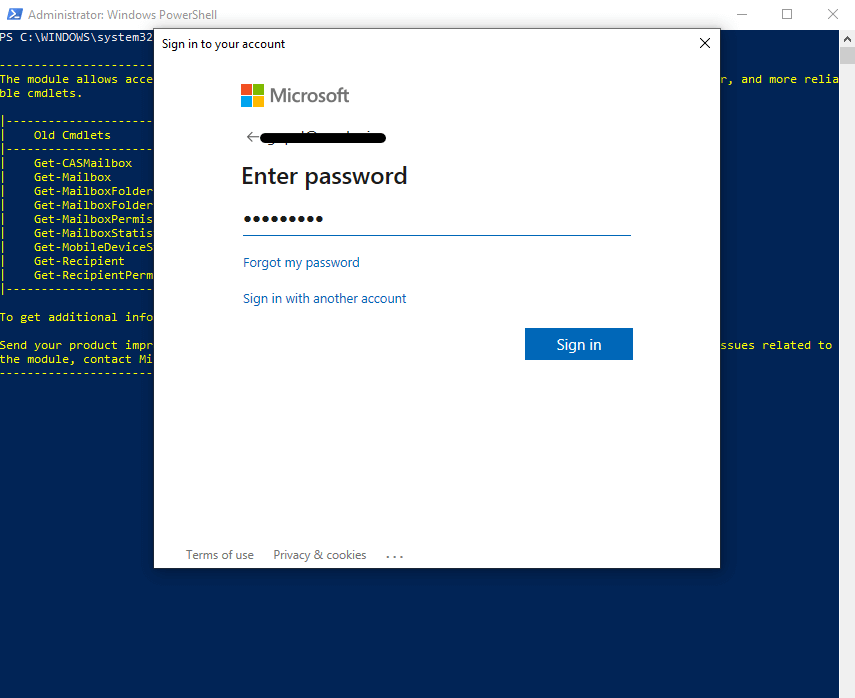
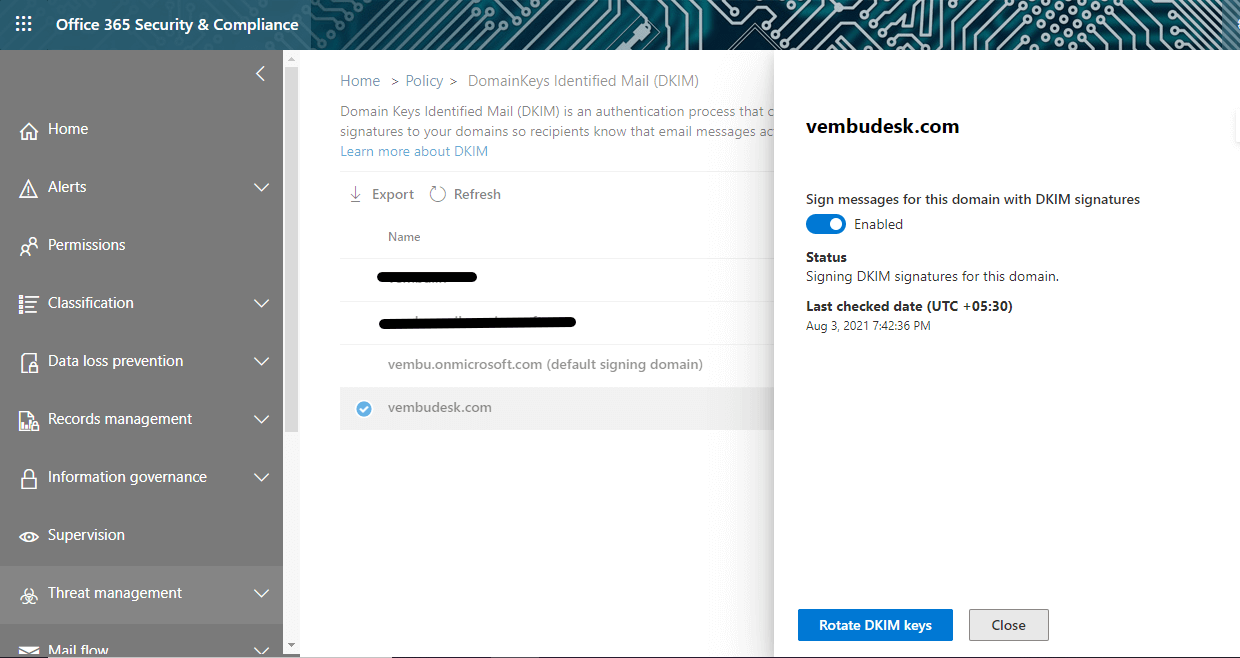
“New-DkimSigningConfig -DomainName vembudesk.com -Enabled $true” ,
this will enable the DKIM configuration button and you can verify in the Office 365 Security and Compliance portal as shown below.
To Confirm DKIM signing is configured properly for Office 365
Wait a few minutes before you follow these steps to confirm that you have properly configured DKIM. This allows time for the DKIM information about the domain to be spread throughout the network.
Send a message from an account within your Office 365 DKIM-enabled domain to another email account such as Gmail. In our example, we have sent a test mail from an Office 365 mailbox “mailbox11@vembudesk.com to a GSuite account.
Open the message and look at the header. Instructions for viewing the header for the message will vary depending on your messaging client. The DKIM-signed message will contain the hostname and domain you defined when you published the CNAME entries. The message will look something like this example:
ARC-Authentication-Results: i=2; mx.google.com;
dkim=pass header.i=@vembudesk.com header.s=selector2 header.b=X4j33OHN;
arc=pass (i=1 spf=pass spfdomain=vembudesk.com dkim=pass dkdomain=vembudesk.com dmarc=pass fromdomain=vembudesk.com);
spf=pass (google.com: domain of mailbox11@vembudesk.com designates 40.107.131.91 as permitted sender) smtp.mailfrom=mailbox11@vembudesk.com;
This header information shows the receiver email is a Gmail account. In the above example, you may see the information such as “dkim=pass and header.s=selector2” denoting the DKIM signature is passed, and we can conclude that DKIM records are properly configured.
Conclusion
DKIM discourages spammers from spoofing and protects recipients from phishing attacks. In turn, it improves email deliverability and strengthens stakeholder trust. Without authentication, messages are either marked as spam or not delivered to intended recipients, causing the company to lose business. So as an administrator, it is important to configure SPF, DKIM, and DMARC records for your domain, after adding to the Office 365 service immediately to avoid email spoofing and phishing attacks.
Related Posts:
Amazon Simple Email Service: An Overview
Microsoft 365 Beginner’s Guide for IT Admins Part 2: Learn to install apps and services on Windows, and a quick overview on migrating emails and files to Microsoft 365
Microsoft 365 Beginner’s Guide for IT Admins Part 1: Learn to set up a business trial account and configure email with a custom domain
How-To Guide: Set up Multiple Domains in G Suite and Microsoft Office 365 for Email Delivery
Follow our Twitter and Facebook feeds for new releases, updates, insightful posts and more.

Leave A Comment