
Introduction
What is Proxmox LXC container
Proxmox LXC containers are a popular method for virtualization and containerization. LXC stands for Linux Containers, which is a lightweight and efficient virtualization technology. Proxmox, on the other hand, is an open-source platform that provides virtualization management capabilities. With Proxmox LXC containers, users can create multiple isolated environments on a single physical server, allowing for the efficient utilization of resources.
These containers operate at the operating system level, sharing the kernel with the host system, which results in improved performance and reduced overhead. Proxmox LXC containers provide an ideal solution for various use cases, such as application deployment, development environments, and even web hosting. They offer flexibility, scalability, and ease of management, making them suitable for both small businesses and large enterprises.
By leveraging Proxmox LXC containers, users can achieve better resource utilization, enhanced security, and simplified management of their virtual infrastructure.
How Proxmox LXC containers differ from traditional Dockers
Proxmox LXC containers and Dockers are both popular solutions used in the world of containerization. While they share some similarities, there are key differences that set them apart. Proxmox LXC containers, short for Linux Containers, provide an operating system-level virtualization method. They offer a lightweight and efficient environment for running applications, allowing for better resource utilization and lower overhead.
In contrast, Dockers utilize containerization technology to package and run applications with their dependencies in isolated environments. This makes them highly portable and enables easy deployment across different systems. Additionally, Dockers provide a streamlined workflow through the use of container images and version control. When choosing between Proxmox LXC containers and Dockers, it is essential to consider the specific requirements of your project and the level of virtualization needed. Overall, Proxmox LXC containers are an excellent option for those seeking a lightweight and efficient virtualization solution, while Dockers excel in delivering portable and scalable application deployments.

In this blog, we are detailing the steps that involves to create a LXC container in a proxmox server. Proxmox allows you to create a LXC container from container images, referred as templates. Proxmox stores a wide range of LXC container images or templates, we can download the container image into the proxmox server and using the image, we can create many number of LXC containers in quick time.
Container images or Container templates
Container images, often called “templates” or “appliances,” are comprehensive packages stored as tar archives. These self-contained packages include all the necessary components to run a container effectively. When using Proxmox VE, users gain access to an extensive collection of basic templates for the most prevalent Linux distributions. These templates can be conveniently downloaded using either the graphical user interface (GUI) or the pveam (Proxmox VE Appliance Manager) command-line utility.
By offering a wide range of templates, Proxmox VE ensures that users can quickly and efficiently set up containers without the burden of manual configuration.
Choosing your container template
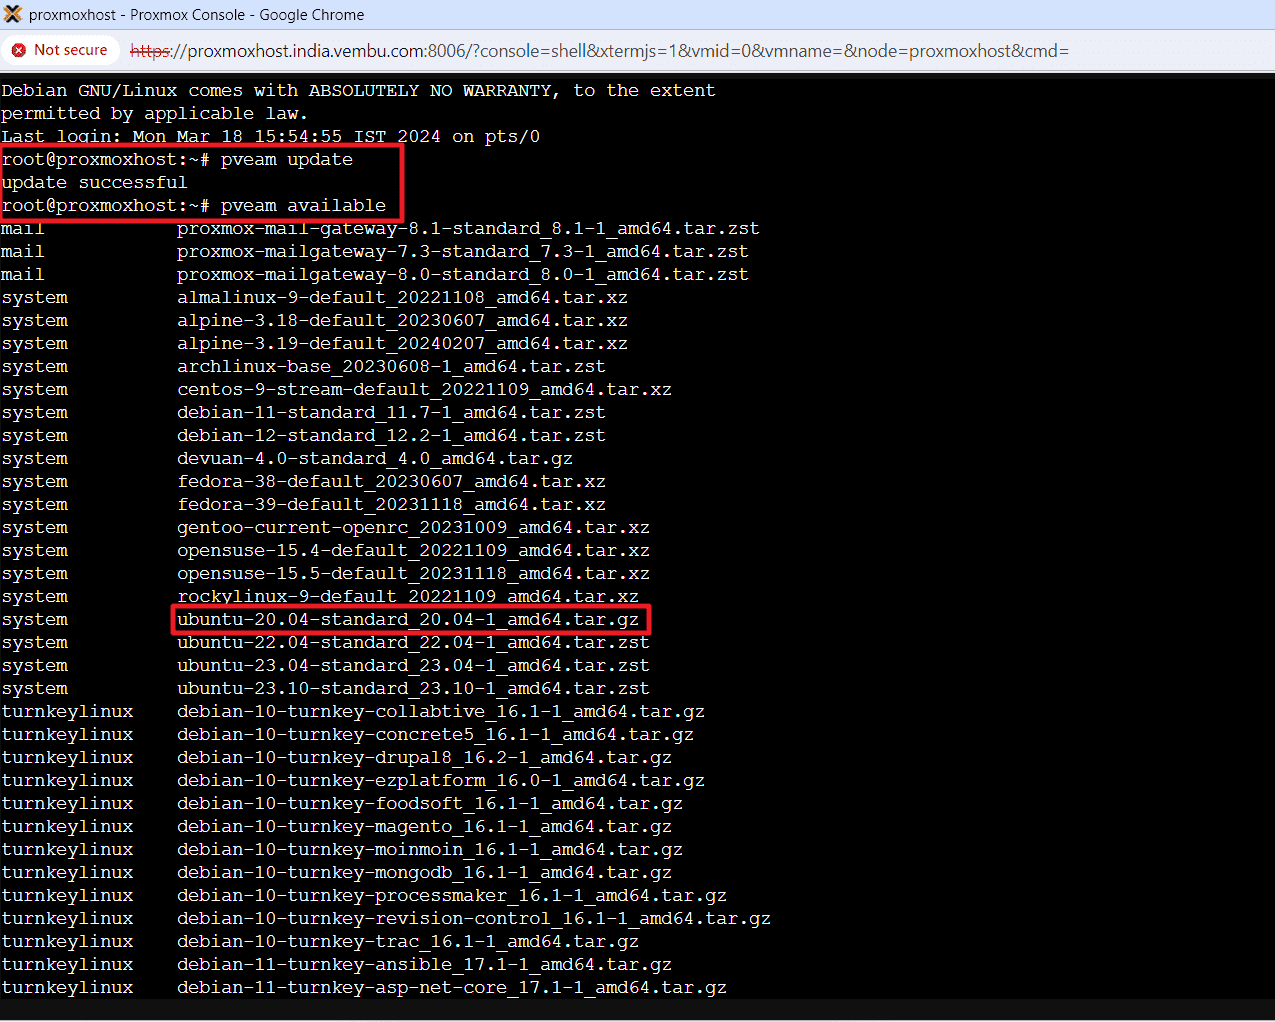
Before creating a LXC container, user must understand his requirement and the linux flavour he wants to use for the container. Users can get the list of container templates by executing the below command in the proxmox host server shell. Before that he should update the list.
# pveam update – Execute to update the container list
# pveam available – Shows the avaiable list after update
Below screenshot shows these two steps.
Here we are going to download the template “ubuntu-20.04-standard_20.04-1_amd64.tar.gz.”, since we are going to use ubuntu 20.04 version as the Linux distro for the container. Before you can use such a template, you need to download them into one of your storage targets. If you’re unsure to which one, you can simply use the local named storage for that purpose. For clustered installations, it is preferred to use a shared storage so that all nodes can access those images.
Here is the command to download the ubuntu 20.04 container template.
# pveam download local ubuntu-20.10-standard_20.10-1_amd64.tar.gz
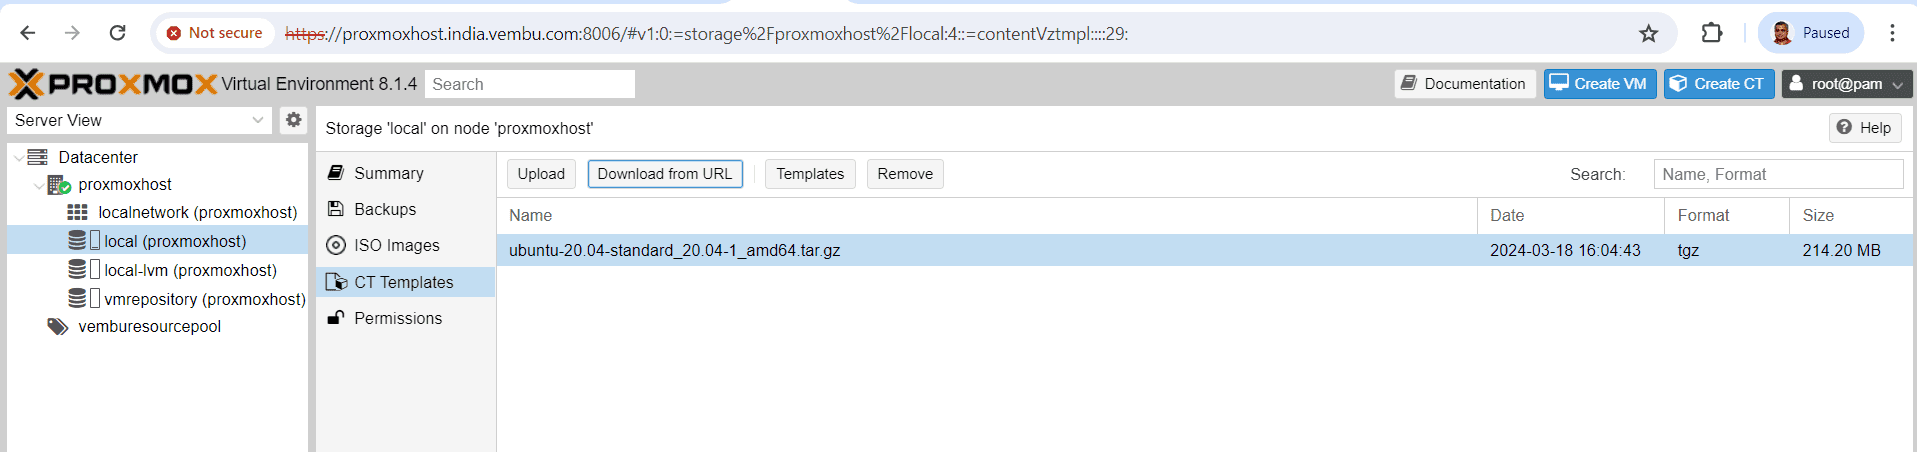
You can also download from webgui console. The below screenshots shows this.
Click Templates on the selected storage page, and choose the download button after selecting the Container template.

Click Download. The respective tgz file will be downloaded and saved under CT templates as shown below.
Creating a LXC container using the downloaded CT Template
Login to proxmox host server web console using root user and its credential
Choose Create CT, a new dialog page opens
General:
Under General tab,
Node : choose the proxmox host
Hostname : Provide a host name
Resource pool : Choose the resource pool you created
Password : Provide a password for the root user
SSH public Key : Upload the public key, if you want to access the container through SSH from network.
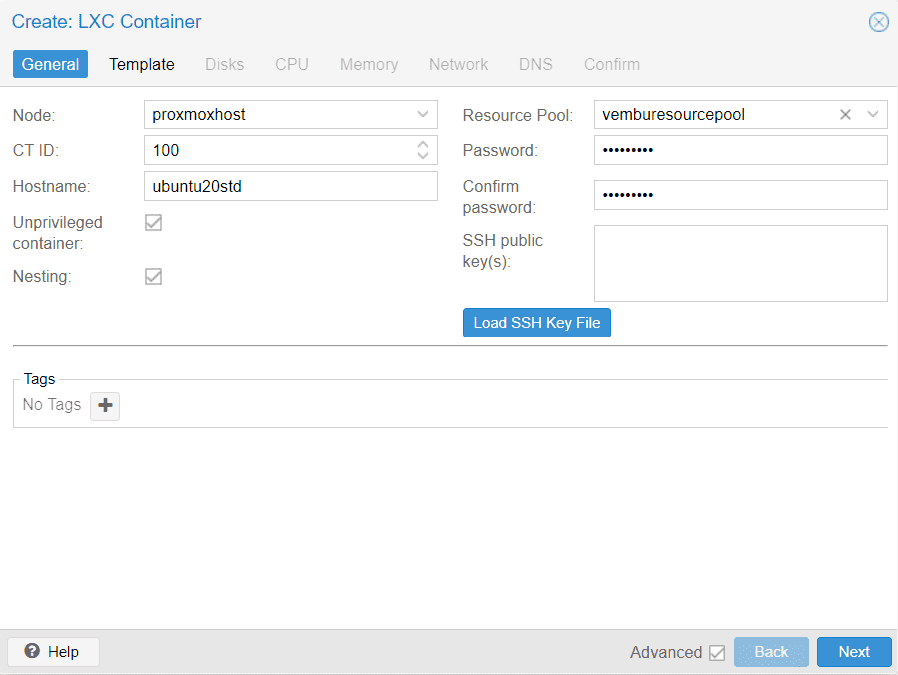
Click Next to Template Tab,
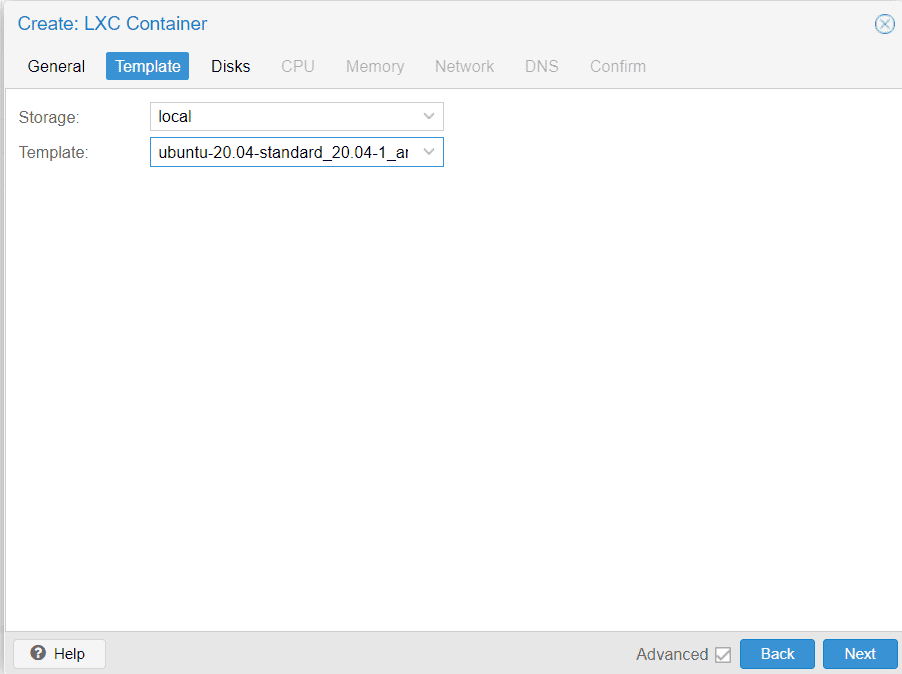
Template :
Under Template, Choose the storage where you downloaded the CT template, and select the respective template you downloaded. Below screenshot shows this step
Click Next to Disks Tab,
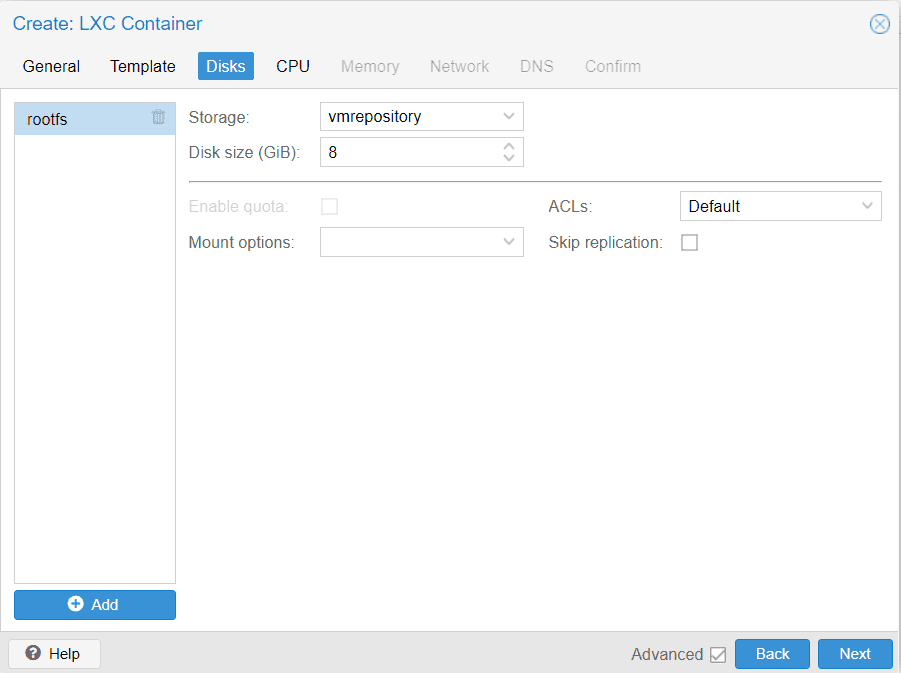
Disks :
Under Disks Tab,
Storage: Choose the storage location where you want to store the container created files. In our case, we already creaged a storage called “vmrepository” to store VM and Container files. so choosen that stroage.
Disk Size (GiB): Allocate the disk size of the container. Default is 8GB, user can increase or decrease the disk size as per the requirement.
ACLs: Default ACLs allows the user to set more detailed file ownership than the traditional user/group/others model.
Mount options: Default none. ( lazytime, noatime & nosuid are configurable )
Skip replication: By default, additional mount points are replicated when the Root Disk is replicated. If you want the Proxmox VE storage replication mechanism to skip a mount point, you can set the Skip replication option for that mount point.
Click Next ti CPU tab,
CPU:
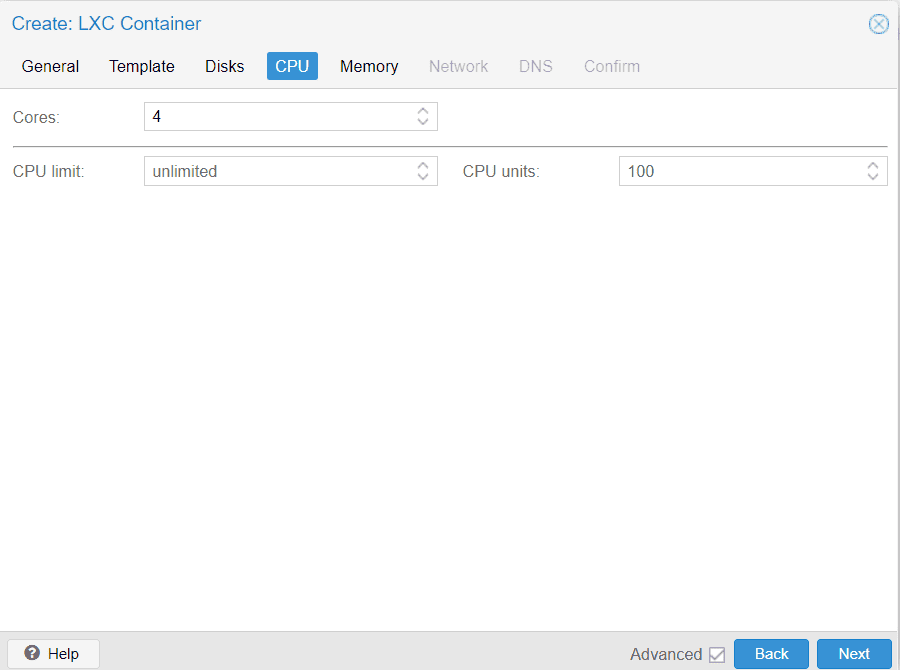
In CPU tab,
Cores – Number of CPU cores required for the Container.
CPU Limit – The count limits the CPU usage. If we assigned 4 cores, then limit the CPU to use it below 4 or not. Default is unlimited, meaning no limit.
Click Next to Memory tab
Memory:
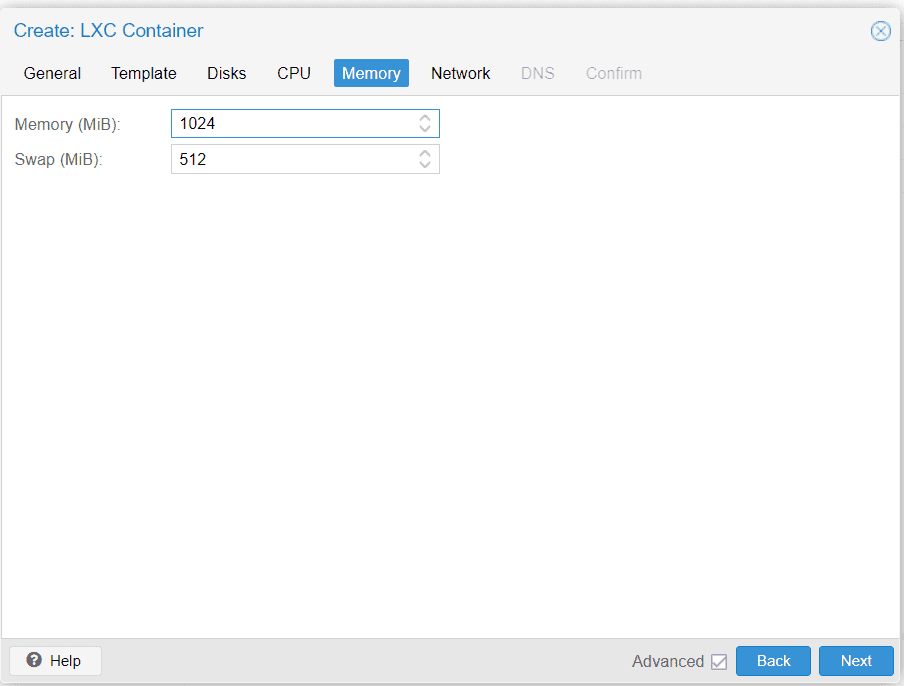
In Memory tab,
Memory (MiB): The total memory allocated to the container.
Swap (MiB): Allows the container to use additional swap memory from the host swap space.
Click Next to Network Tab,
Network :
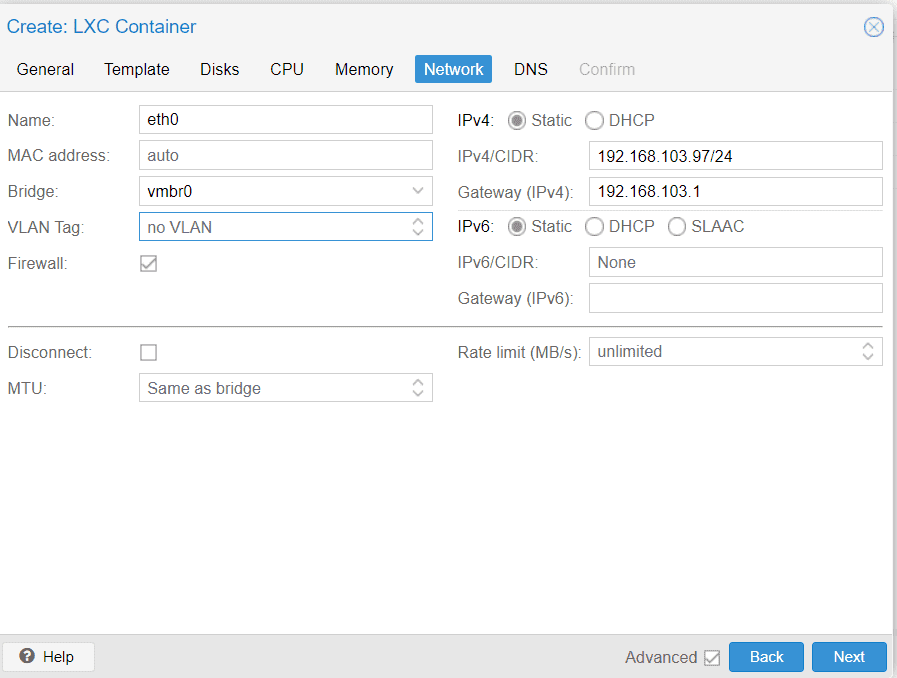
In Network tab,
Name: eth0. Name of the NIC interface
Mac address: Auto. Automatic MAC address is assigned.
Bridge: vmbr0. Bridged to the host bridge vmbr0
VLAN Tag: No VLAN. If require you can speicify the tag no.
Firewall: Enable. Allows you to configure firewall rules. A default policy in place for the container
IPV4: Static or DHCP. If static, provide a static IP with CIDR notation. If you have DHCP server, choose DHCP, same settings for IPV6 too.
Gateway – Provide the Gateway IP
Click Next to DNS tab,
DNS:
In DNS tab,
DNS Domain: provide your domain name as per your network environment
DNS Server: provide your local DNS server IP
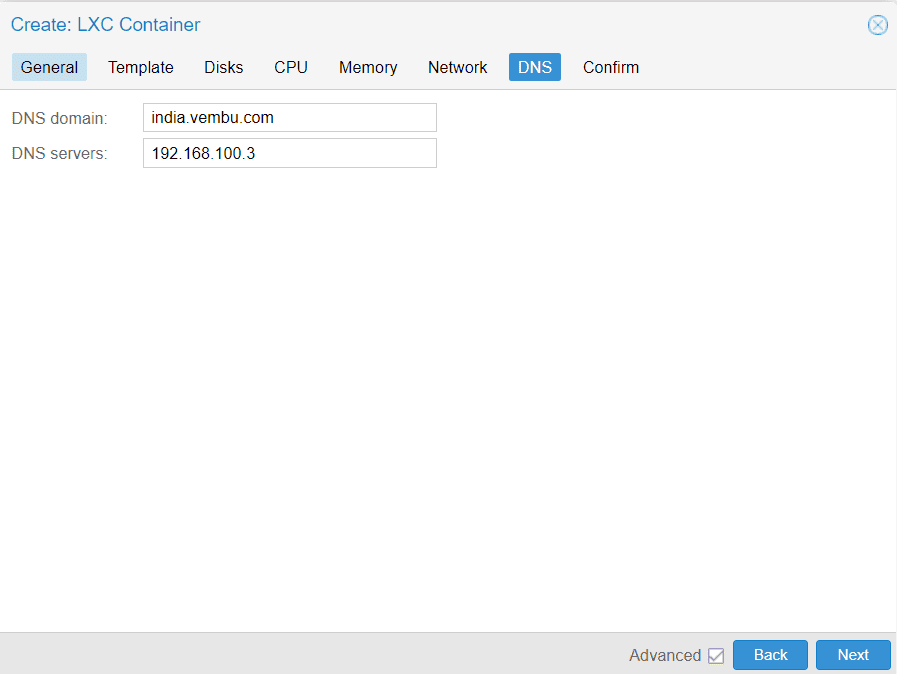
Click Next to Confirm
In the confirm tab, verify your settings provided, and enable “Start after created” to start the container immediately after it created.
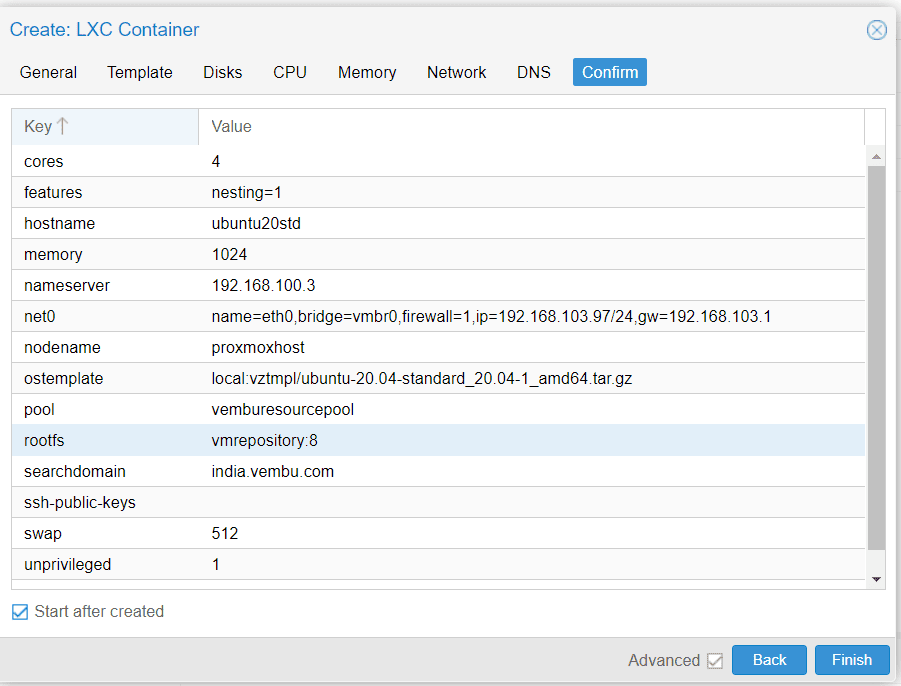
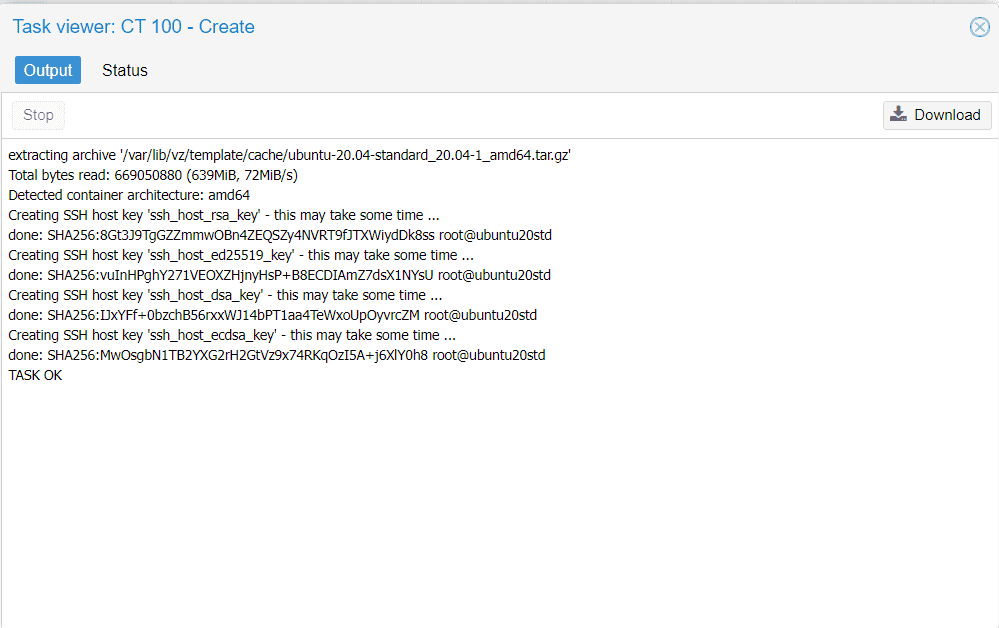
Click Finish to start the Container creation process. You can view the creation process and within few seconds your container will be ready and running.
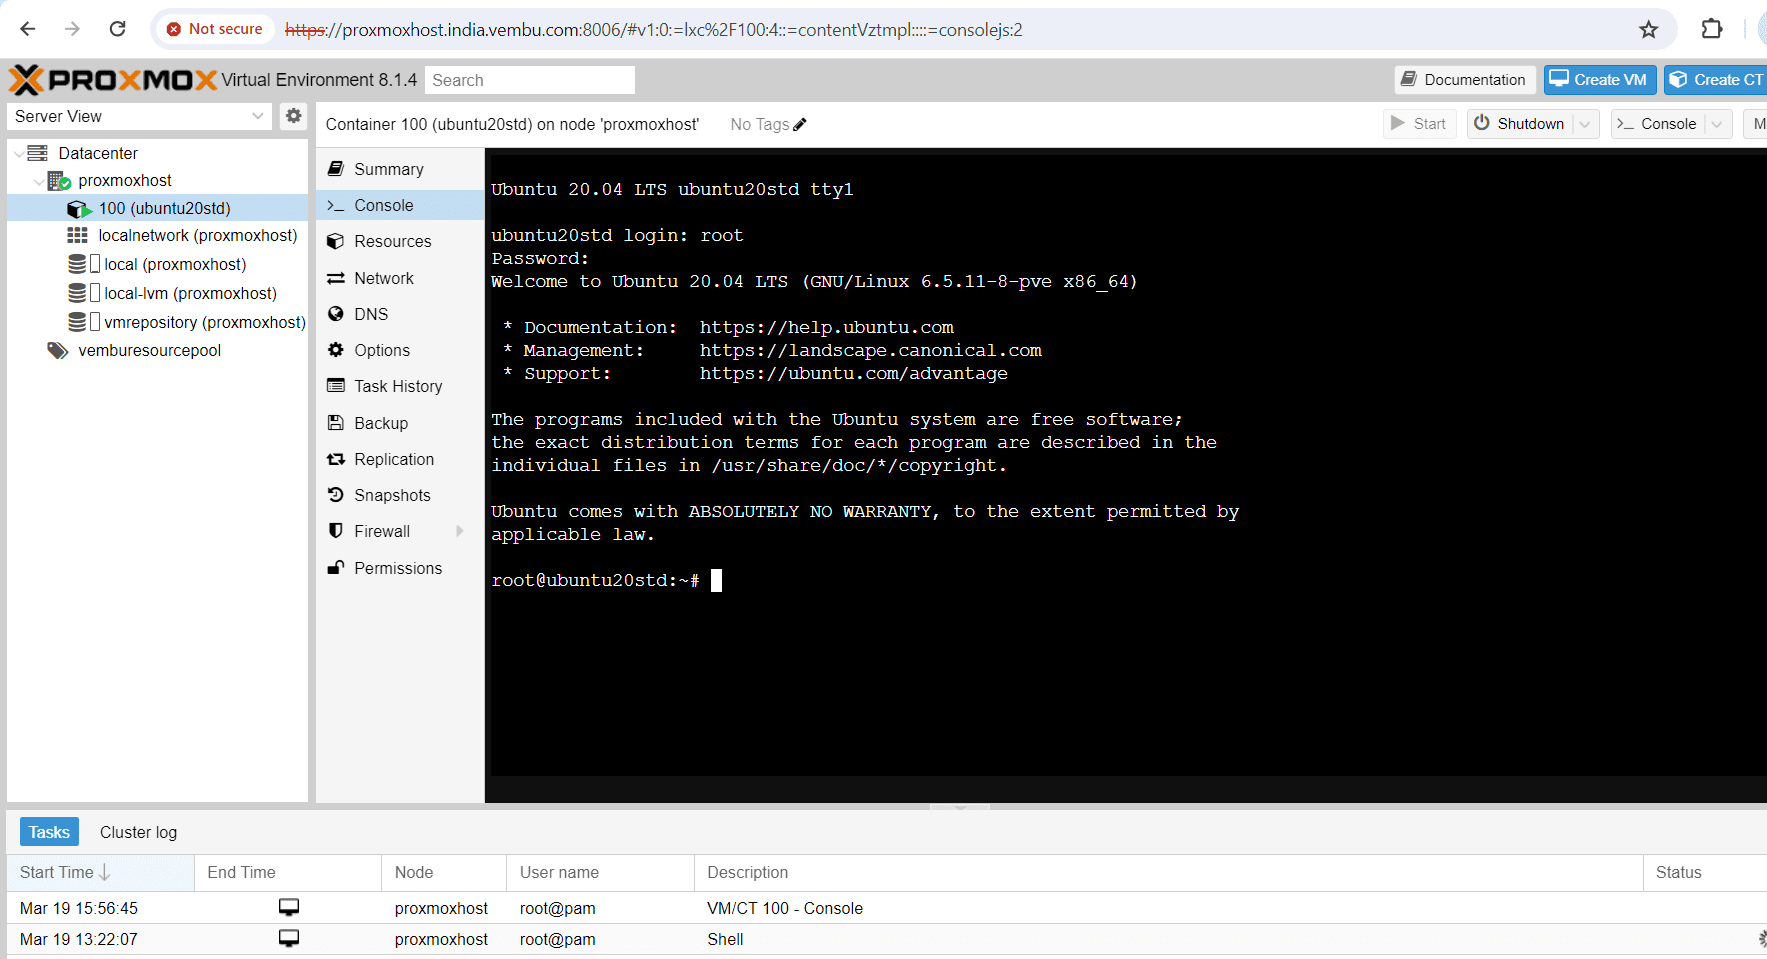
Once the container is up and running, you can access the container through console in the proxmox web GUI by entering the root user and password.
Conclusion
In conclusion, the process of creating a LXC container in Proxmox host offers numerous advantages and a few drawbacks worth considering. LXC containers provide a lightweight and efficient alternative to traditional virtualization methods, allowing for better resource utilization and faster deployment times. With Proxmox host, the management and administration of LXC containers become more streamlined, enabling users to easily configure and monitor their containers.
However, it’s important to note that LXC containers may lack some advanced isolation features found in other virtualization technologies. Despite this limitation, the flexibility, scalability, and cost-effectiveness of LXC containers in Proxmox make them a compelling choice for various use cases.
Read More:
Proxmox Virtualization Series: Creating a Resource Pool & VM in Proxmox – Part 4
Follow our Twitter and Facebook feeds for new releases, updates, insightful posts and more.

Leave A Comment