
In the world of Cloud computing, connectivity can sometimes be a challenge. Managing secure connections can sometimes be complex with multiple machines spread across multiple locations. Fortunately, Microsoft Azure offers a comprehensive solution to this problem through Point-to-Site connectivity.
What is a point-to-site VPN?
A Point-to-Site (P2S) VPN allows a user to securely connect to an Azure Virtual Network (the “site”) from their computer (the “point”). In other words, a P2S VPN allows users to access Azure resources from virtually anywhere in the world securely.
Table of Contents
- Why use a Point-to-Site VPN?
- Step 1: Create a Virtual Network
- Step 2: Configuring the VPN Gateway
- Step 3: Creating the Root Certificate
- Step 4: Configuring the Point-to-Site connection
- Step 5: Connect to the VPN
Why use a Point-to-Site VPN?
The key to using a P2S VPN lies in its flexibility and security. Because it sets up a secure connection between an individual client and Azure, developers and IT professionals can effortlessly work on and access their Azure resources no matter where they are. This makes it particularly useful for remote teams, freelancers, or simply when you need to work away from the office.
Additionally, the encrypted nature of a VPN contributes to the security of your data, which is critical in an era when data breaches and cyber-attacks are commonplace.
Let’s go through the steps of creating a Point-to-Site connection!

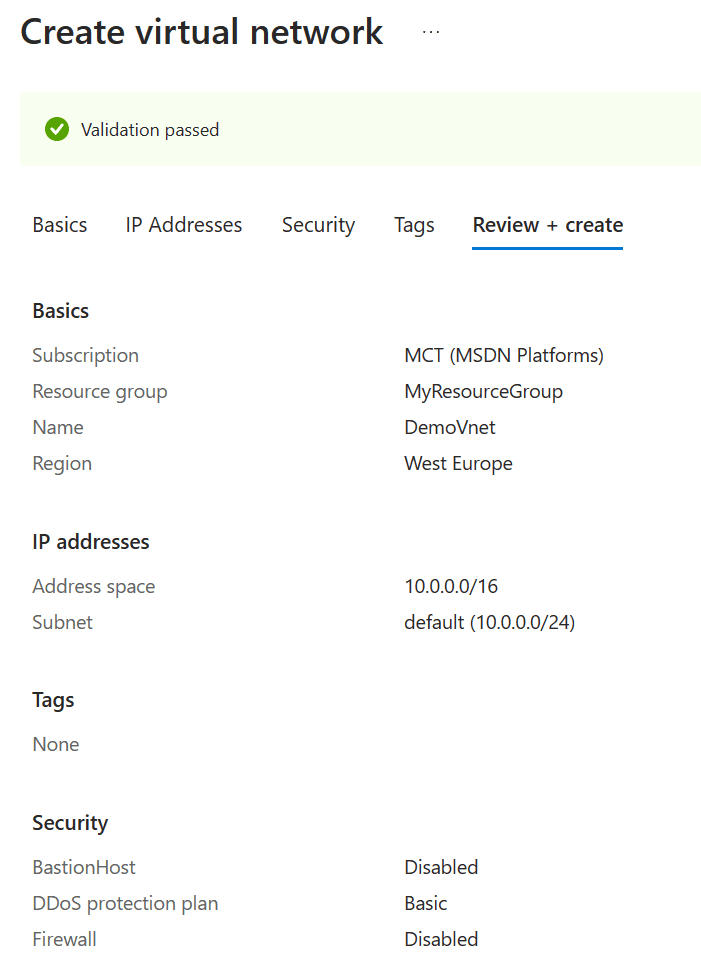
Step 1: Create a Virtual Network
- Log in to the Azure Portal and create a new Virtual Network
- Click “Create Resource” in the left panel
- Search for “Virtual Network” and select it
- Click “Create” to open the Virtual Network Control Panel
- Enter your virtual network’s details such as subscription, resource group, name, region, and IP address range
Step 2: Configuring the VPN Gateway
A VPN Gateway in fact a specific type of gateway that enables a secure connection between an on-premises network and an Azure Virtual Network (VNet). This gateway facilitates the transfer of encrypted data over this connection, ensuring the integrity and security of the data as it travels between these two networks.
There are two types of VPN Gateways you can create in Azure: Route-Based and Policy-Based. Route-Based VPNs use “routes” in the IP forwarding or routing table, while Policy-Based VPNs use policies (IPSec Policies) to route traffic.
An Azure VPN Gateway can also enable connections to multiple on-premises locations or between numerous Azure VNets, depending on your network and business requirements.
Search for “Virtual Network Gateway” in the Azure Portal and click “Create.”
Fill in the necessary details such as name, region, gateway type as ‘VPN’, VPN type as ‘Route-Based’, and select the network you just created.
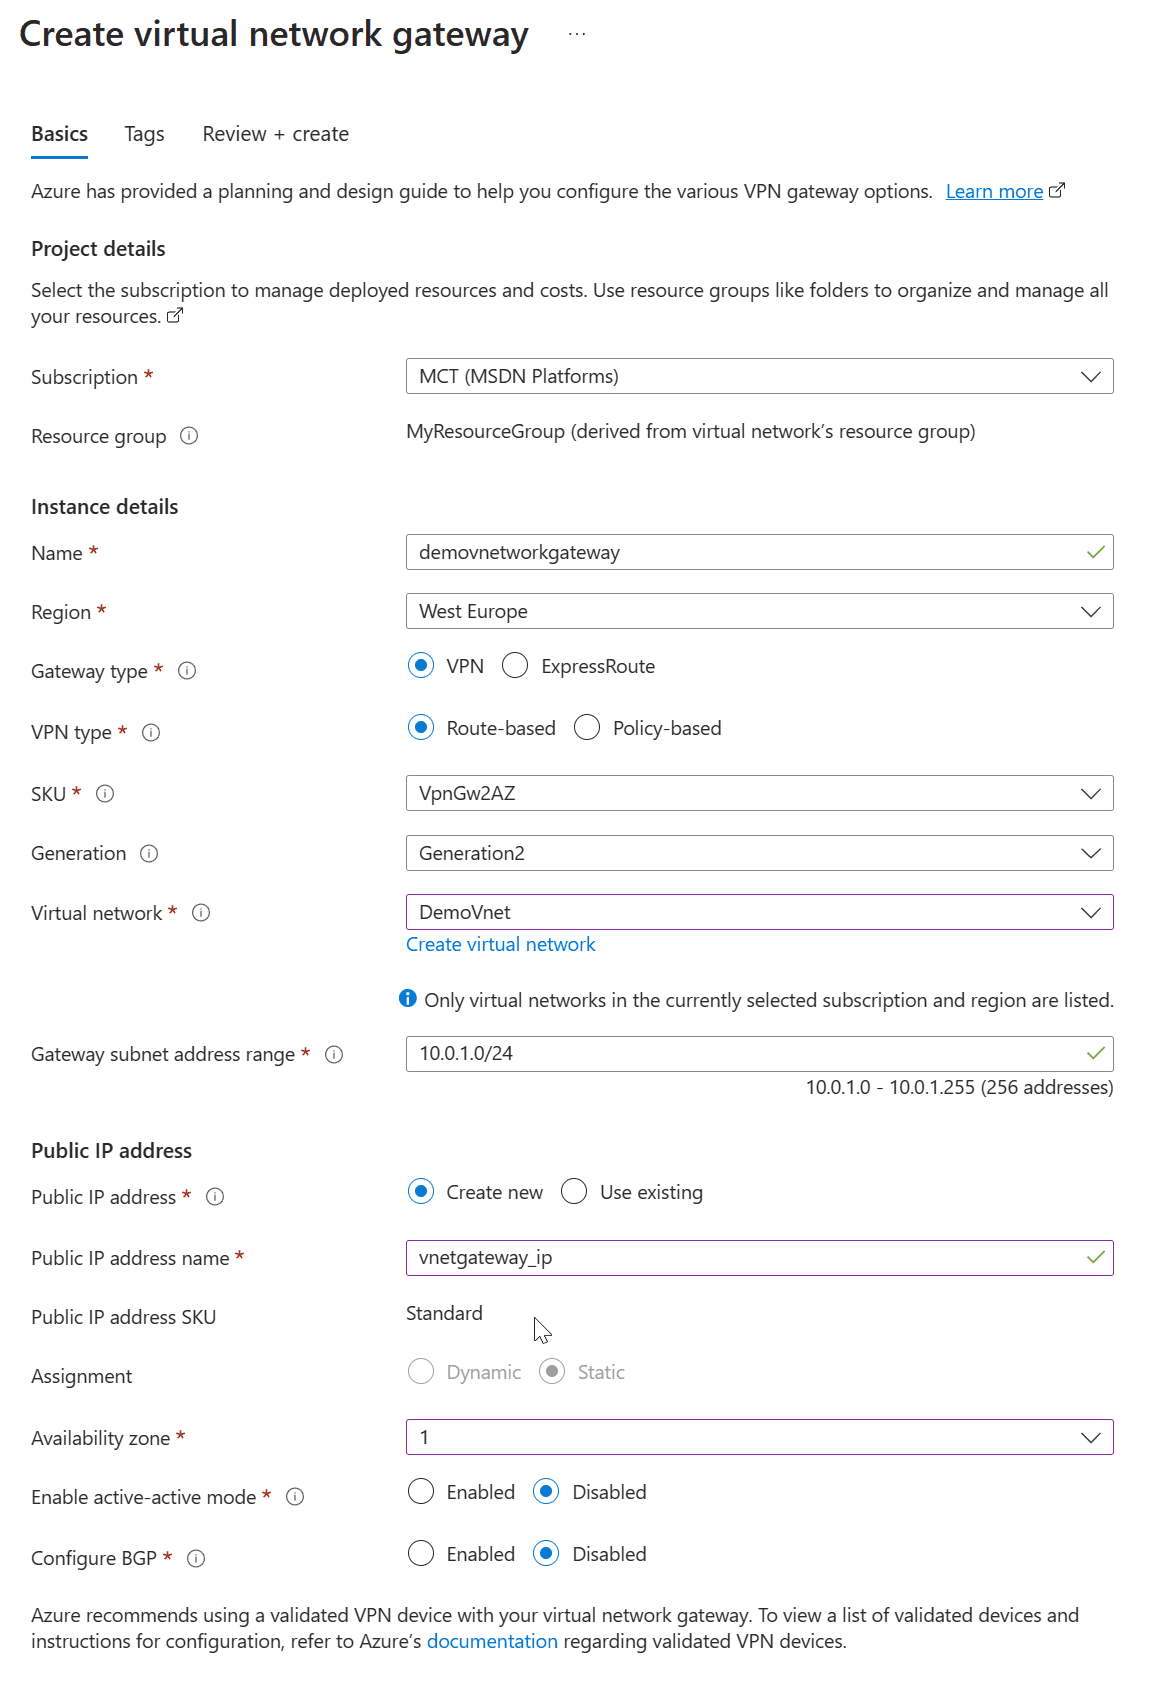
Click “Create” to create the gateway. This process may take 15-20 minutes.
Step 3: Creating the Root Certificate.
The next step is generating a root and client certificates for your P2S connection.
Open the terminal or command prompt on your machine.
Use the following commands to create the root certificate:
openssl x509 -outform pem -in RootCA.pem -out RootCA.crt
Then create a client certificate signed by the root certificate:
openssl x509 -req -in VPNClient1.csr -CA RootCA.pem -CAkey RootCA.key -CAcreateserial -out VPNClient1.crt -days 500 -sha256
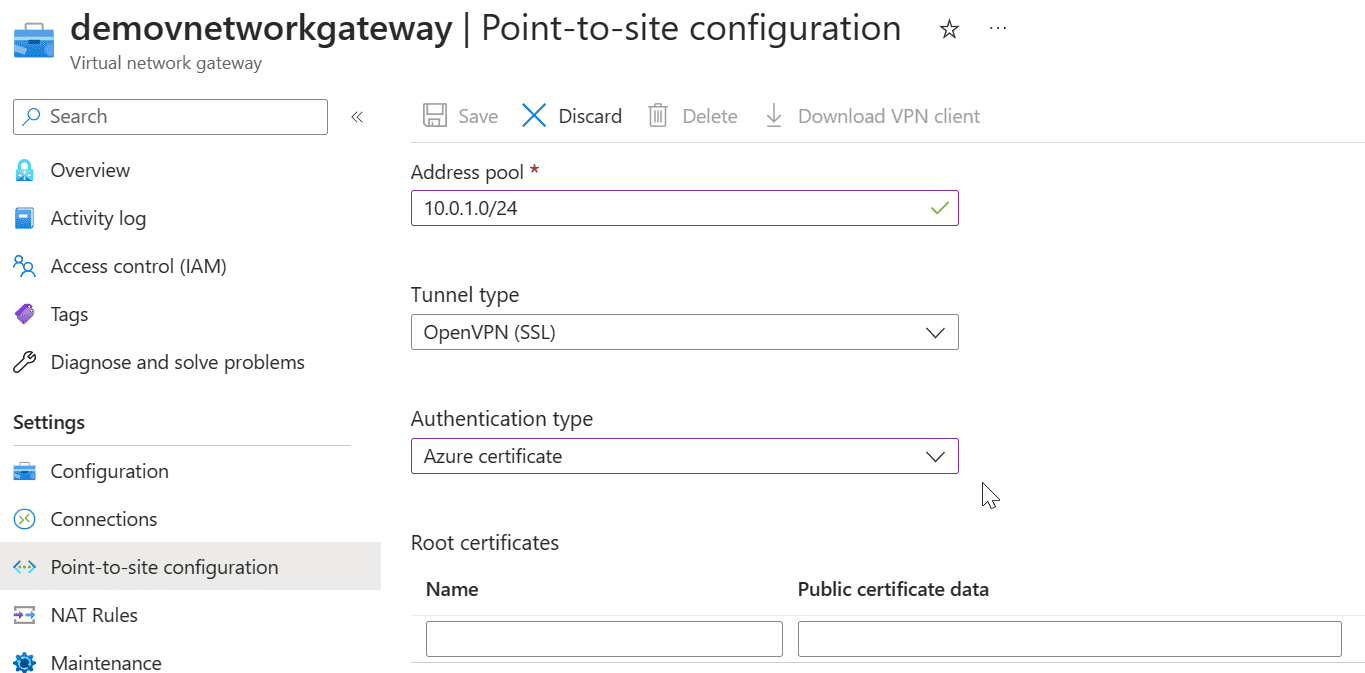
Step 4: Configuring the Point-to-Site connection.
Return to the Azure Portal to configure the P2S connection:
- Go to your VPN gateway page.
- Click “Point-to-site configuration” and then “Configure Now.”
- Enter your address range, tunnel type, authentication type and the root certificate you created.
- Click “Save” to save the configuration.
Step 5: Connect to the VPN
The final step is to create a VPN connection from your client machine:
- Download the VPN client from the “Point-to-site configuration” page in the Azure Portal.
Install the VPN client on your machine - Double-click the downloaded VPN client configuration file to connect
- There you have it, a step-by-step guide to setting up a point-to-site connection to Azure! Ensure the client’s firewall rules and Azure allows traffic to pass through the VPN tunnel
Read More:
Microsoft Azure for Beginners: Securing your servers using Azure Arc – Part 17
Microsoft Always on VPN : Overview, Requirements, and Features
AWS for Beginners: What is AWS Client VPN: Part 20
How to Create a Virtual Private Cloud (VPC) in AWS Management Console and Launch an instance in VPC
Creating a VPC network & provisioning a new firewall rule for the VPC in Google Cloud Platform
Follow our Twitter and Facebook feeds for new releases, updates, insightful posts and more.

Leave A Comment