
Continuing our vSphere Distruibutd Switch blog posts, in this vSphere Distributed Switch part C in our VMware for Beginners series, we will continue to discuss this subject and focus on creating and configuring vSphere Distributed Switch.
What will we discuss in this third blog post about vSphere Distributed Switch
How to create and configure a vSphere Distributed Switch?
The following image shows an example of our vSphere environment using vSphere Distributed Switches that we have been working on since this VMware for Beginners series began.
vSphere Distributed Switch details:

3x ESXi hosts and 4 physical NICs distributed in 2 vDS with 2 physical NICs each.
Storage vDS
- 2x Uplinks(physical NICs) per ESXi host
- 2x PortGroup(Storage and vMotion)
In this case, we use the Storage Portgroup to connect our ESXi hosts to Storage and the second Portgroup for the vMotion network.
Virtual Machines vDS
- 2x Uplinks(physical NICs) per ESXi host
- 4 Portgroups(Management, Production VMs, Marketing VMs and Development VMs)
Using this type of configuration in our vDS for our Virtual Machines and ESXi hosts management, we can separate the traffic using the same vDS with different VLANs for each department and network.

How to create and configure a vSphere Distributed Switch?
Let us now create a vSphere Distributed Switch.
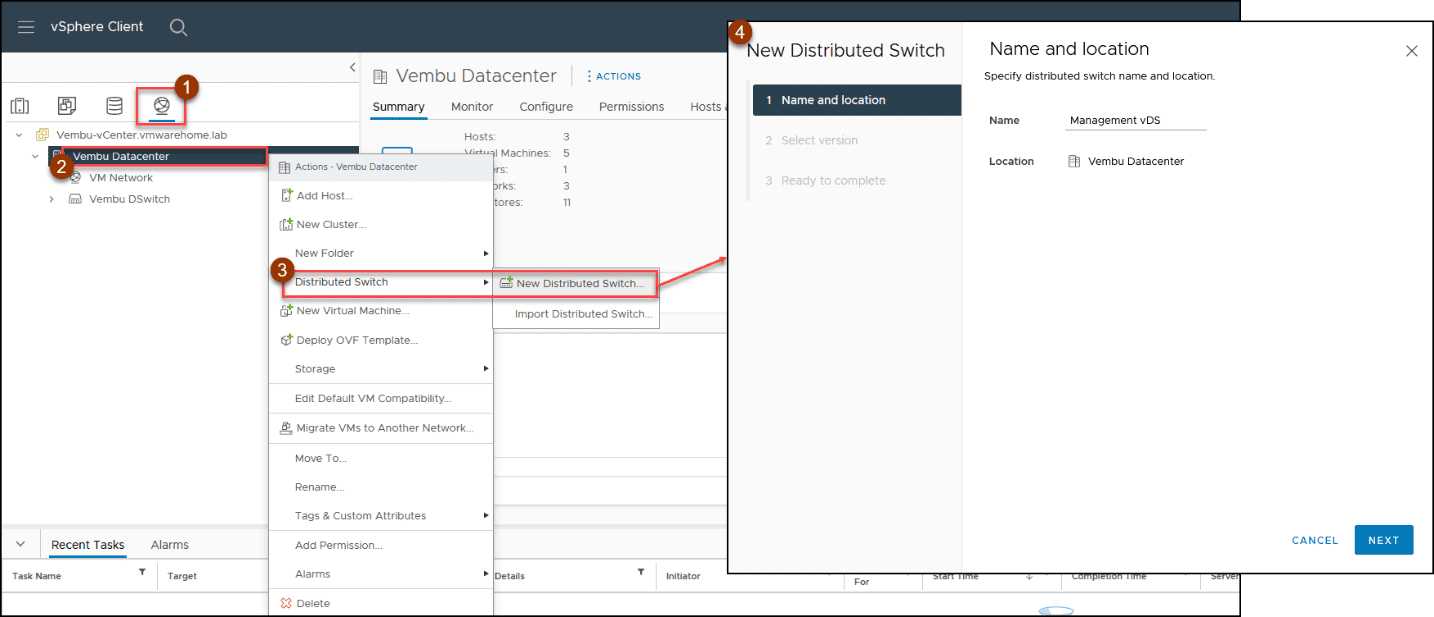
In the vCenter, select the icon Networking, in the Datacenter level, right-mouse click, and on the menu, select Distruibed Switch and then New Distruibuided Switch.
Give your vDS a name(following the above design we will create Management vDS).
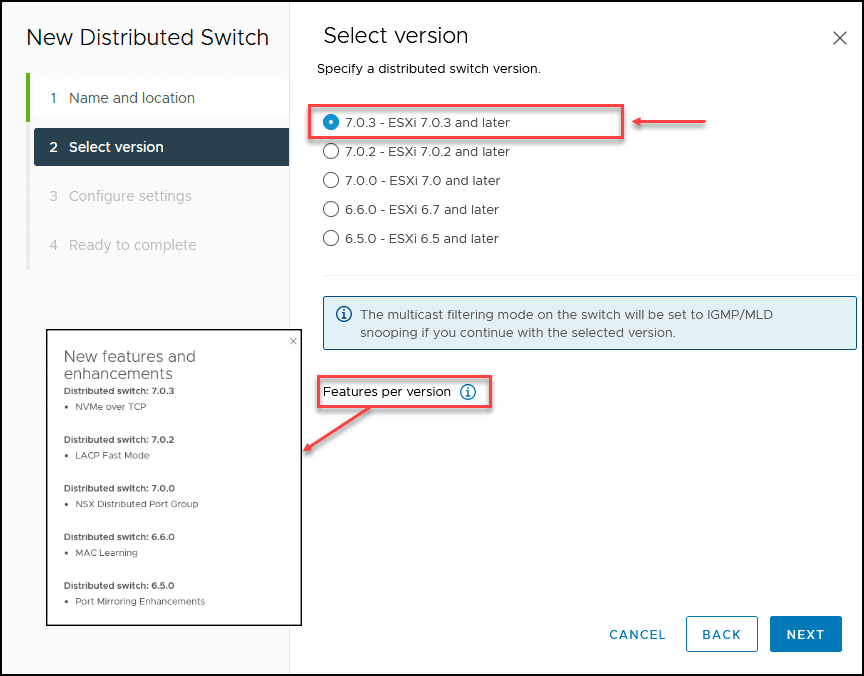
Next, select the vDS version. We usually select the most updated one unless there is a particular reason not to.
Note: We can check the features update per version in the next image.
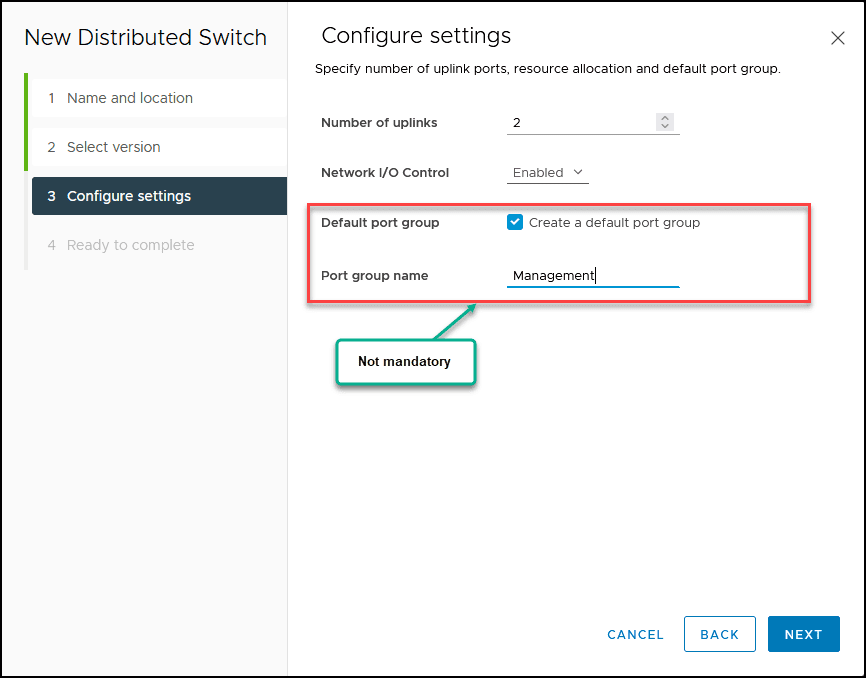
Next, we select the number of uplinks(physical Ethernet cards) we will use in this vDS. As is shown in the above design, each vDS will have 2 vmNICs.
Note: Since vDS does not work without a logical Portgroup, we can create the first Portgroup now, and we will create the Portgroup Management.
We can now finish creating vDS.
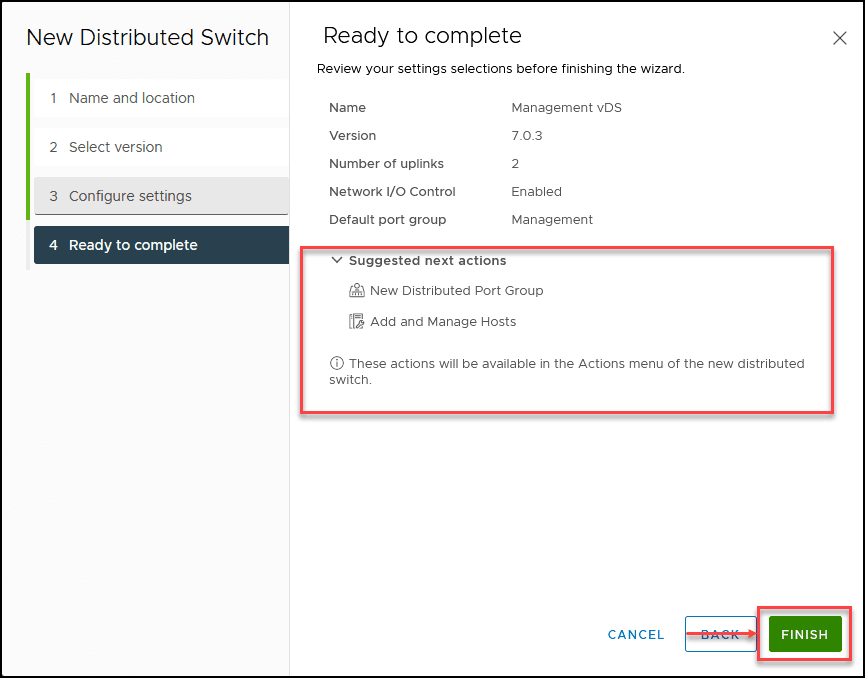
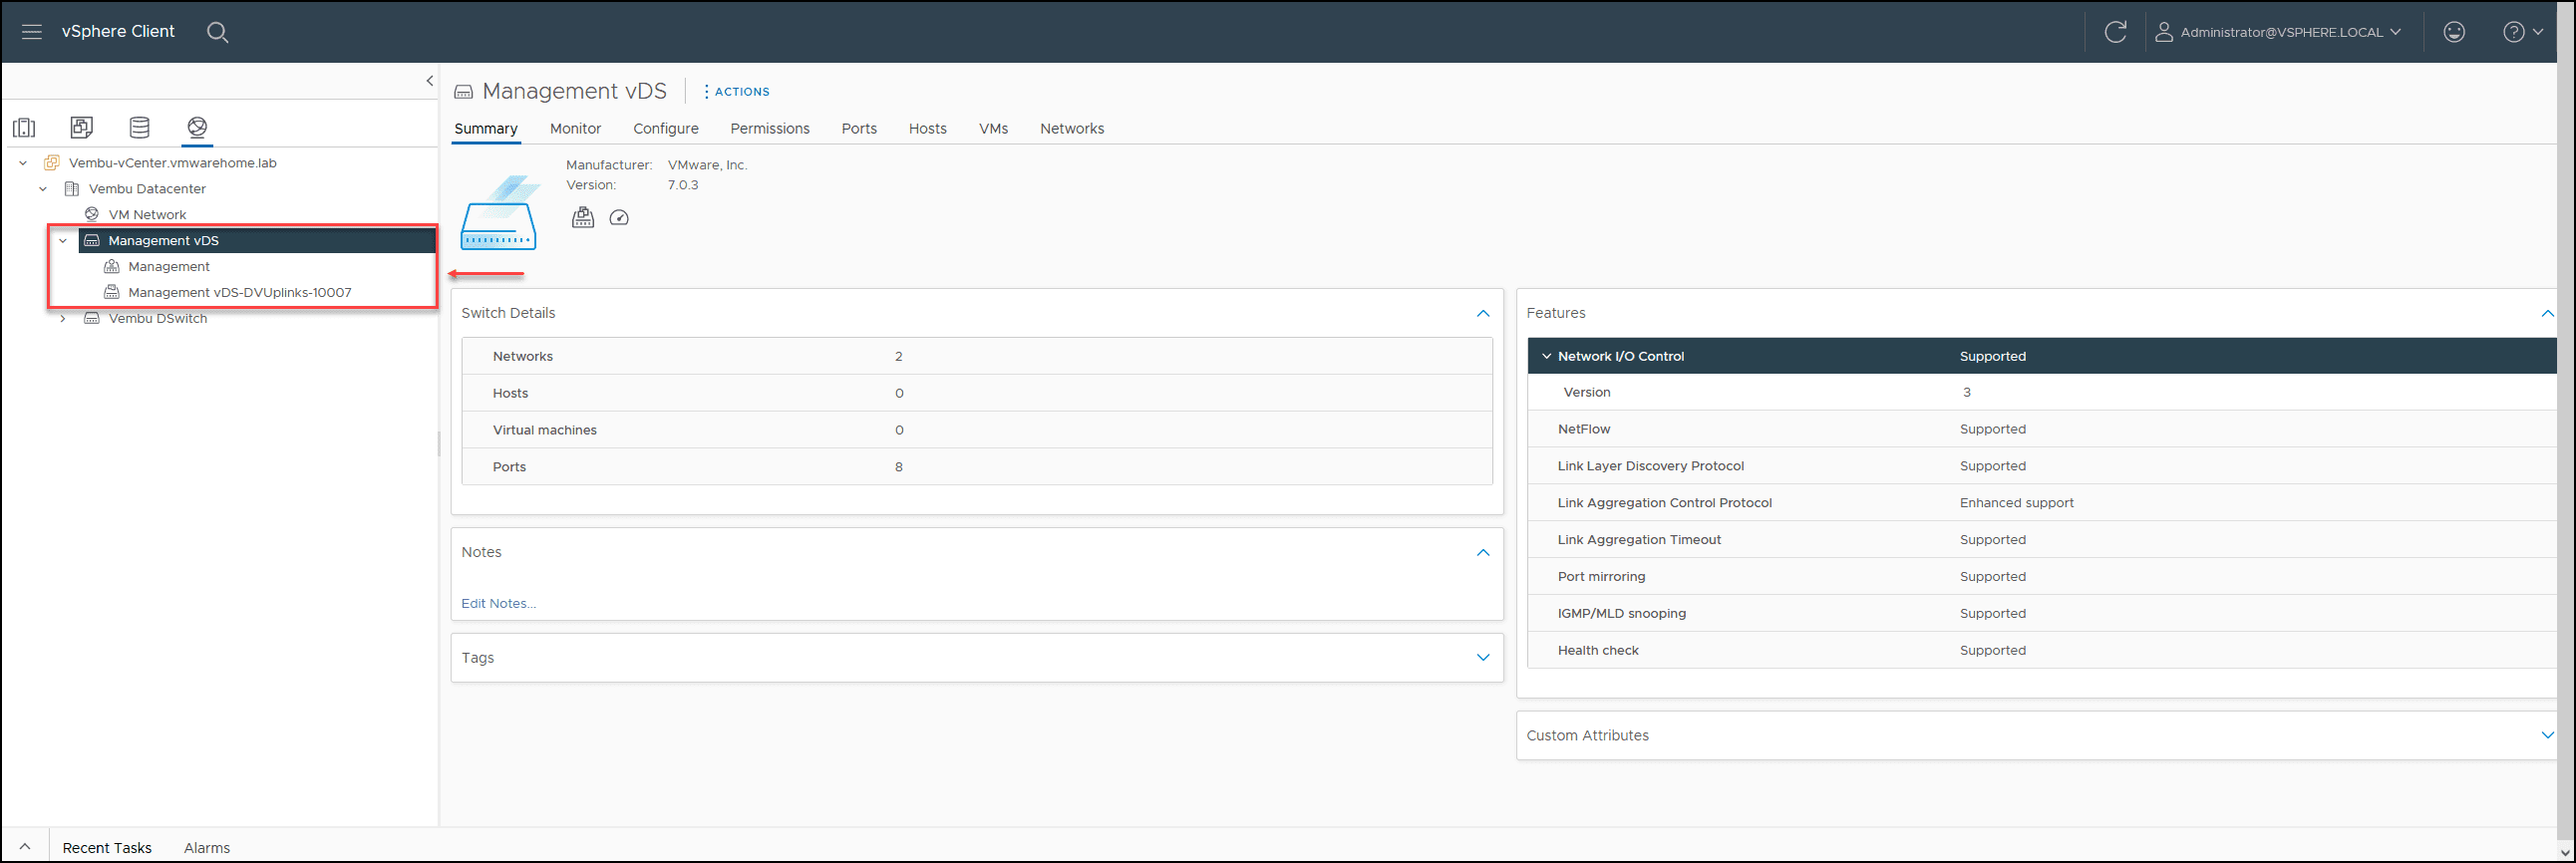
We now have our vSphere Distributed Switch created.
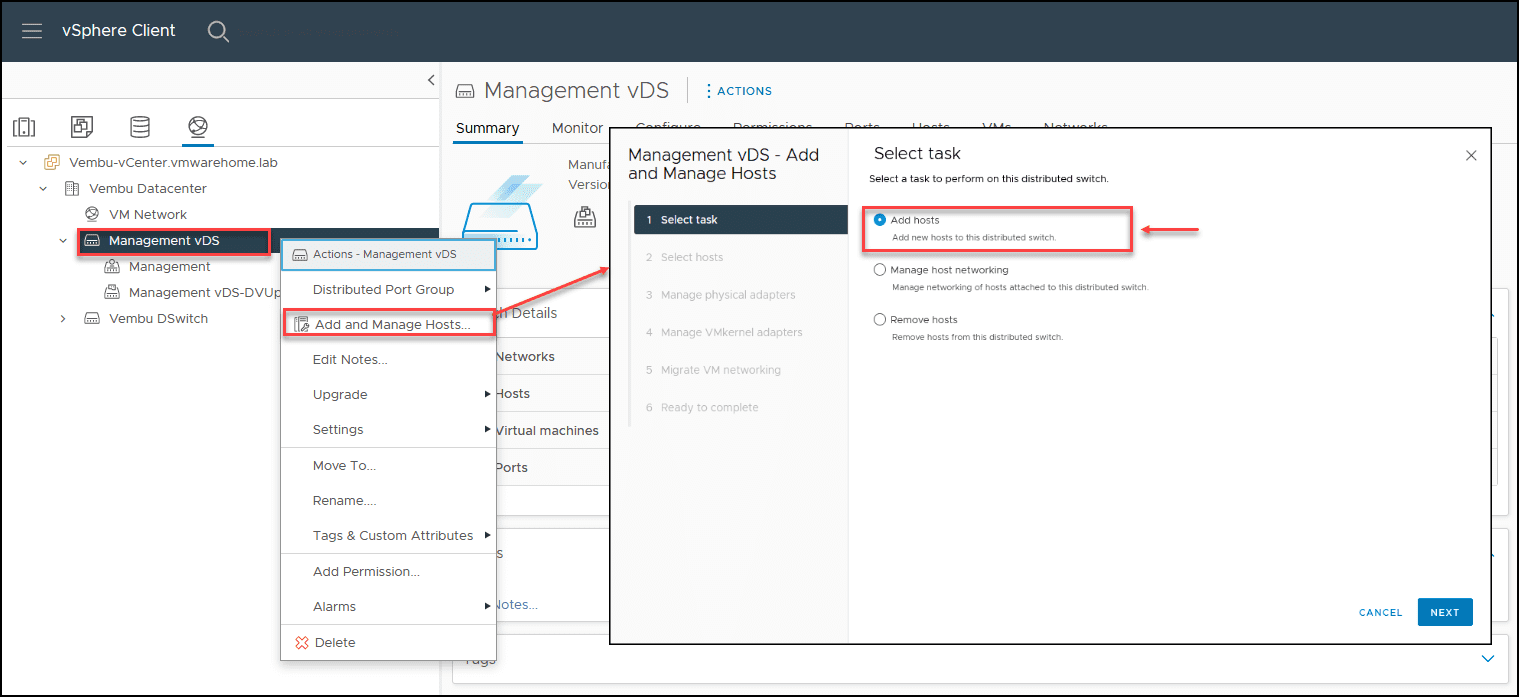
After creating the vDS, we will add the ESXi hosts that will work with this vDS. We will use all the ESXi hosts(3) in the Cluster. We can select all in the Cluster or use specific ones.
Go to the vDS just created and right-mouse click, and in the menu, select Add and Manage Hosts and then Add Hosts.
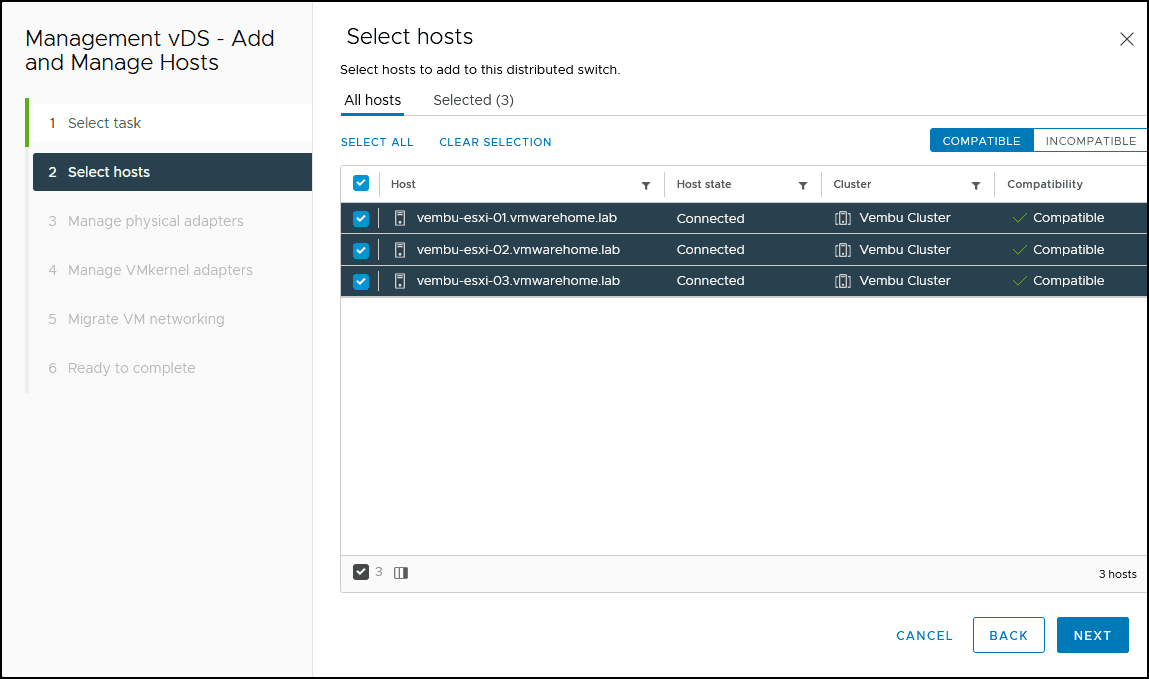
Next, we select the ESXi hosts that will be added to this vDS. In our case, it is all.
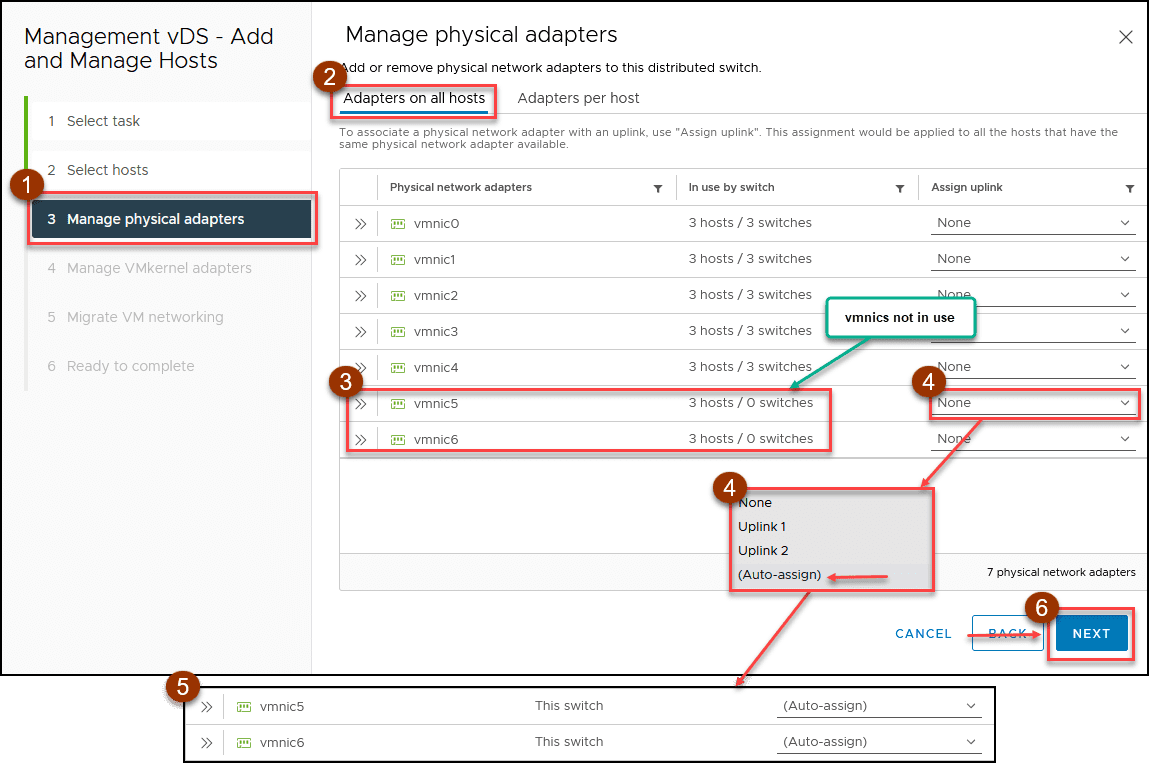
Next is the important part of the vDS network. We must select which network adapters(vmNICs) this vDS will use.
We can select Adapters on all Hosts or Adapters per host. Since we will use the same vmNICs in all ESXi hosts, we select Adapters on all Hosts. Selecting this option, vDS automatically selects the same vmNIC in all ESXi hosts.
If, for example, in ESXi host A, we will add vmnic1 and vmnic3, but in the ESXi host B vmnic2 and 3, we need to select the option Adapters per host and select vmNICs per host.
After you check which vmNICs are available and not being used in another vDS or Standard Switch, assign an uplink number. We should select the Auto-assign option to better manage the uplink numbers.
Note: As you remember, in the previous blog posts in this VMware for Beginners, we had 4 vmNICs(from vmnic0 to vmnic4) and have created 2 Standard Switches(vSwitch0 for management and VMs network and vSwitch1 for Storage), which is why they are used at the moment. So I added two extra vmNICs just to create this new vDS.
After we finish all the vDS configuration, we will migrate all vmNICs(1 to 4) to this new vDS and remove the vmnic5 and 6.
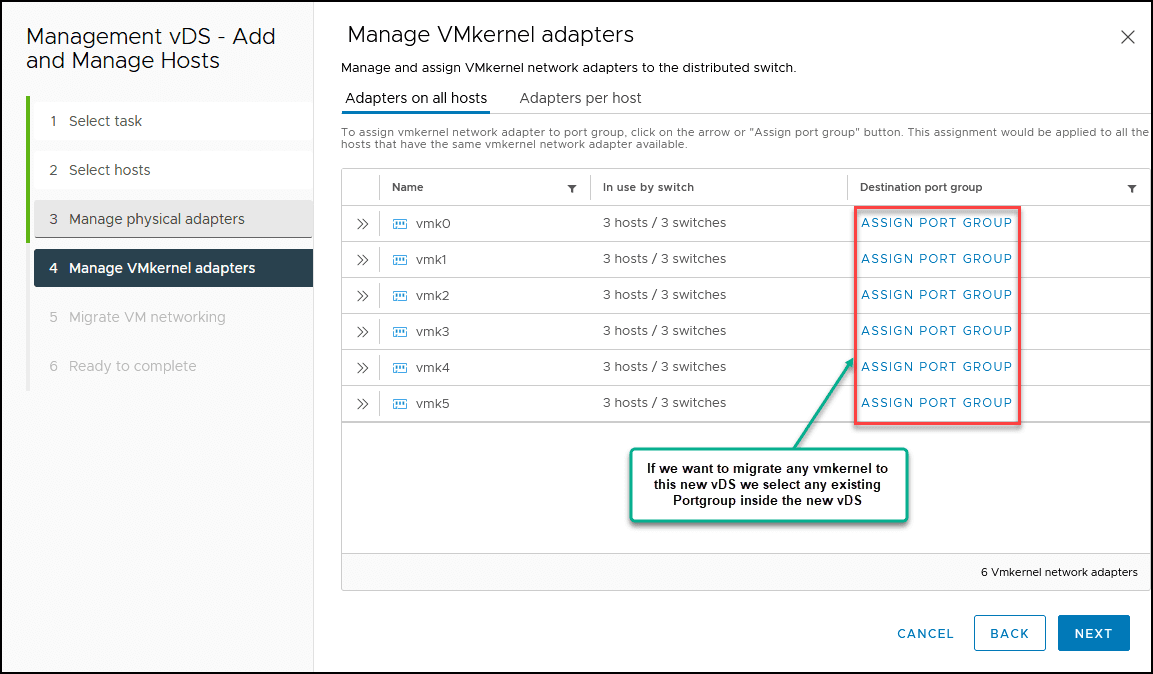
The next step is if we want to migrate any vmkernel(like ESXi host management, vMotion, or iSCSI vmkernel) to this new vDS and assign any Portgroup that we have already created.
Note: We will not do this now. We will discuss that process in the migration subject. So we can skip this step.
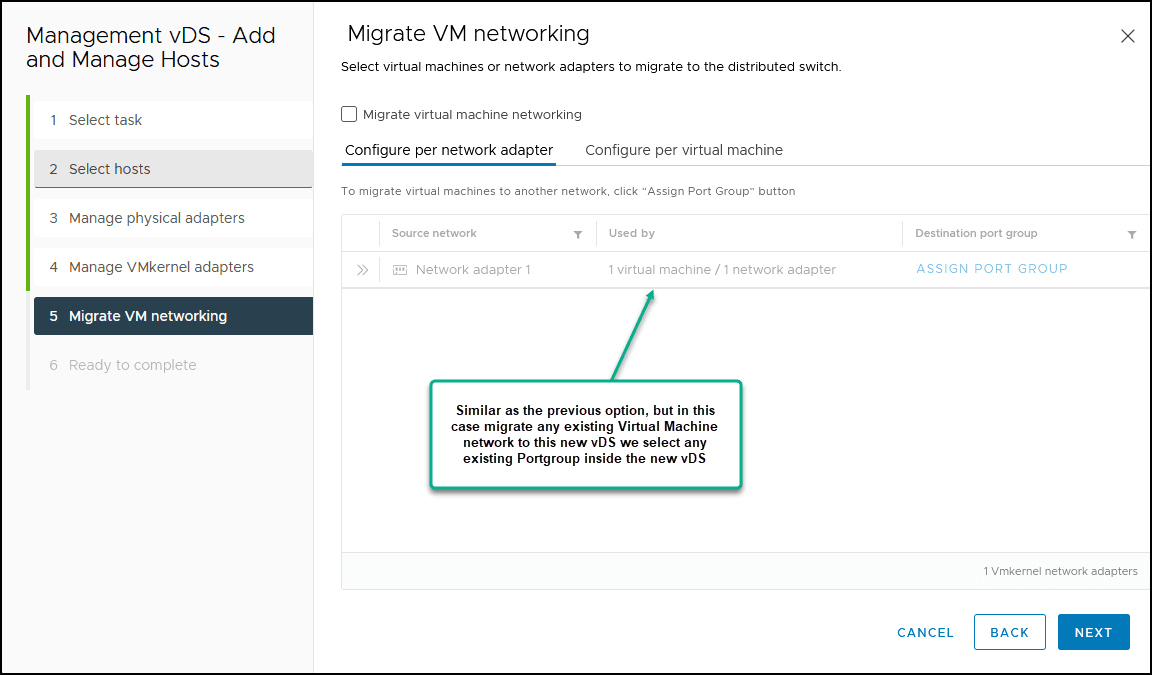
The same as the above option, but now for the Virtual Machines network. Again, we will not migrate any network now, you can skip this step.
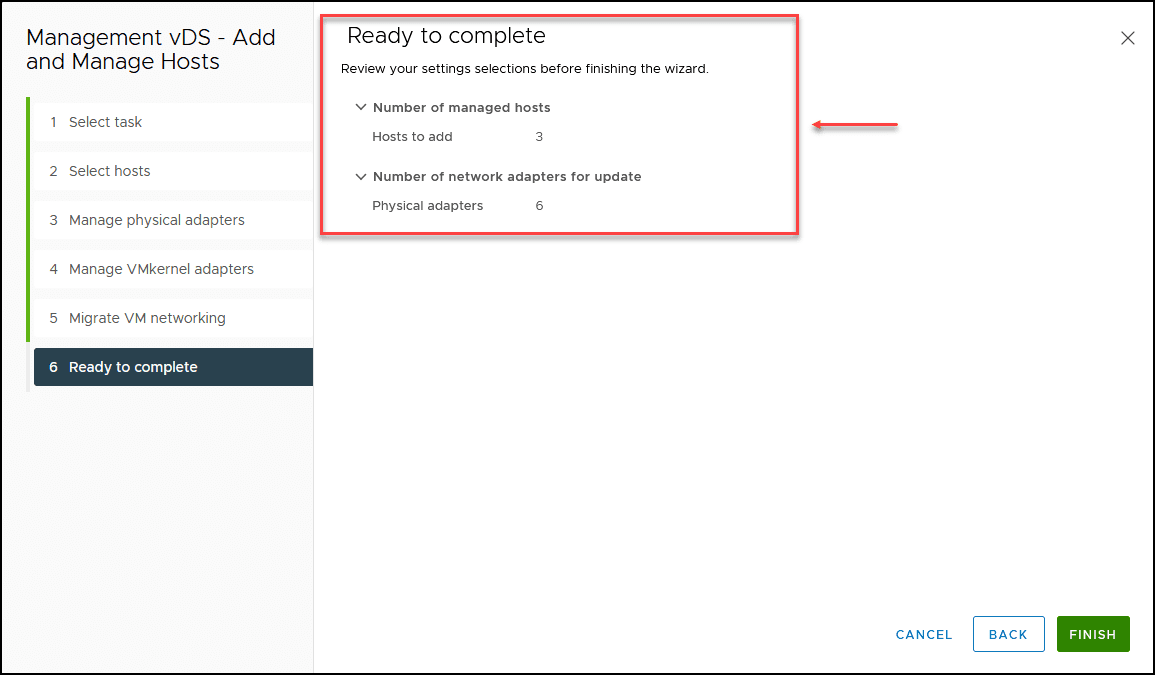
We can finish, and your vDS is created and is using the 3 ESXi hosts that are in your Cluster and will use vmnic5 and 6.
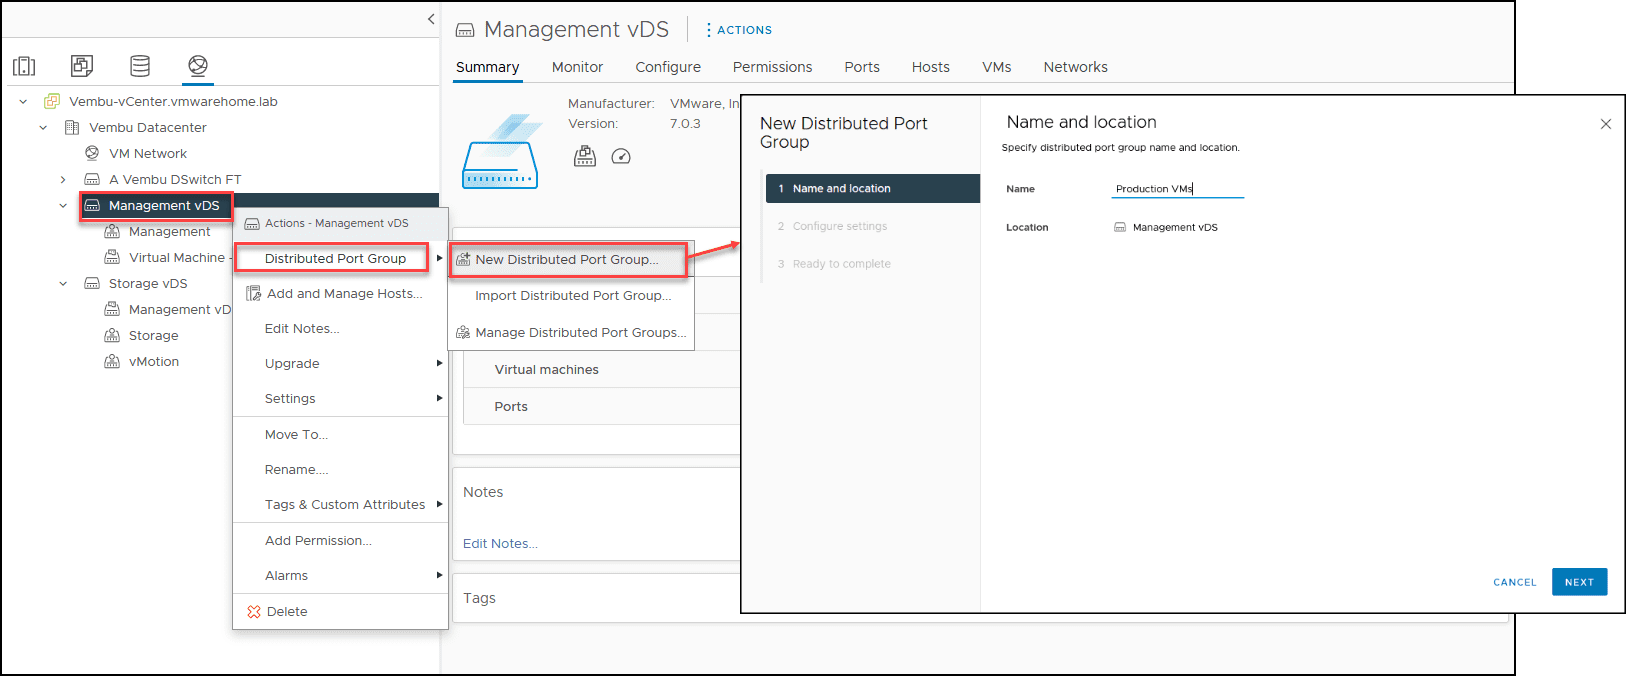
To finish this vDS section, we now create a vDS Portgroup inside the vDS we created. As you remember, we created one(Management Portgroup) automatically when we created the vDS.
As we have in our design, we now need to create all the Virtual Machines vDS Portgroups inside this vDS.
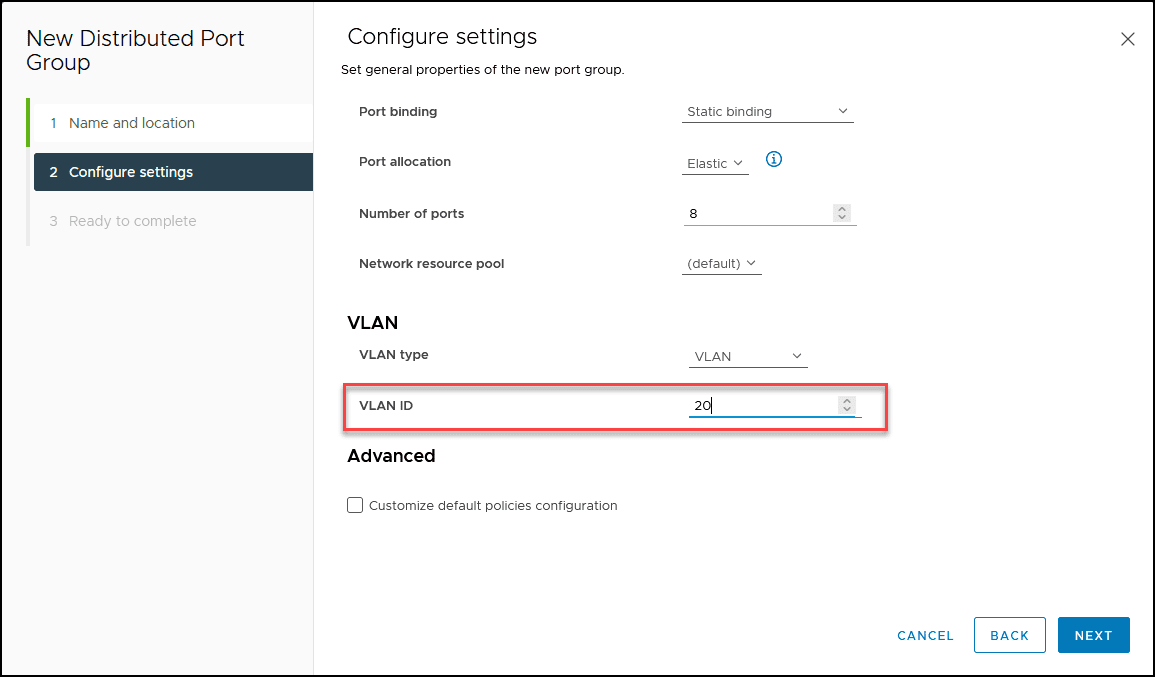
Right-mouse click in the vDS, Distributed Port Group, then New Distributed Port Group, and type the name of your vDS Portgroup(in this case, Production VMs).
Next, we don’t need to change anything. Just add the VLAN that we have in our design(if you are not using VLANs, leave it by default, none).
Note: Customize default policies configuration only if you are using any of the above main features we have listed above that are disabled by default. Is not our case for this example.
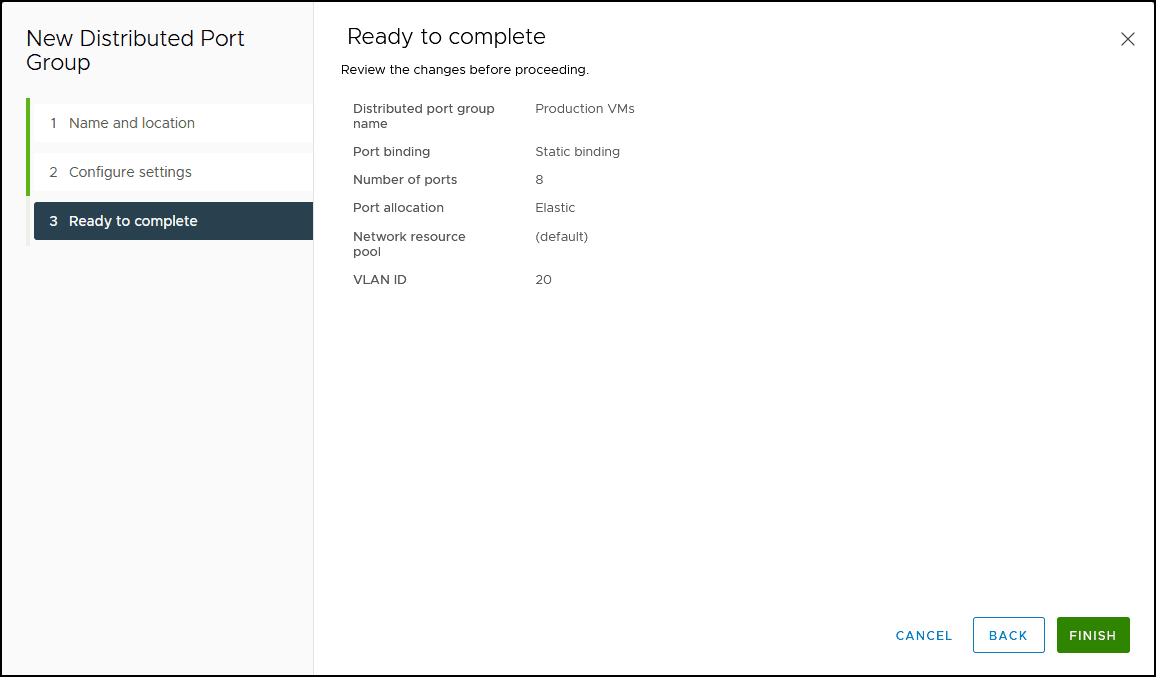
Double-check the information and finish the vDS Portgroup.
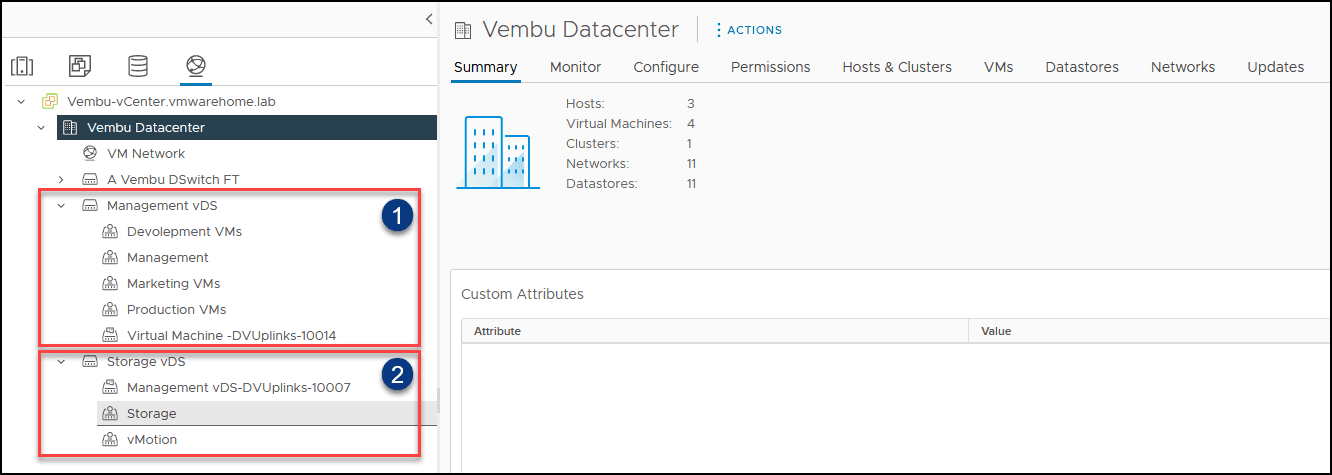
I also created the others Virtual Machines network Portgroups in the design(Marketing VMs, and Development VMs).
I also created the second vSphere Distributed Switch that we have in the design and the Portgroups. Just follow the previous steps and create the second vDS.
In the following image, we can see all vDS and Portgroups created.
With this section and the last step, we finish this third blog post about vSphere Distributed Switch. In the next blog posts, we will continue to discuss vSphere Distributed Switch.
In the next blog posts, we will discuss migrating VMkernel or Virtual Machines Networks, LACP, and using VLANs and other features discussed in this first blog post about vSphere Distributed Switch.
Read More:
VMware for Beginners – What is vSphere Distributed Switch: Part 15(b)
Follow our Twitter and Facebook feeds for new releases, updates, insightful posts and more.

Leave A Comment