
An essential part of managing access to Microsoft Entra ID and resources is understanding how to allow users to have access to resources. Role-Based Access Control (RBAC) has long been held as a best practice in the realm of security for providing users with access to resources. For the AZ-104 exam, you need to understand the basics of Microsoft Entra ID Role-Based Access Control and how it is configured.
What is Role-Based Access Control?
Role-Based Access Control grants permissions and access to resources based on the role of the user. Someone in HR would get resources that are related to HR and someone in IT would be granted access to resources related to IT infrastructure.
It helps to eliminate the notion of granting more permissions than are needed simply to get the user into the system. However, for Role-Based Access Control to work effectively, the roles need to align with the needs of the users.
Microsoft Entra ID role definitions
Microsoft Entra ID supports two role definitions out of the box:
- Built-in roles
- Custom roles
Built-in roles come as standard with a predefined set of permissions. Microsoft Entra ID supports a number of roles that are built-in, and Microsoft continues to expand these. For more complex needs, Microsoft Entra ID also allows creating custom roles.

Setting up permissions through these custom roles is a dual-stage process, starting with the creation of a custom role definition, then allocating it through a role assignment. A custom role definition is a set of permissions selected from an available list, identical to those in built-in roles.
After creating the custom role definition or using an existing built-in role, you can assign it to a user via a role assignment. This assignment grants the user the permissions defined by the role within a certain area of effect, known as the scope.
This dual-stage method enables the repeated assignment of a singular role definition across various scopes. A scope defines the resources within Microsoft Entra that the role member can access. Typically, the scope is organization-wide, granting the role holder permissions across the entire organization’s resources.
Custom roles can also be applied to more narrow scopes, such as individual objects, such as a specific application. In practice, the same role could be assigned to one user for all applications within the organization, while another user might be restricted to just a single application.
Assigning roles to groups
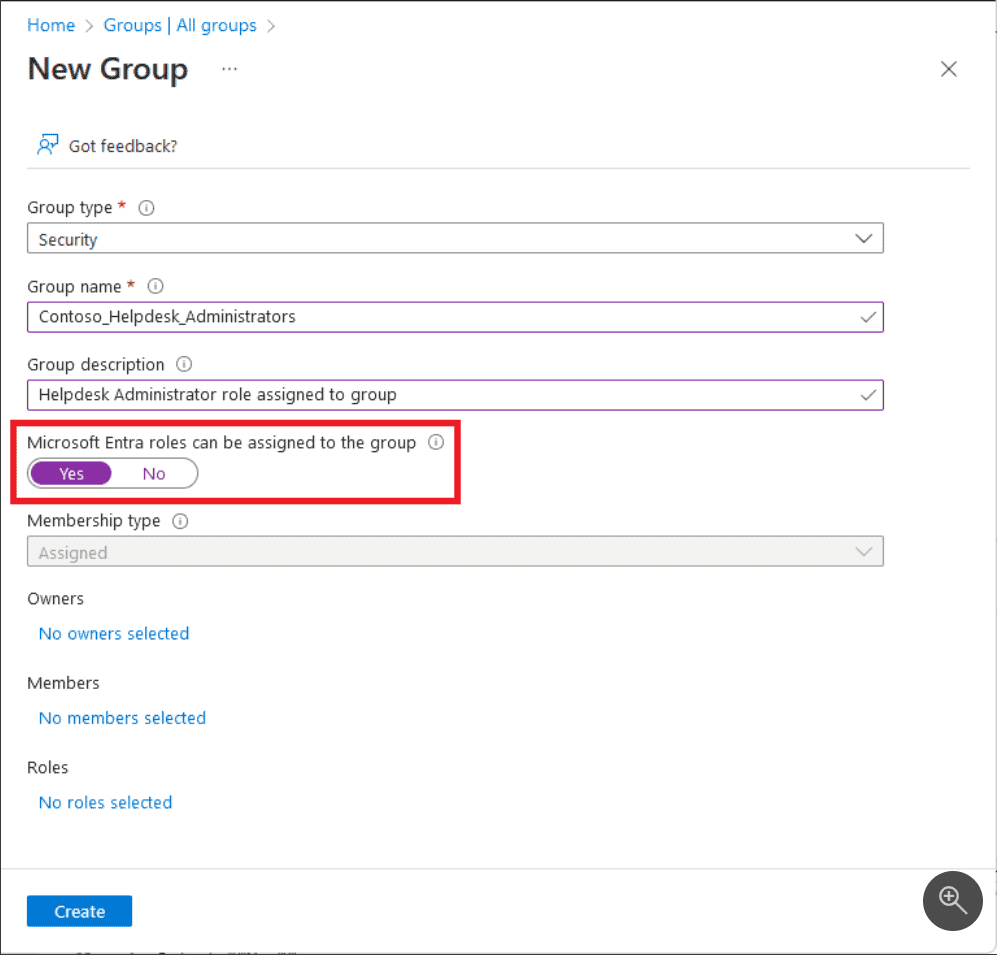
You can assign roles to groups in Microsoft Entra ID. However, the option is only available to assign roles to groups if the group was configured as a “role-assignable” group. Note in the screenshot below, the option for Microsoft Entra roles can be assigned to the group. When this is flagged to Yes you can assign roles to the group.
You can also use the following PowerShell code to create a role-assignable group:
Connect-MgGraph -Scopes “Group.ReadWrite.All”,”RoleManagement.ReadWrite.Directory”
$group = New-MgGroup -DisplayName “Role Assignable Example Group” -Description “This group is an example of Role Assignable Group.” -MailEnabled:$false -SecurityEnabled -MailNickName “RoleAssignableExampleGroup” -IsAssignableToRole:$true
Three sections of RBAC in Microsoft Entra ID
Role-Based Access Control in Microsoft Entra ID consists of the following components:
- Security principal: A user, group, or service principal with access to Microsoft Entra resources. Users have profiles in Microsoft Entra ID, groups are role-assignable within Microsoft 365 or security groups, and service principals are identities for apps and automated tools
- Role definition: A set of permissions defining allowable actions on Microsoft Entra resources, like creating or deleting. Roles are either un-modifiable built-in types provided by Microsoft or customizable ones by your organization
- Scope: Limits role assignment actions to certain resources. For instance, assigning a role to a developer only for a particular application involves setting that application as the scope
- Role assignment scopes include tenant-wide, administrative unit, or specific Microsoft Entra resources like groups, enterprise applications, or application registrations
Viewing the roles and administrators dashboard
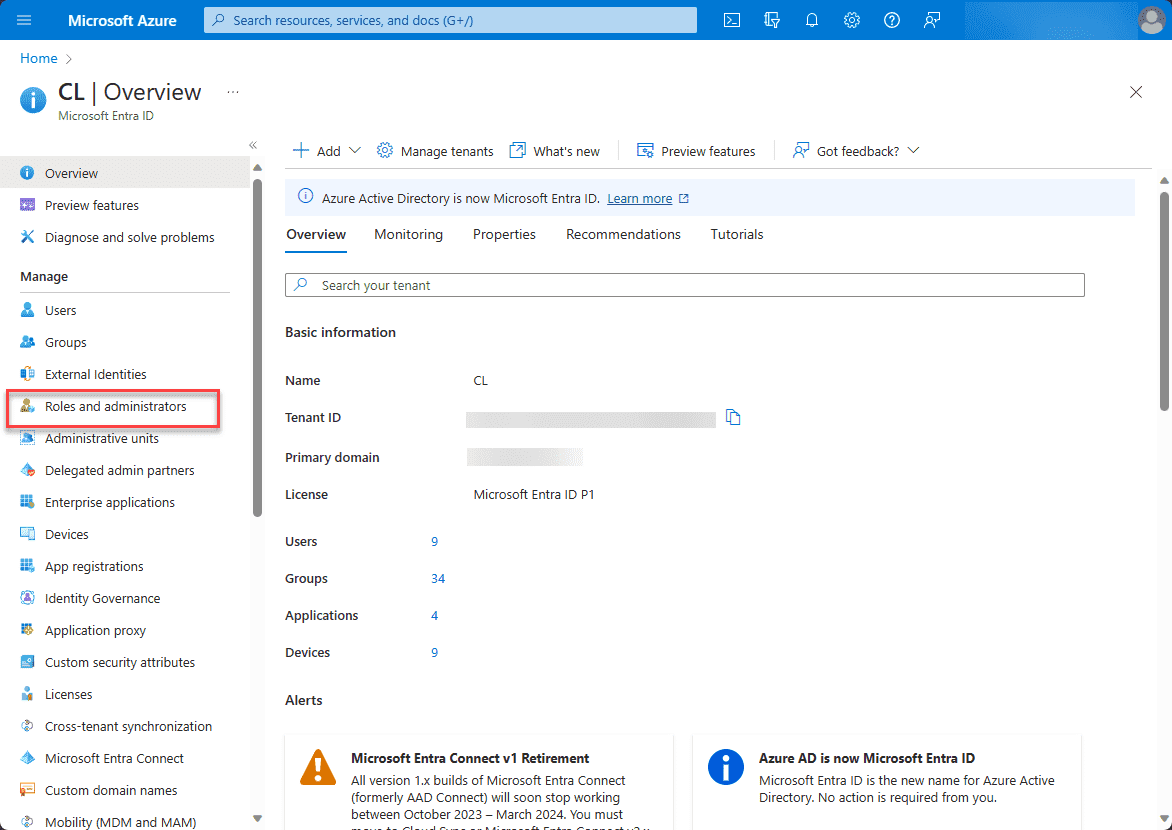
You can easily view the roles and administrators dashboard by navigating to Microsoft Entra ID > Roles and administrators.
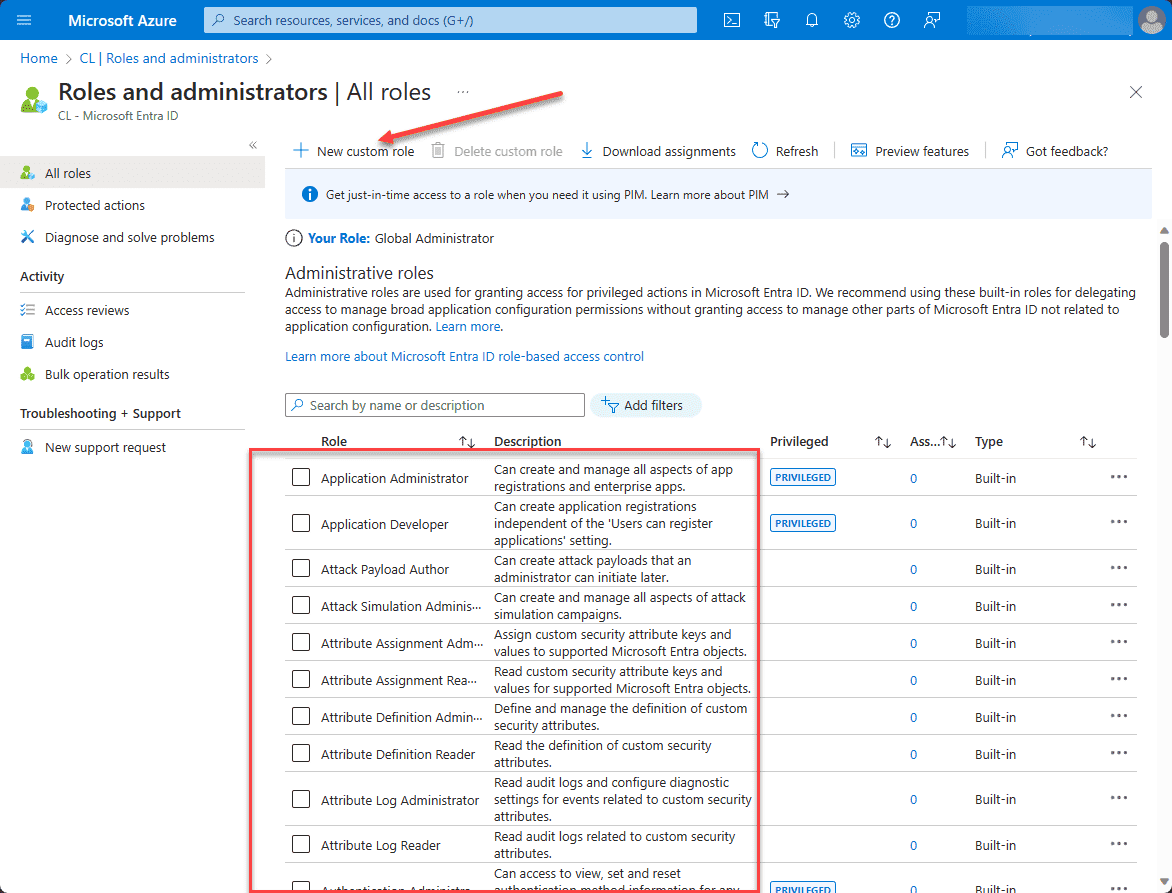
When you click the Roles and administrators link, you will be taken to the All roles dashboard. You will see the built-in roles listed, such as Application Administrator, Application Developer, etc.
To create a new custom role, click the +New custom role link.
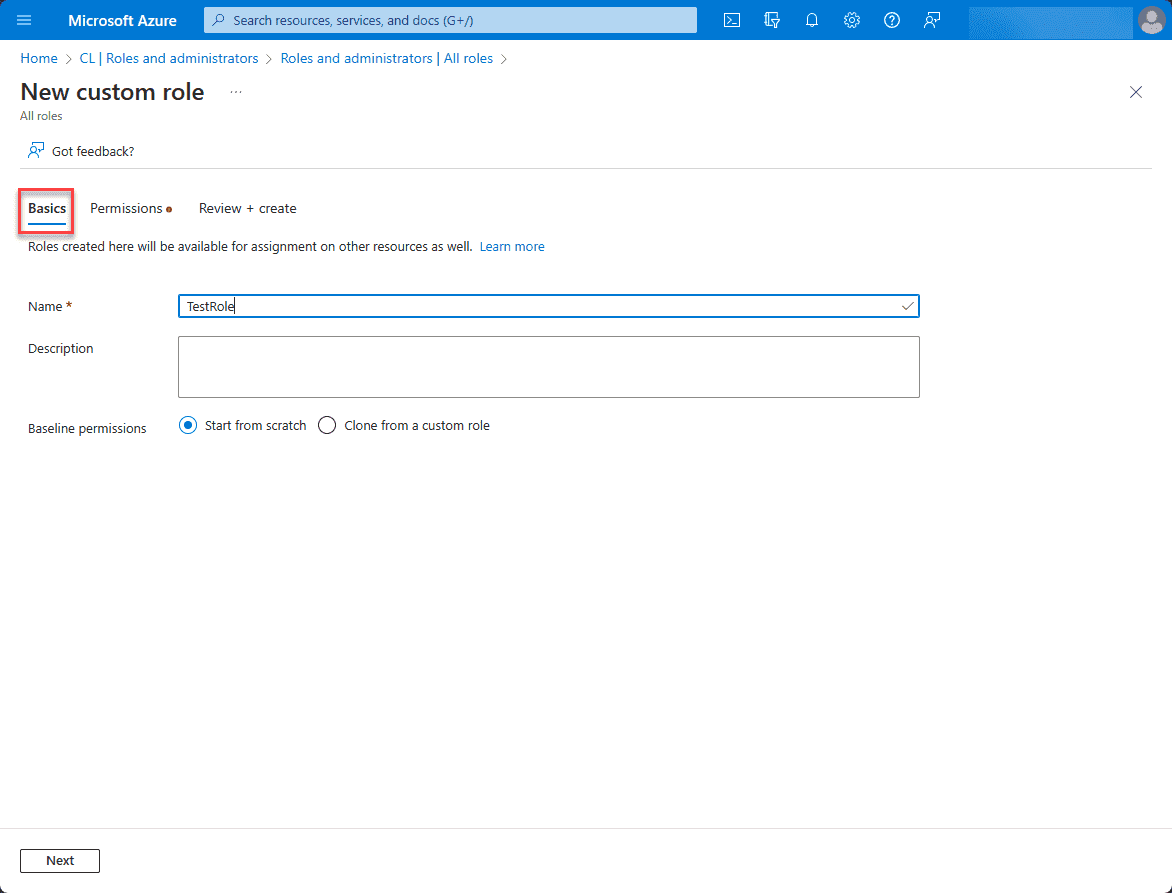
This will launch the new custom role wizard. On the Basics screen, name the role and set a description (optional). Also, note the Baselines permissions. Here you can start from scratch, or clone from another custom role.
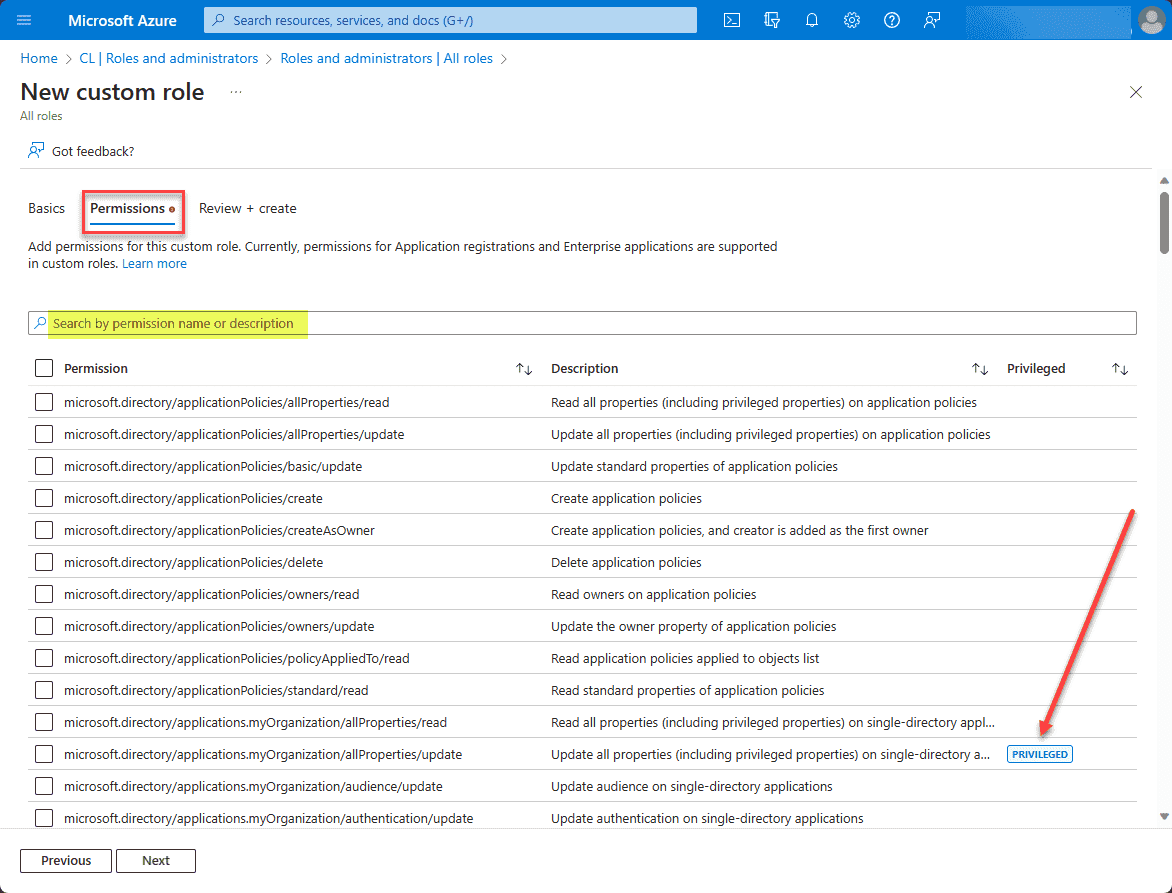
On the permissions screen, you will see the available permissions you can apply to the role. There are many to choose from. You can use the search by permission name or description to help locate something specific. Also, Microsoft does a good job here of noting which permissions are privileged or high-level permissions that you will want to be careful to assign.
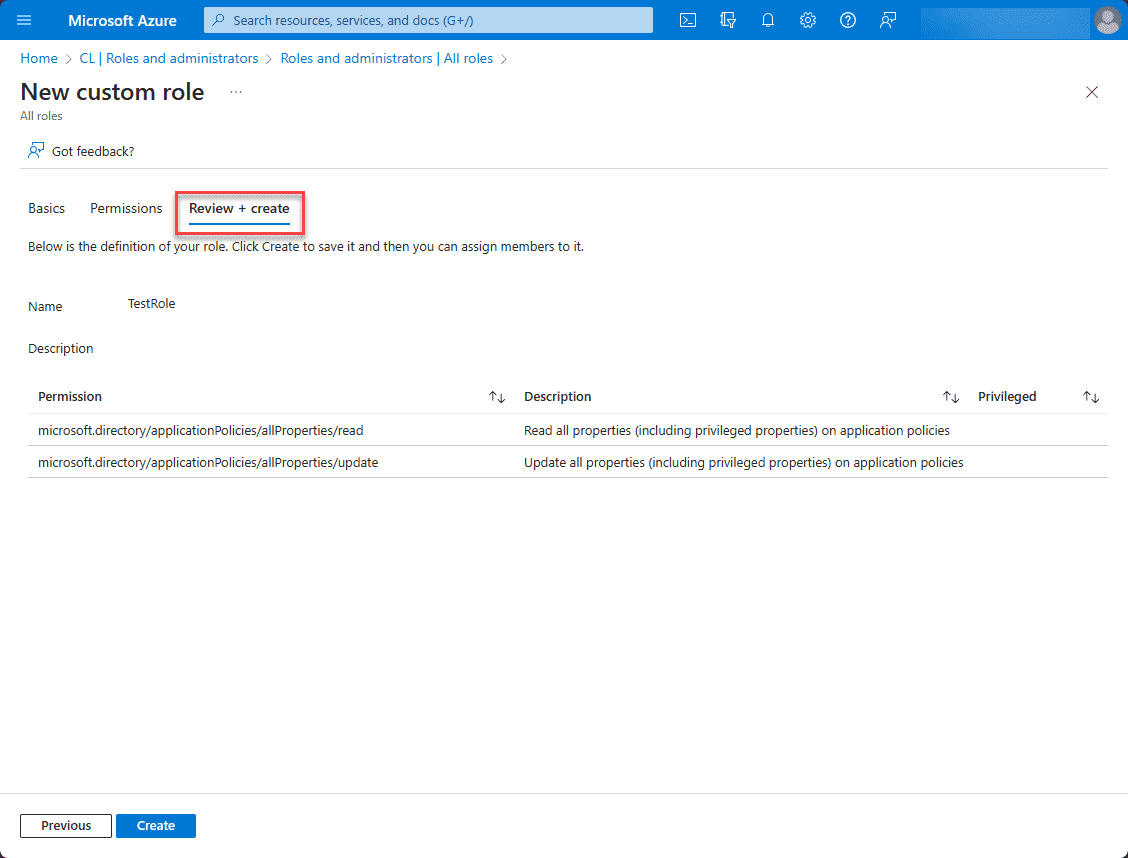
One the Review + create screen, review your permissions assigned and click Create.
Assigning roles to users
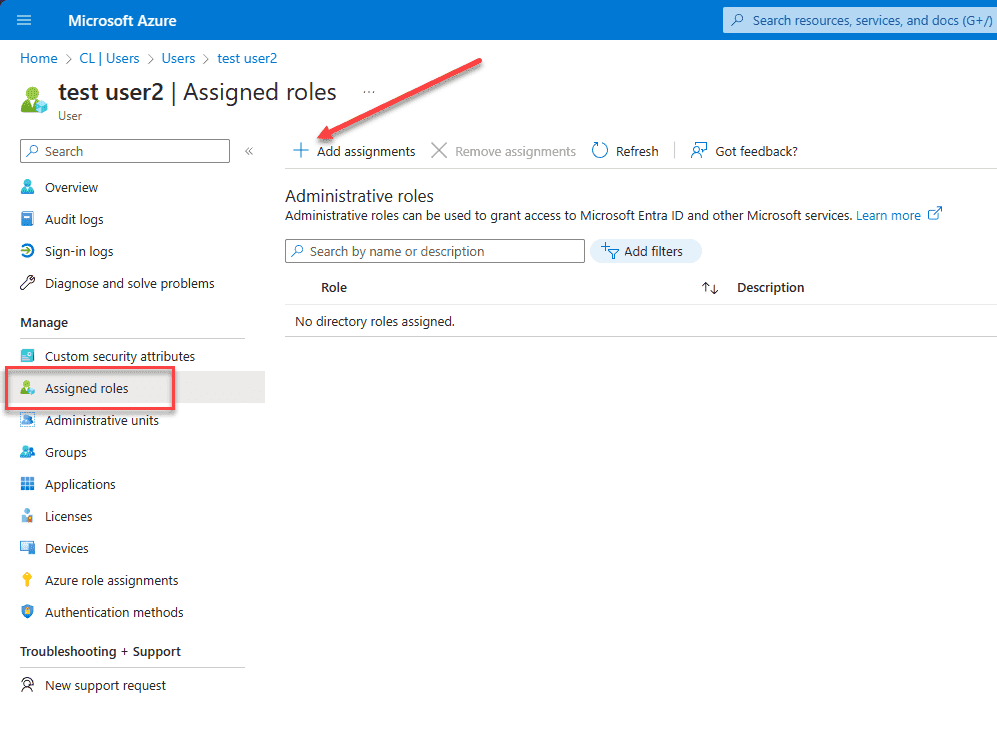
Now that we have created the custom role in Microsoft Entra ID roles and administrators, we can assign the custom role to a user. To assign roles to users, navigate to Microsoft Entra ID > users > your user > properties. Click Assigned roles.
This will pop out the blade Directory roles. On the blade, you can search the available roles. Here we are searching for “test” which will filter down to our recently created role. Place a check in the box next to the role and then click the Add button.
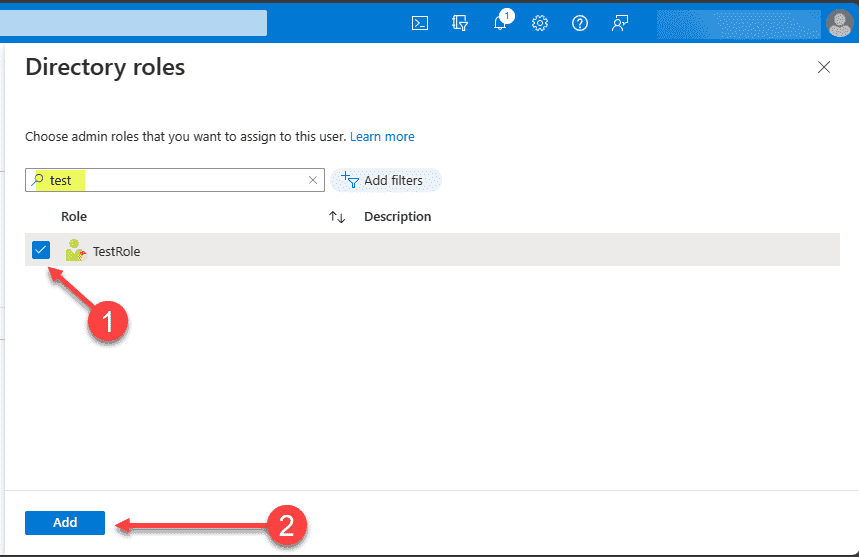
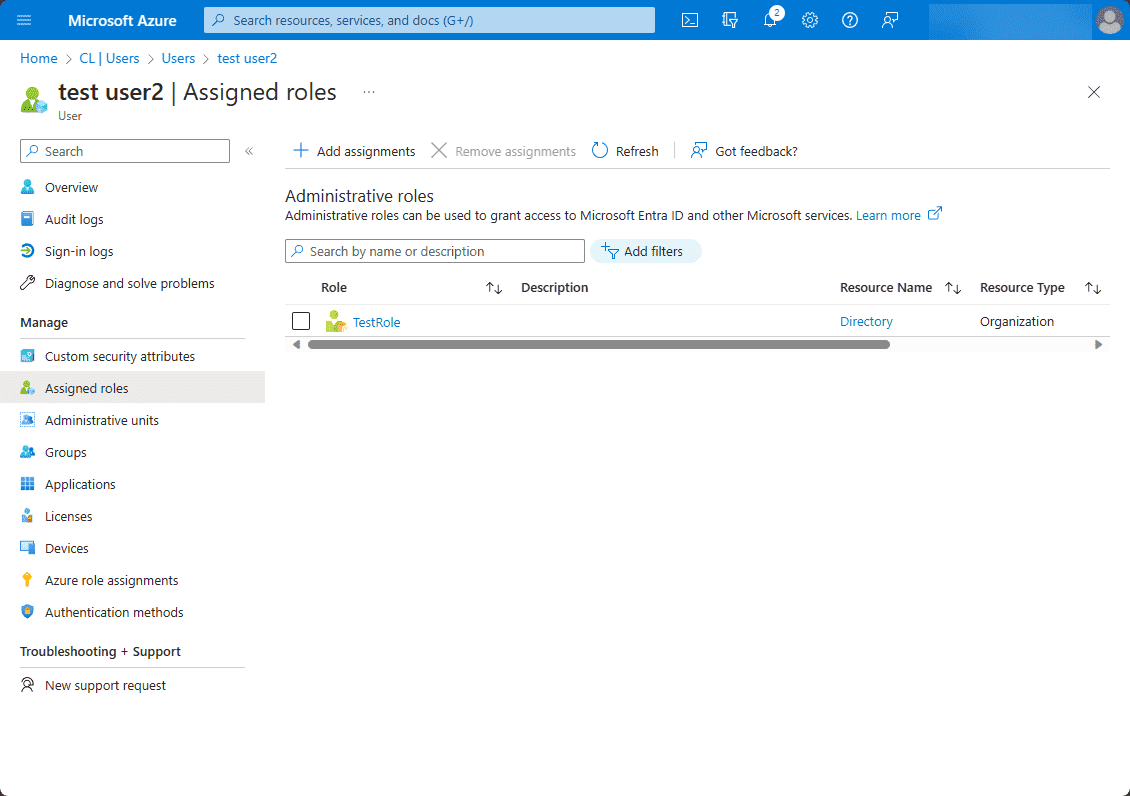
After clicking the Add button, the new role is now assigned to the user in Microsoft Entra ID.
Wrapping up
We have taken a look at role based access control in Microsoft Entra ID, how to create custom roles with customized permissions, and how these are assigned to users. We have also covered the considerations for assigning roles to Microsoft Entra ID groups as these need to be configured as role-assignable groups.
Related Posts:
Microsoft Azure Administrator: AZ-104: Create Microsoft Entra ID Administrative Units – Part 9
Follow our Twitter and Facebook feeds for new releases, updates, insightful posts and more.

Leave A Comment