
Introduction
Oracle supports running its Database 12.1 and higher Standard and Enterprise editions in Azure VM images based on Oracle Linux. Users can run Oracle databases on Azure infrastructure using Oracle Database on Oracle Linux images available in the Azure Marketplace.
Users don’t need to deploy an Azure VM and install the Oracle application on the VM, the Azure Marketplace provides the Oracle Linux images to choose, and users can create the VM using the image and it comes with Oracle application and updates / patches automatically when on release time.
According to the Microsoft documentation, below are the versions / Editions supported by the Azure Infrastructure.
- Oracle Database 12.1.Standard and Enterprise edition
- Oracle Database 12.2, Standard and Enterprise edition
- Oracle Database 19.3
You can also take one of the following approaches:
- Set up Oracle Database on a non-Oracle Linux image available in Azure
- Build a solution on a custom image you create from scratch in Azure
- Upload a custom image from your on-premises environment
- Choose supported Oracle linux and install your own Oracle database
In this blog, we are providing the steps that involve deploying an Oracle Linux image from the Azure Marketplace. You can do it either manually or through Azure CLI or Azure cloud shell.

Choosing the Oracle Image from Azure Marketplace
To get a list of currently available Oracle images, run the following command in Azure CLI or Azure Cloud Shell
az vm image list –publisher oracle –output table –all
Alternatively you can choose the required VM image from Azure Market place directly. Follow the below steps to choose the Oracle Image from Azure Marketplace service.
Login to your Azure portal using the valid username and password.
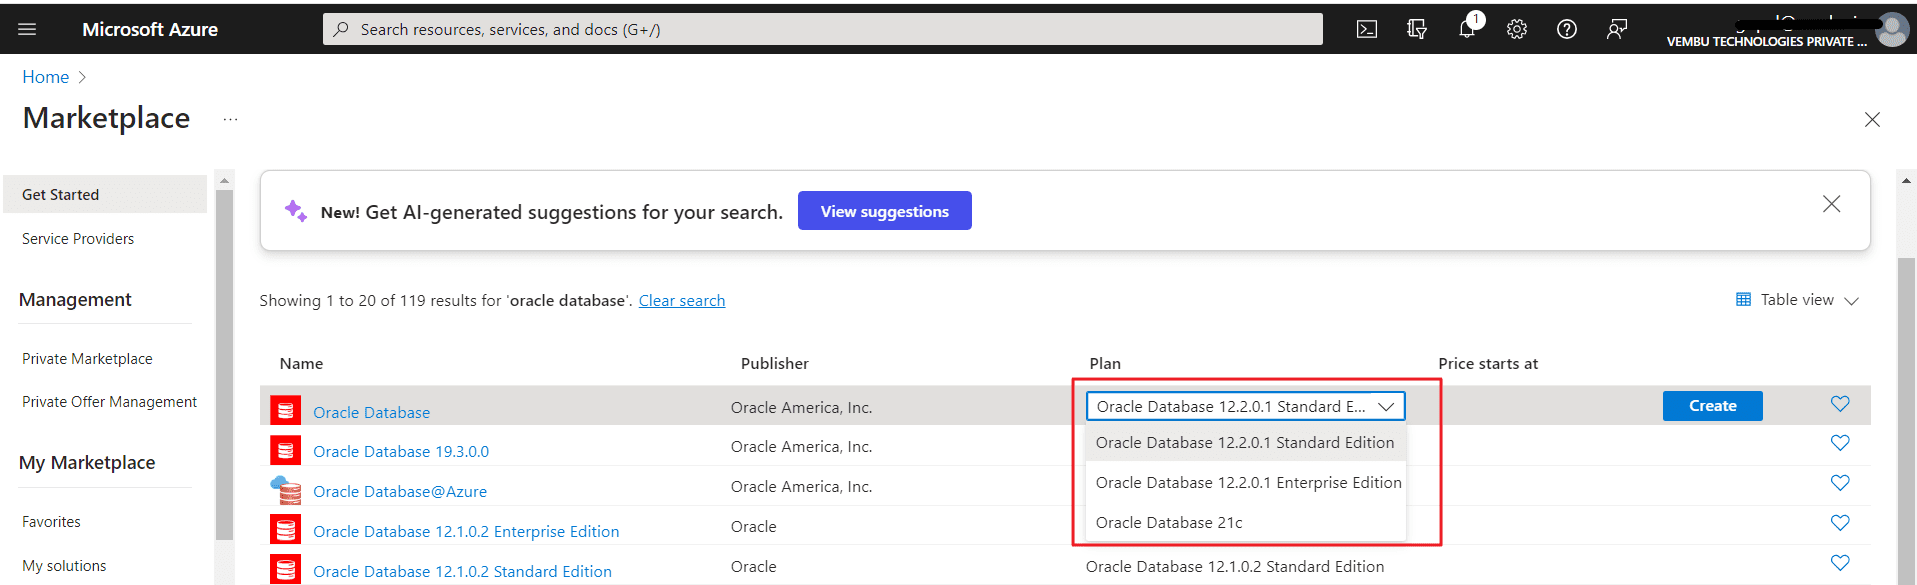
Choose the Marketplace Service ( Type Marketplace in the top search box ), and type “Oracle database” in the “search the Marketplace” box.
The search result shows the available oracle database in the Azure region and you can choose the Oracle version and edition in the drop down box
Click “Create” to start the deployment. The below screenshot shows this page, and the red rectangle box shows the edition to choose and you can see the “Create” confirmation box nearby.
Creating the Oracle database image VM
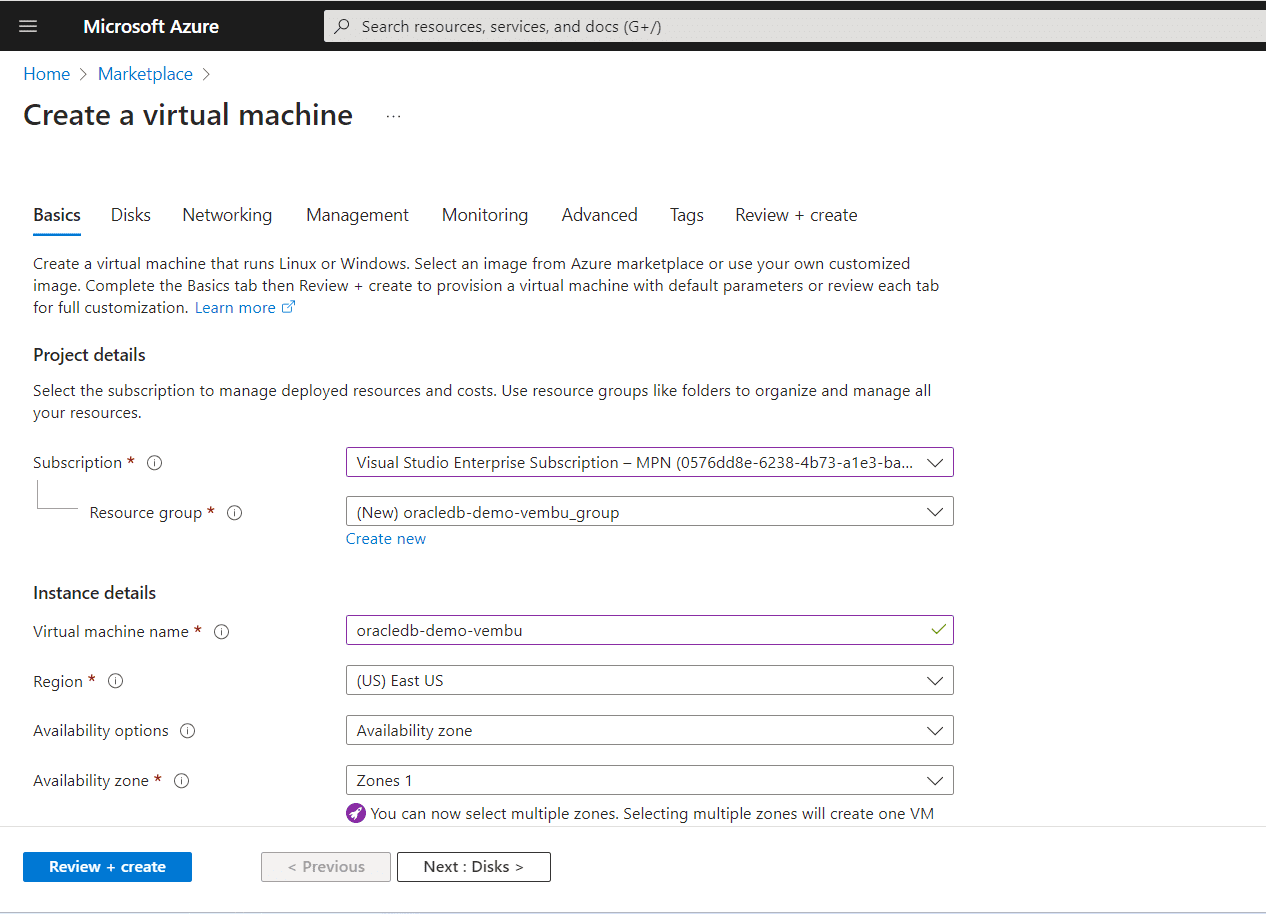
In this step, we are providing the parameters such as vCPU ,Disks, Networking and access details for the VM. Under project and Instance details we are choosing the Subscription, VM name, Region and availability zone. The below screen shows this information in details.
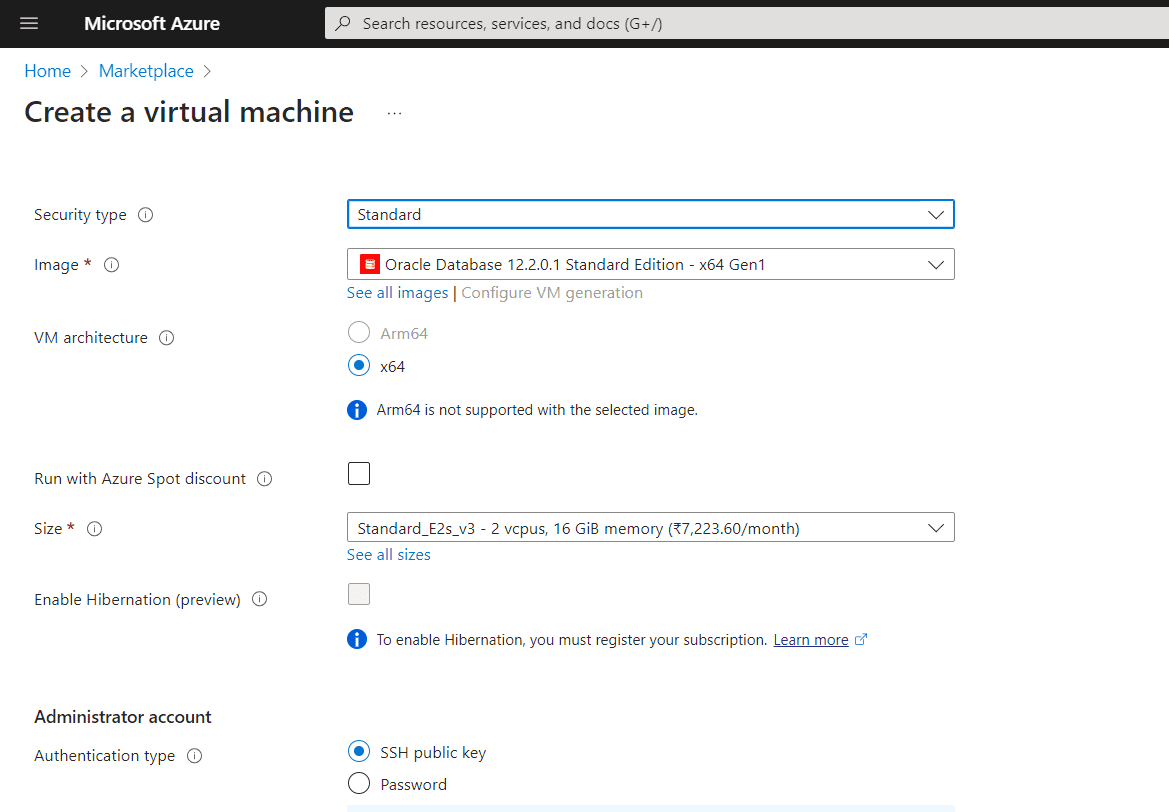
In the next step, pick out the security type as “standard” and choose the Oracle database image you want to deploy, here we are choosing the “Oracle database 12.2.0.1 Standard edition – x64 Gen 1” image and VM architecture as x64.
Further, user needs to provide the size of the VM. Here we are choosing the “Standard_E2s_v3 – 2vcpus, 16GiB memory” size.
Also choose the authentication type as “SSH Public Key” , in this secure way we are connecting to the vm. Alternatively we can use username/password authentication also.
The below screenshot shows these details
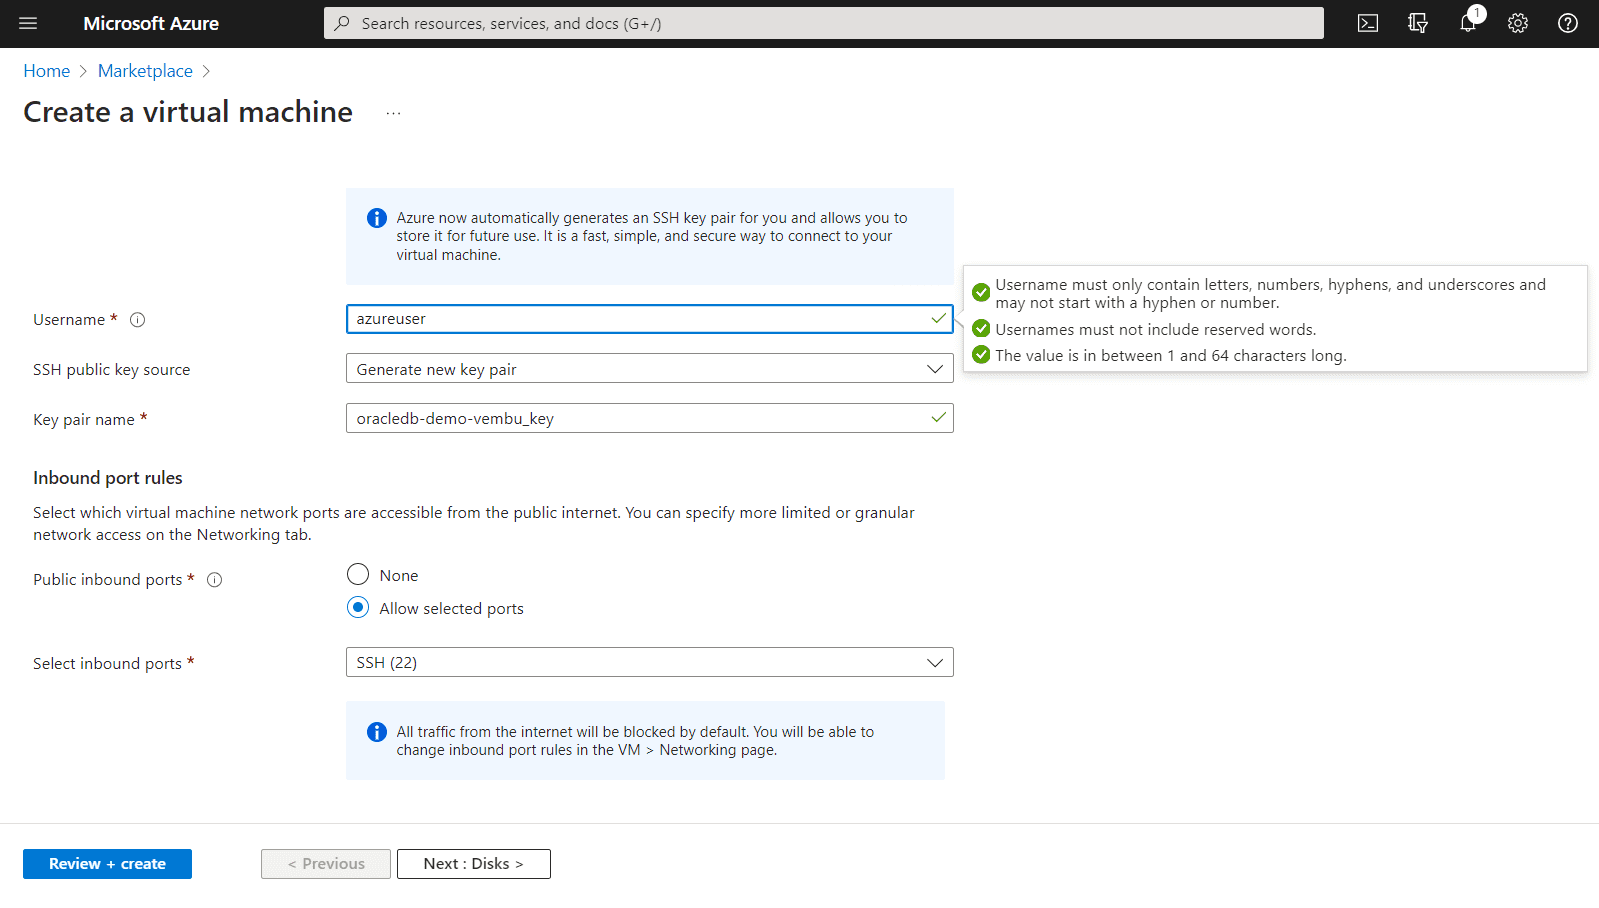
In the next step, provide the administrator username to be created in the Azure VM OS. This username will be used once your connect the VM using the SSH public key. In the inbound port rule section, choose the port number to be allowed to connect from outside world. By default, all ports are blocked to access from outside. Since we are using SSH to connect the VM, we are allowing only the port no 22 to access from outside. The below screenshot shows this information in detail.
Click Next to configure Disks for the VM.
In this step, we need to provide the OS Disk size, OS Disk type and if there is any data disk to be attached. By default when creating the VM, a temporary disk will be attached. Users are recommended to attach a new permanent disk for user data. You can also attach an existing disk. Here we are choosing 30Gb Premium SSD disk.
Also if require you can encrypt the OS disk here.

Click Next to defining network connectivity for the VM
Here we are configuring network interface card (NIC) settings. We can control ports, inbound and outbound connectivity with security group rules, or place behind an existing load balancing solution. When creating this VM, a new virtual network & subnet and a new public IP created for the VM.
We can set the level of NIC network security group. By default, Basic security group is selected. You can choose Advance level of security group also.
Specify public inbound ports and SSH port 22 is allowed for inbound connection.
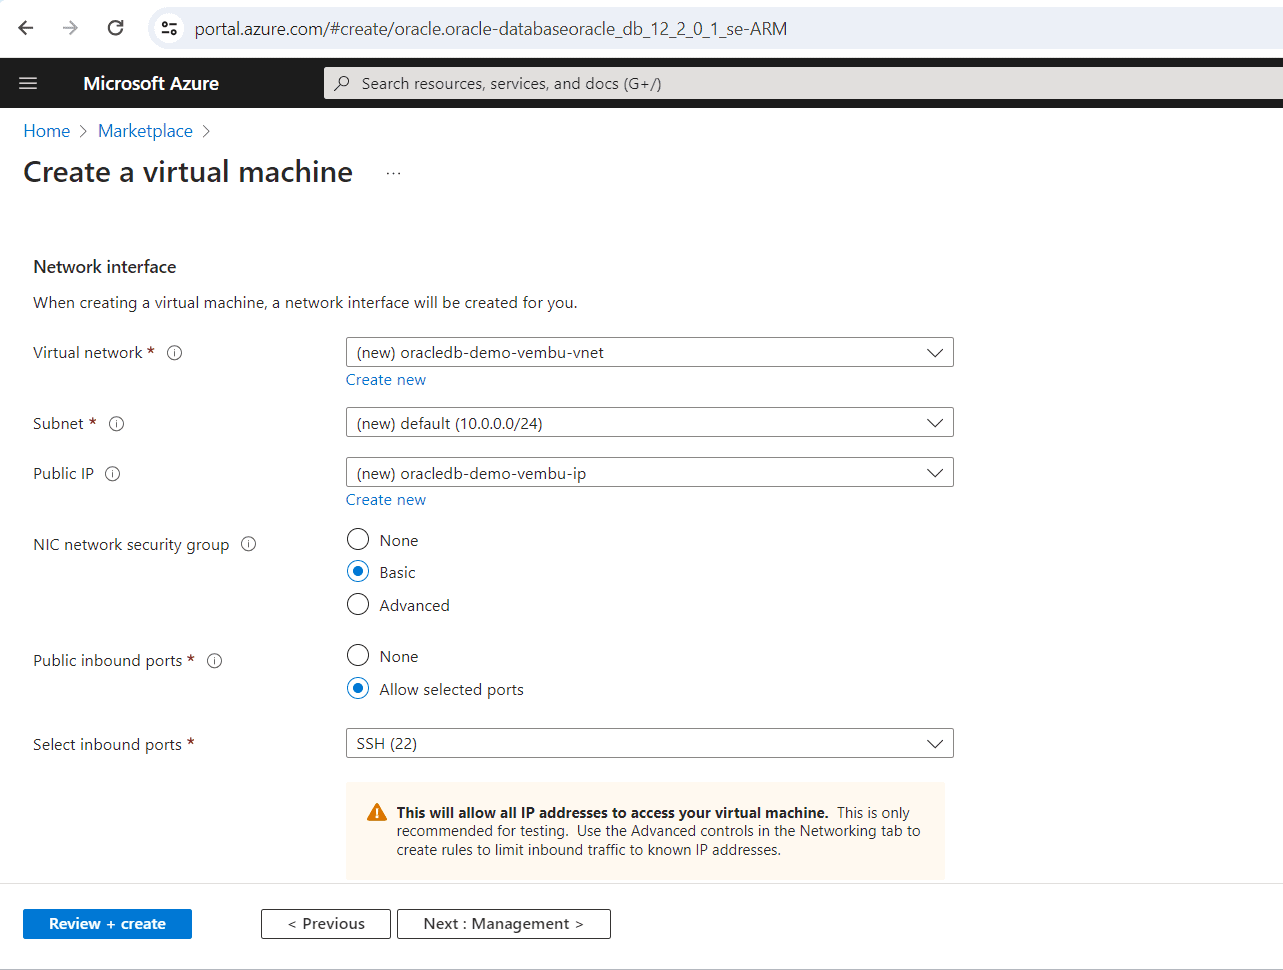
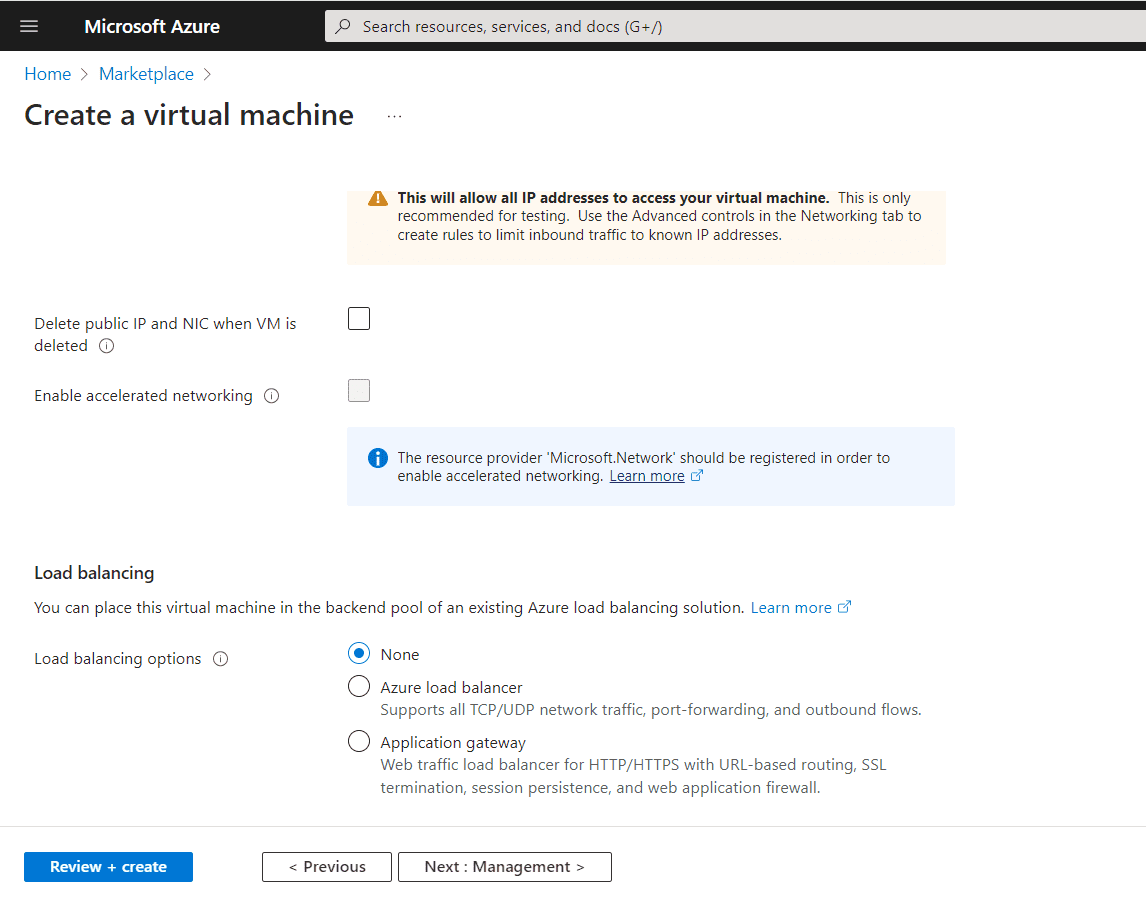
Under the Load balancing section, we may choose the Load balancing options, and hence we can place this virtual machine in the backend pool of an existing Azure load balancing solution.
Click Next to Management section. This is an optional section where we may configure the VM for Microsoft defender for cloud. This provides unified security management and advanced threat protection across hybrid cloud workloads.
Also you can enable auto-shutdown and backup process for the VM in this step. If required, users are recommended to enable these services in this step.
The Rest of the steps are optional and not required to configure, the default configuration is good to have.
In the final step, review the configuration and click “create” to start the VM deployment in the Azure Cloud.
User may see a validation process on the screen and show the validation passed message to confirm the Azure VM creation process. Click create finally once to start the deployment process.
A new dialog box appears, asks the user to download the private key and start to create the required resources as shown in the below image.
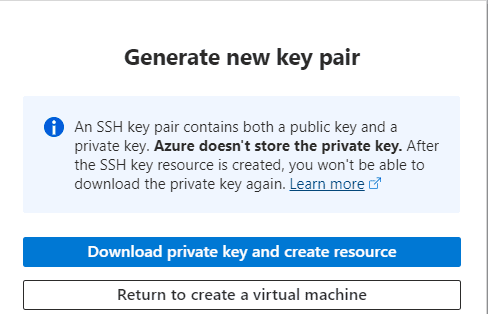
Click “Download private key and create resource” to continue, and save the PEM file safely in your computer.
Then you find the “Deployment is in progress” message on your portal, and finally get the message “Deployment is complete” in few minutes.
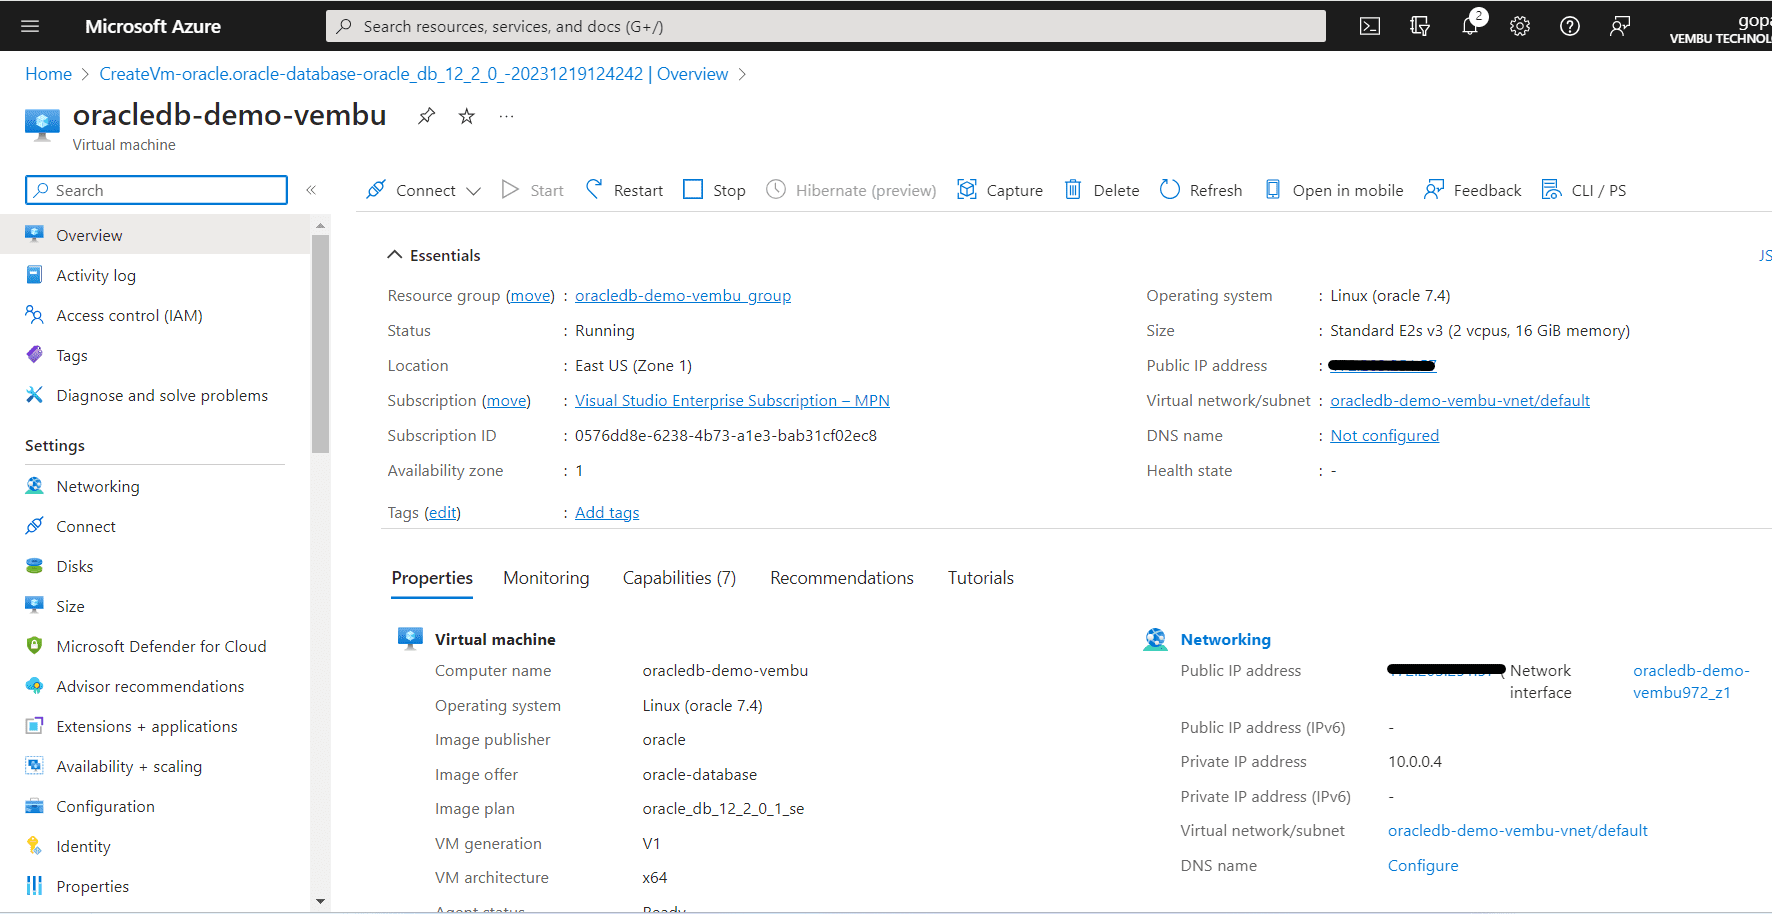
Click “Goto resource” button to find the running VM status and check the other new configurations are assigned to the VM. The below screenshot shows all the details of the VM.
Here, we covered only the creation of an Oracle database VM in the Azure Cloud, and users are encouraged to understand and study the working with oracle DBs in the newly created Azure VM further.
Conclusion
Having an Oracle Database Virtual Machine (VM) in Microsoft Azure offers several advantages, leveraging the capabilities of both Oracle and Azure. Here are some takeaways to use Oracle database VM in Azure Cloud
- Azure provides a scalable and flexible environment, allowing you to easily scale up or down based on your Oracle database workload requirements
- You can resize your Oracle VMs and storage resources in Azure to accommodate changes in demand without significant downtime
- Azure offers a range of services for high availability and disaster recovery, such as Azure Site Recovery and Azure Backup, helping ensure that your Oracle database remains accessible in case of unexpected events
- Azure provides a secure infrastructure with features like network security groups, Azure Active Directory, and encryption at rest and in transit. Both Oracle and Azure comply with various industry standards and regulations, helping you meet compliance requirements for your Oracle database deployments
- Azure offers a wide array of services that can enhance your Oracle database deployment, such as Azure Active Directory for identity management, Azure Monitor for performance monitoring, and Azure Automation for streamlined management tasks
- Azure provides flexible pricing models, including pay-as-you-go and reserved instances, allowing you to optimize costs based on your Oracle database usage patterns. Integration with Azure Cost Management tools helps you monitor and control your spending
Follow our Twitter and Facebook feeds for new releases, updates, insightful posts and more.

Leave A Comment