
Introduction
When you have several Azure Virtual Machines to deploy, the customization process of each system can be time-consuming. Traditionally IT Admins have been using a Golden Image to deploy a machine within their organization.
Table of Contents
In order to create a Golden Image (which is also known as a Template or a Master), it is essential to:
1. Create a Virtual Machine
2. Install the Operating System from scratch inside this Virtual Machine
3. Then install all the organizational prerequisites on this VM.
For instance, a prerequisite could be to install specific software such as:
- Adobe Reader
- Word, Outlook, Excel, …
- VMware View Agent
- System Center Configuration Manager Agent
- And so on…
Or maybe to create a folder, a custom Event Log … So finally the Virtual Machine must be “sys-prepped” in order to create it as an image.
As a system administrator, you would like to automate this task to save time. Thanks to the “capture” feature, which is available in Azure (in the Virtual Machine blade), you will be able to create a Golden Image, and then deploy a Virtual Machine from this template. Either you can use the Azure Portal to perform this task or you can of course use Windows PowerShell. In this guide, I will explain both methods.

Azure is not magic; Below are some important considerations, before capturing a Virtual Machine:
- When you deploy a new Virtual Machine based on the Golden Image, this VM will be created in the same Azure Region where the Golden Image was running. So if your Golden Image was running in West Europe, you won’t be able to deploy a VM in West US
- So if you need to deploy VMs to multiple Azure regions, the only workaround is to create multiple Golden images for multiple Azure Regions
- You cannot update the Golden image using Windows update. So, the newly created Virtual Machine will need to be updated immediately after its creation
Requirements
Let’s see the prerequisites before going deeper in this guide:
- You must have an Azure Subscription
- You must have at least one Resource Group or create a new one
- You must have a storage account in your Azure subscription
- A Virtual Network with an existing subnet must exist
- And of course, you must have an existing Virtual Machine so that we can generalize it
Getting Started
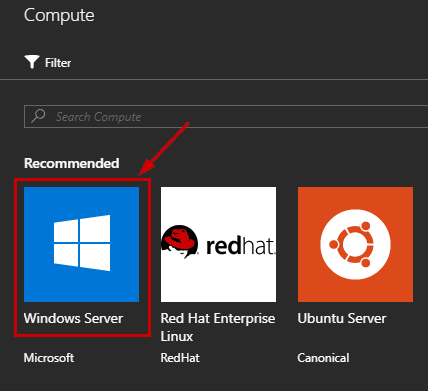
In this example, I created a Windows Server 1709 Virtual Machine by clicking “Create a resource”:
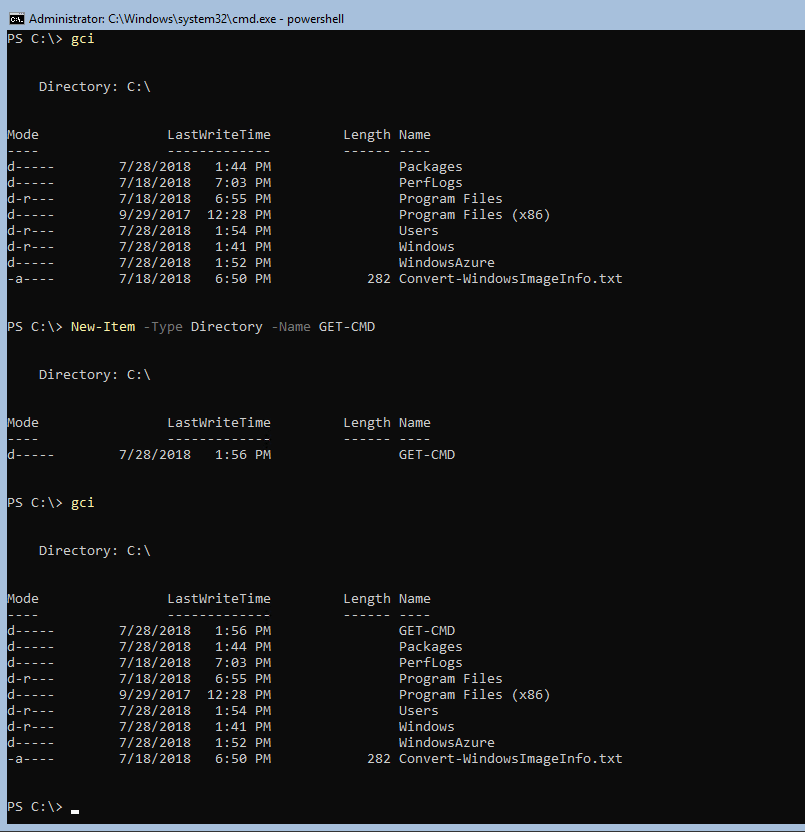
and then create a folder called “GET-CMD”. At this step, you can install software; copy/paste some custom scripts, or whatever you want …
Before creating an image, it is important to use “Sysprep” to prepare the Windows guest OS on the Virtual Machine. If you create an image from a Virtual Machine that has not been generalized, any Virtual Machine created from that image won’t start.
What is “Sysprep”?
“Sysprep” (System Preparation) prepares a Windows installation (Windows client and Windows Server) for imaging, allowing you to capture a customized installation. “Sysprep” removes PC-specific information from a Windows installation, “generalizing” the installation so it can be installed on different PCs.
Note: Capturing a Virtual Machine image will make the Virtual Machine unusable. This action cannot be undone.
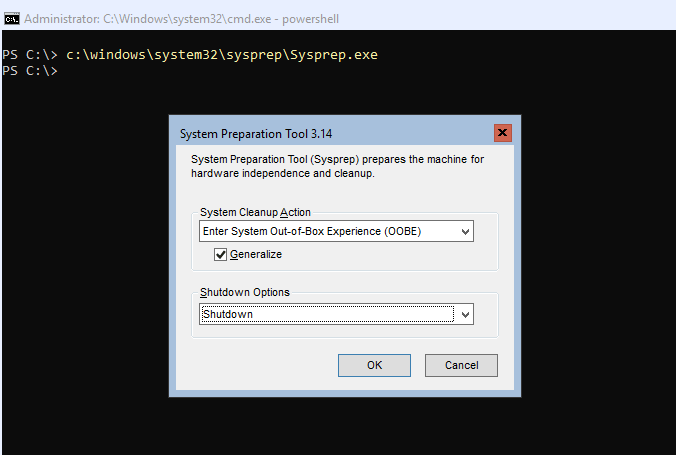
Once you have finished the customization, navigate to “C:\windows\system32\sysprep” and run “sysprep.exe”. Run the system preparation with the following settings:
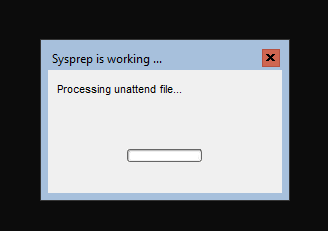
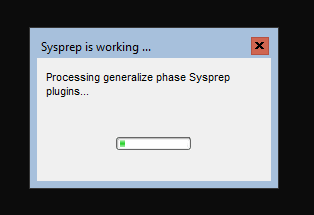
Sysprep is generalizing the Virtual Machine, so wait a moment …
Note: Sometimes, you may get an error during the sysprep process, which is very common. To solve this issue, you have to navigate to the following directory:
C:\windows\system32\sysprep\panther\
Open the log file and look at near the bottom of the log file, and you will see that there are some error messages that mention a certain application or something else. You have to correct this error, and try to sysprep the machine again.
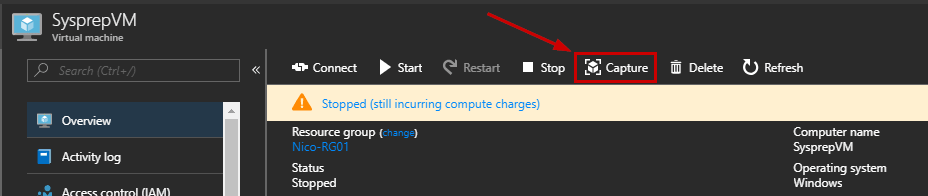
Once the generalization is done, the Virtual Machine will stop. Open the Azure Portal, and confirm the status:

Click on your Virtual Machine, and then notice the “Capture” button. Azure allows you to convert a Standard Virtual Machine to a Template (e.g Golden Image).
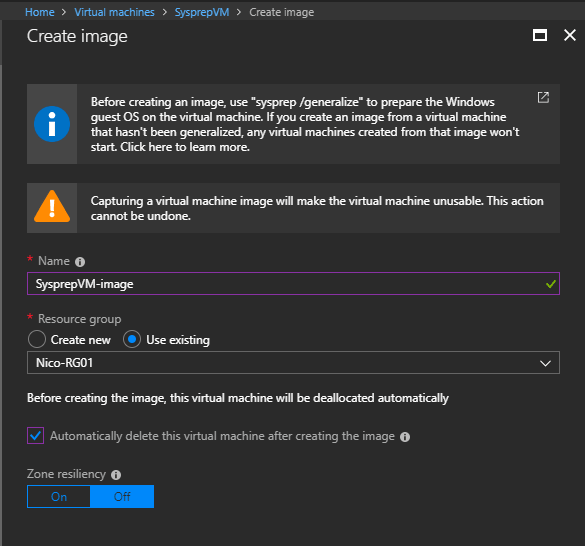
A new wizard will appear and you will be prompted to type a name, and to select a Resource Group. As I mentioned before, capturing a Virtual Machine image will make the Virtual Machine unusable, so you can check the box to delete the Virtual Machine after creating the image.
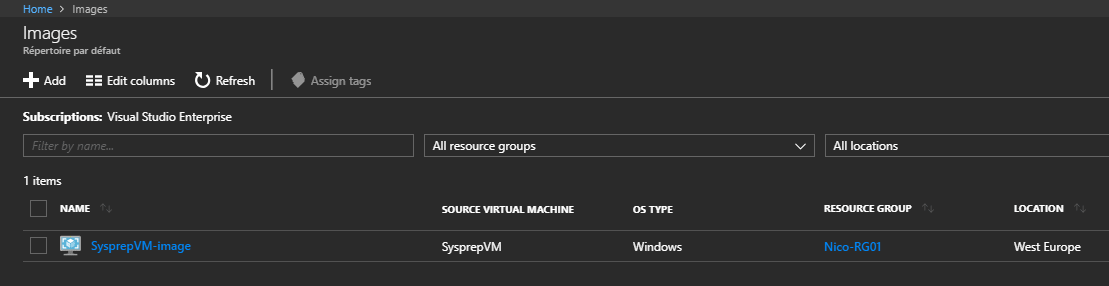
Click OK, and wait until the Virtual Machine is converted. Once the template is created, navigate to “All services” and “Images”:
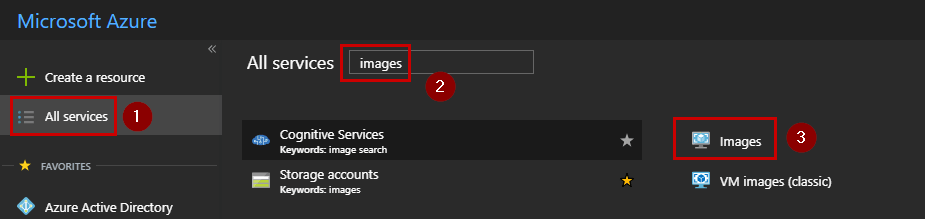
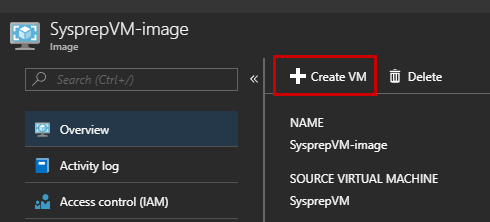
And you will notice the Golden Image.
From this image, you can click “+ Create VM” to create a new Virtual Machine based on this template.
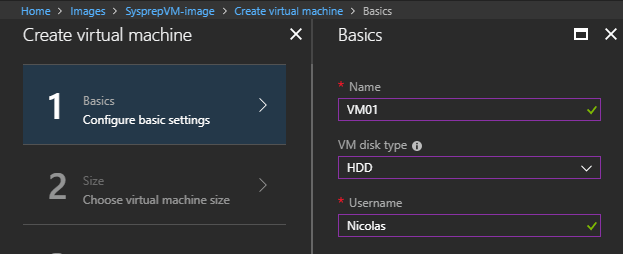
In the new blade that appears, you must type a name for the newly created Virtual Machine:
Wait until the deployment is done. In my case, the deployment took only 4 minutes 10 seconds. Now let’s connect to this Virtual Machine and confirm if the folder exists or not.

The folder exists and the last write time is the same as the “SysprepVM”, so everything is ok, the “VM01” is up and running.
Windows PowerShell for automation
Automating IT admin tasks is essential for every sysadmin, so you should use Windows PowerShell to generalize a Virtual Machine. Thanks to Windows PowerShell and the Azure RM PowerShell Module, you will be able to automate the whole process in Azure.
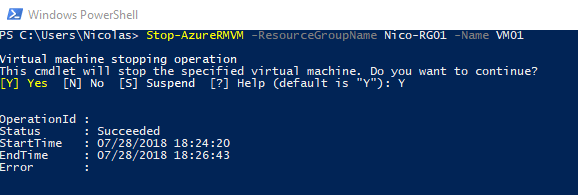
Firstly, as we did in the Azure Portal, we need to stop the Virtual Machine:
Stop-AzureRmVM -ResourceGroupName $rgName -Name $vmName -Force
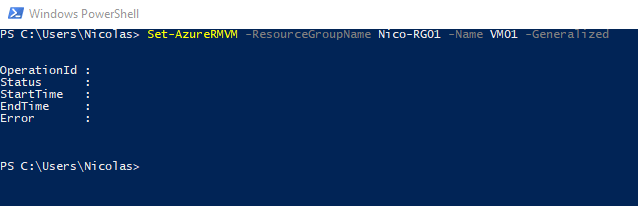
Here, we need to use the Set-AzureRmVm cmdlet to generalize the VM:
Set-AzureRmVm -ResourceGroupName $rgName -Name $vmName -Generalized
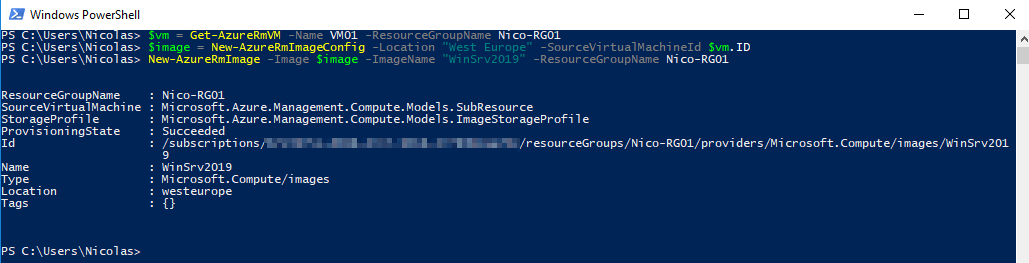
The last step retrieves the Virtual Machine information, then we create a new Azure Image Configuration in the West Europe region, and finally, we can create the Azure Image using the New-AzureRmImage cmdlet:
$vm = Get-AzureRmVM -Name $vmName -ResourceGroupName $rgName
$image = New-AzureRmImageConfig -Location $location -SourceVirtualMachineId $vm.ID
New-AzureRmImage -Image $image -ImageName $imageName -ResourceGroupName $rgName
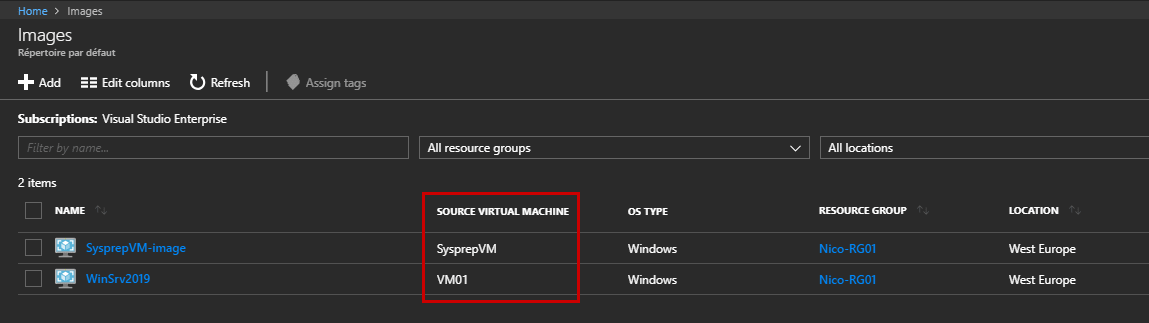
Once the template is created, navigate to “All services” and “Images” to confirm the newly Azure Image:
Conclusion
In this article, we discussed Azure Images, which are very important for Azure Admins in order to deploy multiple Virtual Machines in Azure, based on a template. We also discussed about Windows PowerShell to automate this task and to save time. You can use the Azure Portal instead of PowerShell if you are not very familiar with the command line.
Thanks to Azure Images, you can create Azure Virtual Machines based on your own template which is essential to suit your needs.
If you are an IT administrator or a Beginner who would like to learn more about Azure, please check out our Azure series for Beginners:
Microsoft Azure for Beginners: Choosing between Azure Native Firewall vs Vendor Virtual Appliances – Part 19
Migrating from VMware to Azure Using Azure Migrate – Part 2
How to Manage Azure VM on Windows Admin Centre in the Azure Portal
Follow our Twitter and Facebook feeds for new releases, updates, insightful posts and more.

Leave A Comment