
As a Cloud administrator, one would normally get a lot of requests to manage access for users and groups. For example, a new employee would have joined the team or a user might need changes in their access privileges or a user might have left the organization and hence the access permissions have to be revoked. In case of multiple users, access has to be managed through groups. These are some normal tasks in Identity and access management.
Table of Contents
- Creating new user account for AWS console access
- Creating user account for AWS programmatic access
- CONFIGURE AWS CLI WITH ACCESS KEY ID & SECRET KEY
- Conclusion
In AWS, users might need access to manage their cloud resources through cloud portal or through programmatic methods like AWS CLI or SDK etc., for automation purposes. In AWS, the main account that has access to all the services and to perform any task is known as the root account. Normally, this account will not be used to perform day to day tasks and the root account access information will be kept only with owners of the account. For all others, including the Cloud administrators or developers or any other teams, separate accounts are created and attached to specific roles to provide the required level of access and permissions that can be used to do only those tasks required for them.
This article will walk you through how to manage users and groups from AWS portal for both the AWS console access and for the programmatic access.
Creating new user account for AWS console access
To create a new user account and to set up a password to access the AWS console follow the steps as given below.
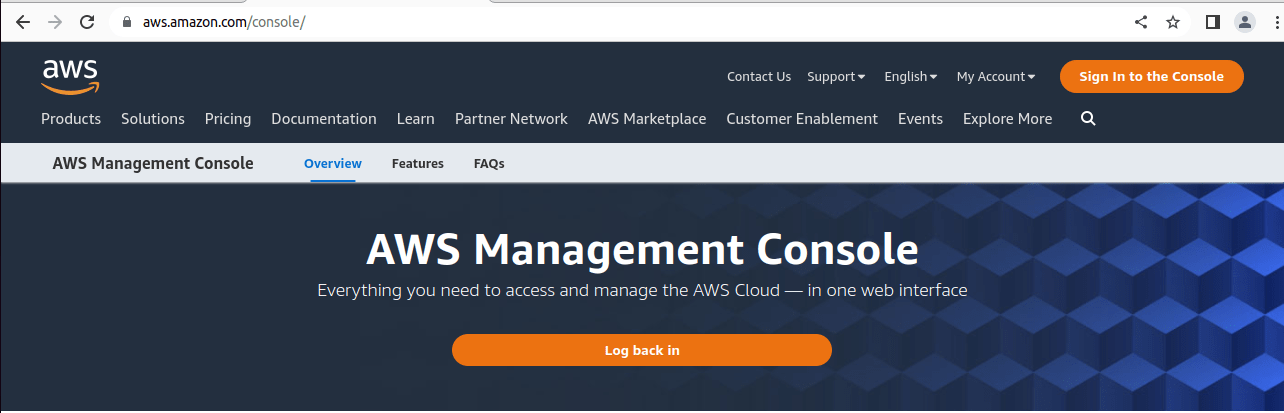
1. Login to AWS console using the link https://aws.amazon.com/console and click on Sign in to the Console.

2. In the next screen, select the option “Root User” and enter the root account username and password.

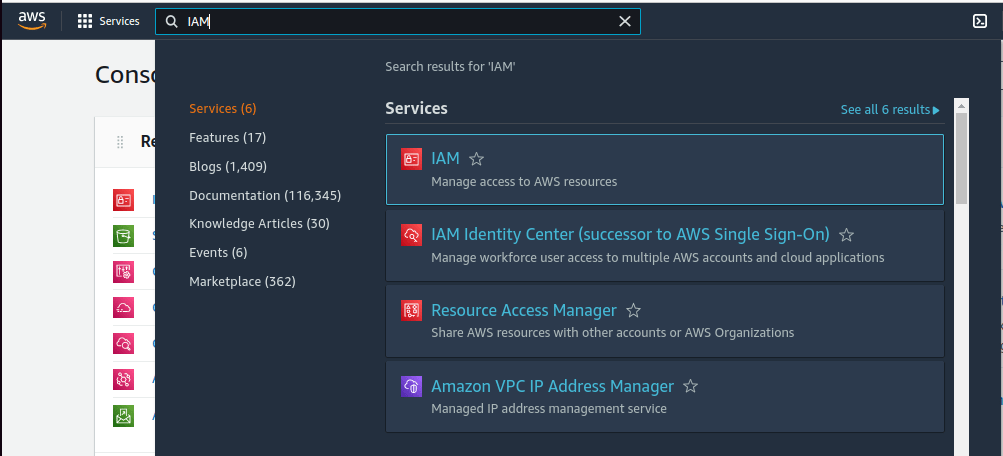
3. Search for IAM in the search box on the top of the screen and select the IAM service from the drop-down results.
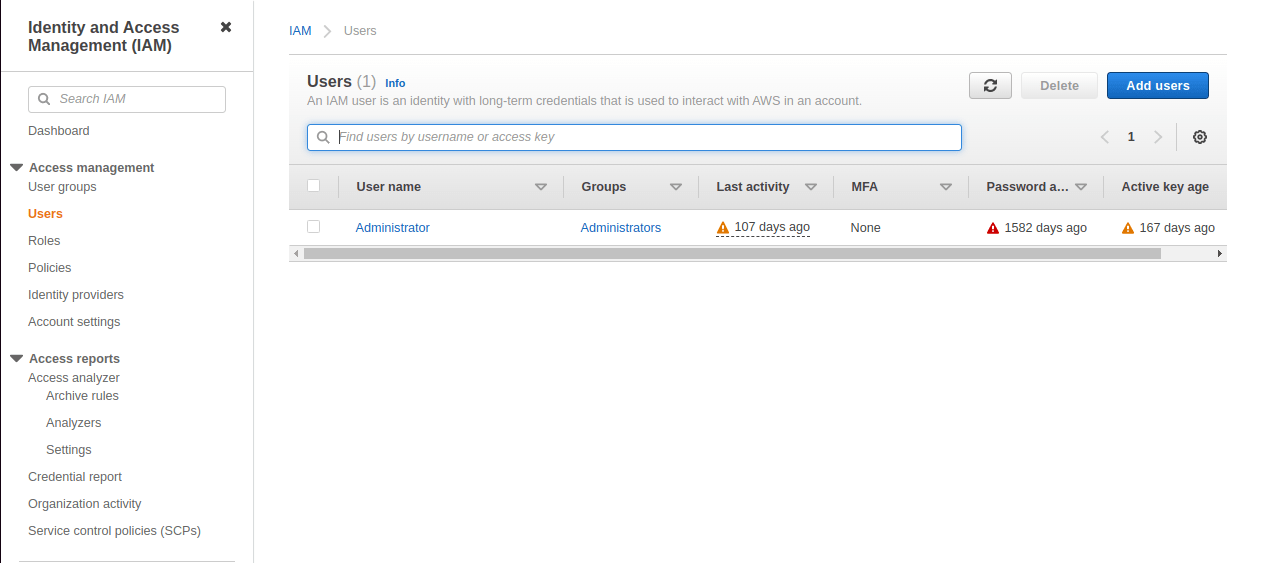
4. Click on Users option in the left-hand side of the screen to add a new user
5. In the next screen, click on the Add Users option.
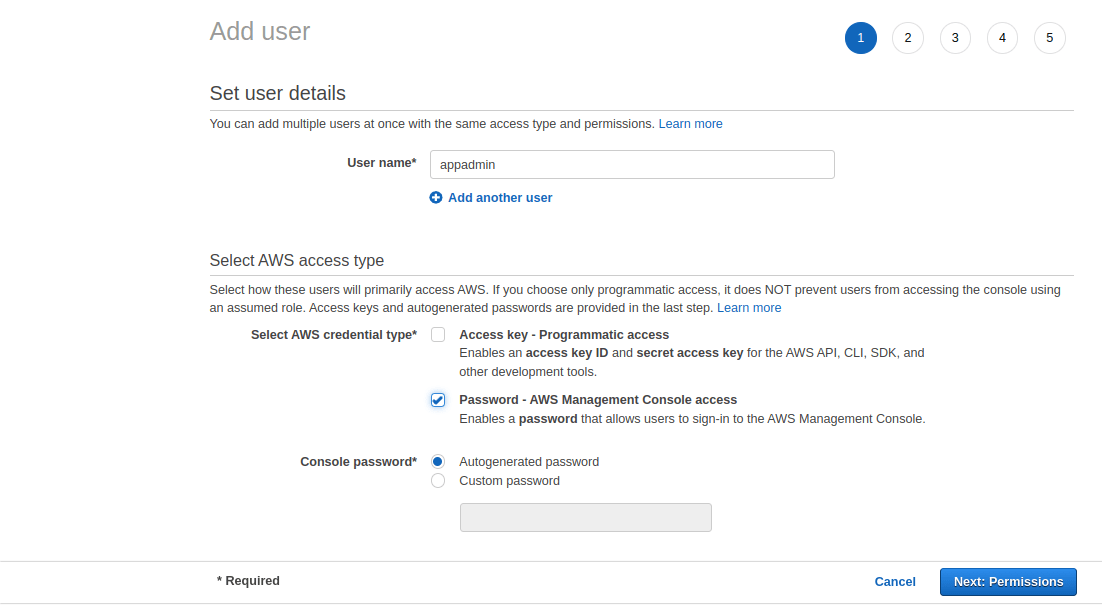
6. In next screen, you will get option to enter user name and select type of access. Also, if there are multiple users with same privileges to be created, you can do so by clicking on Add multiple users. Here the username is given as appadmin and the AWS credential type is chosen as Password – AWS Management Console access. You can either give your own password by choosing custom password or it can be autogenerated. Here we are choosing autogenerated password.
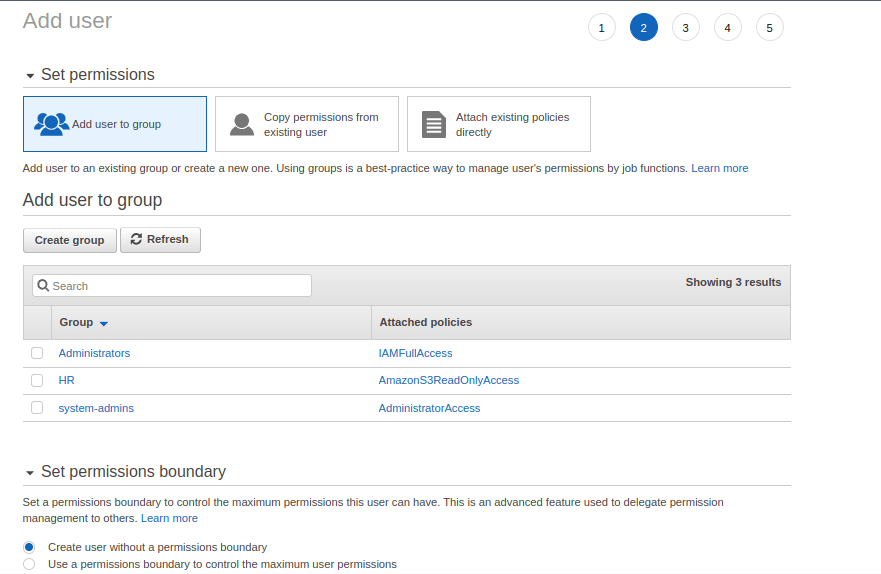
7. In next screen, we have options to set permissions for the user and to select permissions boundary. We can set permissions by following the three methods.
- By adding the user to a group
- By copying the permissions of an existing user
- By attaching existing policies directly to a user
Here we will add the user to a group so that the user inherits the permission from the group. We will create a new group with required permissions and then add the user to that group.
Permissions boundary is an advanced option which can be used to set fine grain permissions that defines the maximum permissions a user can have. Here we will choose the default option to create a user without permissions boundary.
In the screen, choose the option Add user to group and click on Create group.
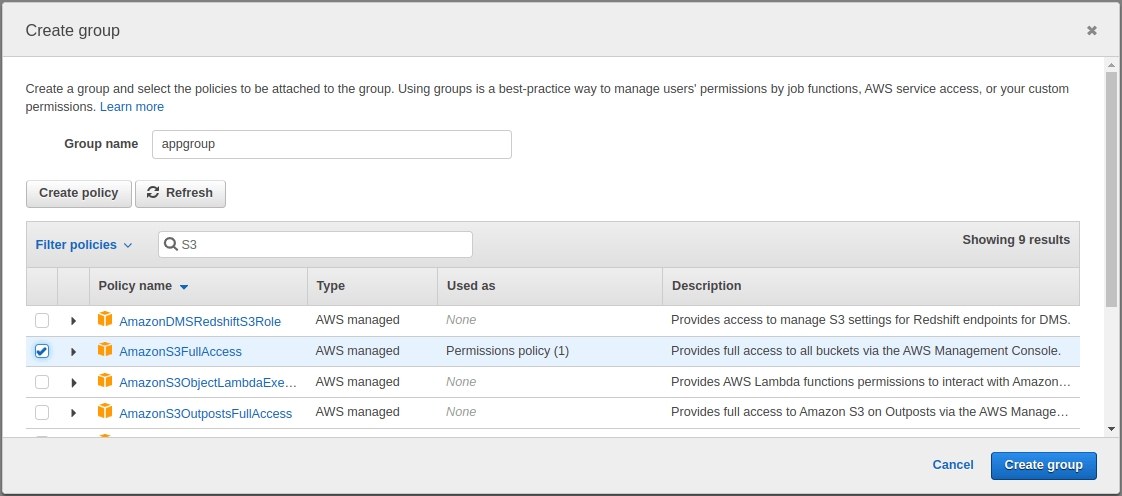
In the screen, enter the Group Name and choose a policy to be attached for the group. The policy provides the required permissions for the group. Here we give the group name as “appadmin” and choose the policy as “AmazonS3fullaccess”. This policy provides full access to all the S3 buckets in the account through the AWS console. You can choose any group name and policy of your choice as per the requirement. Once the required details are entered, click on create group
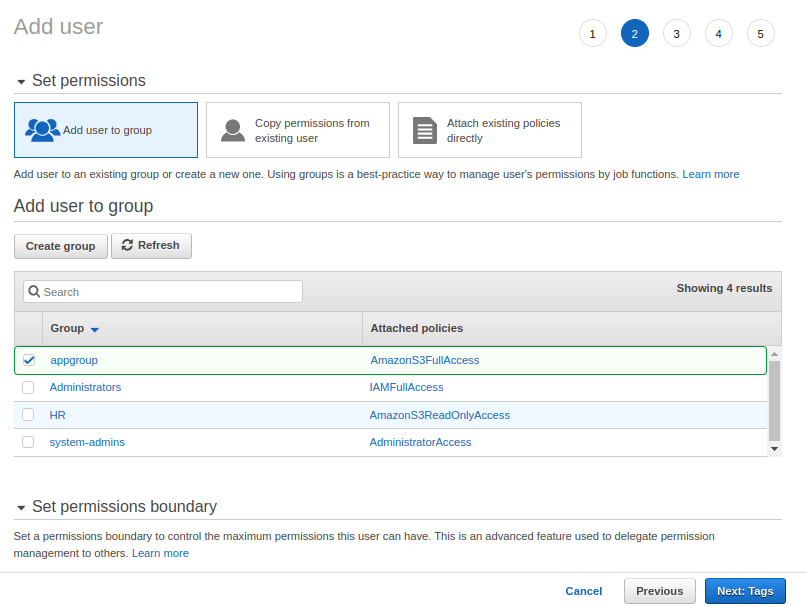
Once you click on create group, the next screen appears as below with the created group name and the policies attached to it. The new group is selected for the user. Click on the Next: Tags option to go to the next screen.
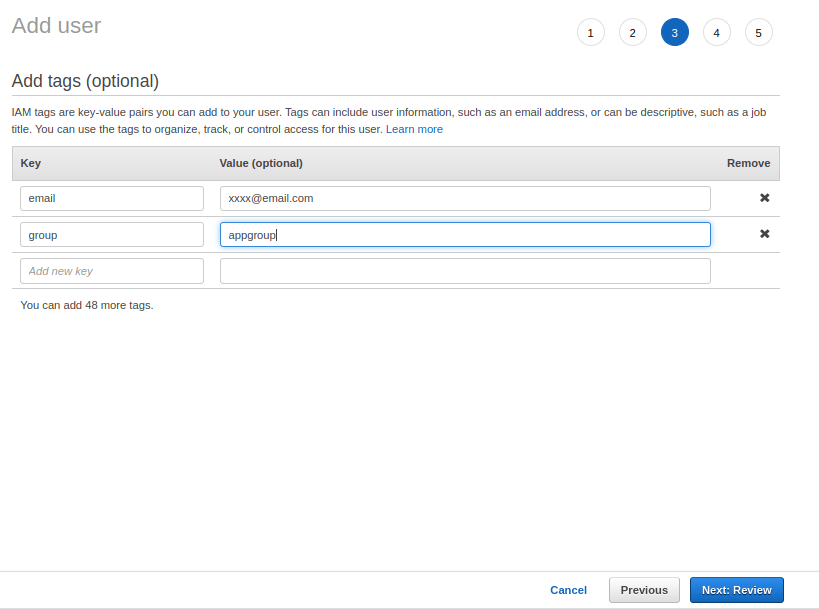
8. In the next screen, we can enter some tags to the user. Tags are used to enter some additional information about any cloud resource that you create in AWS. Tags are very useful for managing the Cloud operations. For example, a tag about the team using the resource (or) a tag about the cost centre of the resource who will be billed for the resource usage (or) a tag about the status of the resource (Under development or in production). Tags are simple key value pairs where key is used to identify the tag and value is the descriptive information we enter for the key.
Here we are using “email” and “group” as the key and “xxxx@email.com” and “appgroup” as the values for the key. You can enter any key or value as per the standards defined in your cloud environment. Tags are not mandatory requirement. If there are no need for tags then ignore this section and move on the next screen by click on Next: Review.
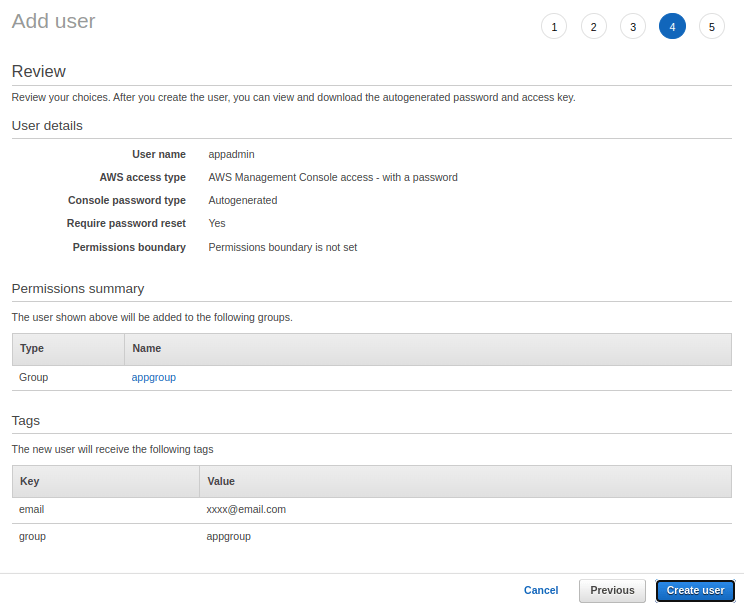
9. In the next screen, review all the information that is entered. If there are any changes required go back to the previous screen and make the necessary corrections. If not, click on Create User and complete the user creation.
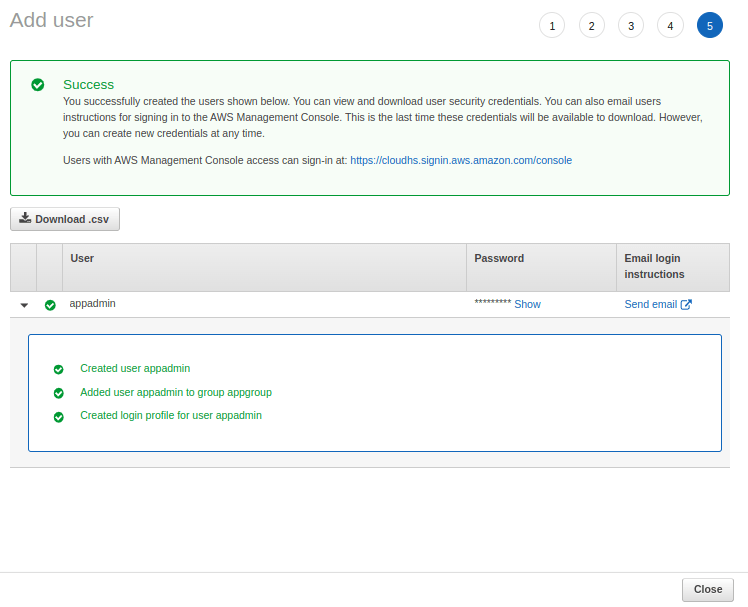
10. In the next screen, you will receive confirmation about the user creation and then you will find an option to download the password or email it. Once this screen is closed, the password cannot be retrieved again. A new password has to be set if the password is lost or not saved. Either click on Download .csv or Send email option to send the password to the user. Once done, click on Close. With this, user creation for AWS console access is completed. To login to the AWS cloud console, share the link for the console that is visible in the message in the screenshot given below.
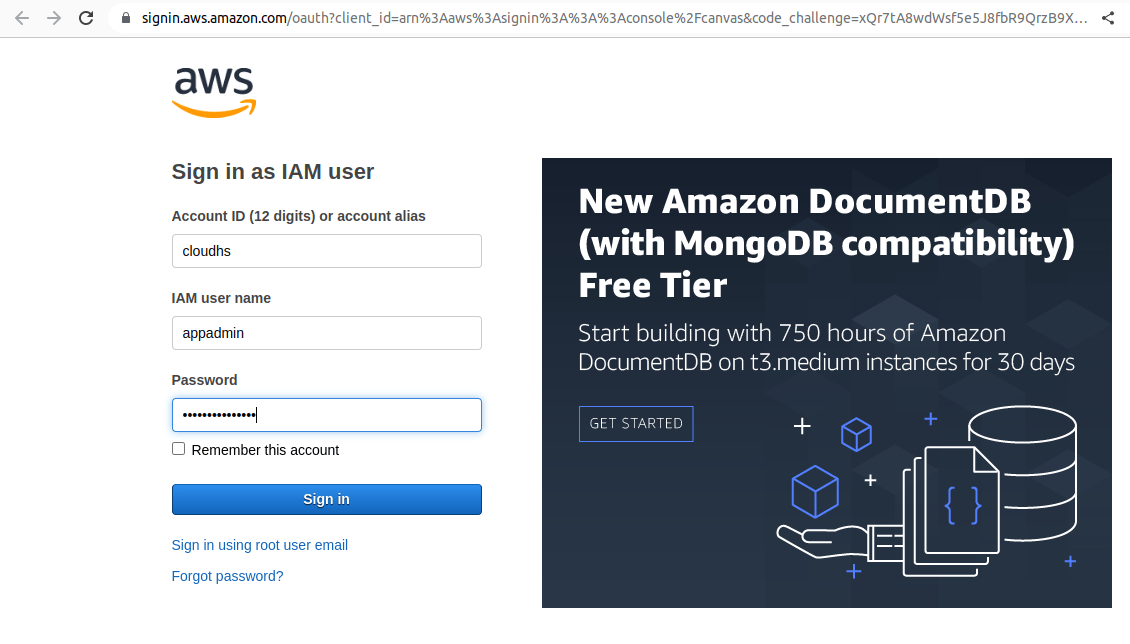
Note that this is an alias name for the AWS console. This will be different for other accounts you would use and it depends on the configuration done by the cloud administrator.
11. Now, the user can login to the AWS console using the AWS management console link that was available in the previous screen. The sign in page automatically fills in the Account Alias name. Type in the username and password received from the administrator. Here the user’s name is “appadmin” and the password is the auto-generated password created in the previous steps.
In the next screen, you will be prompted for changing the password when you login for the first time. Change the password and move on to the next screen.
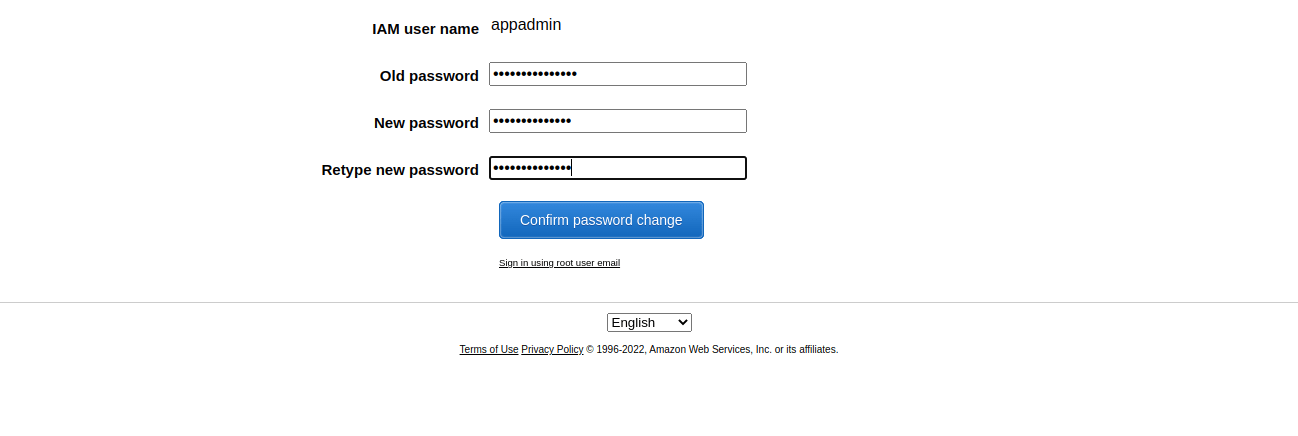
Once the password is changed, you have to sign in again with the changed password. Now you have logged in with the user created, you will be able to perform the actions as defined by the permissions provided to the user through the policies.
Creating user account for AWS programmatic access
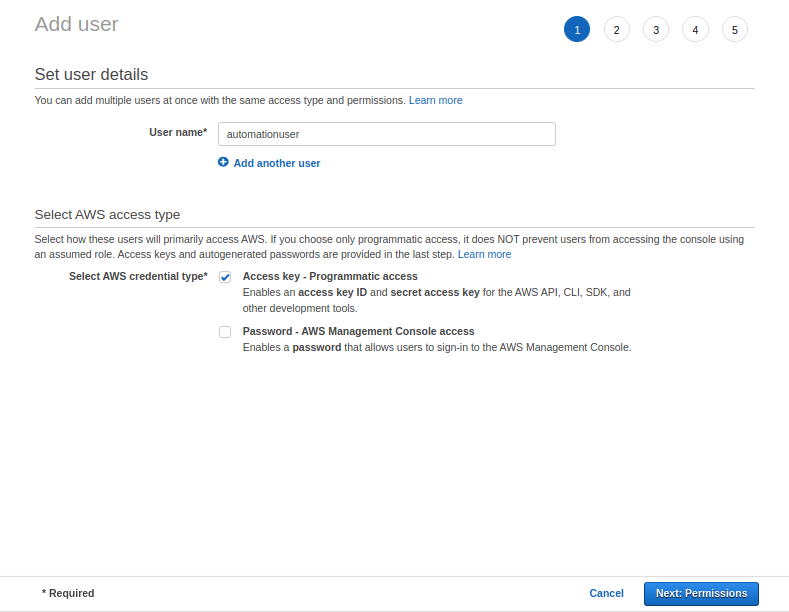
In this section, we will create a user account for programmatic access – that is, to use along with AWS CLI, API and SDK’s. In this method an access key ID and access secret will be generated instead of a password. Using this, the user can access the AWS cloud resources. The procedure is similar to the previous method in which the user was created for AWS console access except that we will choose different credential type. In the first page of Add User, we will choose the credential method as programmatic access as shown below.
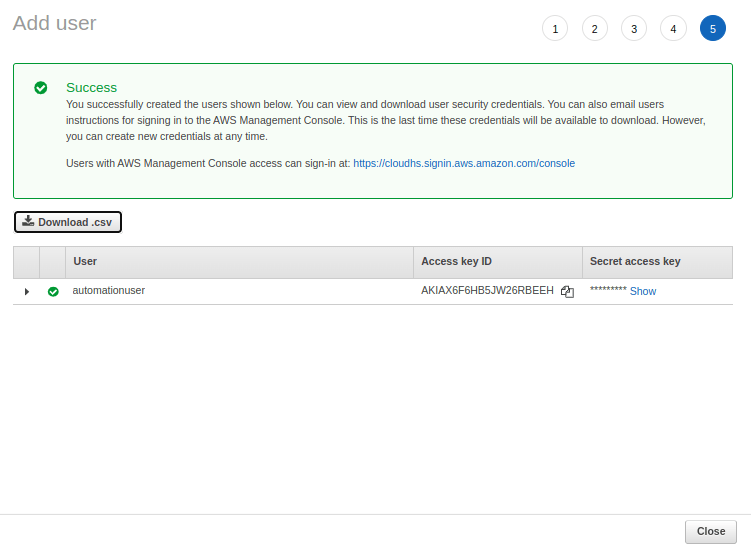
Move on to the next steps to set permissions, tags and then create the user. In the final screen, the Access Key ID and the Secret Key will be available. Download the key before moving away from the screen as it is not possible to retrieve the key once this screen is closed.
CONFIGURE AWS CLI WITH ACCESS KEY ID & SECRET KEY
Now, let us look at how to configure this access key id and secret access key to use with AWS CLI. Download and install AWS CLI on a Linux system with the following commands.
- curl “https://awscli.amazonaws.com/awscli-exe-linux-x86_64.zip” -o “awscliv2.zip”
- unzip awscliv2.zip
- sudo ./aws/install
Once the CLI is installed, you can run the aws configure command to setup the access key and secret for AWS CLI access. The command to configure is
- aws configure –profile
- profile_name can be any name related to purpose of the access key and secret
We will use a profile name called “automation” and configure the CLI access. We need to enter the access key ID, secret access key, default region and default output format for the CLI commands. If we don’t specify a region, then with each AWS CLI command the region has to be keyed in. If the default output format is not specified, then JSON format is used to display the output for the AWS CLI commands. For Access key id and secret, use the values that you downloaded while creating the programmatic user.
$ aws configure –profile automation
AWS Access Key ID [None]: AKIAX6F6HB5JW26RBEEH
AWS Secret Access Key [None]: Zsj7dyehKSPMLlo98
Default region name [None]: us-east-1
Default output format [None]: text
Once the command is executed, a hidden directory .aws is create and two files named config and credentials are created for the profile name used in the aws configure command. Here the profile name is automation. You can check the contents of the files by using the cat command and see the details configured.
$ cat ./.aws/config
[profile automation]
region = us-east-1
output = text
$ cat ./.aws/credentials
[automation]
aws_access_key_id = AKIAX6F6HB5JW26RBEEH
aws_secret_access_key = Zsj7dyehKSPMLlo98
Create a bucket using the AWS CLI and list the S3 buckets in your account with the profile created.
$ aws s3api create-bucket –bucket mys3-test-bucket-00001 –profile automation
/mys3-test-bucket-00001
$ aws s3 ls –profile automation
2022-10-03 04:46:10 mys3-test-bucket-00001
Conclusion:
In this article, we have demonstrated how to create a user for AWS console and AWS programmatic access in a detailed way. Also, we have seen how to configure the programmatic user with AWS CLI so that CLI can be used to create resources in AWS cloud. Be very cautious while providing the access permissions with the policies. Provide only the required permissions to do the required tasks. If the AWS managed policies are not suitable, create a new customer managed policy with only those permissions that are required for a user. Always follow the least privilege principle to provide access, keeping the environment secure.
Explore our Beginners’ series below:
AWS Mastery for Beginners: Elevate Your IT Career with Our Comprehensive Series
Mastering Microsoft Azure from Scratch: A Step-by-Step Guide for Beginners
AZ-104 : Microsoft Azure Administrator Certification Comprehensive Training Series
Follow our Twitter and Facebook feeds for new releases, updates, insightful posts and more.

Leave A Comment