Read on:
AWS for Beginners: Understanding AWS Terminologies: Part 1
AWS for Beginners: What is AWS EC2: Part 2
AWS for Beginners: AWS Compute Services: Part 3
Read More
Amazon Elastic Block Store (EBS) is a block-level storage service for Amazon Elastic Compute Cloud (EC2) instances. EBS volumes are network-attached storage that can be provisioned and used independently from the life of an EC2 instance. EBS volumes can be encrypted for added security and can be used in a variety of different workloads, including big data, data warehousing, and business-critical applications.
To encrypt an unencrypted EBS volume in AWS, you can use the AWS Management Console, AWS Command Line Interface (CLI), or the AWS SDKs. Here are the steps to encrypt an unencrypted EBS volume using the AWS Management Console.
Workflow:
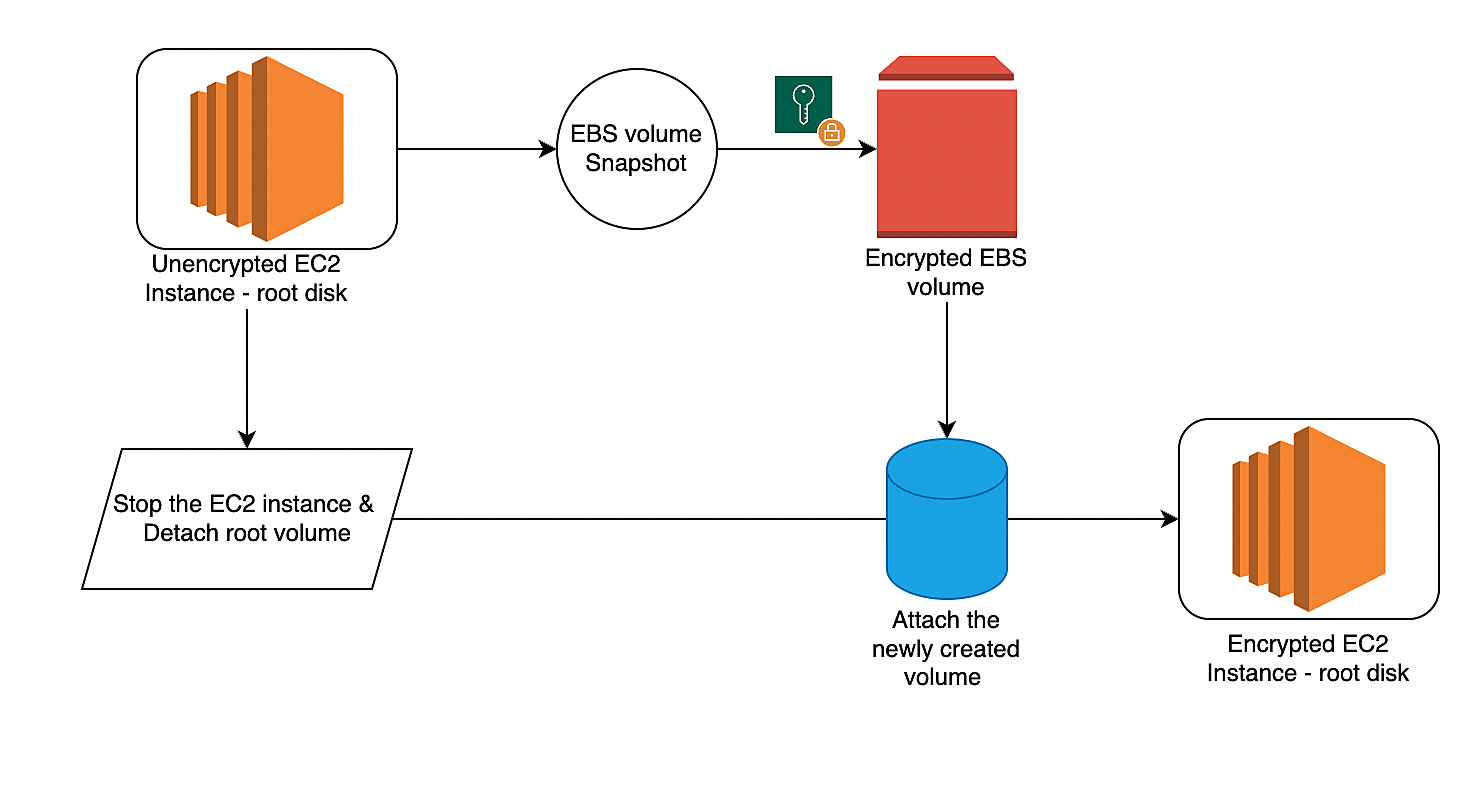
1. Open the Amazon EC2 console at https://console.aws.amazon.com/ec2/
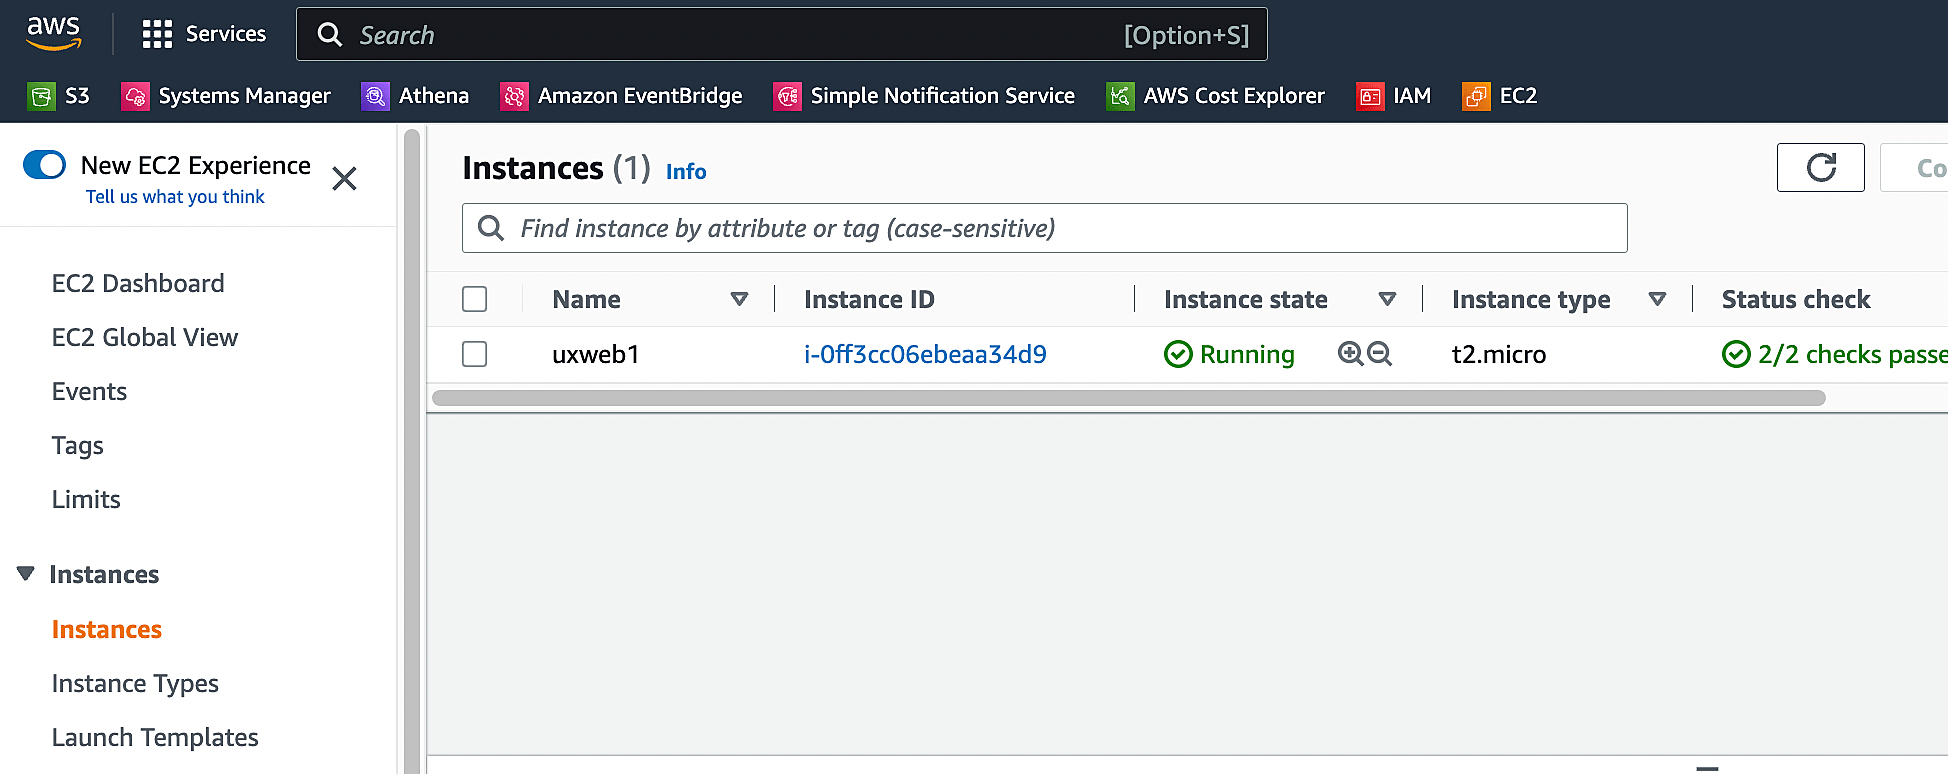
2. Select the EC2 instance and navigate to the section “Storage”. Click the volume lD to take the page to the “Volume” section. You can also directly navigate from the navigation menu on the left side.

3. Select the unencrypted volume that you want to encrypt. From “Actions”, Click “Create Snapshot”.
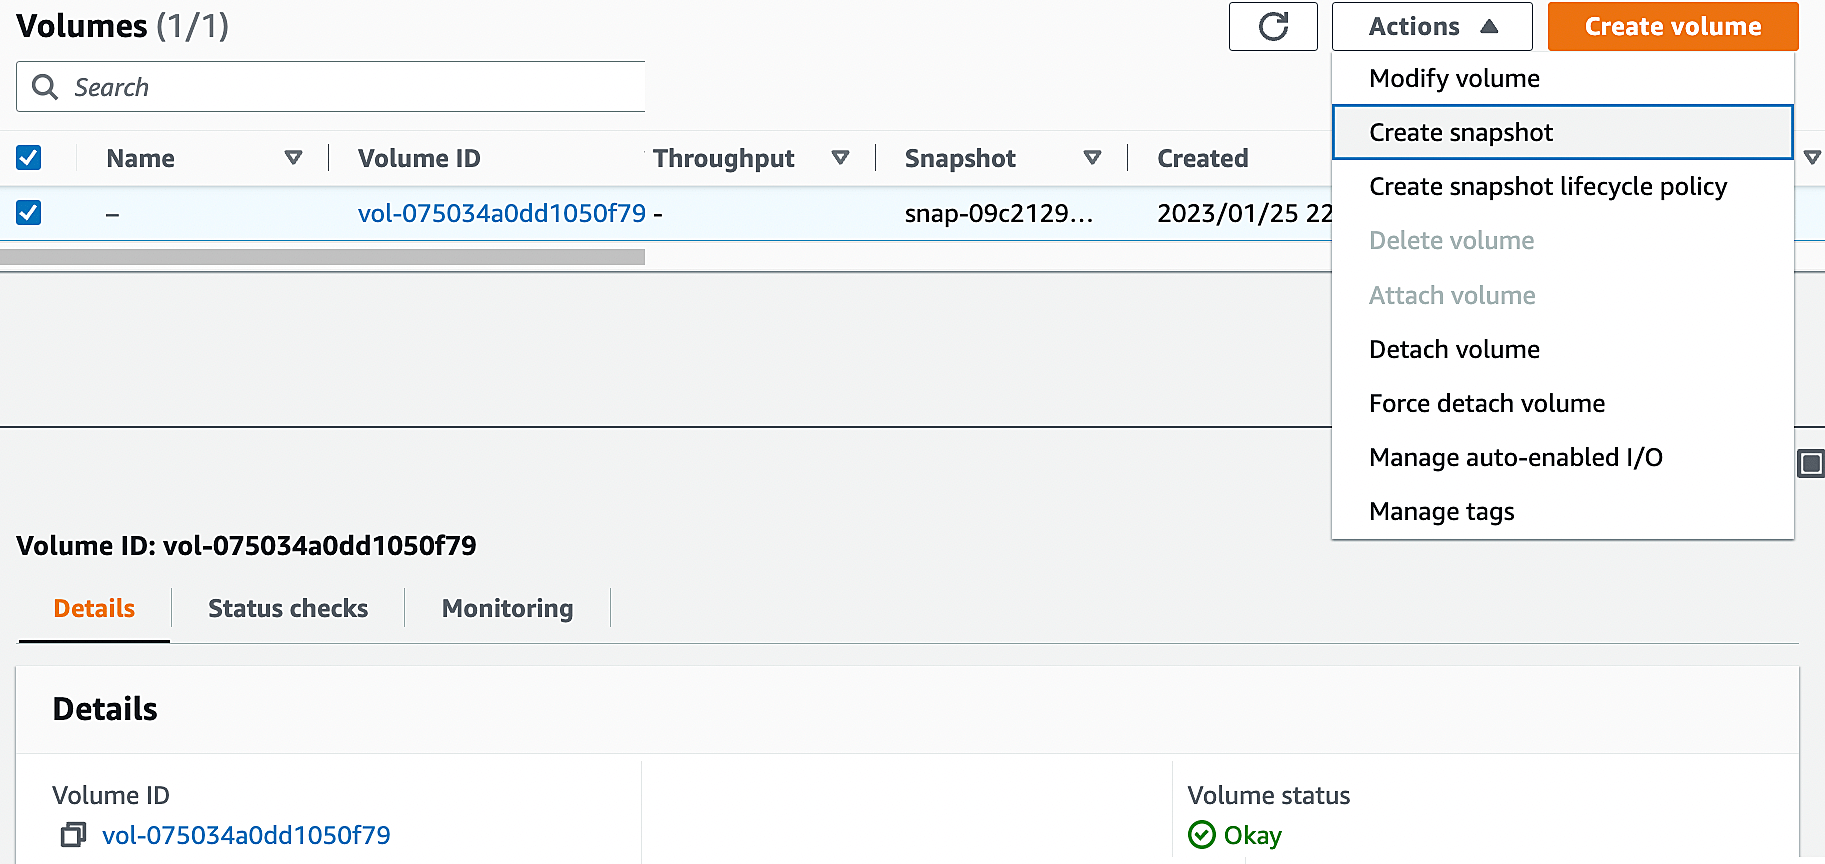
4. Choose “Actions”, then choose “Encrypt volume”.
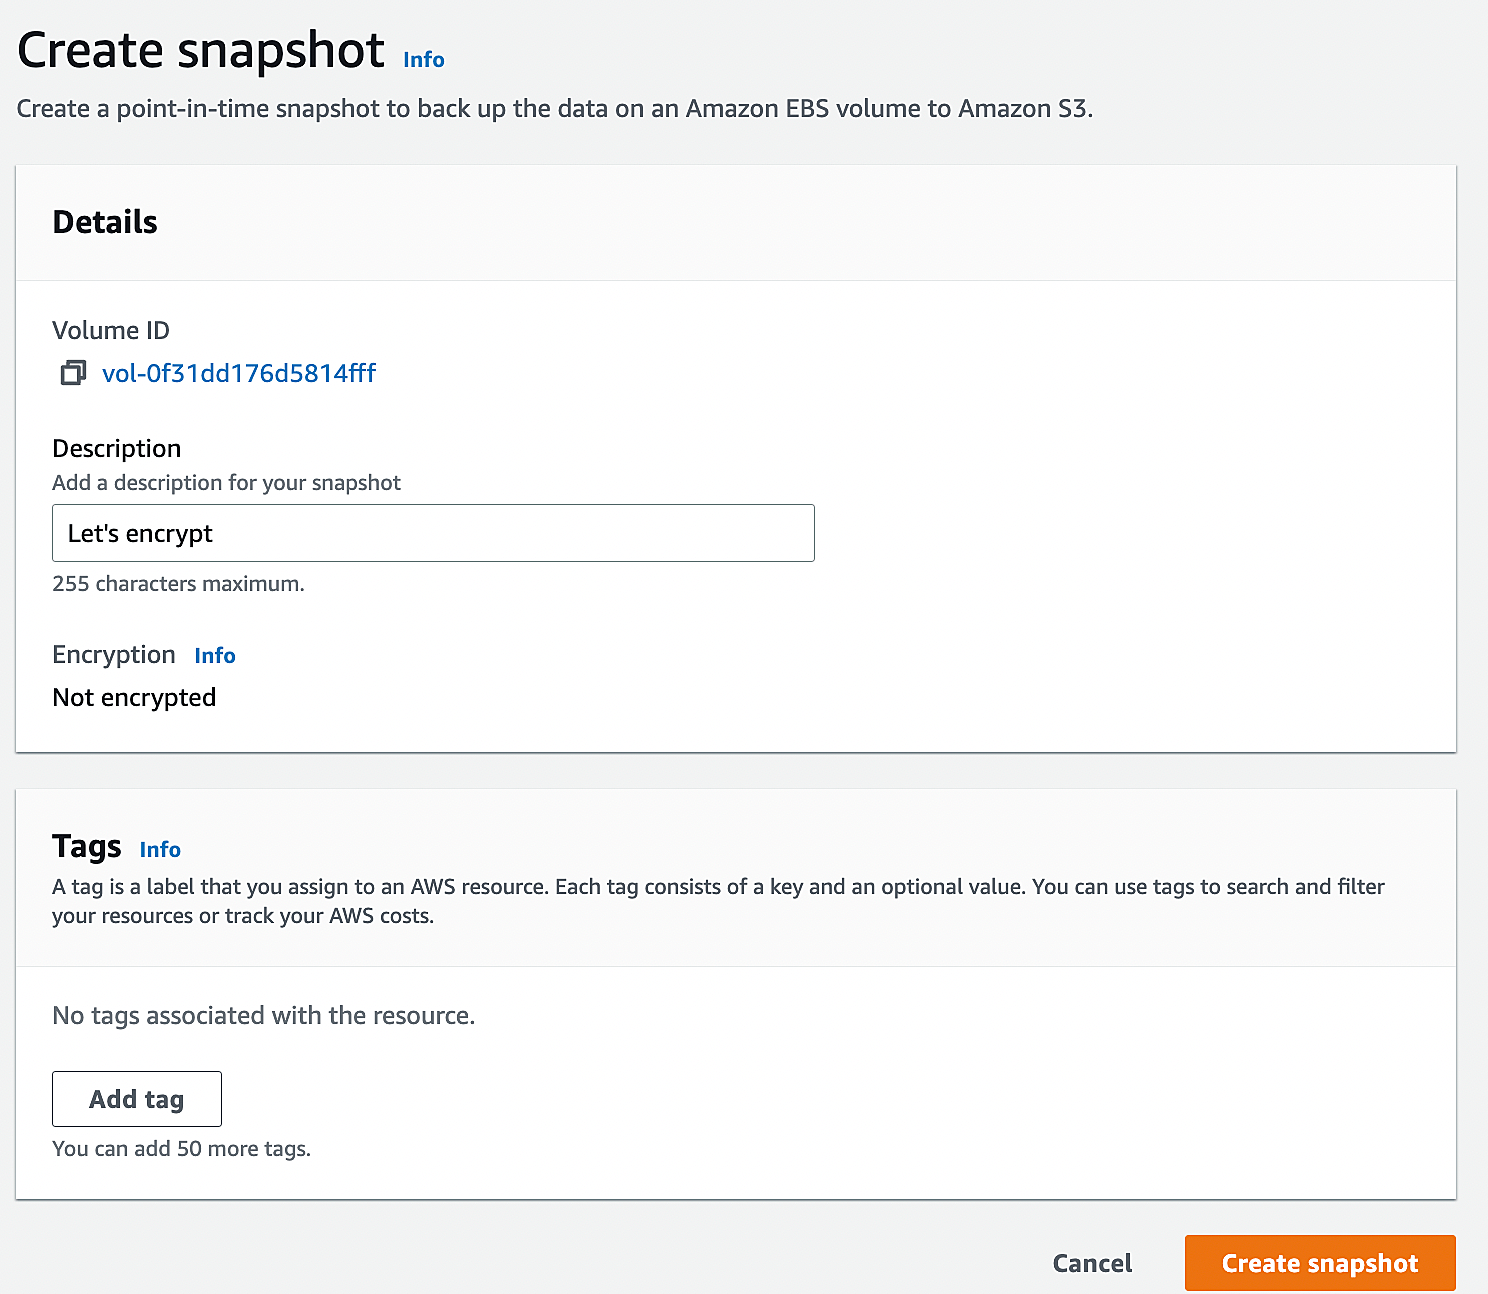
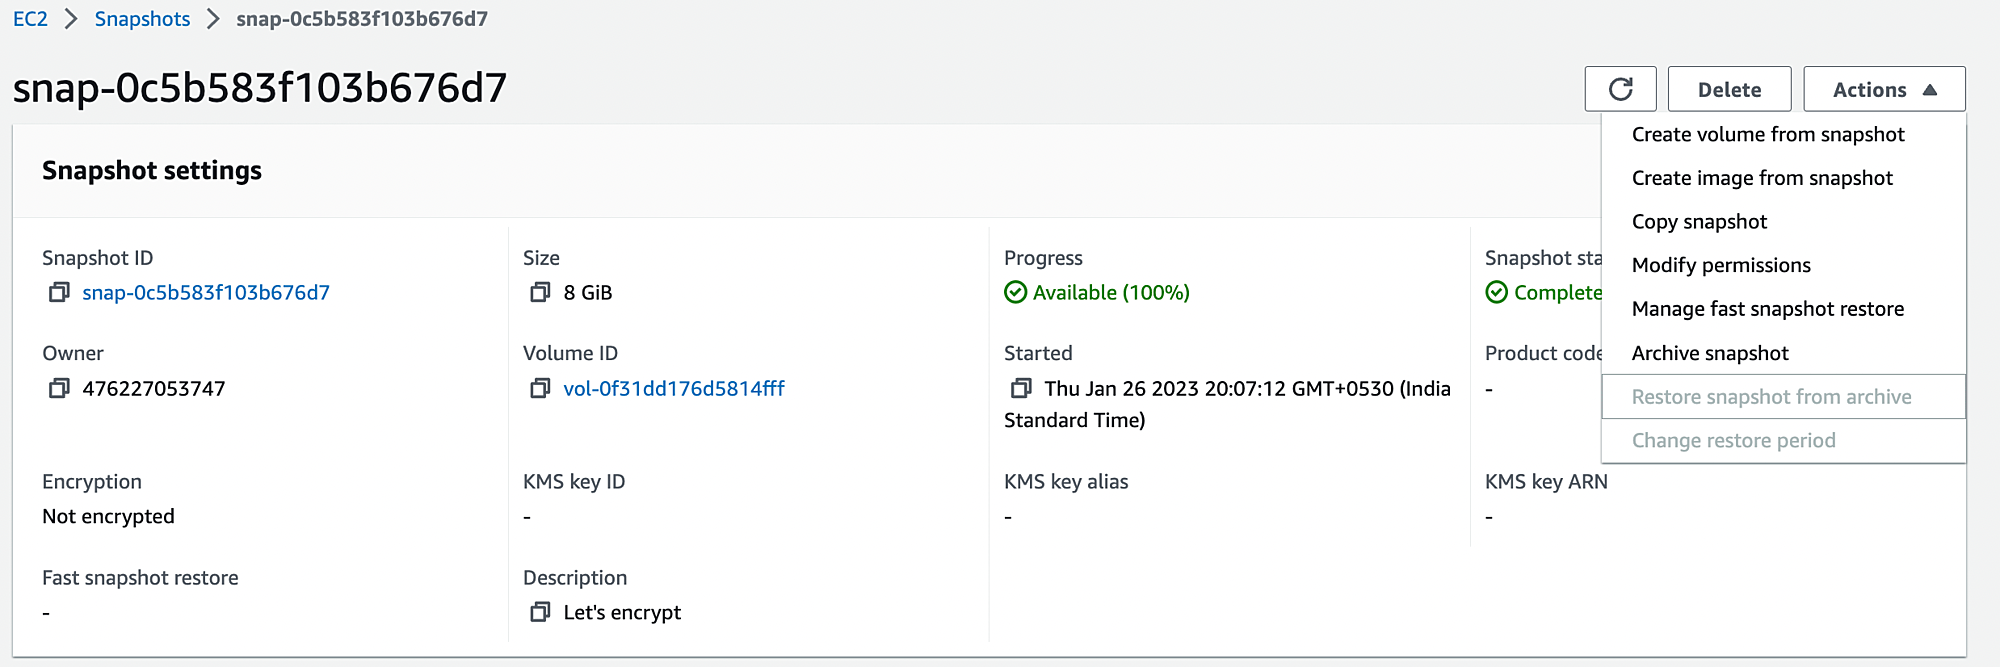
5. Here is the snapshot details. You can navigate to the snapshot in the left side plane.

6. Let’s create a new volume from the snapshot.
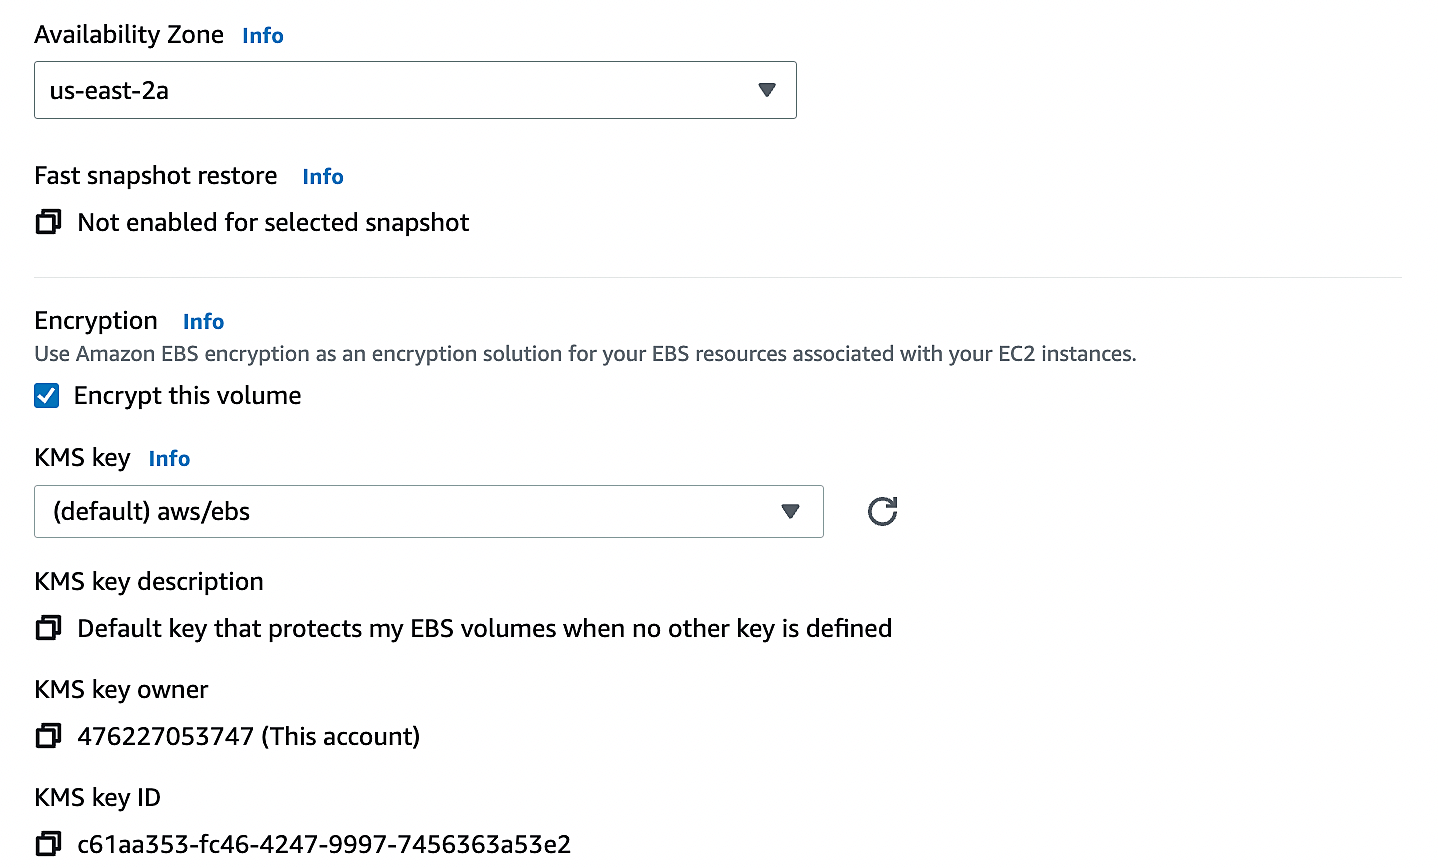
7. In this window, ensure that you have selected the “Encrypt this volume” option. You must select the “Availability zone” same as the instance location. For encryption, You need to select the KMS key.
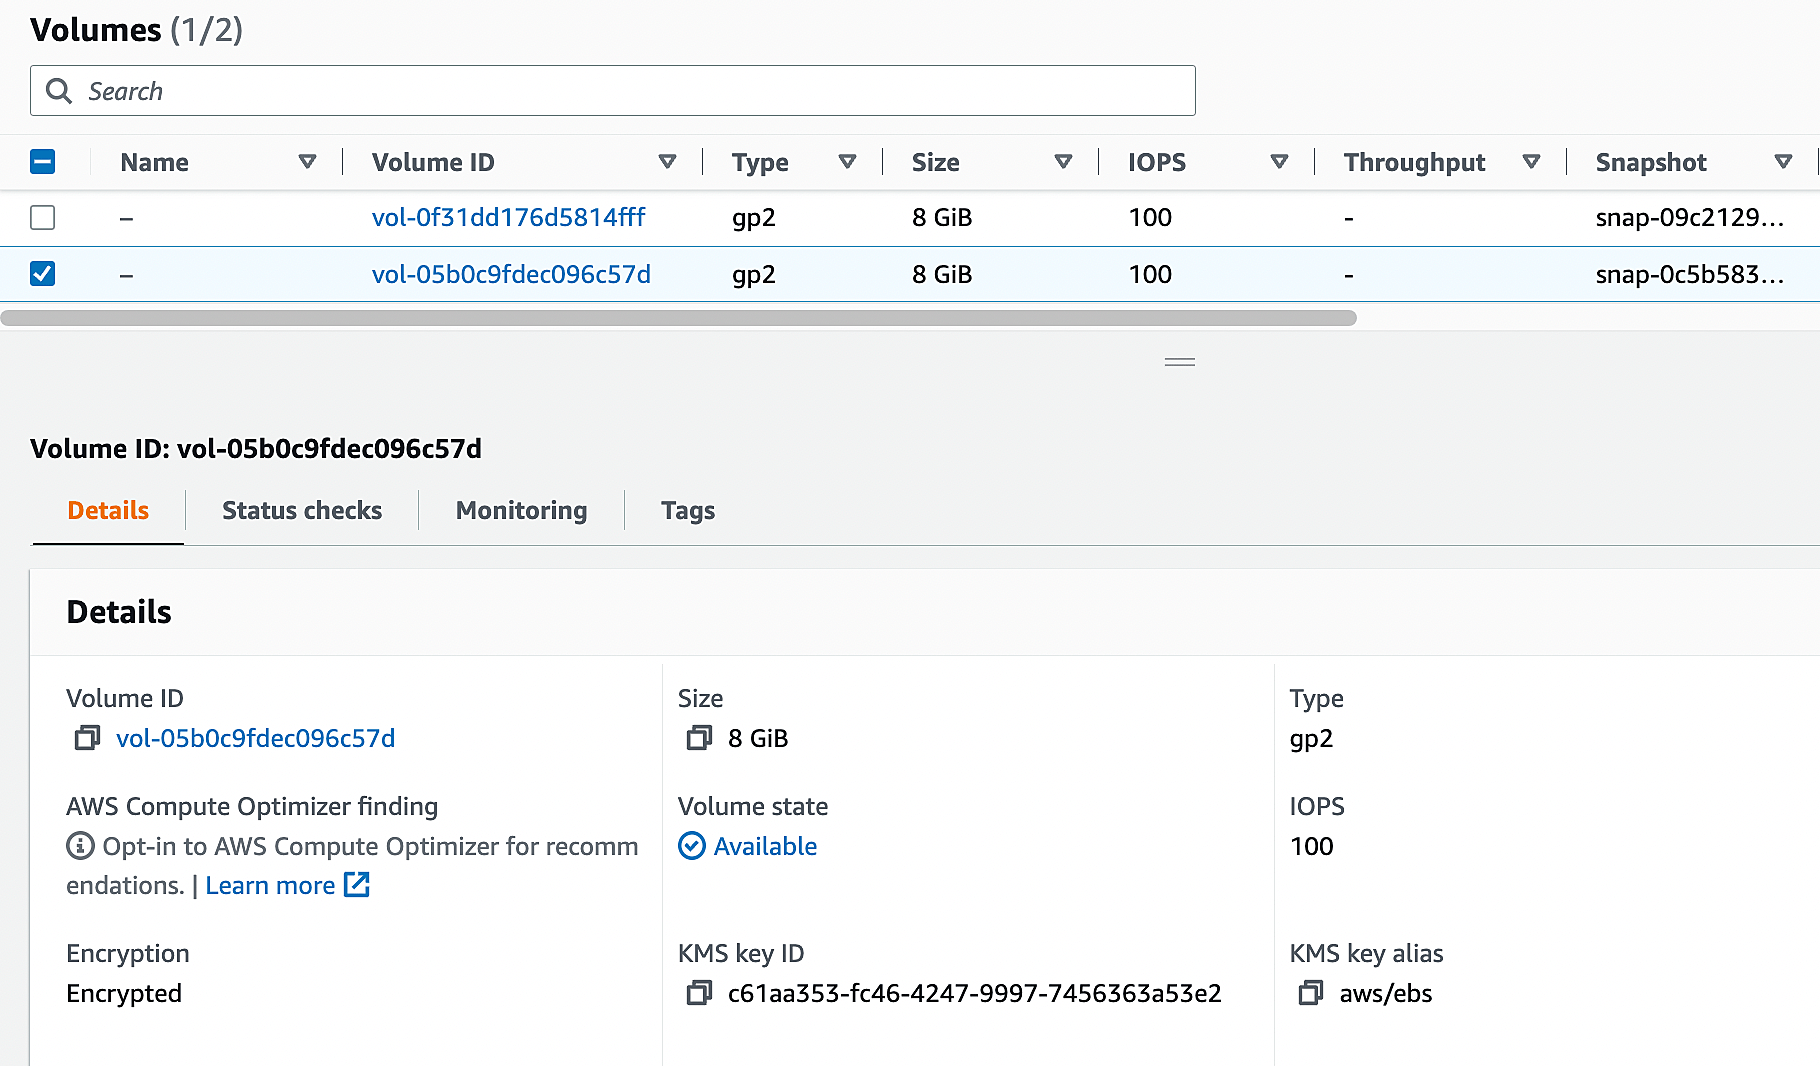
8. Here is the new encrypted volume created from the snapshot.
9. Stop the running instance.

10. Select the unencrypted volume. From actions menu, click “Detach Volume”.

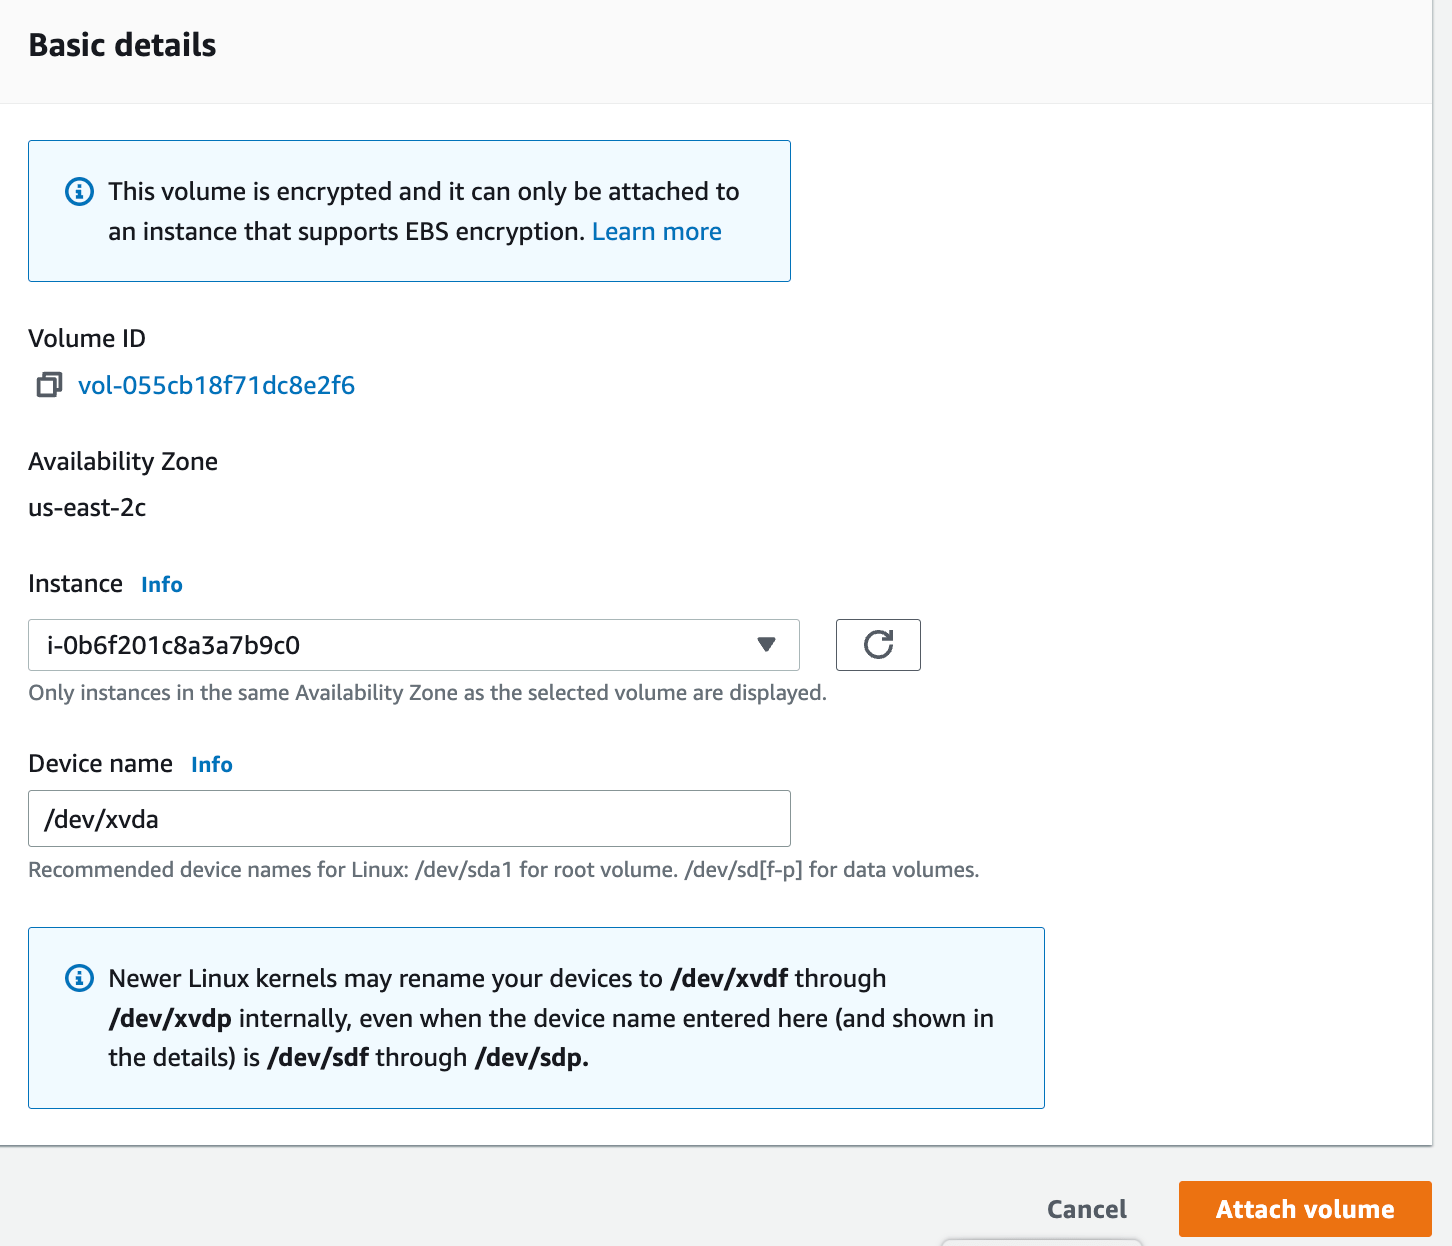
11. Click on the encrypted volume and click on “Attach volume”.

12. Select the instance in which we need to attach the volume.
13. Navigate back to the instances. Now we can see that instance volume is encrypted.
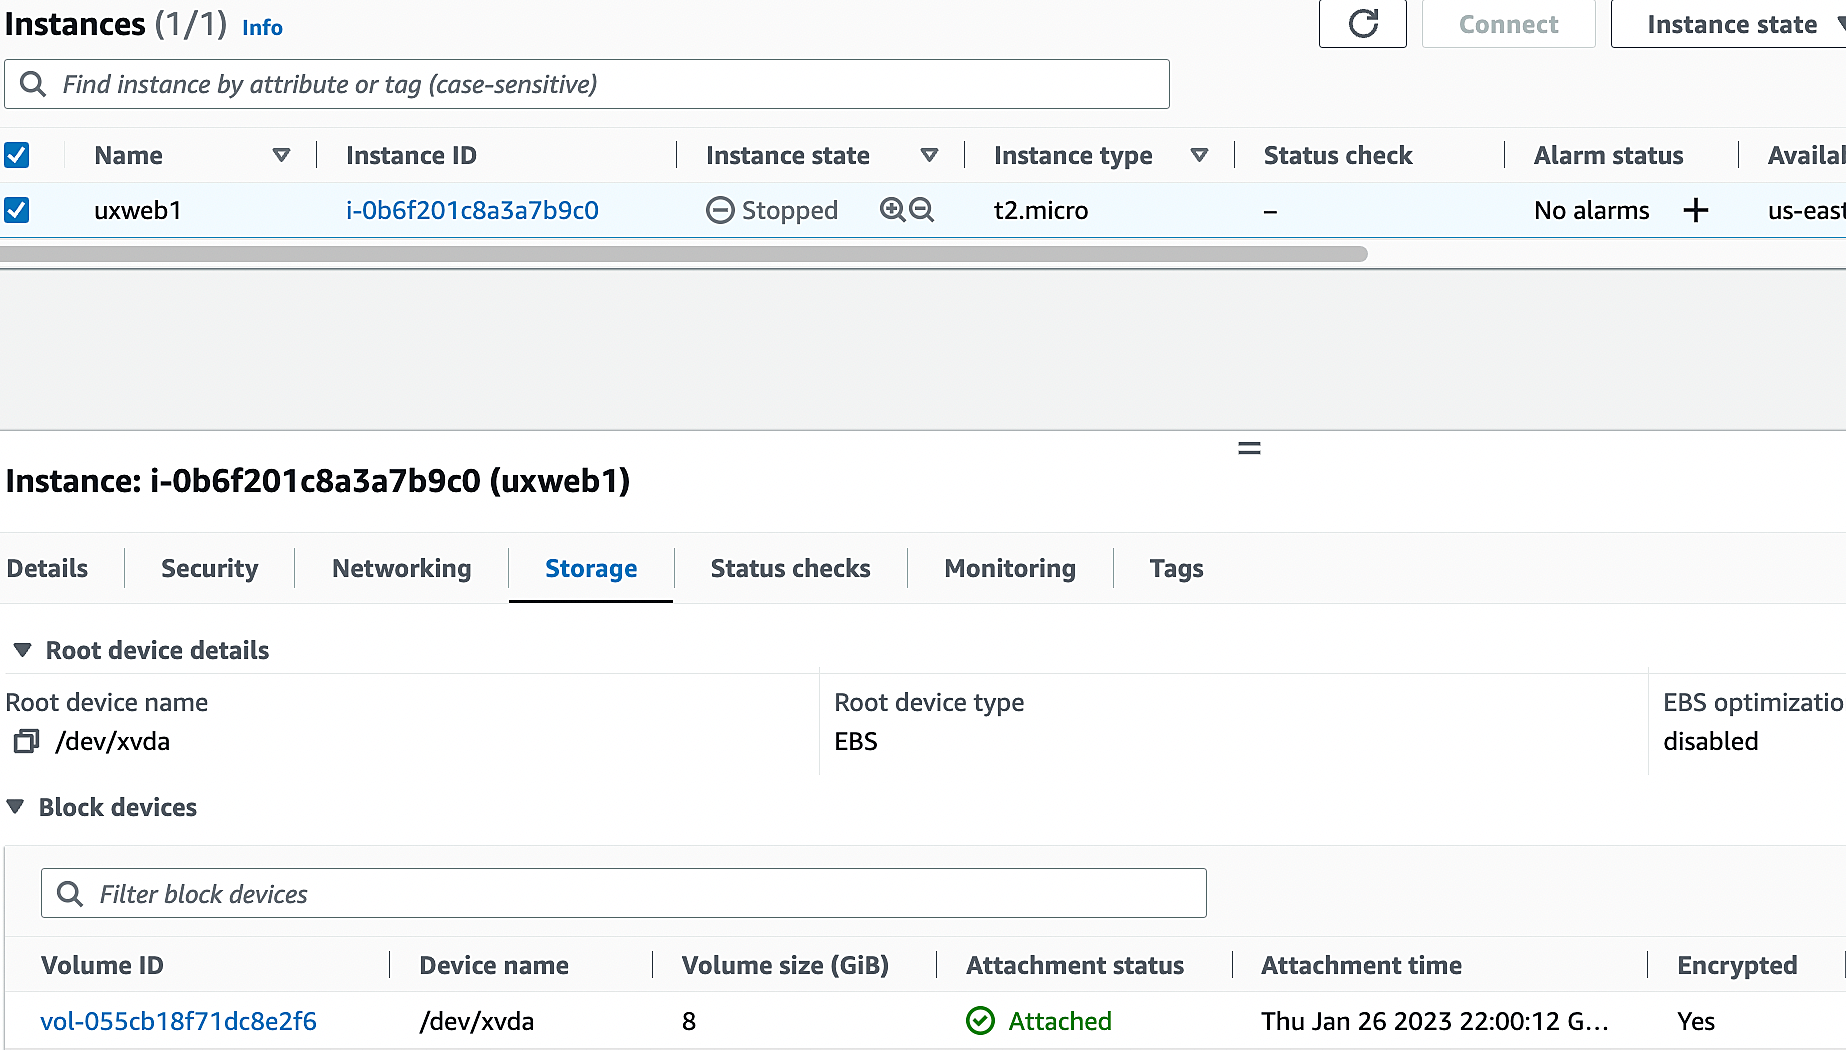
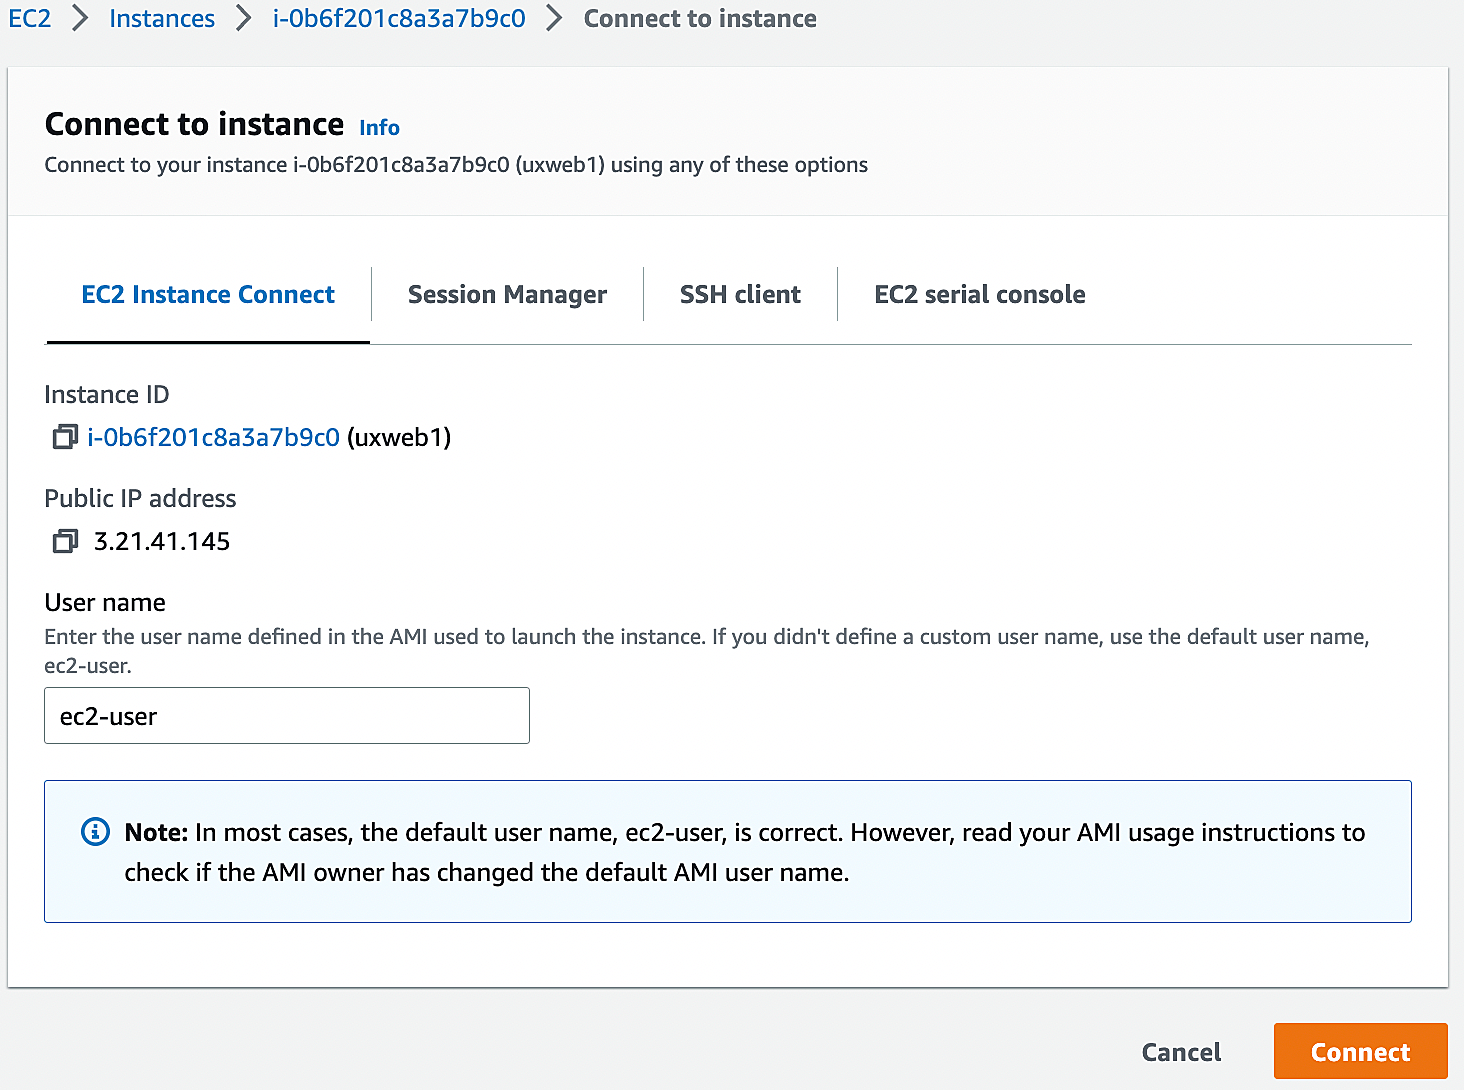
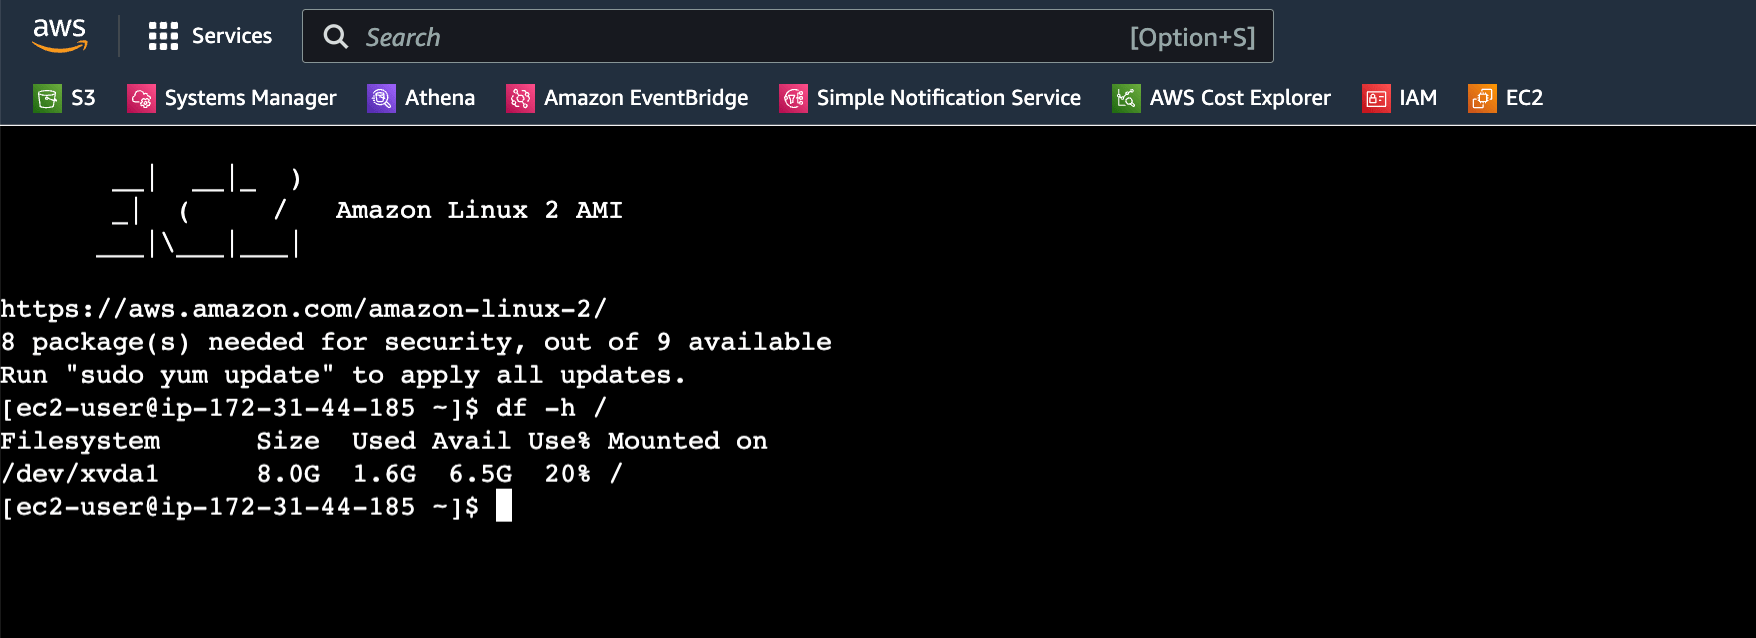
14. Let’s start the instance and validate the migration. If the public IP is enabled, You can directly connect from AWS console.
Conclusion:
We have successfully converted the unencrypted AWS EC2 instance root disk to encrypted one. This can be achieved using the AWS CLI and can be scripted as well if you need to do the bulk migration. But it’s always recommended to plan in advance and launch instances with encryption rather than doing migration at later stage. Because this requires man-hours and need the outage window for detaching the old disk and booting from the new encrypted disk. Hope this article is informative to you.
AWS for Beginners: How to Protect AWS Security Tools: Part 4
AWS for Beginners: What is IAM (Identity and Access Management) and Best Practices: Part 5
AWS for Beginners: Provisioning IAM Users and Programmatic Access in AWS: Part 6
AWS for Beginners: Securing Root account using MFA: Part 7
AWS for Beginners: Amazon S3 Overview, Security and Best Practices : Part 8
AWS for Beginners: Creating and managing IAM groups: Part 9
AWS for Beginners: AWS Managed Policies and In-line Policies: Part 10
AWS for Beginners: Create and Attach a policy to an IAM User: Part 11
AWS for Beginners: How to Create a Customer Managed Policy: Part 12
AWS for Beginners: What are EC2 Placement groups: Part 13
AWS for Beginners: ALB vs NLB vs GLB – Which AWS Load Balancer Should You Choose: Part 14
AWS for Beginners: What is AWS Elastic IP Address: Part 15
AWS for Beginners: How to add secondary IP to EC2 Instance using Elastic Network Interfaces (ENI): Part 16
AWS for Beginners: How to Enable Multi-Attach for Amazon EBS Volumes: Part 17
Follow our Twitter and Facebook feeds for new releases, updates, insightful posts and more.


Leave A Comment