
In the last three articles, we covered the introduction to WSUS, installation, and initial configuration. In this article, we will talk about computer groups and explain how to create one.
Computer groups help you organize your computers and target updates to them at a convenient time. For instance, you can create a computer group called ‘Accounting’ and assign all accounting machines to it. Then, you can establish a dedicated configuration specifying which updates will be installed, which machines will be targeted, the language, and the installation time.
This article consists of two steps: creating a computer group and assigning computers to it.
Step 1: Create computer groups
In the first step, you will create a new computer group on WSUS. You need to open the WSUS console and then follow the procedure.
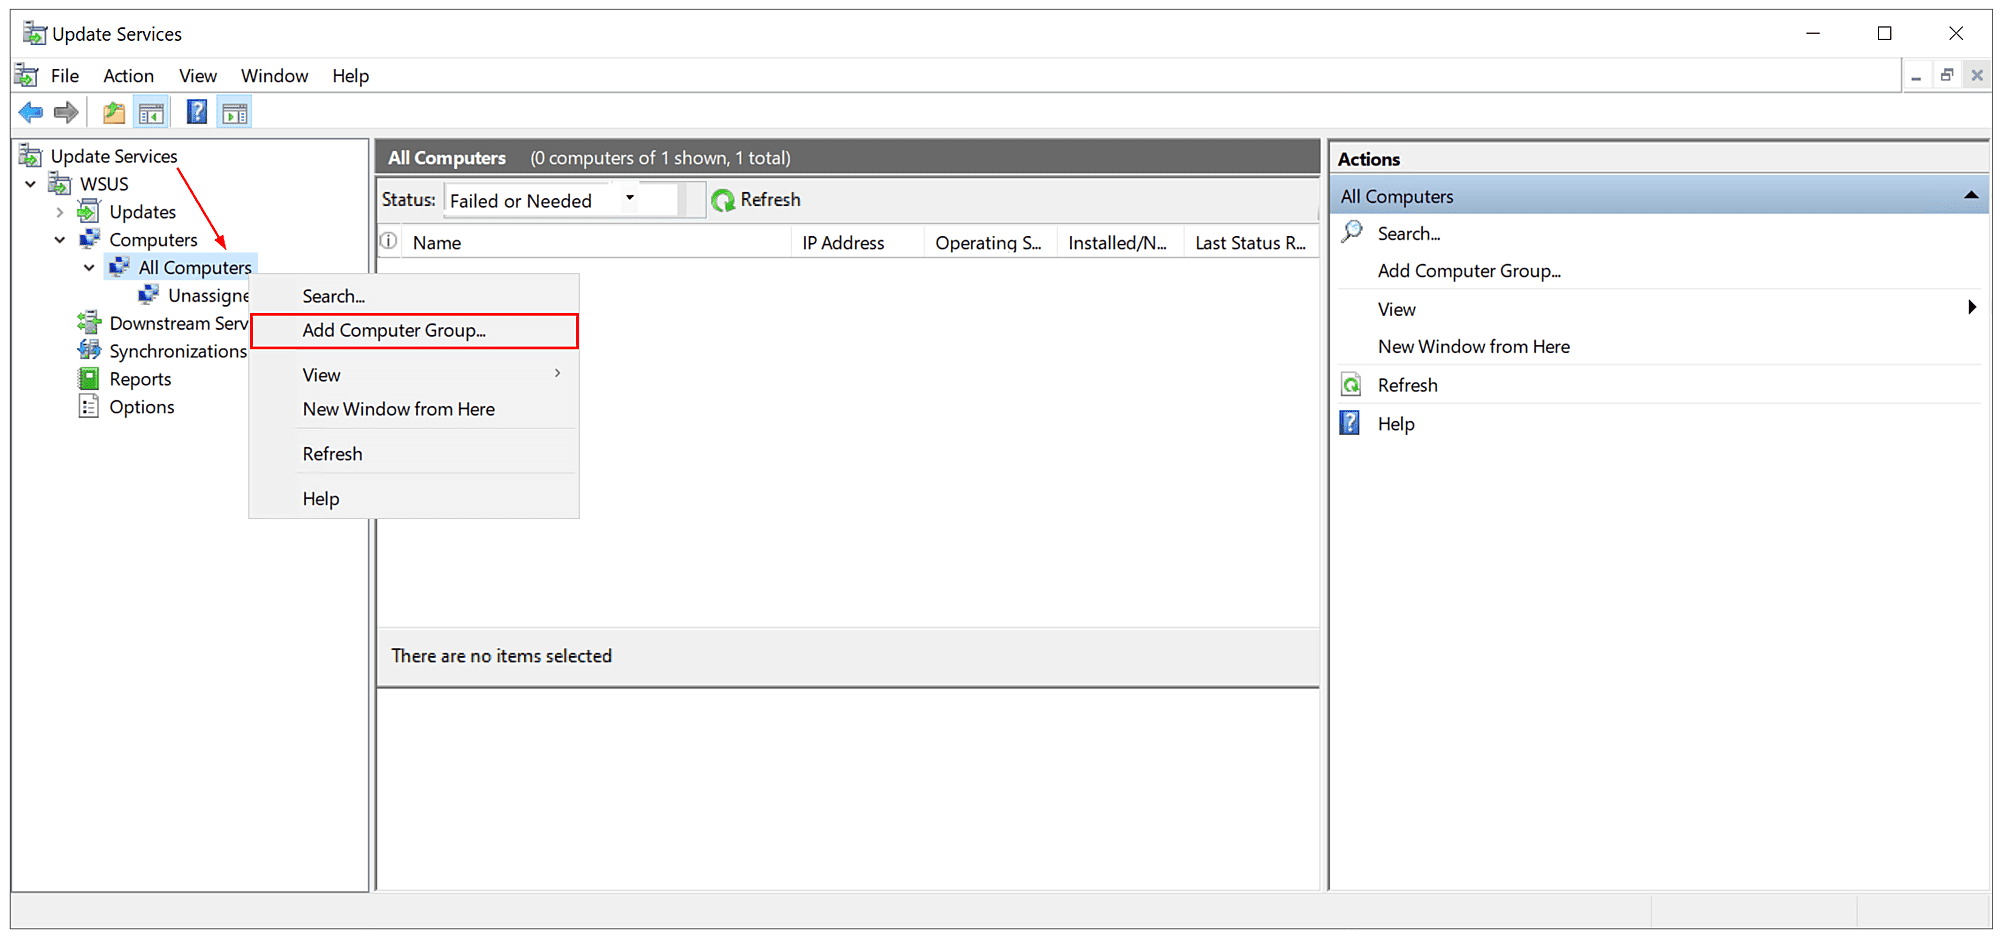
- Expand Update Services > WSUS > Computers > All Computers
- Right click on All Computers and then click Add Computer Group
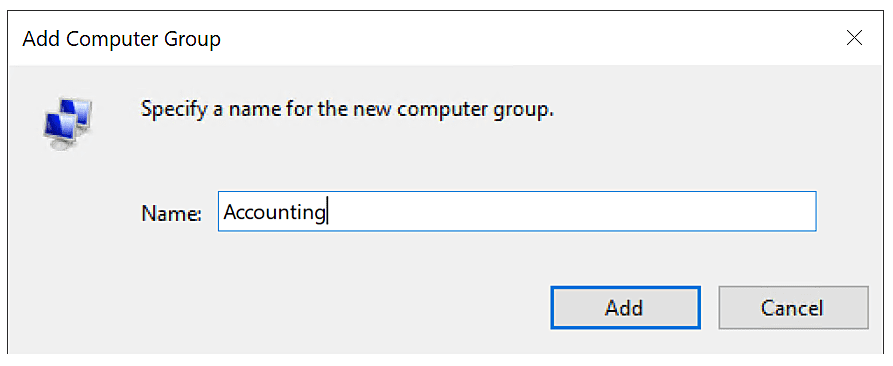
- Enter the name of the new computer group and click Add. In my case, the computer group is called Accounting
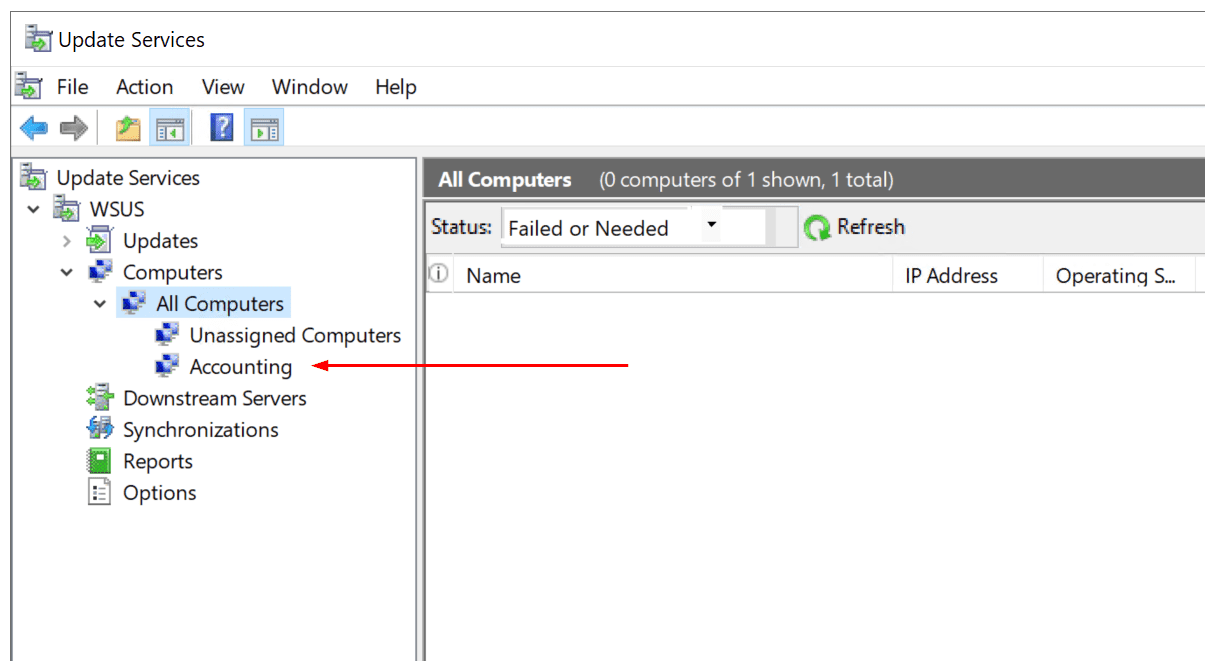
- That will create additional computer group called “Accounting” next to Unassigned Computers group

By default, all clients are assigned to the already existing computer “All computers.” In the case of any new machine joining your domain, it will be automatically added to “All computers”. Additionally, all new computers are automatically assigned to “Unassigned computers” until you assign them to a different computer group.
Note from Microsoft: You cannot remove the Unassigned Computers or All Computers group. Every client computer remains a member of the All Computers group in addition to any group you assign it to. Client computers are members of the Unassigned Computers group only until you assign them to a computer group.
That is it. Let’s continue with the second step.
Step 2: Assign computers to groups
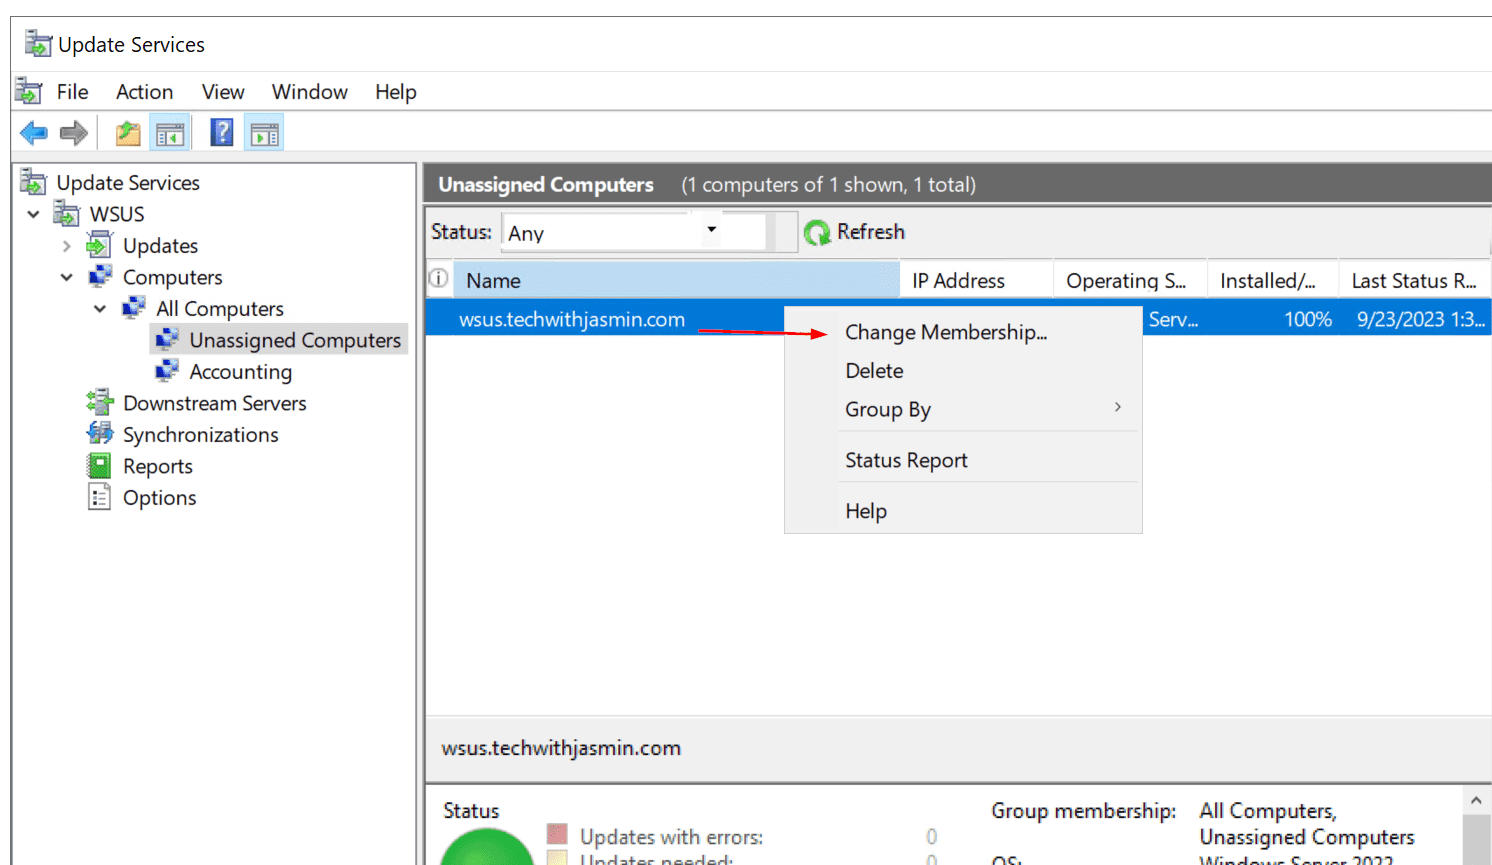
Now, you have created computer groups, and your clients are still residing in the ‘Unassigned Computers’ group. In the next step, you will need to move them to the newly created computer group (in my example, that is the ‘Accounting’ computer group).
You can do it in two ways. One way is using server-side targeting, which is basically moving computers from ‘Unassigned Computers’ to newly created groups manually. This would work if you don’t have that many computers.
Basically, you navigate to your computer, right-click on it, then click ‘Change Membership,’ choose your new group, and click ‘OK.
However, if you have many computers in your domain and new ones are frequently being created, it’s more efficient to use client-side targeting. In this scenario, client machines will automatically add themselves to the proper computer group. You can accomplish this through group policies or by modifying registry keys.
To enable client-side targeting on your WSUS server, you will need to configure group policy on your domain controller. Here is how to do it:
- Log in to your domain controller
- Open Server Manager, and then navigate to Tools to access Group Policy Management
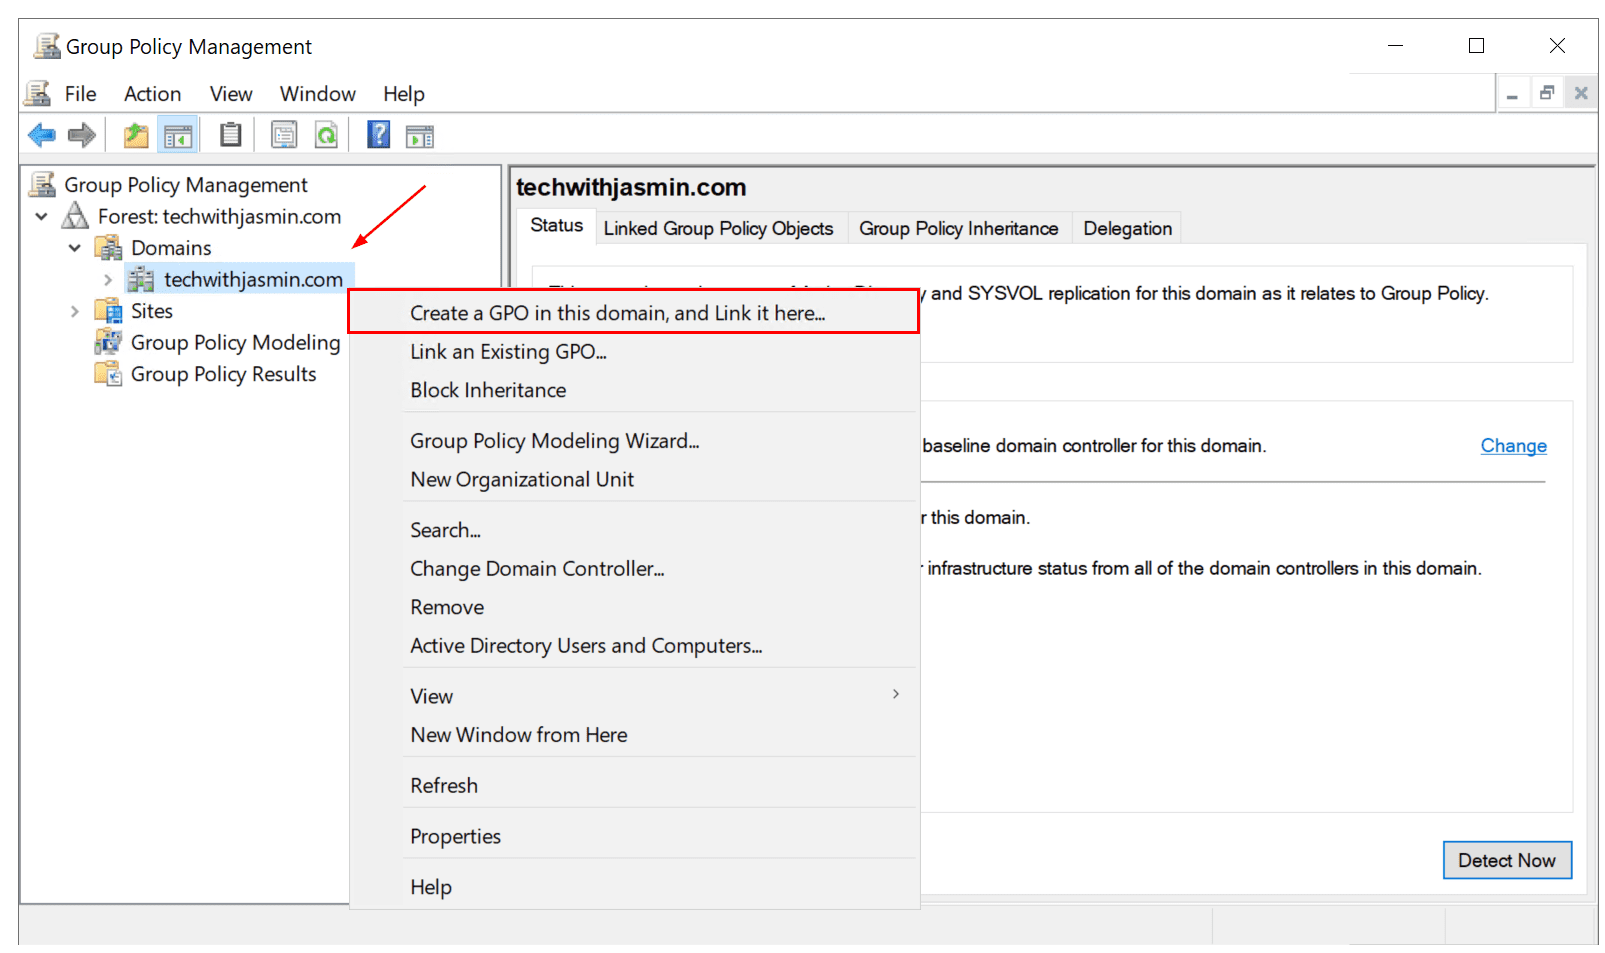
- Expand your forest and then right click on your domain and click Create a GPO in this domain, and Link it here
- Enter the name of the GPO and click OK. I created a new GPO called WSUS
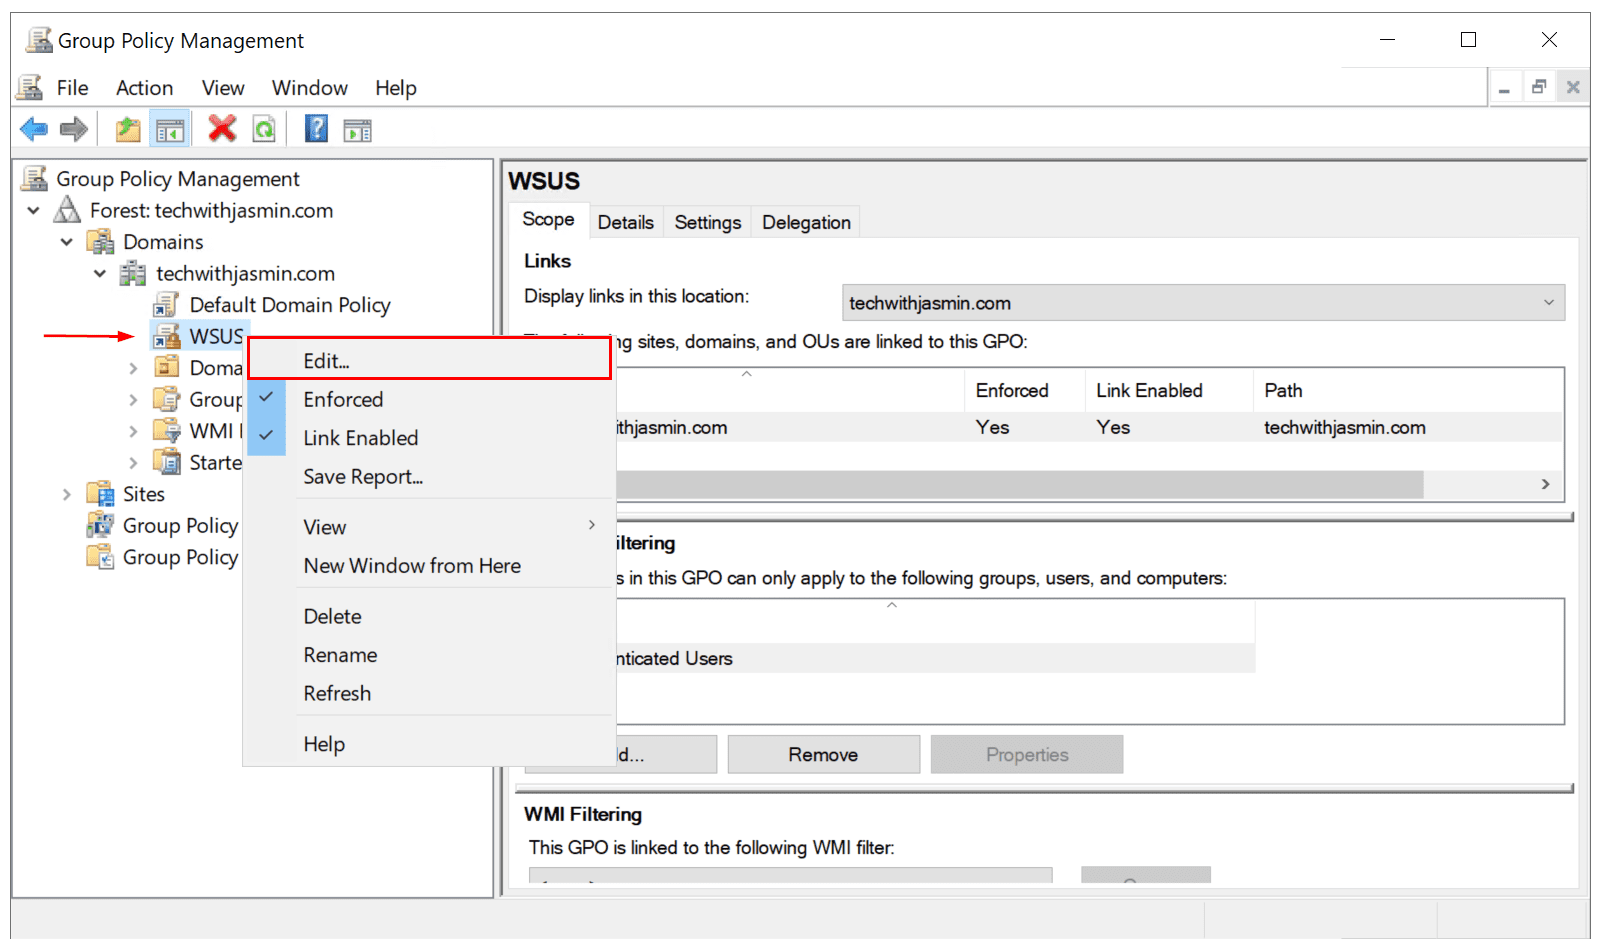
- Right-click on the newly created GPO and click Edit
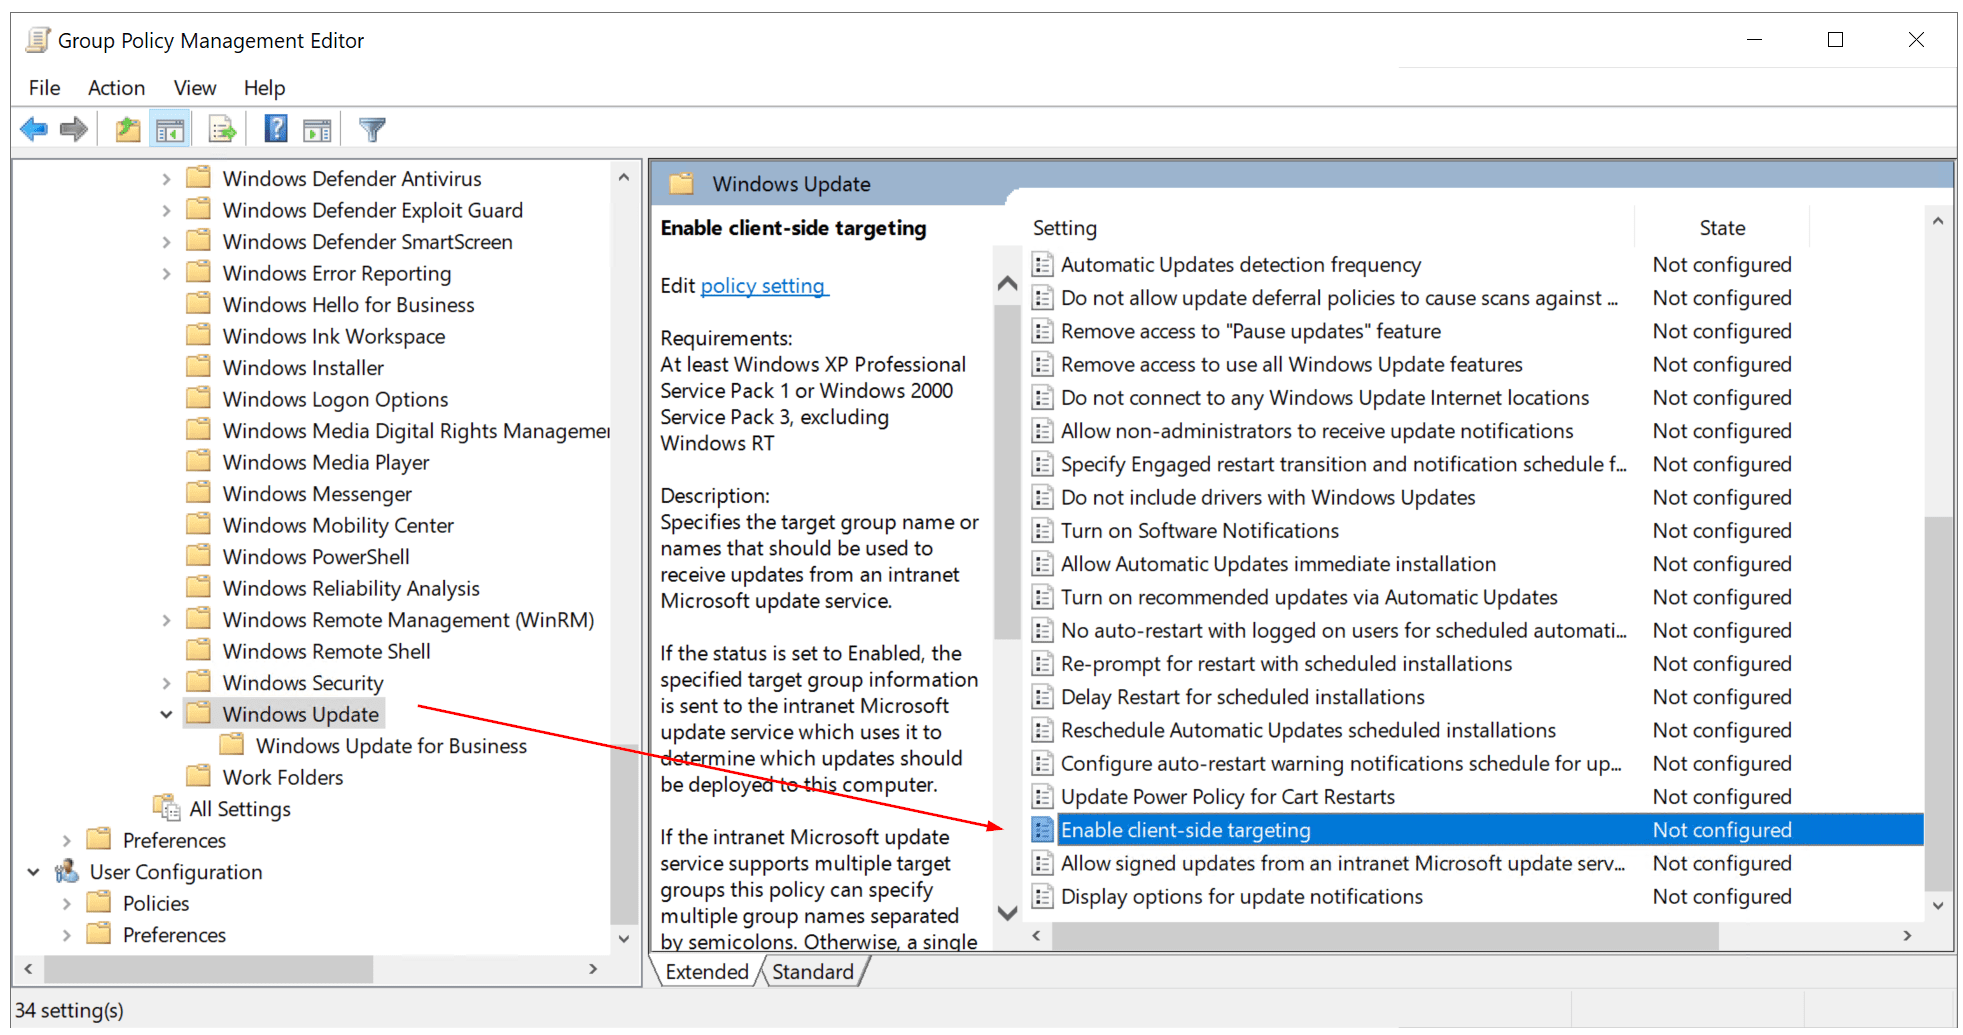
- Expand Computer Configuration > Administrative Templates > Windows Components > Windows Update and then navigate to Enable client-side targeting
- Right click on Enable client-side targeting
- Select “Enabled,“ and then, under “Target group name of this computer”, type the name of your computer group. Specifies the target group name or names that should be used to receive updates from an intranet Microsoft update service
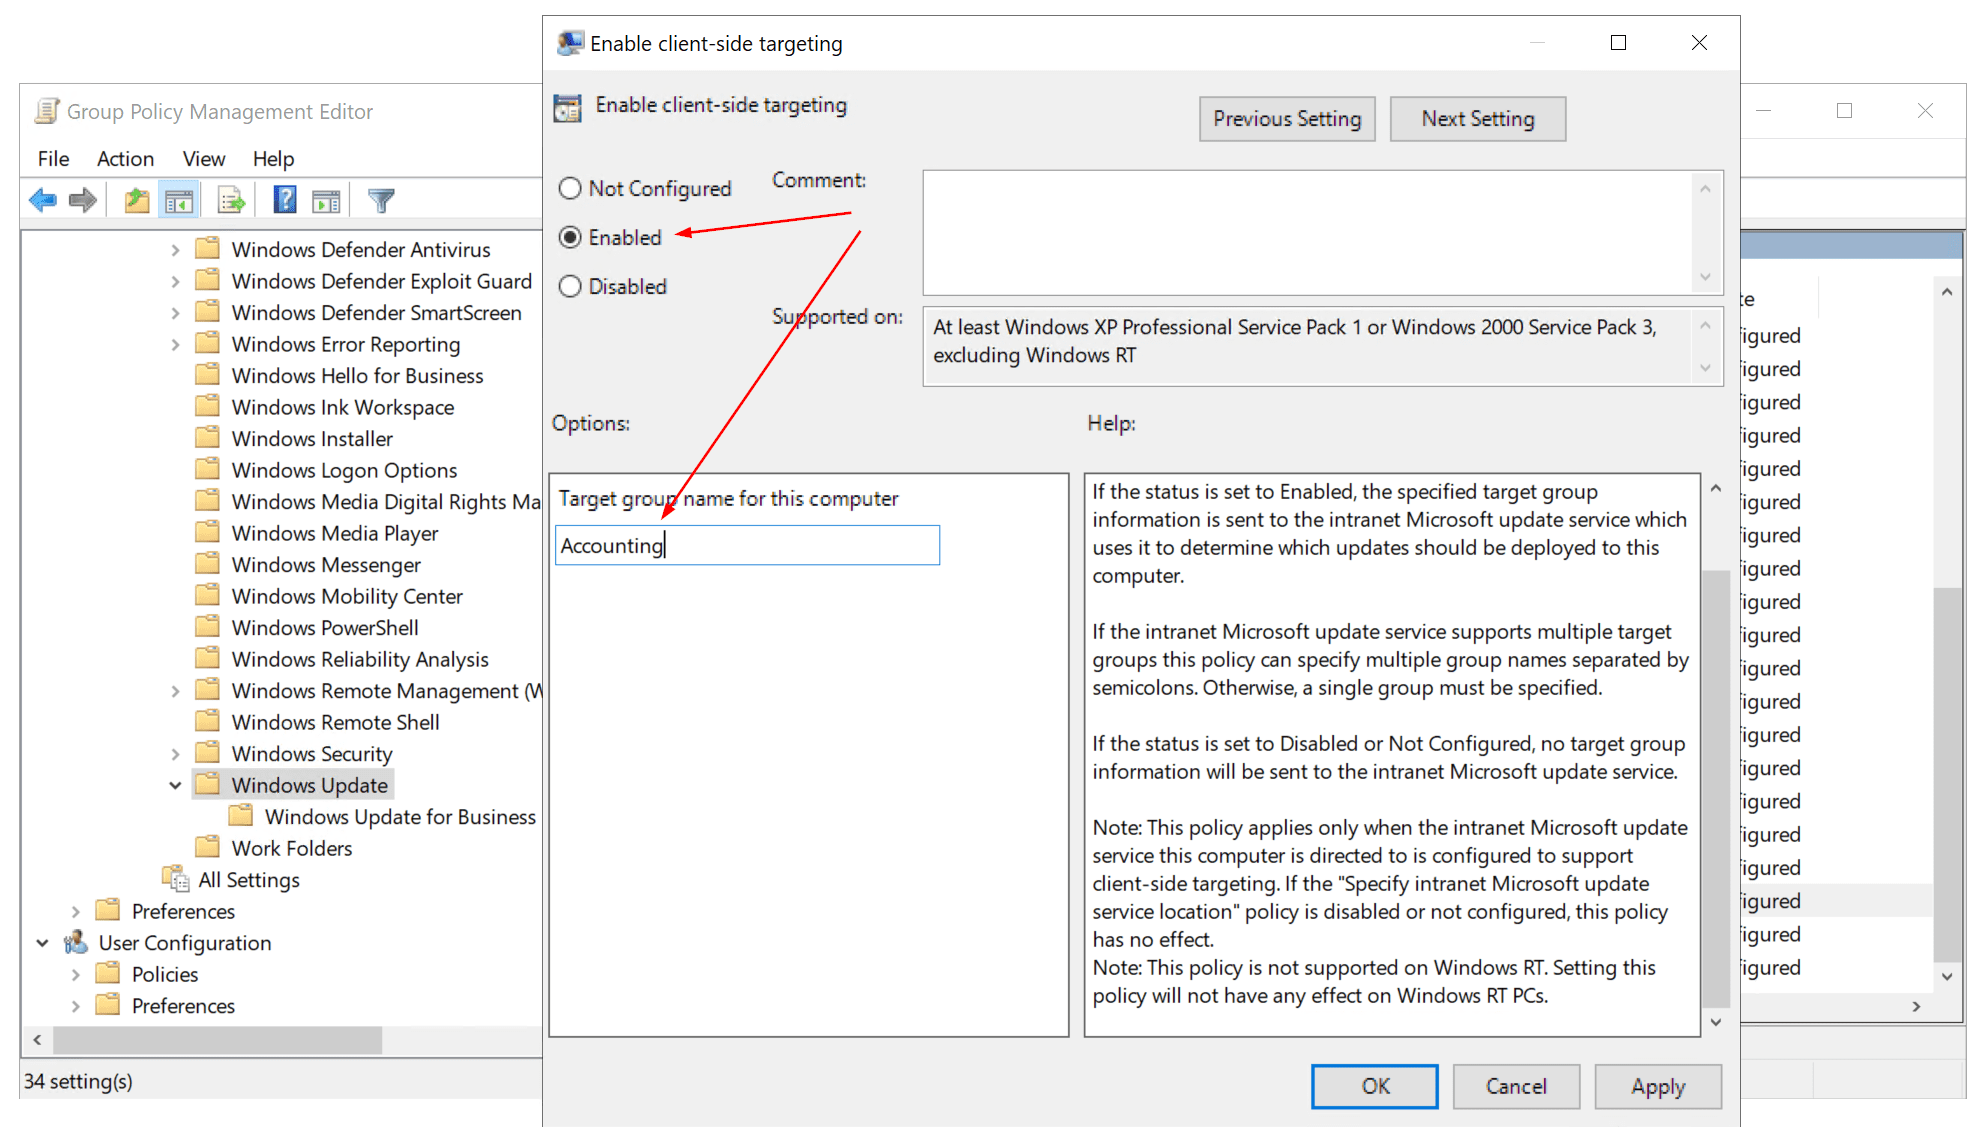
If the status is set to Enabled, the specified target group information is sent to the intranet Microsoft update service which uses it to determine which updates should be deployed to this computer.
If the intranet Microsoft update service supports multiple target groups, this policy can specify multiple group names separated by semicolons. Otherwise, a single group must be specified.
If the status is set to Disabled or Not Configured, no target group information will be sent to the intranet Microsoft update service.
Please note this will work only when you configure other group policies related to your WSUS. You can read them in our next article.
Read More:
WSUS : Get Started with Windows Server Update Services (WSUS) – Part 1
WSUS : Windows Server Update Services (WSUS) installation on Windows Server 2022 – Part 2
WSUS: Post-deployment WSUS configuration – Part 3
How to Update and Patch Windows Hyper-V Hosts and Clusters
Follow our Twitter and Facebook feeds for new releases, updates, insightful posts and more.

Leave A Comment