
When I want to explain Windows Storage Spaces (formerly known as Windows Storage Pools), I always refer to RAID (Redundant Array of Independent Disks). Almost every IT Admin is familiar with the concept of RAID technology. Let’s take a moment to refresh our memory.
Table of Contents
- A Brief History
- Step 1: Prepare your disks
- Step 2: Create a Storage Pool
- Step 3: Create virtual disks
- Step 4: Create a volume
- Wrapping Up
RAID is a hardware-based technology that provides data redundancy and improves disk performance. While RAID is typically associated with hardware-based solutions, there are also software-based RAID implementations available. When using RAID, multiple physical or virtual disks are combined to create a single logical volume.
On another side, Windows Storage Spaces is a software-based technology that allows combining multiple physical and virtual disks to provide data redundancy and improve performance. Windows Storage Spaces doesn’t come as a hardware-based implementation.

A Brief History
Microsoft introduced Windows Storage Spaces in Windows 8 and Windows Server 2012 and continues offering them in newer operating systems. Today, Windows Storage Spaces are still available as a feature in Windows 11 and Windows Server 2022.
Since the first release, Microsoft introduced new features such as Storage Spaces Direct which allows the creation of highly available and scalable storage solutions. Besides that, it supports integration with Azure, deduplication, compression, and more.
Step 1: Prepare your disks
Before proceeding with the second step, you should ensure that you have physical or virtual disks available to be combined in a single Storage Pool.
For demonstration purposes, I use three 10 GB disks on Windows Server 2022. However, in real-world scenarios, larger disks are typically used.
Step 2: Create a Storage Pool
In the second step, you will create Storage Pool using Server Manager. Please login to your Windows Server and proceed with the next steps.
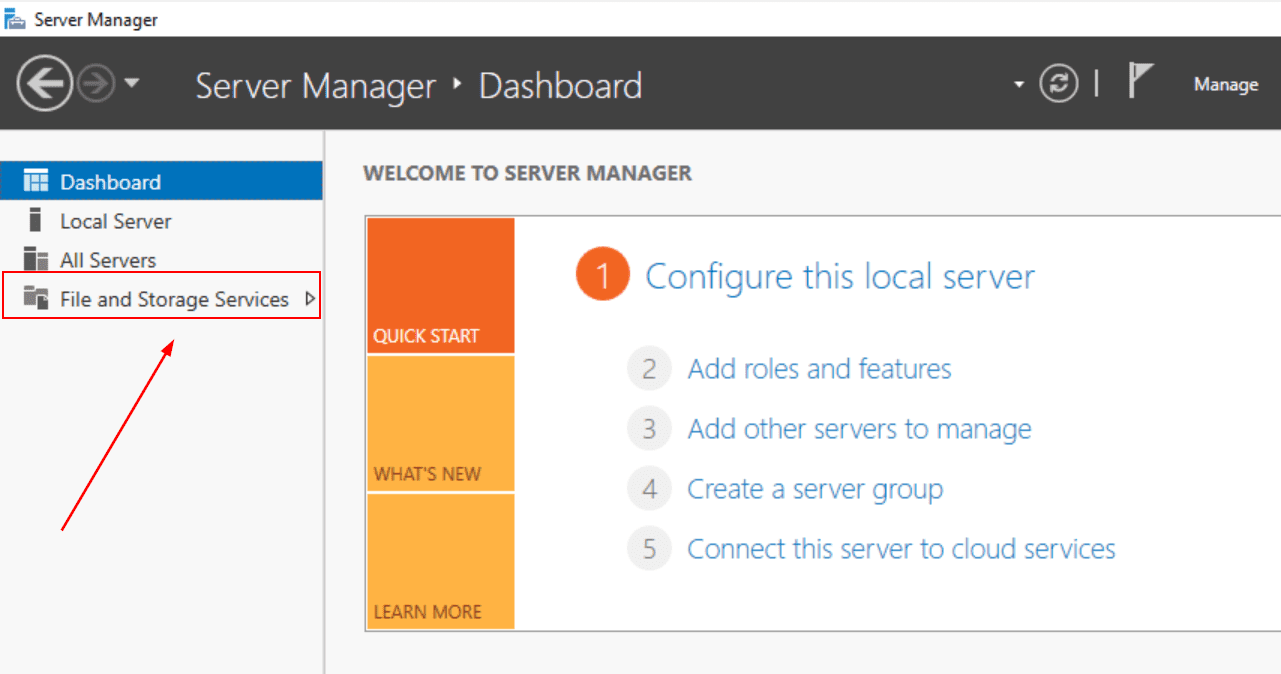
- Open Server Manager
- Click on File and Storage Services on the left side of the window
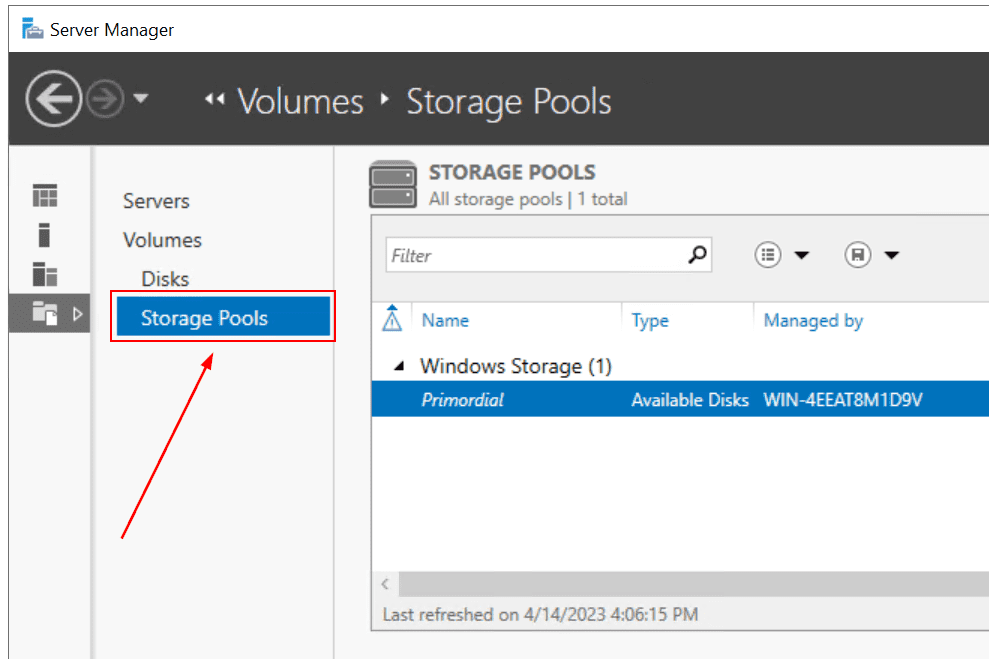
- Click on Storage Pools
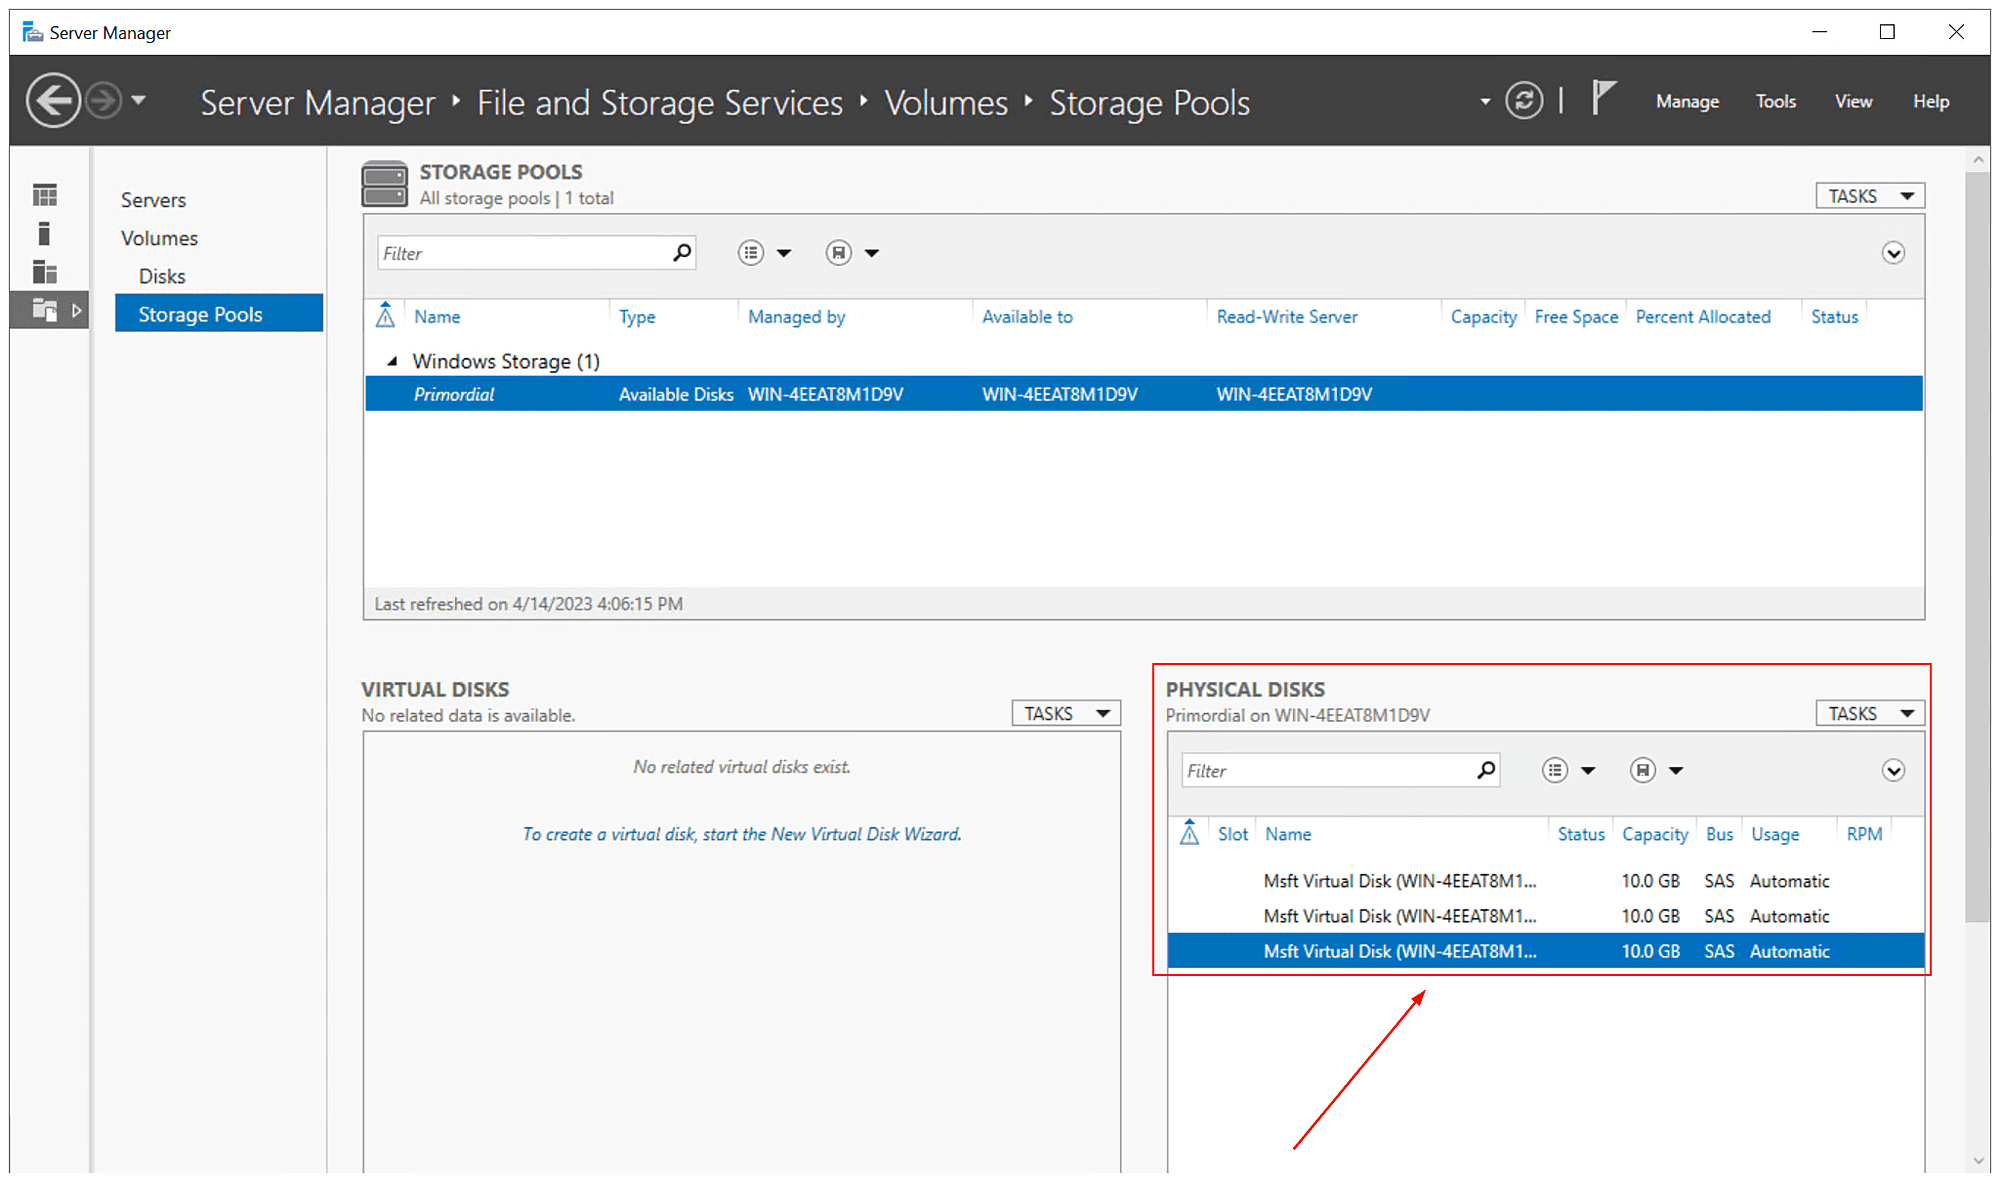
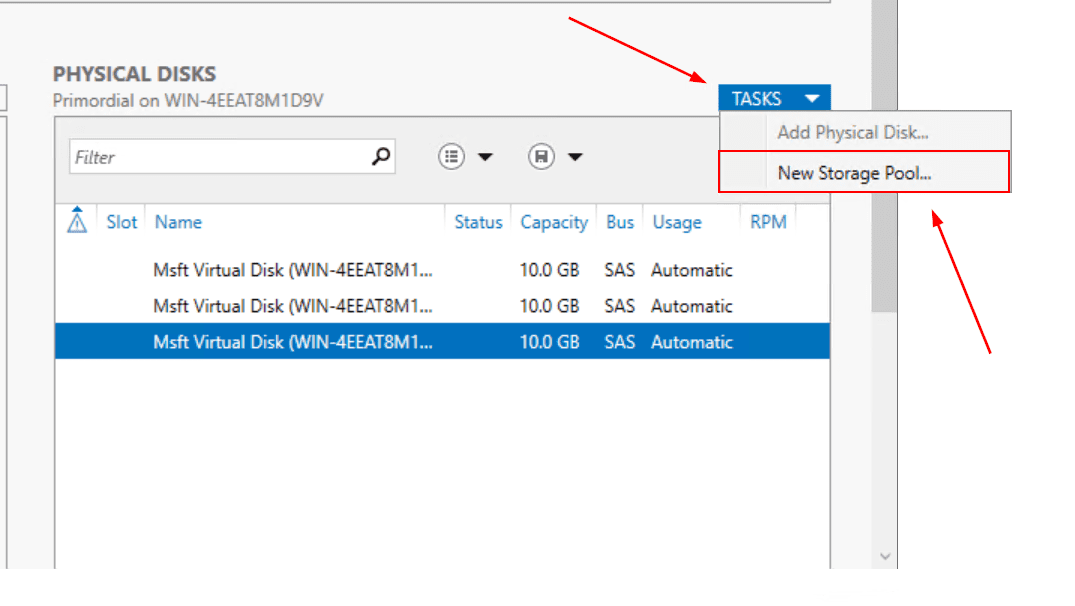
- Navigate to Physical disks to validate if disks are detected by Windows Server and can be used to create Storage Pool. In my case, there are three disks, 10 GB each I will use to create Storage Pool
- Click on Tasks and then click New Storage Pool…
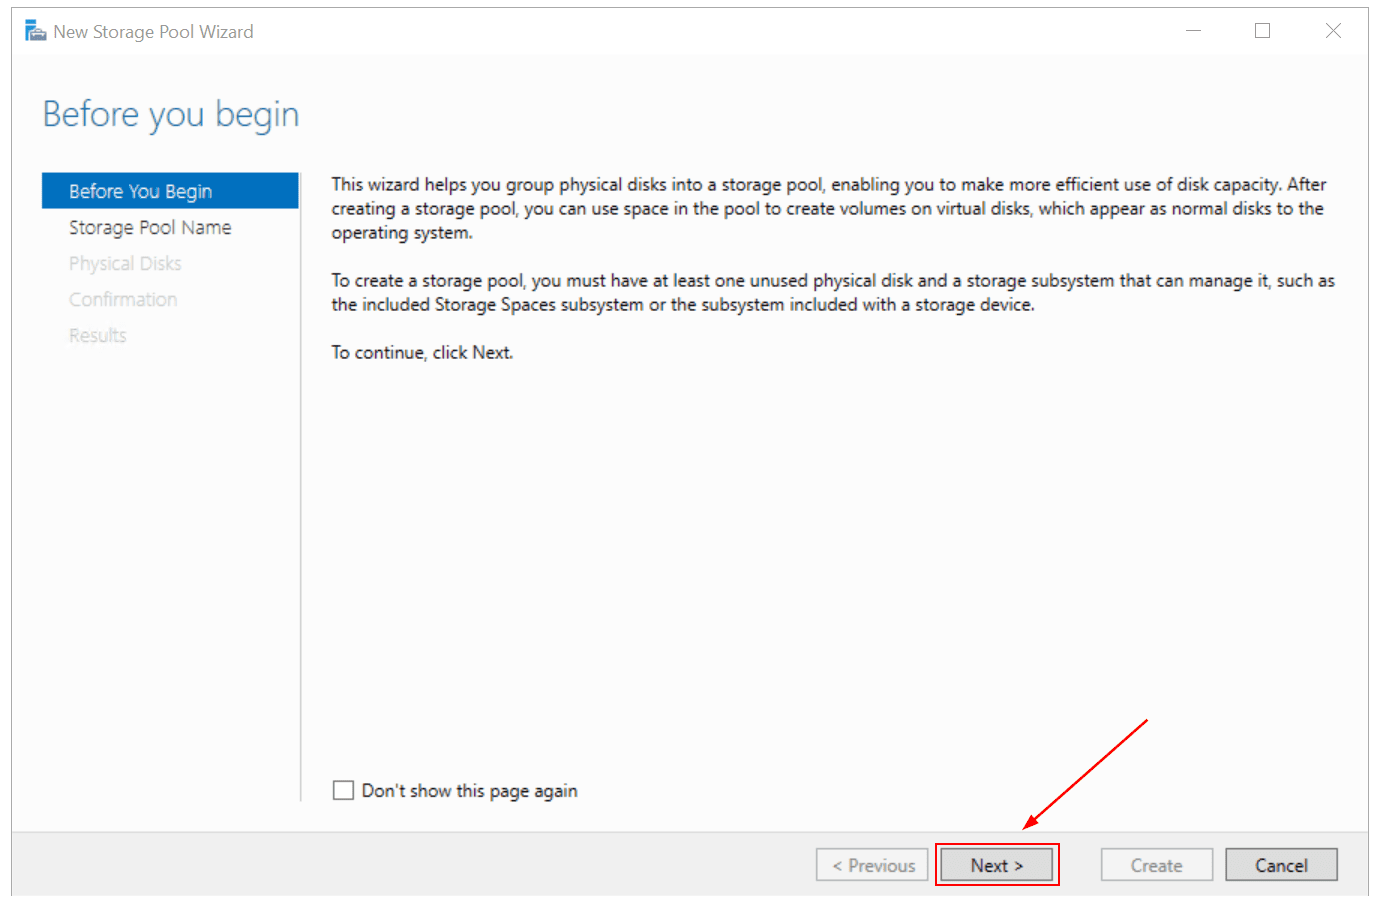
- Under Before you begin, click Next
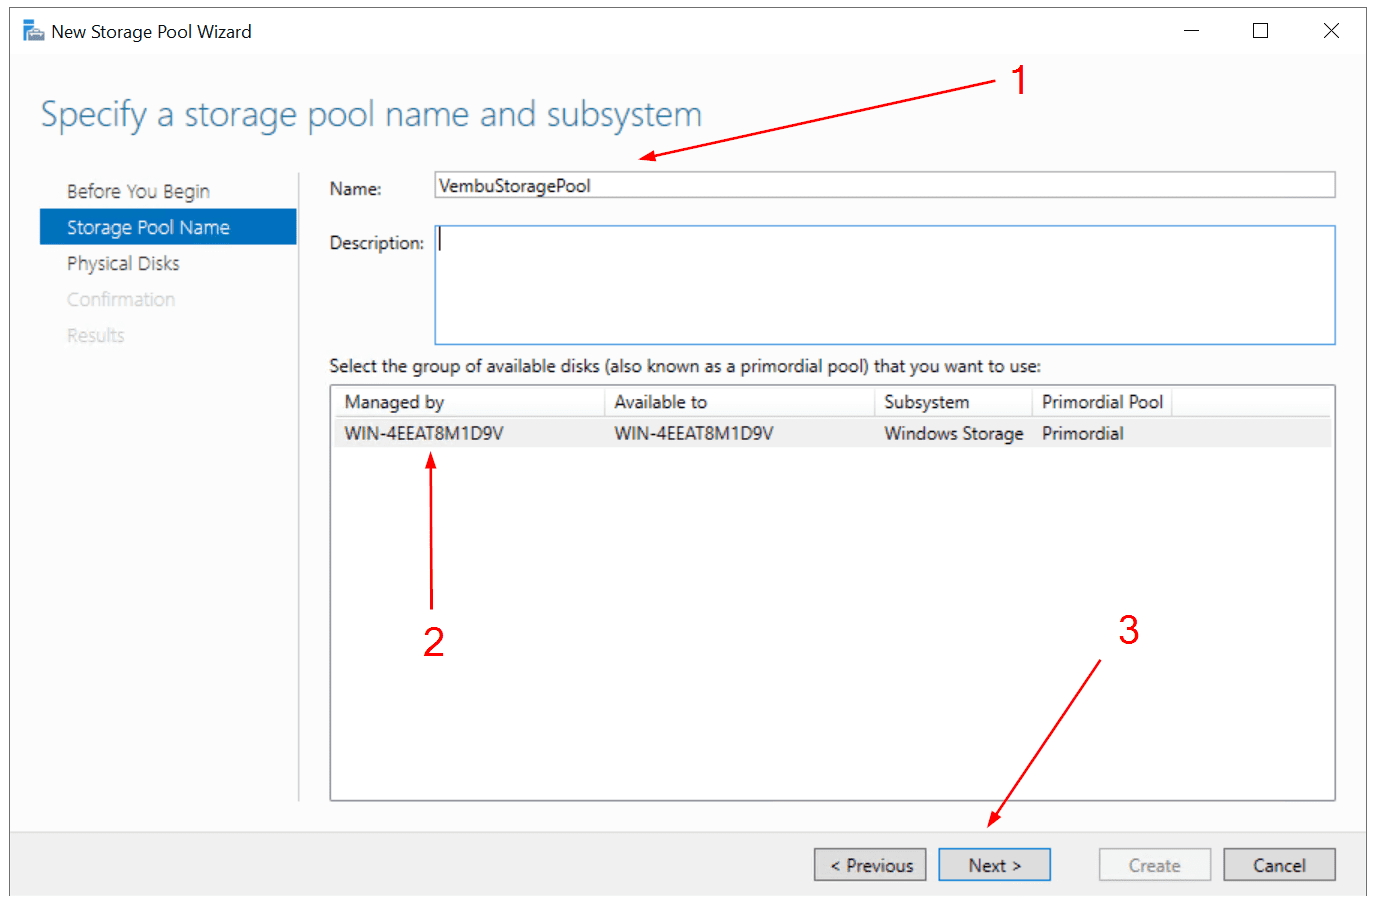
- Under Storage Pool Name, specify a storage pool name and subsystem, and then click Next. In my case, the storage pool is called “VembuStoragePool” and my system is “WIN-4EEAT8M19V” – which is the computer name. You can also add a description if you want
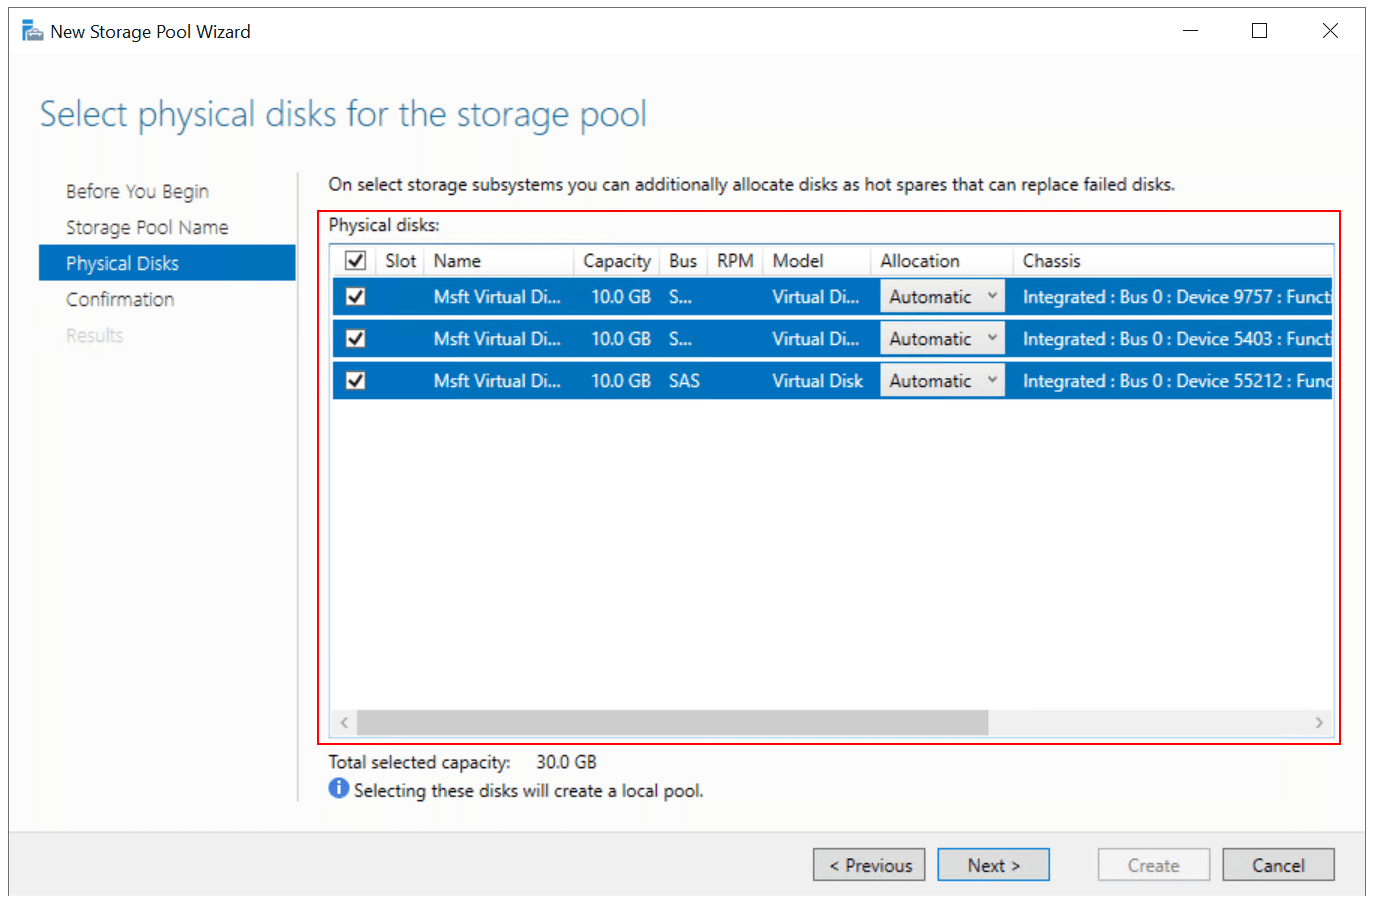
- Under Physical Disks, select the physical disks you want to include in a storage pool, and then click Next. In my case, I selected all three disks, 10 GB each.
You can also configure the Allocation of each disk. There are three options available
- Automatic – automatically distributes available capacity to the disks in the pool
- Hot spare – automatically replaces failed disks
- Manual – you manually assign a specific amount of capacity to each disk in the pool
- Under Confirmation, confirm selections and click Create
- Once done, click Close
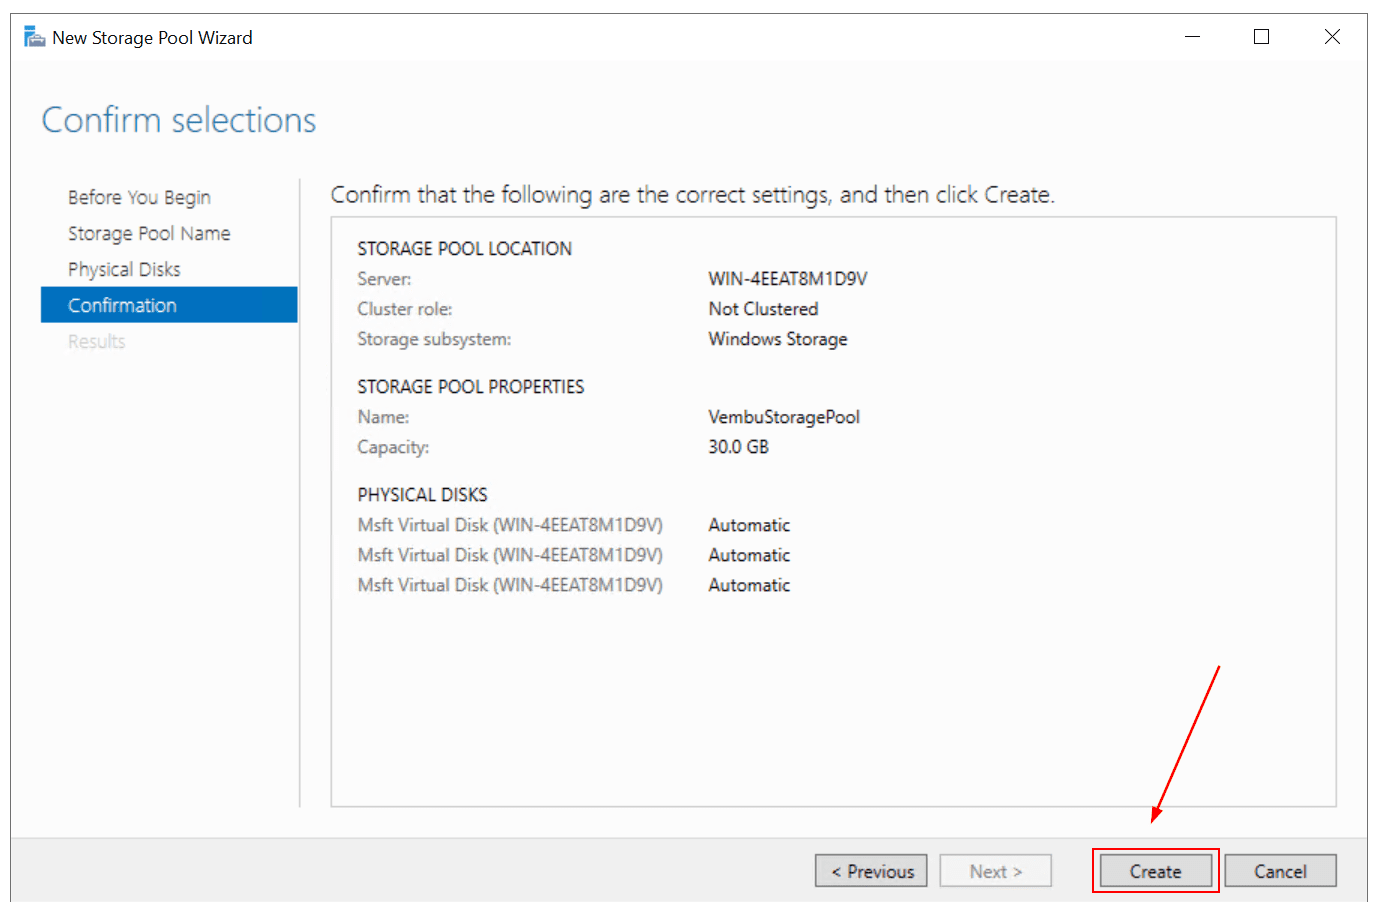

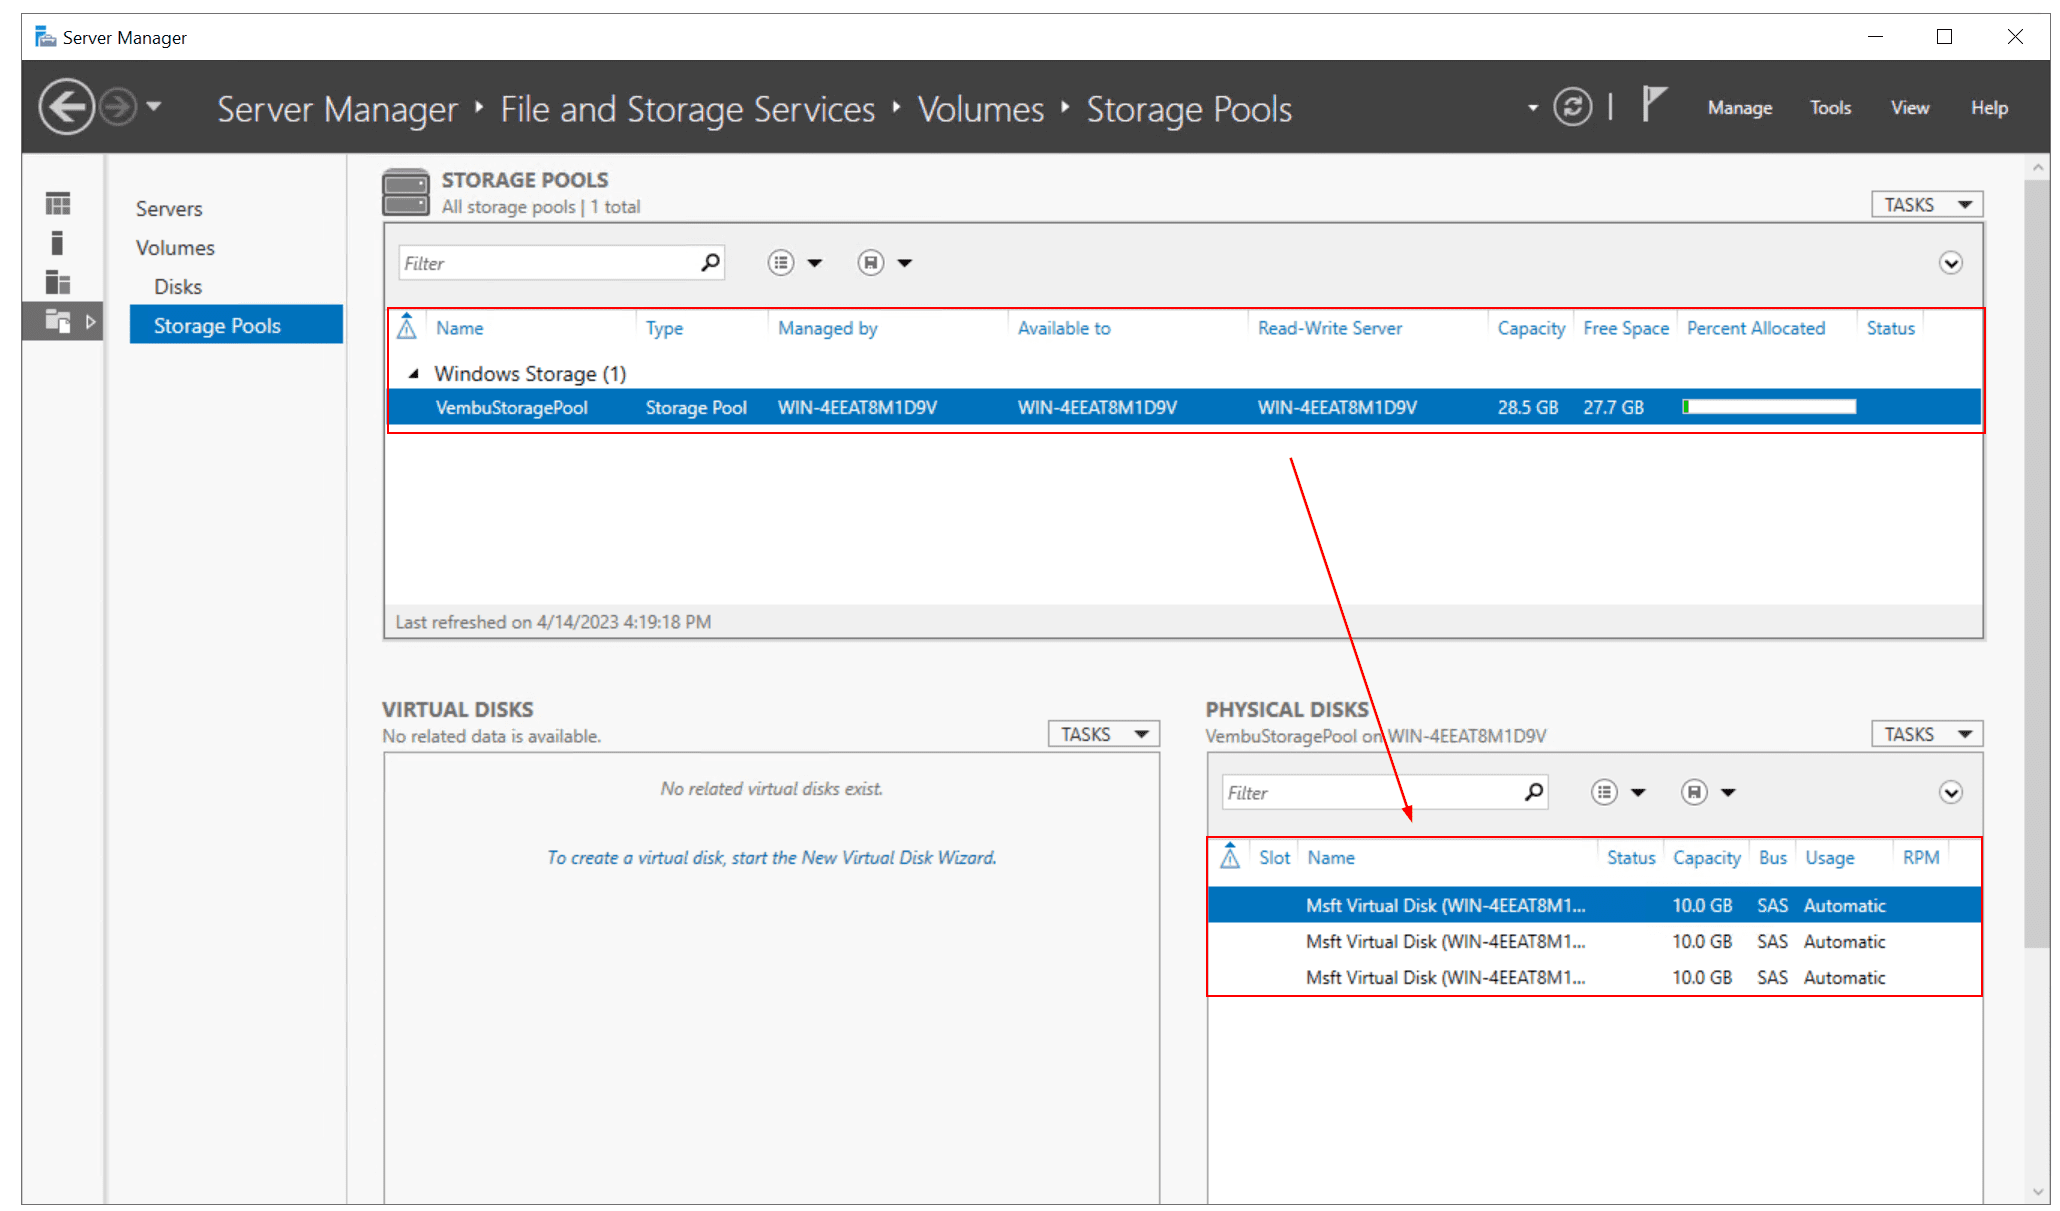
You have successfully completed the New Storage Pool configuration. Now if you open Server Manager and navigate to Storage Pools, you will see a new storage pool has been created. In my example, the new storage pool is called “VembuStoragePool”, it has a capacity of 30 GB (3 disks x 10 GB).

Step 3: Create virtual disks
We created a storage pool, however, we cant use it. In the third step, we will create a virtual disk based on the Storage Pool we created in the second step
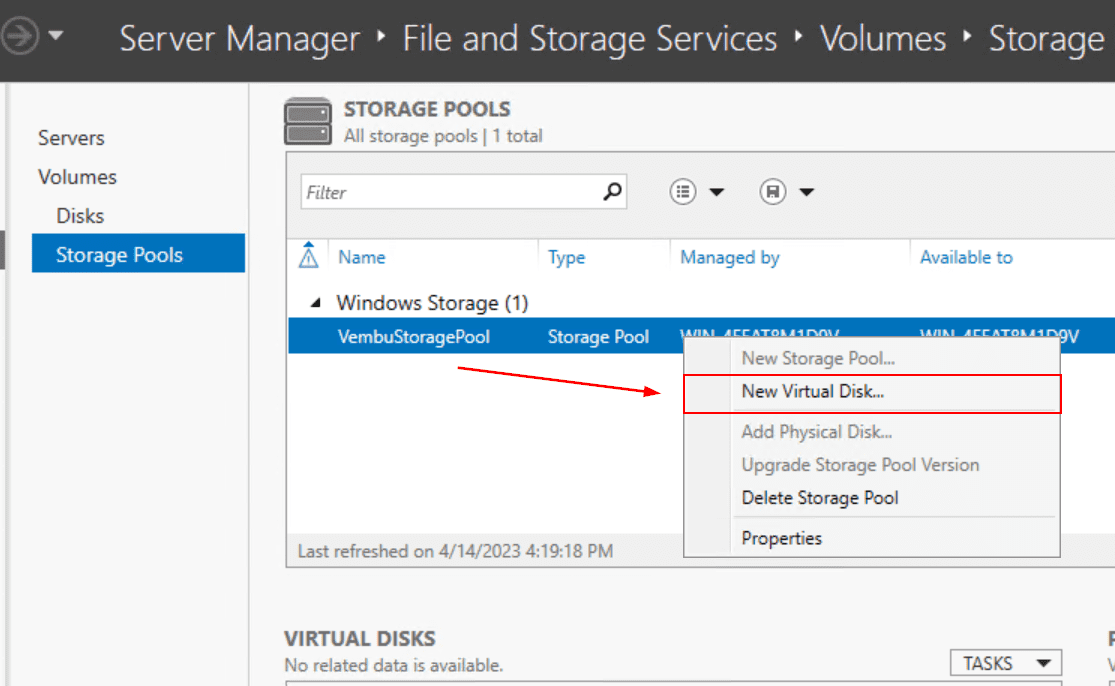
- Open Server Manager
- Click on File and Storage Services on the left side of the window
- Click on Storage Pools
- Right click on the newly created Storage Pool and then click New Virtual Disk
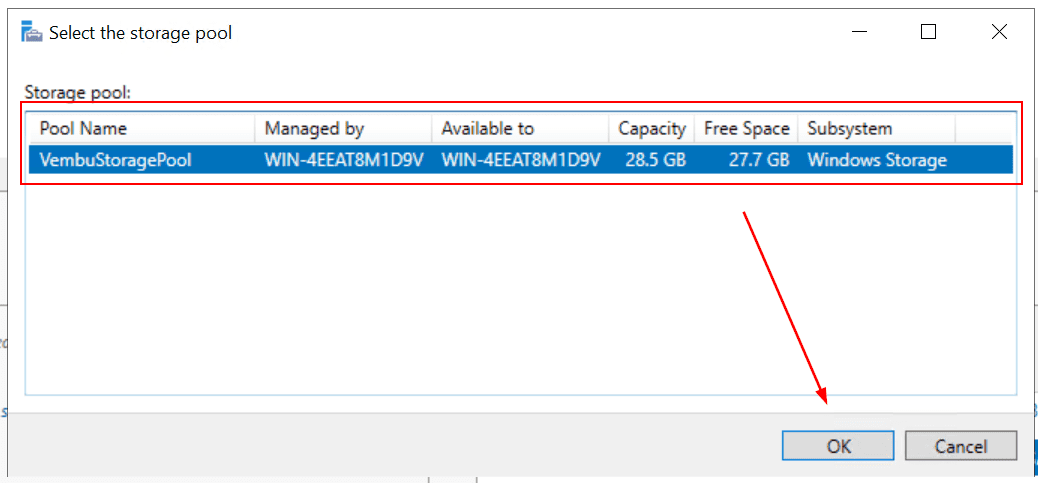
- Select the storage pool and then click OK
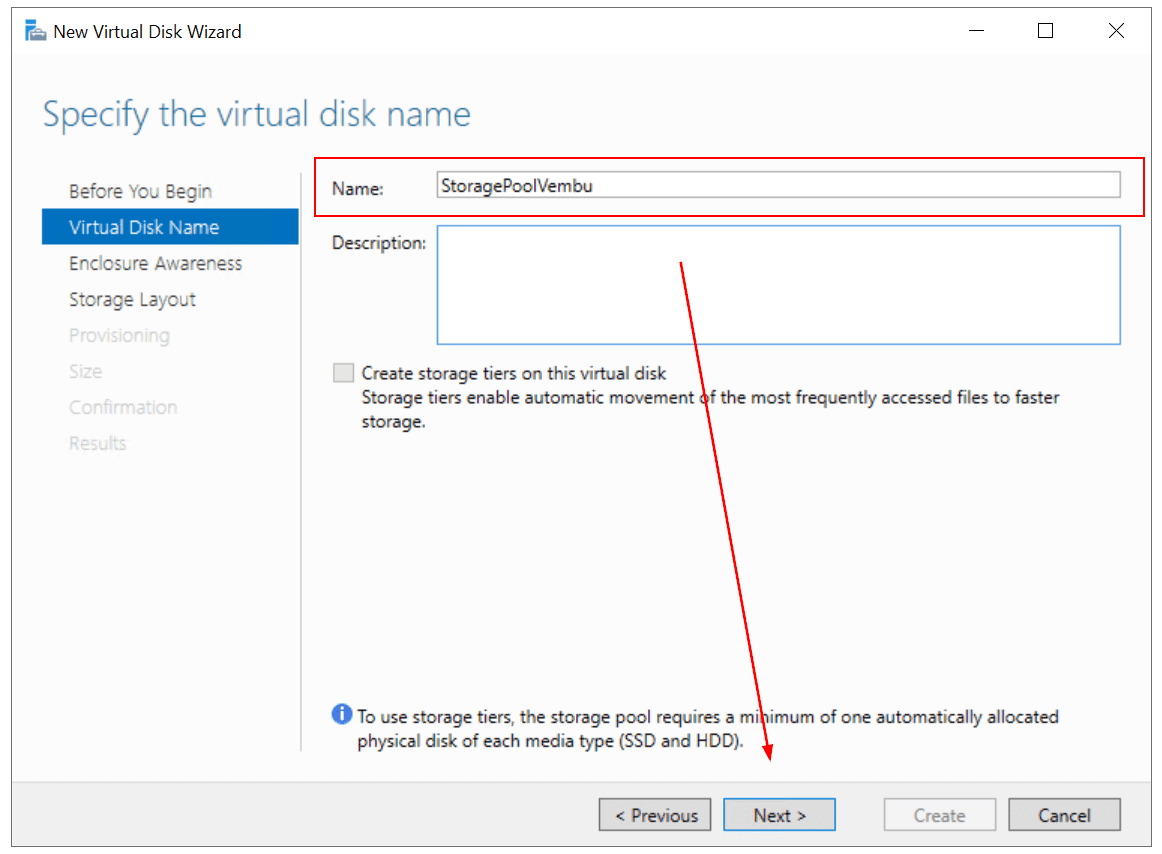
- Under Before you begin, click Next.
- Under Virtual Disk Name, specify the virtual disk name, add a description (optional), and click Next. In my case, the virtual disk name is StoragePoolVembu. If you have a minimum of one automatically allocated physical disk you can enable storage tiers. Storage tiers enable the automatic movement of the most frequently accessed files to faster storage
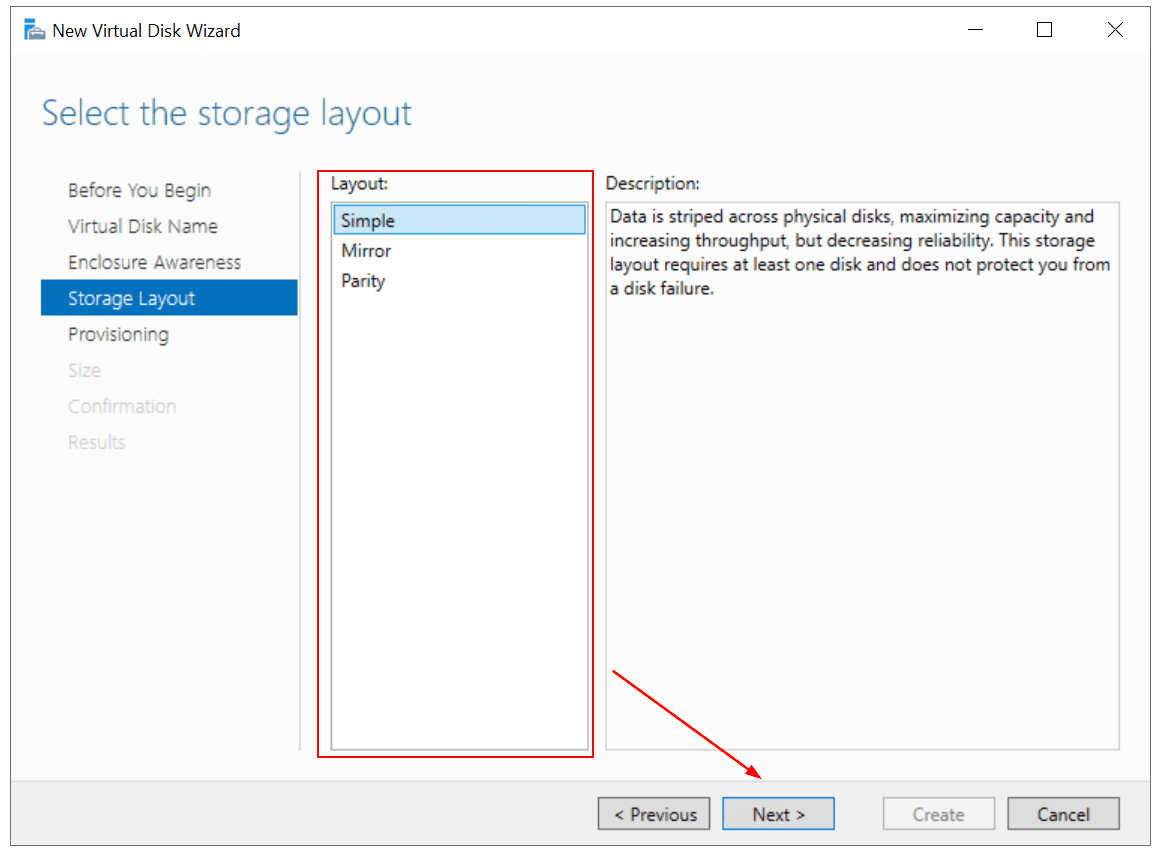
- Under Storage Layout, select the storage layout and then click Next. You can choose a Simple, Mirror, or Parity layout
Simple storage layout – data is striped across all disks maximizing capacity and increasing throughput. There is no disk failover tolerance. In my case, three disks with 10 GB each, will result in 30 GB of Simple storage layout
Mirror storage layout – data is striped across all disks creating copies of data. This storage layout increases reliability and decreases capacity. In case of single disk failure, use atleast two disks. If you have two disks of 10 GB capacity each, the total capacity of Mirror storage will be 10 GB. To protect against two disks failure, use at least five disks
Parity storage layout – data is striped across all disks increasing reliability, but also reducing capacity and performance. To protect against single-disk failure, use at least three disks. In case of disk failure, your data will not be lost
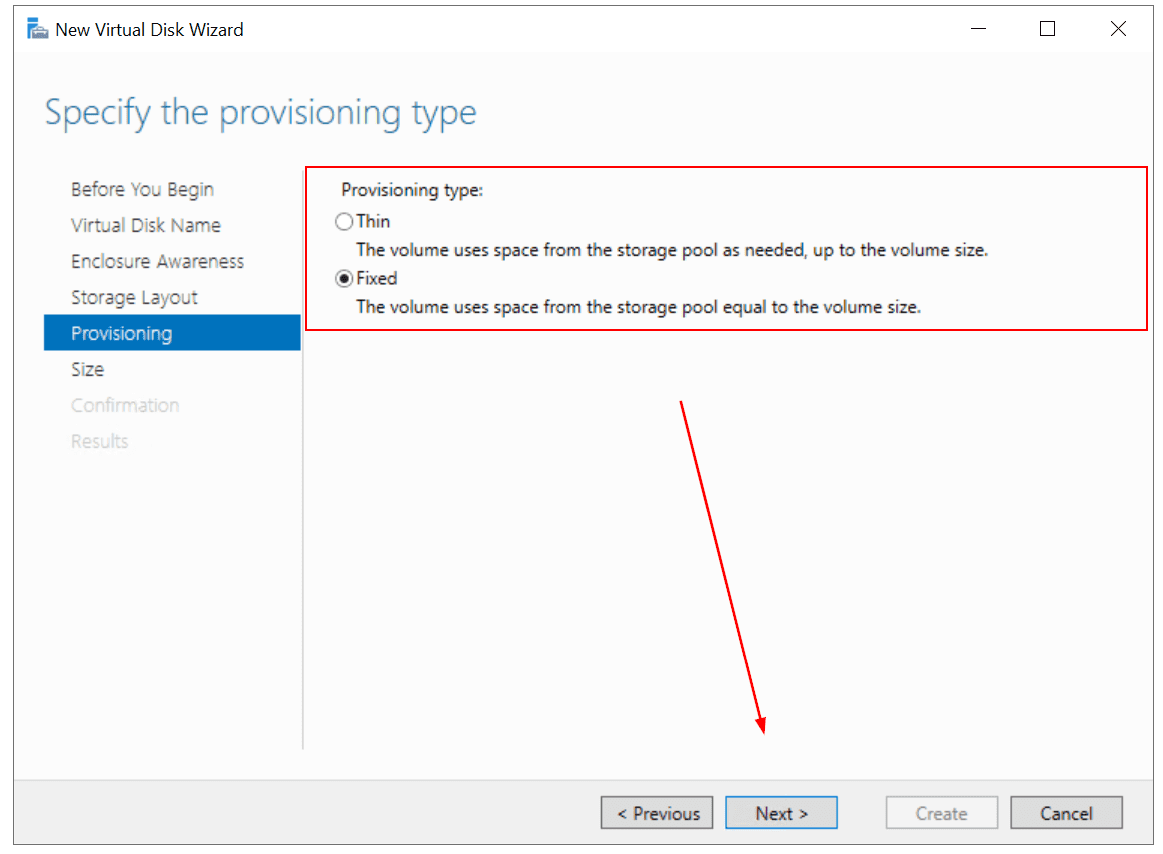
- Under Provisioning select Thin or Fixed and then click Next. For Thin provisioning, the volume uses space from the storage pool as needed, up to the volume size. For Fixed provisioning, the column uses space from the storage pool equal to the volume size
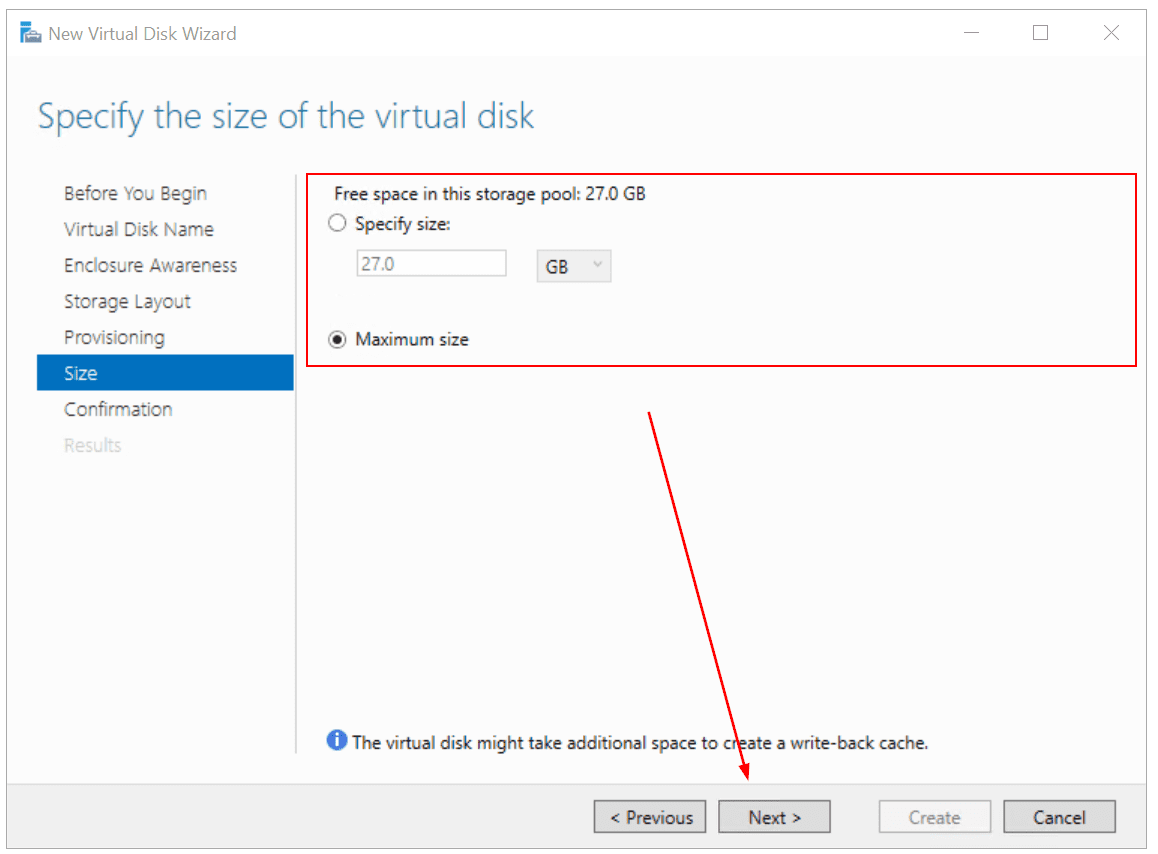
- Under Size, specify the size you want to allocate to your virtual disk, could be a specific size or maximum size, and then click Next. In my case, I use maximum size
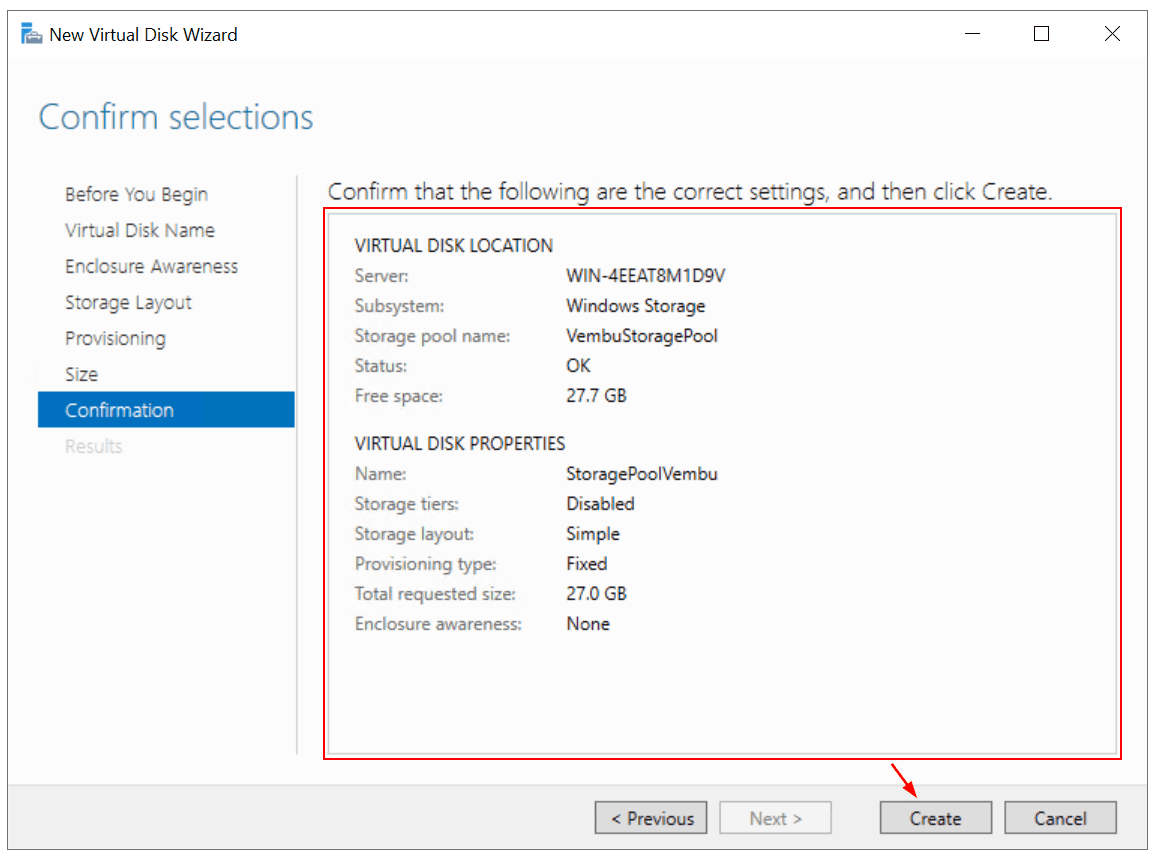
- Confirm the selection and then click Create
- Once done, click Close
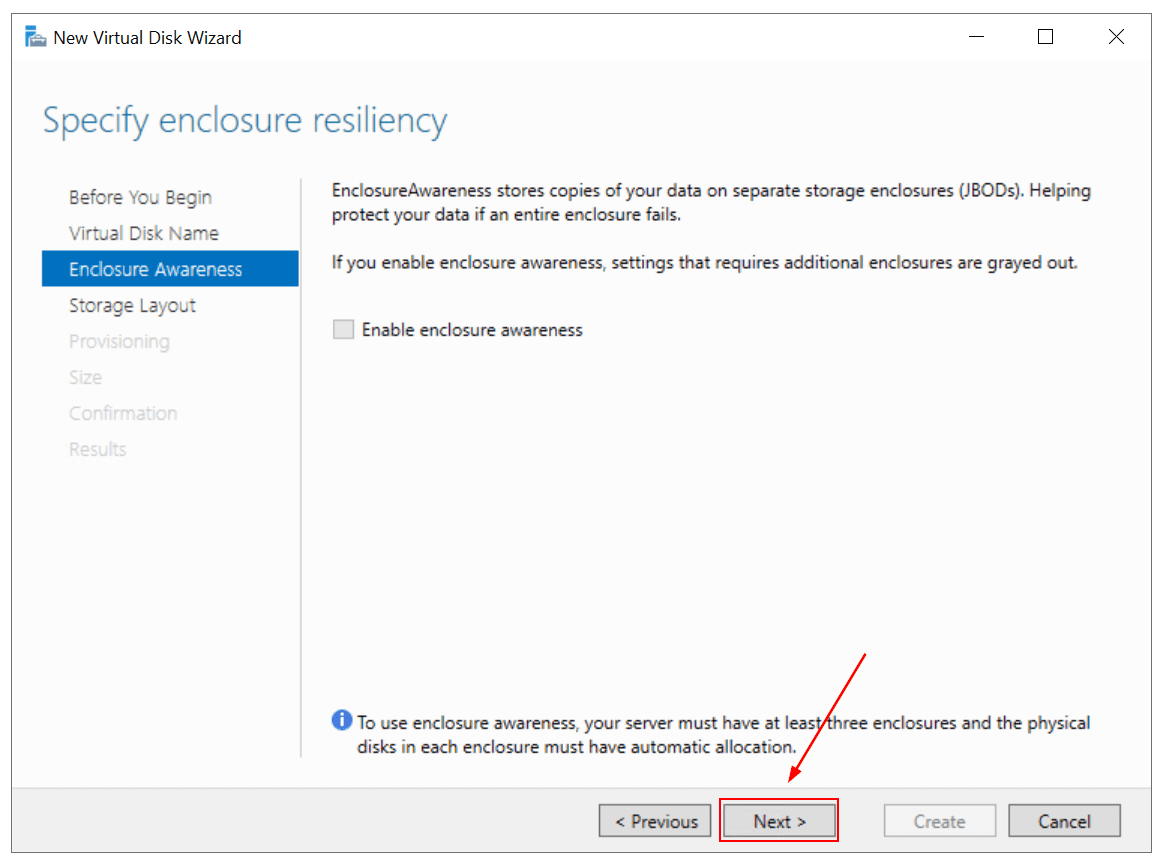
Under Enclosure Awareness click Next. Enclosure Awareness stores copies of your data on separate storage enclosures. To use enclosure awareness, your server must have at least three enclosures and the physical disks in each enclosure must have automatic allocation
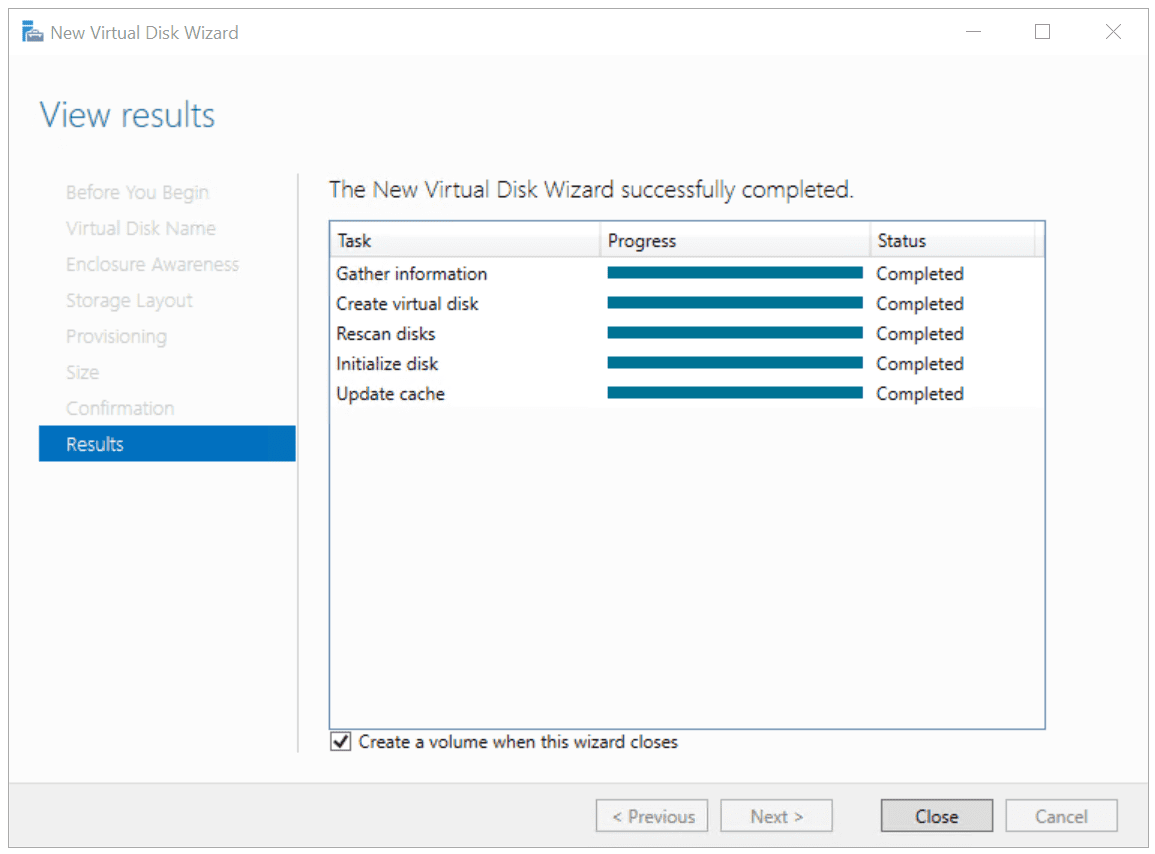
A new wizard will open to create a volume. Proceed with the next step.
Step 4: Create a volume
In the fourth step, you will create volume and prepare it for storing your data.
- Under Before you begin, click Next
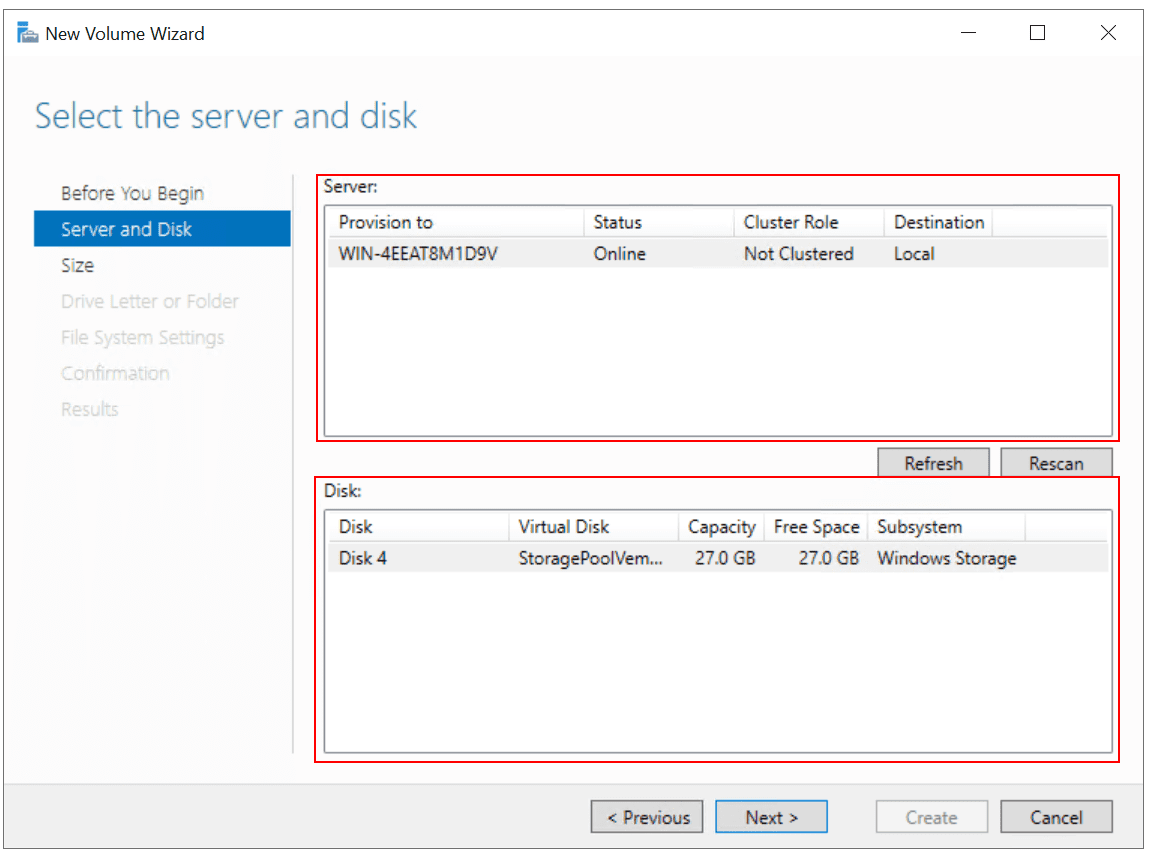
- Under Server and Disk, select the server and disk, and then click Next
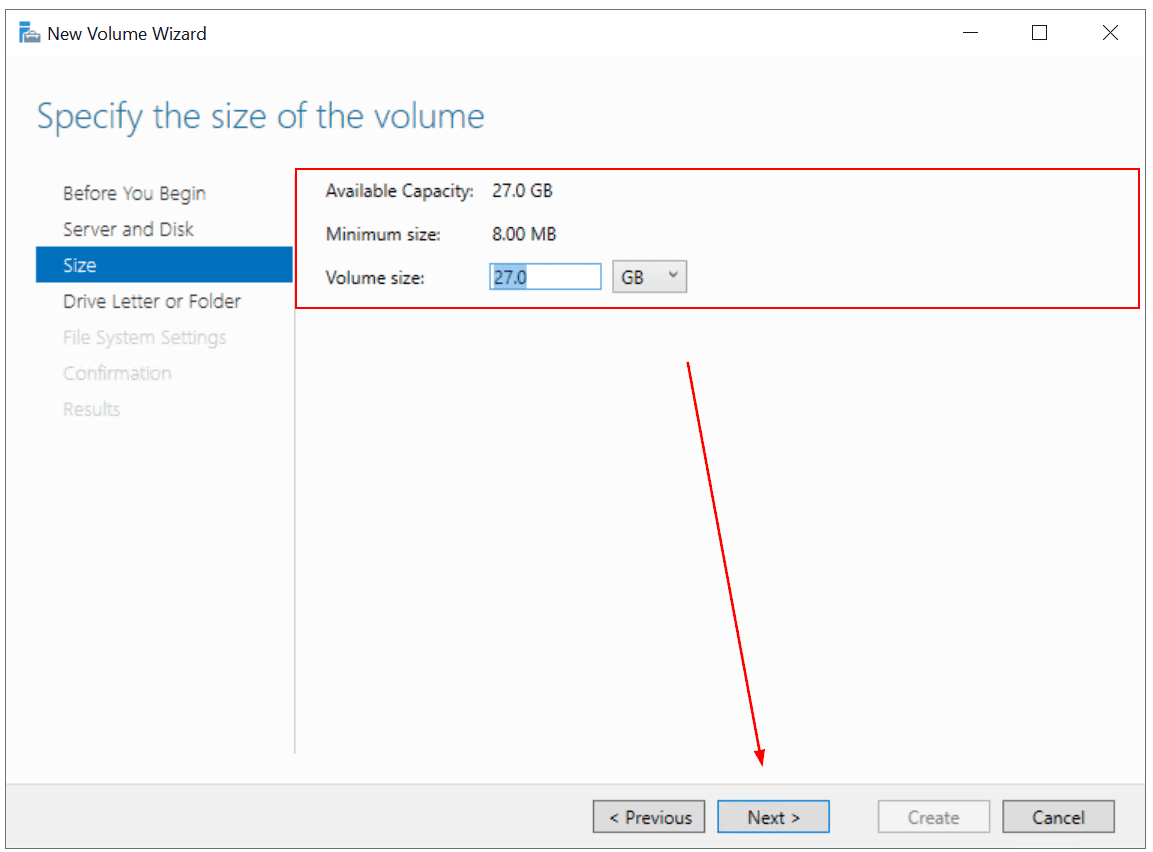
- Under Size, specify the size of the volume and click Next. I use maximum capacity
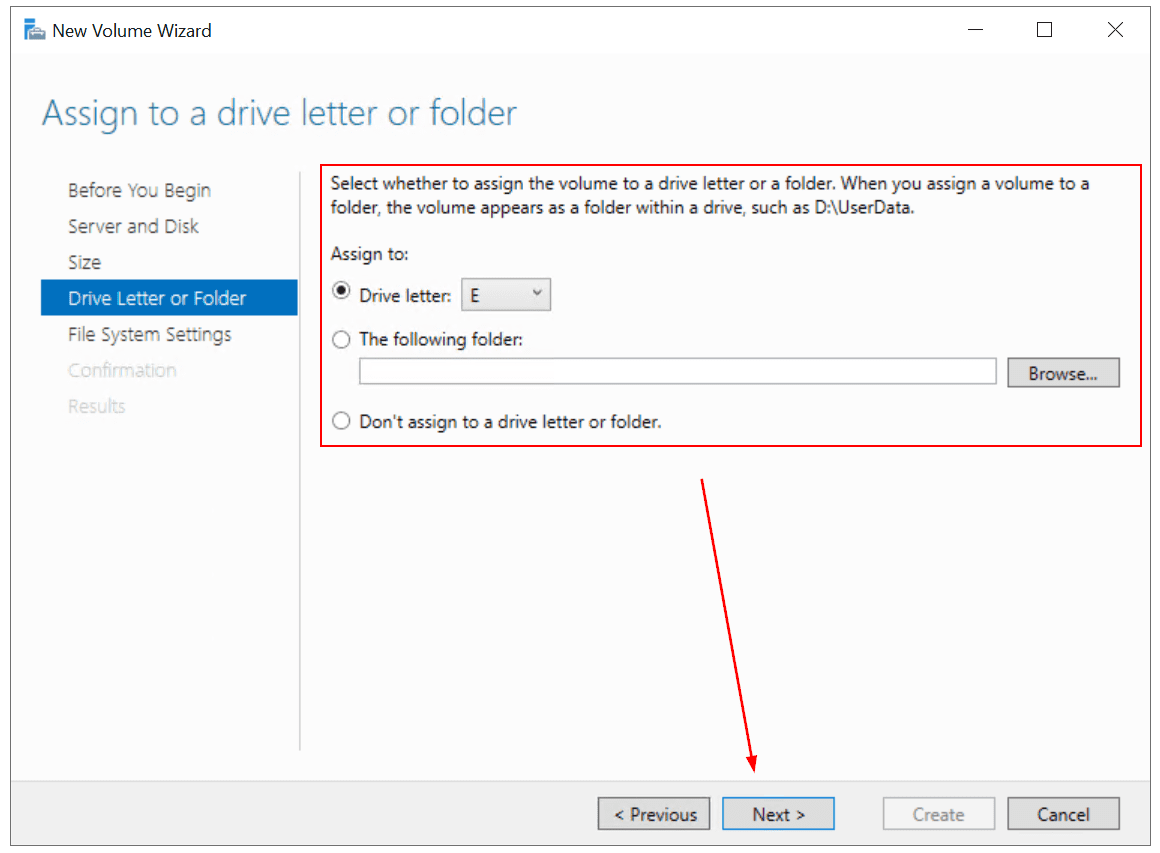
- Under Drive Letter or Folder, assign driver letter and then click Next. I use the volume letter E
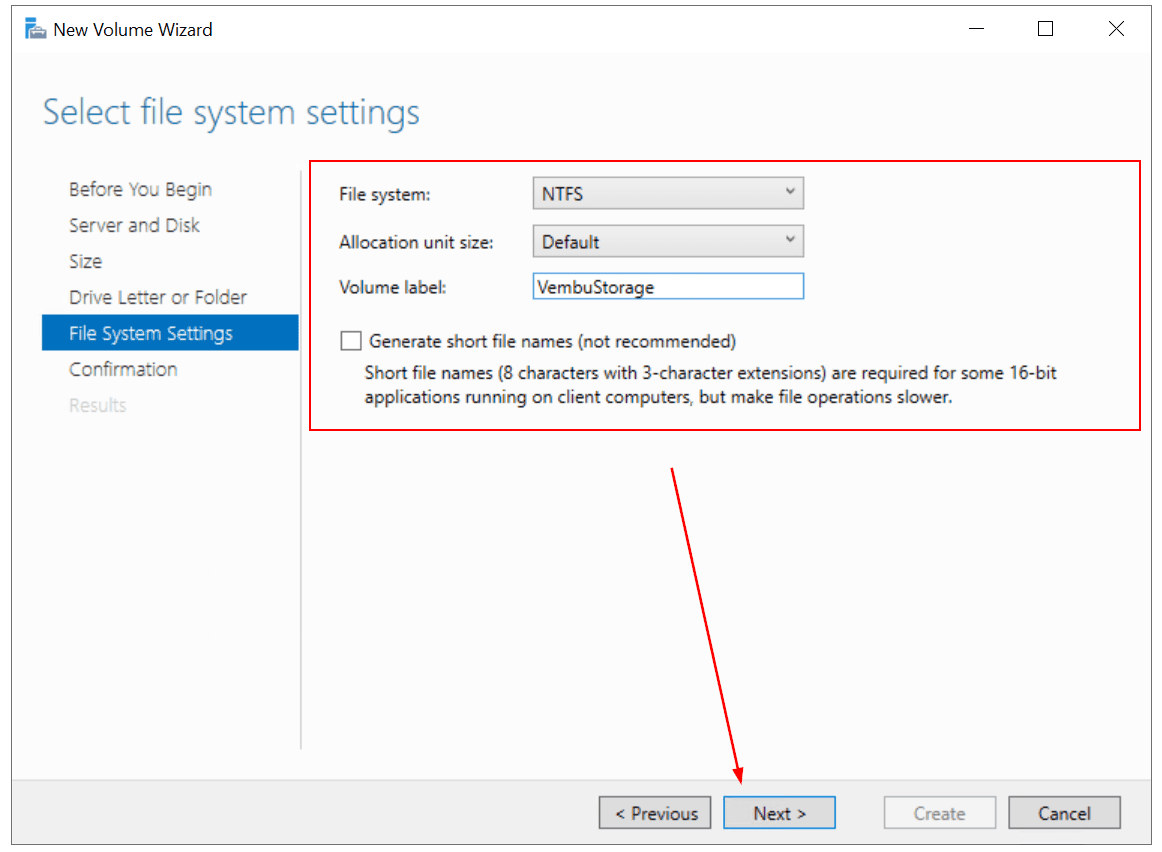
- Under File System Settings, select file system setting, allocation unit size, and define volume label and then click Next. In my case, I keep the default settings and only change the volume label to VembuStorage
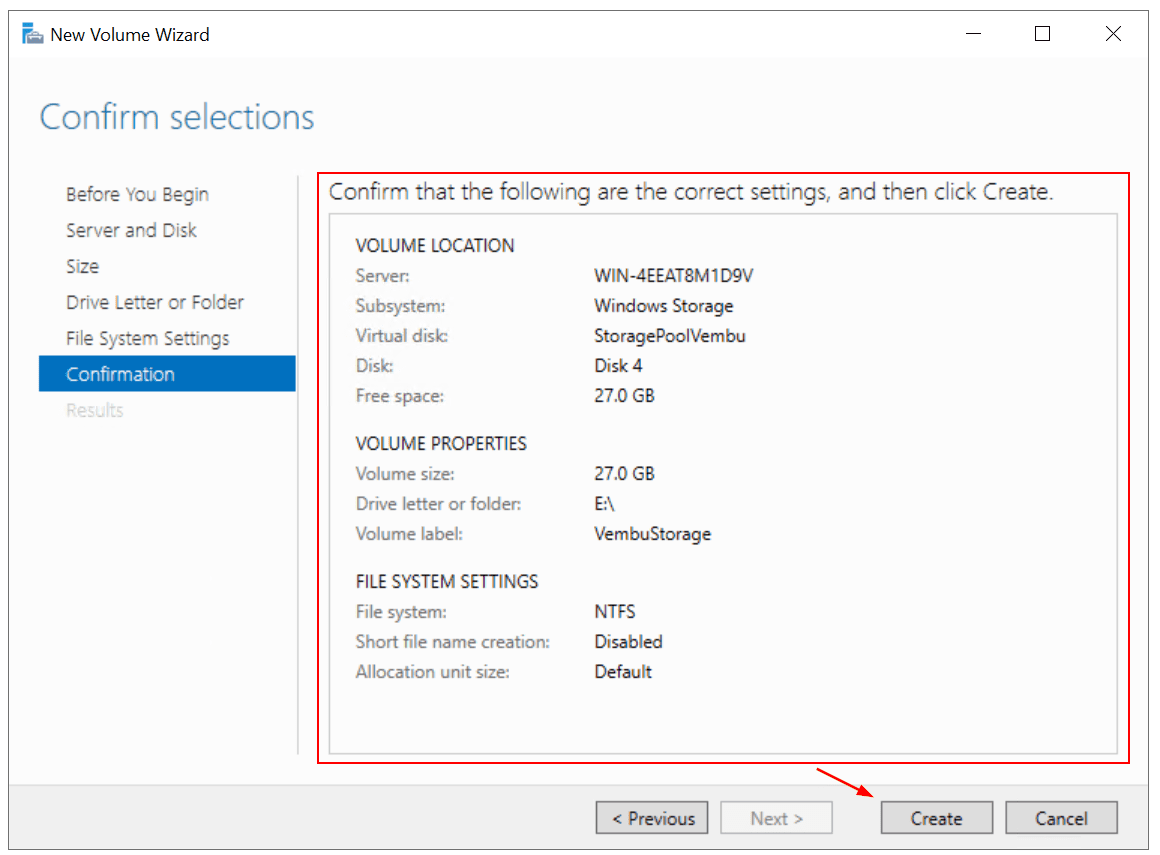
- Under Confirmation, confirm selections and click Create
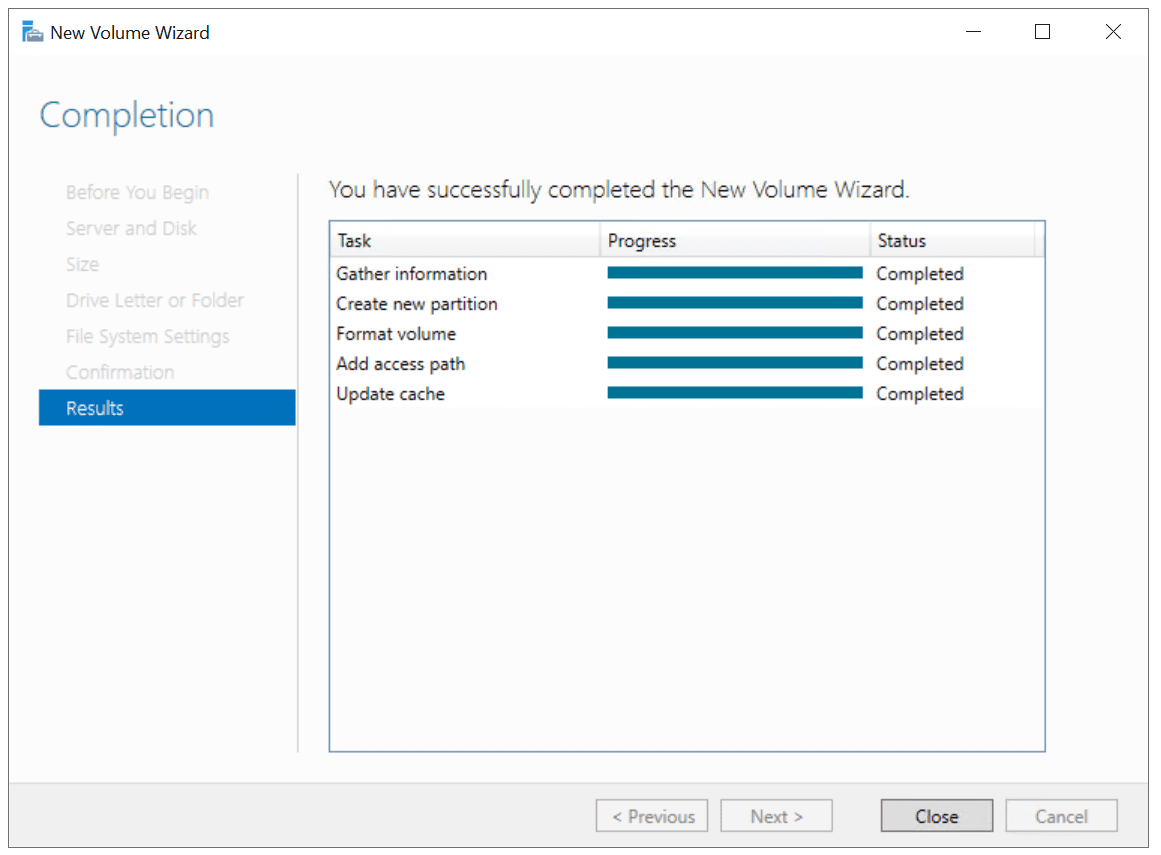
- Under Results click Close
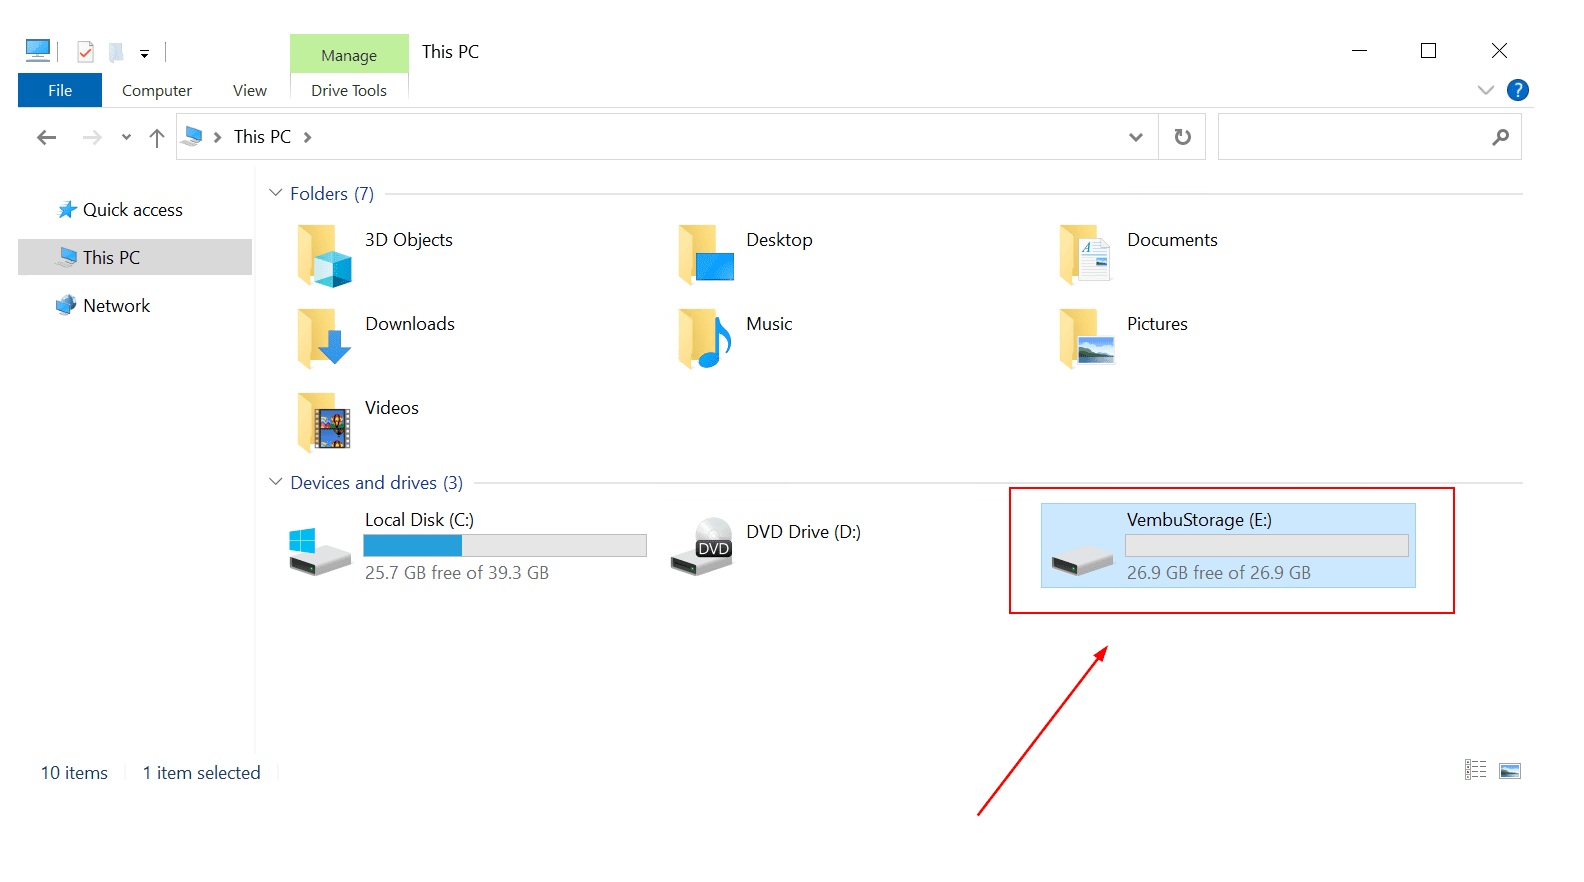
- Open File Explorer and navigate to the newly created volume. This volume is a storage pool that includes three disks, 10 GB each. A total capacity is 30 GB (Simple storage layout)
Wrapping Up
A Storage Pool is a native Windows Server feature that helps you to combine multiple physical or virtual disks in a single logical disk. It is available since Windows Serve 2012 and is still supported in Windows Server 2022. Storage Pool provides data redundancy and helps to increase performance. The procedure consists of four steps, including installing or preparing disks, creating a storage pool, creating a virtual disk, and creating volume.
This article provides a more comprehensive explanation of each step.
Related Articles:
Configuring Storage Spaces Direct and Resilient File System (ReFS)
Windows Server 2019 Storage Spaces Direct Best Practices
Managing Windows Server 2019 Storage Spaces Direct with Windows Admin Center
Follow our Twitter and Facebook feeds for new releases, updates, insightful posts and more.

Leave A Comment