
Quick Bites
- This blog post provides a step-by-step guide for installing Windows Server Update Services (WSUS) on Windows Server 2022
- It covers the system requirements, environment setup, and detailed instructions for the installation process using Server Manager
- Additionally, it includes a section on how to uninstall WSUS if needed
In the previous article, we covered some fundamental information you should know before installing WSUS in your infrastructure. Just to refresh your memory, WSUS stands for Windows Server Update Service, and it is used for the centralized update and reporting of Microsoft-based products. This includes Windows, Windows Servers, Exchange, SQL, SharePoint, and others.
Table of Contents
- System Requirements
- My Environment Setup
- Step by step: How to install WSUS
- BONUS: How to uninstall WSUS
In this article, I will guide you through the process of installing WSUS on your Windows Server 2022. The procedure also applies to previous versions of Windows Server.
System Requirements
WSUS doesn’t require a lot of resources. In order to enable WSUS on your Windows Server 2022 or previous versions, you would need to assign a minimum of 1.4 GHz x 64 pCPU; however, 2 GHz or faster is recommended.
In addition to that, you should assign 2 GB of RAM memory and 40 GB or more disk space. In regards to memory, you should go with 2 GB of RAM memory, 40 GB or greater of disk space, and a 1 Gbit/s network adapter.
If you decide to store updates locally, you need to plan for secondary storage, which could range from 10 GB to even a few hundred GBs, depending on how many products and updates you select.

If your machine supports the aforementioned resources, we can proceed with the installation.
Before I move on, let me remind you that all your machines, including both the WSUS server and clients, need to be part of the domain.
My Environment Setup
I am running Windows Server 2022 on a virtual machine hosted on a Hyper-V server. It has 2 vCPUs, 6 GB of RAM, and 40 GB of disk space. The FQDN of the domain is wsus.techwithjasmin.com. This FQDN is important, as we will configure WSUS clients to obtain updates directly from it.
Step by step: How to install WSUS
Please log in to your Windows Server 2022 and proceed with the following steps.
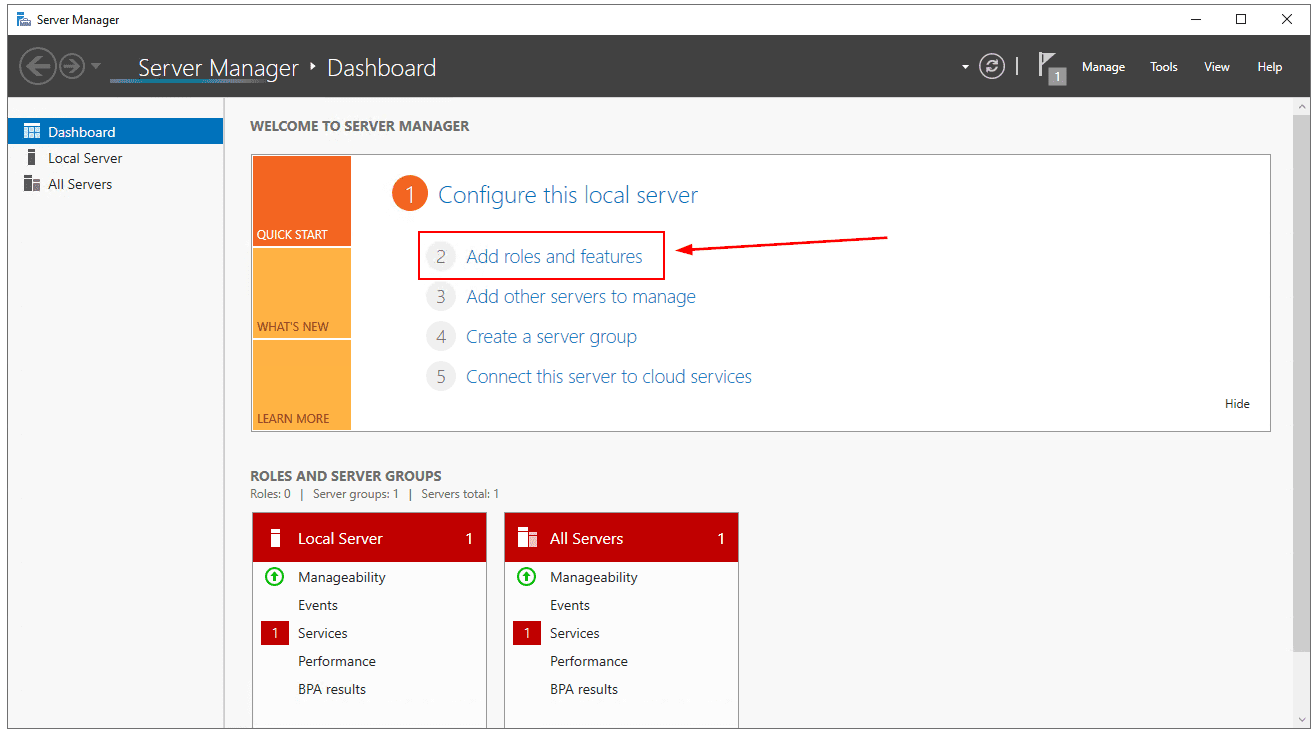
- Open Server Manager.
- Click on Add roles and features.
- Under Before you begin click Next
- Under Select installation type click Next
- Under Select destination server click Next
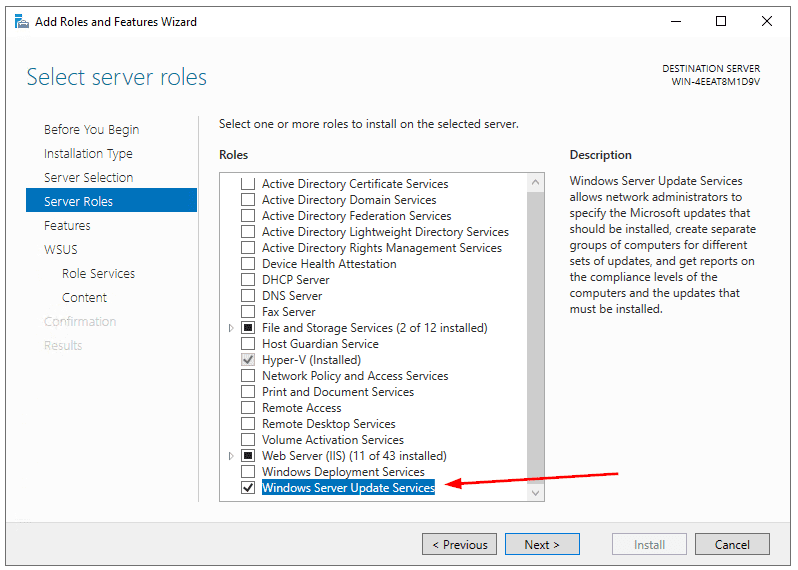
- Under Select server role, select Windows Server Update Services, and then click Add features
- Under Select features click Next
- Under Windows Server Update Services click Next
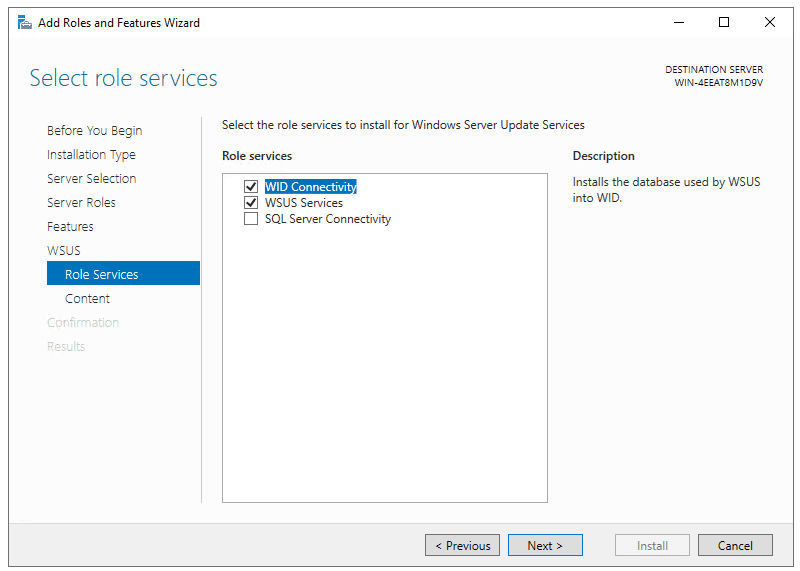
- Under Select role services, keep the default selected services and click Next
- In the Content location selection, decide whether you want to store updates locally on your server (for example, on a different partition or disk) or if you prefer not to store them but instead download them directly from Microsoft
If you choose to store them locally, select Store updates in the following location and provide a location path, such as D:\WSUS. If you do not wish to store them, unselect Store updates in the following location, and then click Next
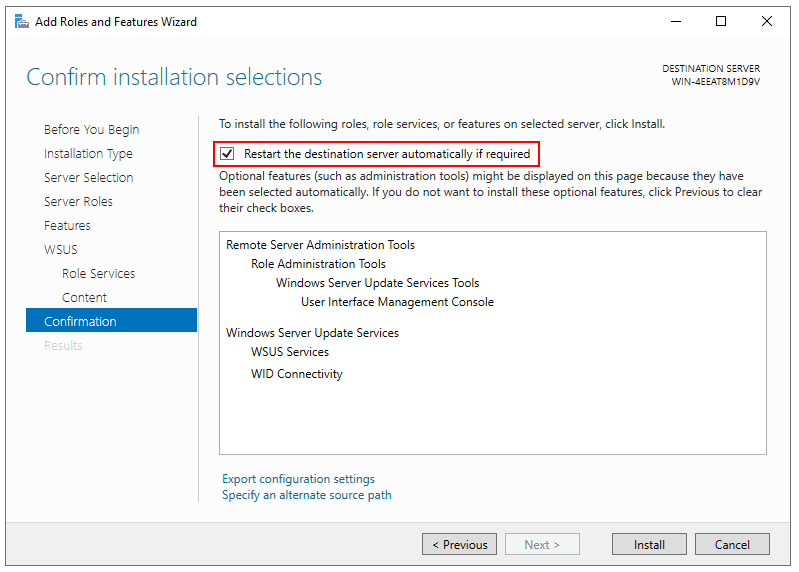
- In the Confirm Installation Selections section, choose Restart the destination server automatically if required, confirm by clicking Yes, and then click Install
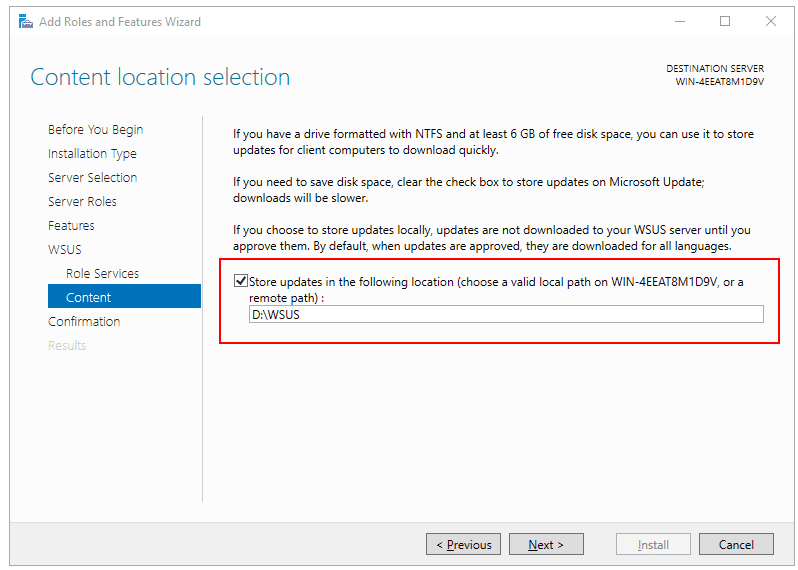
Select content location selection
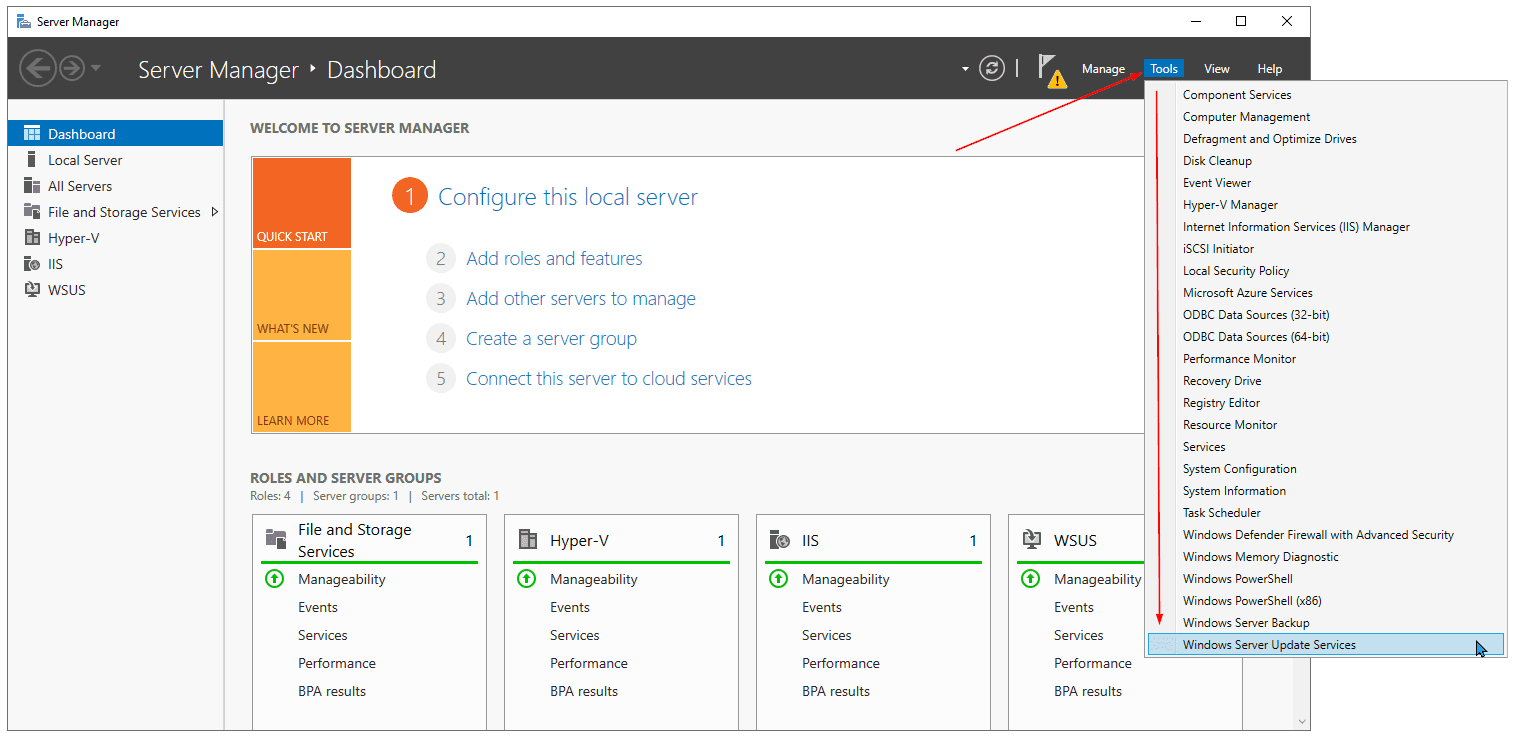
Wait until WSUS is installed, and you are ready to go. To open it, navigate to Server Manager > Tools > Windows Server Update Services.
BONUS: How to uninstall WSUS
As we discussed the installation of WSUS, it also makes sense to at least mention how to uninstall it. When it comes to Windows Server, you don’t uninstall roles and features from Control Panel or Apps and Features.
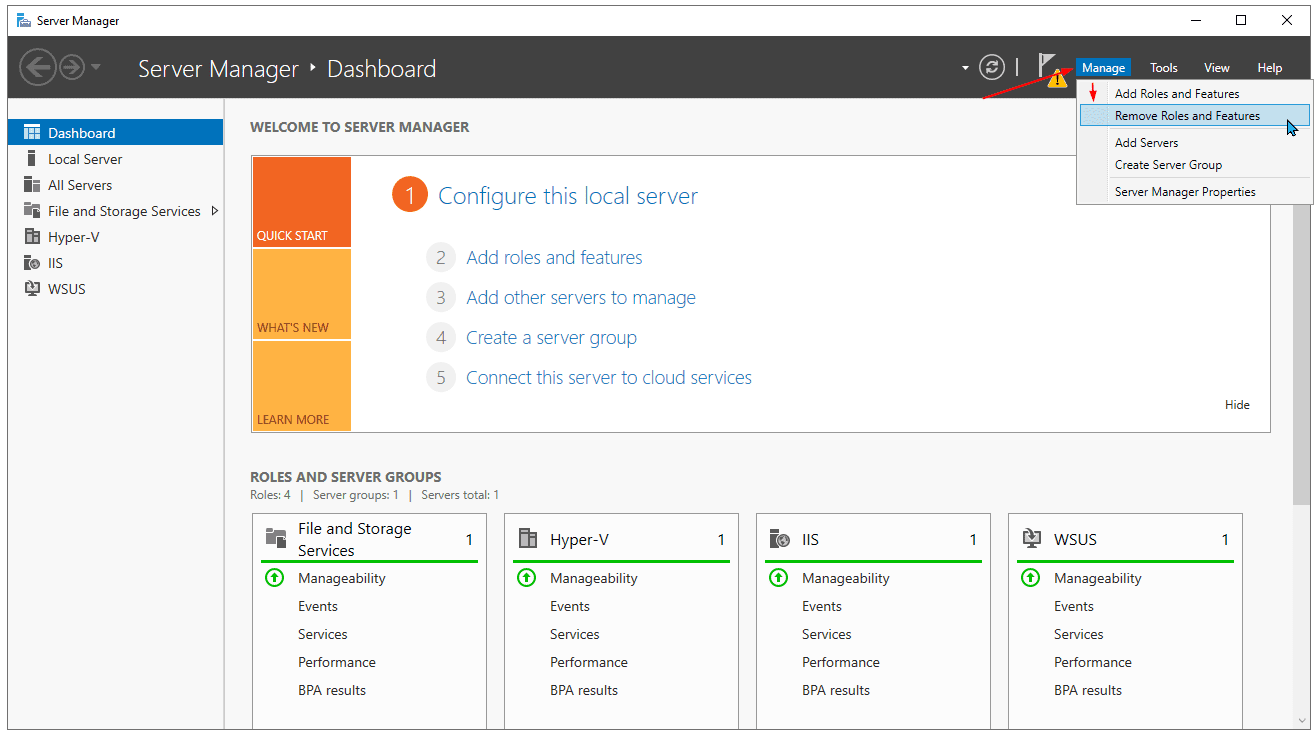
To do so, you need to open Server Manager, navigate to Manage, and then click on Remove Roles and Features.
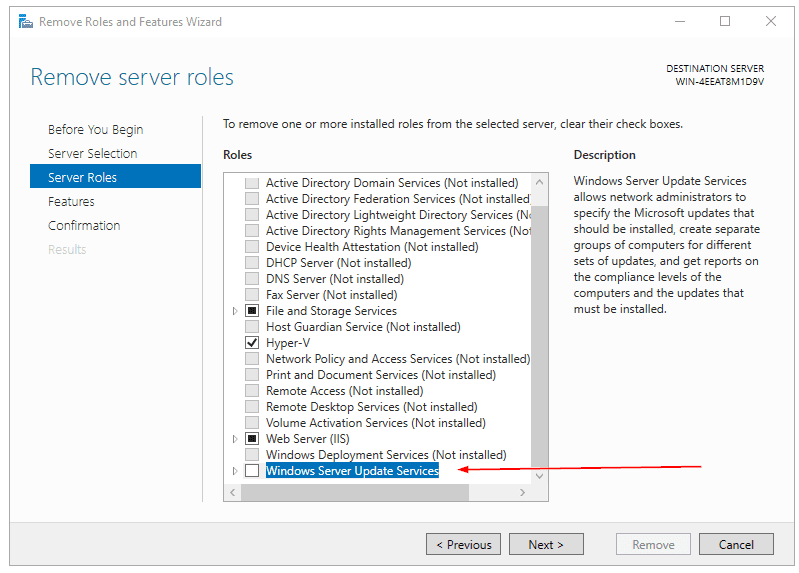
When you reach the Server roles section, unselect Windows Server Update Services, click Remove Features, and then click Next > Next > Remove.
In the next article, we will dive into the initial configuration of your WSUS server. Stay tuned.
Related Posts:
WSUS : Get Started with Windows Server Update Services (WSUS) – Part 1
WSUS: Post-deployment WSUS configuration – Part 3
WSUS: Create Computer groups in WSUS – Part 4
WSUS: Configure GPOs and Prepare your WSUS Clients – Part 5
Follow our Twitter and Facebook feeds for new releases, updates, insightful posts and more.

Leave A Comment