
Microsoft Virtual Machine Conversion tool allows you to migrate your physical or virtual machine to Azure cloud in the form of VHDs
Requirements for Conversion to Microsoft Azure
- It is required to have a Microsoft Azure Cloud account, please signup for an azure cloud account if you don’t have it already
- A valid Azure subscription id
- Create an Azure Storage Account with the Deployment model as Classic, tied to same subscription id
- Management Certificate, which can be used for authentication with your subscription ID on Microsoft Azure
- Download the Microsoft Virtual Machine Converter 3.0 from the Microsoft Download Center
Note: Certificates used in Azure are x.509 v3 certificates and can be signed by another trusted certificate or they can be self-signed. A self-signed certificate is signed by its own creator, therefore it is not trusted by default.
Let’s step into details, how to setup your environment for doing this conversion.
Note: This blog is written with the assumption that the user has some fundamentals in Azure cloud.
Begin with setting up the authentication protocol between your premises machine [where you are going to deploy the Microsoft Virtual Machine Converter 3.0] and Azure cloud, since this is the key feature for this blog to start with.
Steps to get available certificate from Azure portal.

- Login to azure classic portal, Click here
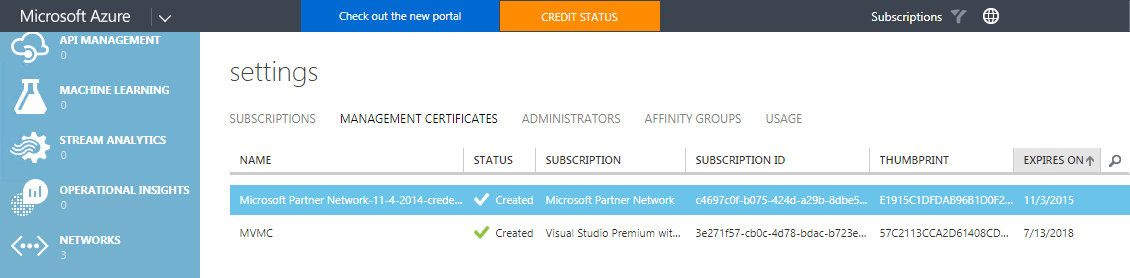
- Navigate to “Settings->Management Certificates” by accessing it from left most panel
- Choose the certificate whose expiry date is valid
- Note down its Subscription ID and Thumbprint and keep it aside, this is required when setting up the connector
- By any chance if you don’t have the valid certificate in place, then you can refer the below section to generate a self-signed certificate
Note: Management certificates allows you to authenticate with the Service Management API provided by Azure. Many programs and tools (such as Visual Studio or the Azure SDK) will use these certificates to automate configuration and deployment of various Azure services.
How to generate a self-signed certificate and upload it to Azure Cloud Portal?
- Remote it into the windows machine where you have planned to setup or install Microsoft connector util
- Open PowerShell window
- Invoke the below command
- Now you need to add the certificate to Personal and Trusted Root Certification. To do this, follow below steps
- Open run command and invoke “MMC.exe” process
- Click File, click Add/Remove Snap-in, and then click Certificates
- On the Certificates snap-in screen, click Add, and then select my user account. Click Finish, and then click OK
- Expand Console Root, expand Certificates – Current User, expand Personal, and then expand Certificates
- Right-click your Microsoft Azure certificate. By default, this is named Microsoft Azure Tools, you can name it as you like. Select All Tasks, and then click Export
- Click Next, and then click No, do not export the private key. Click Next
- On the Certificate Export Wizard screen, click DER encoded X.509 (.CER), and then click Next
- Type a file name, click Next, and then click Finish
- Expand Console Root\Certificates – Current User, expand Trusted Root Certification Authorities, and then expand Certificates
- Right-click Certificates, and then click Import
- Click Next, and then locate the file that you exported in step 8.
- Upload the generated certificate to Azure cloud account, by Navigate to “Settings->Management Certificates” by accessing it from left most panel
- Choose “Upload” button and browse to certificate location on the local machine and select the required subscription id to which you wish to tide this certificate
Psedocu : New-SelfSignedCertificate -DnsName “
Note: Replace “DNS_NAME” with the required name of your choice.
For Example: If you are planning to generate the self-signed certificate with the DNS Name as MVMC, then the example command looks like below.
New-SelfSignedCertificate -DnsName “MVMC” -CertStoreLocation “Cert:\CurrentUser\My”
Note: Follow the steps in the wizard to complete the import process. Verify that the Microsoft Azure Tools certificate[Name: MVMC] now appears in both the Personal and Trusted Root Certification Authorities stores.
Setting up Microsoft Virtual Machine Converter?
- Double click the downloaded mvmc_setup util and proceed with on screen instruction to complete its installation
- On successful installation, open MVMC util, go to Machine Type Wizard, choose either “Virtual Machine” or “Physical Machine” depending on your needs
- Click on next button where you will have to choose “Migration Destination” Wizard, select “Migrate to Microsoft Azure” as your destination and click “Next” button
- Now at the Azure Connection wizard, provide the subscription id and thumbprint information which is used as the authentication protocol for your local machine connected to azure cloud and click on next
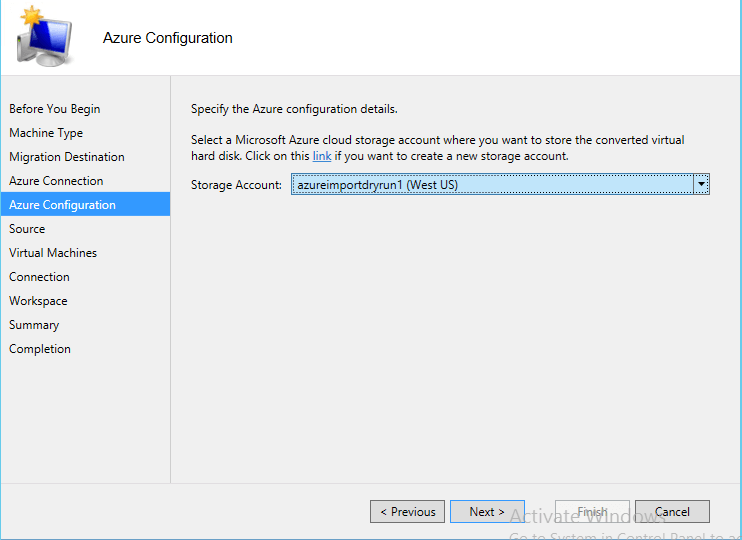
- After the successful authentication, wizard will take you to choose the “Storage Account” where you are planning to put the converted VHD file and click “Next” button
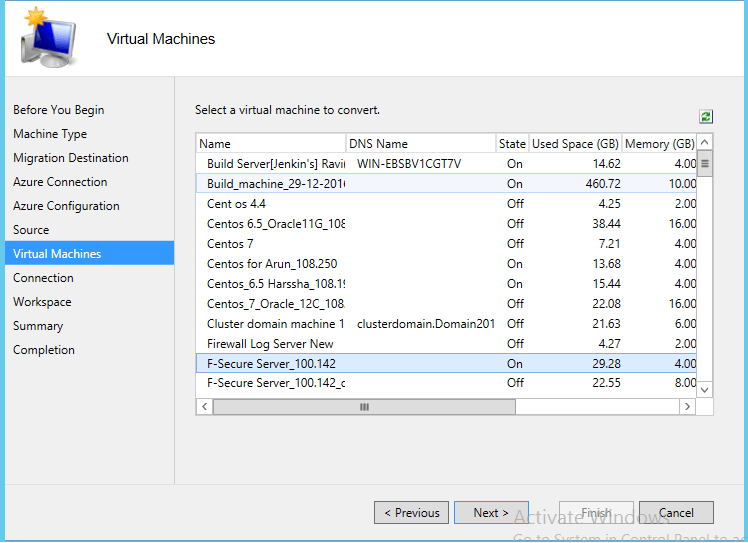
- Now provide either VCenter/ ESXi source logon credentials and click “Next” button on successful authentication. it will list down the list of available VM’s in the source
- Select the VM which you are planning to migrate it to Azure cloud
- In the workspace wizard, choose the cache volume which is used for this conversion process
- On the summary page make sure your selection is intact and click “Finish” button to start your VM Conversion process
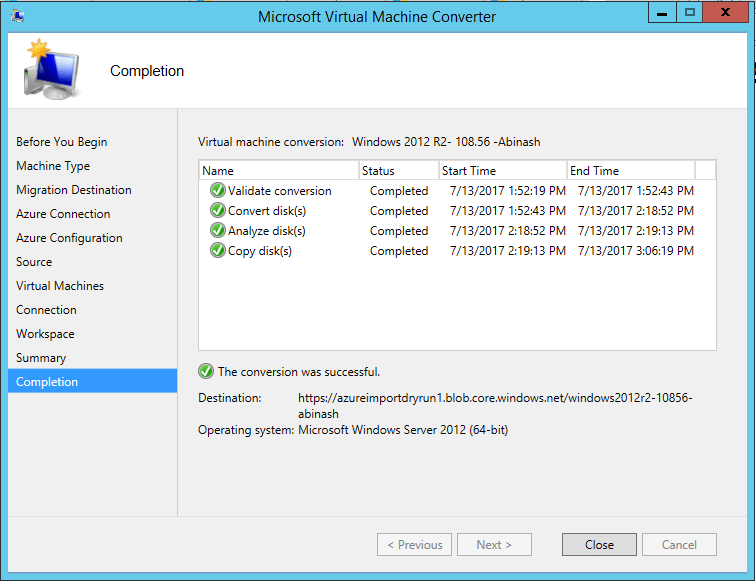
- At the “Completion” wizard you can monitor the conversion activity. Once the conversion and migration got completed, you will get notified in the wizard
Note: Make sure you are choosing the volume which has enough space for the conversion.
Conclusion :
On successful completion of the migration process, you will see your migrated VM’s available in azure cloud account, which is grouped in the classic deployment mode. Selecting VMs, one can manage machine dependent operations like: starting VM, stopping VM or deleting VM.
Follow our Twitter and Facebook feeds for new releases, updates, insightful posts and more.

Leave A Comment