Vembu BDR Suite » Vembu Backup & Replication for VMware » Restore VMware VMs » Disk Level Recovery
Disk Level Recovery
Disk Level Recovery
- Disk Level Recovery allows you to restore an individual disk from the VM that is backed up. The disk will be restored to the target VM and will be attached so that it can be accessed from that target VM.
- In some cases, you can also attach the restored disk to your original VM in case of any disaster. Once the disks are attached to the target VM, you will be alerted to manually reboot the VM so that the configurations get updated.
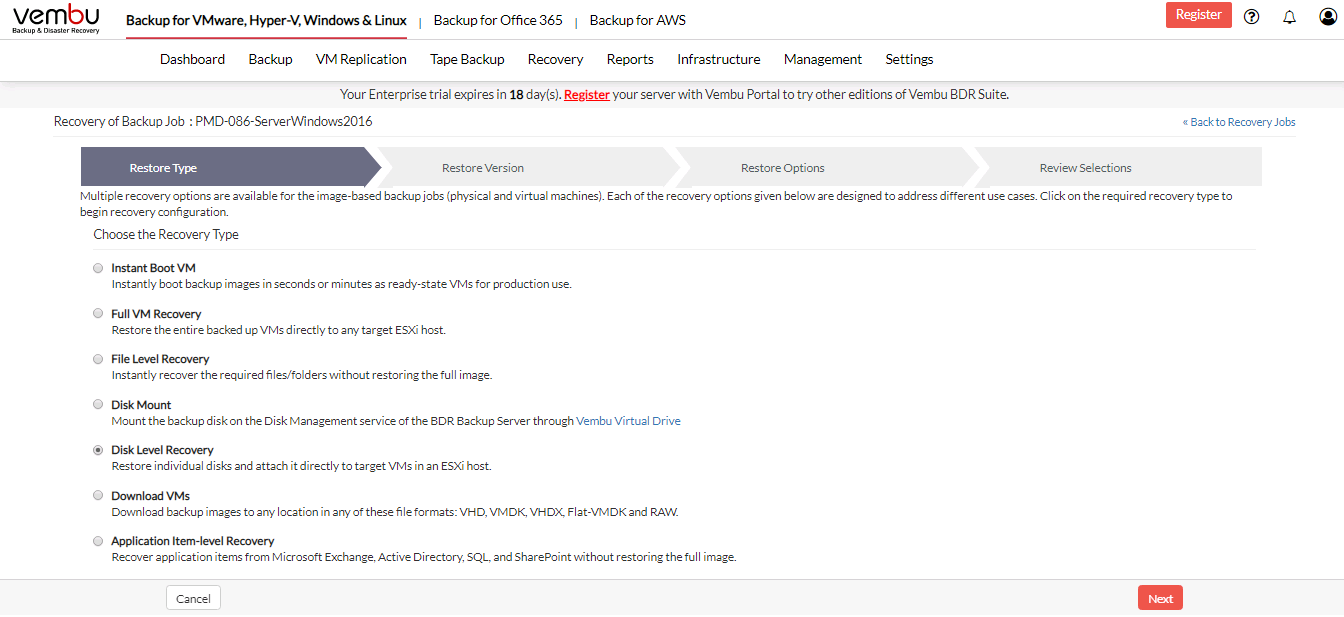
Step 1: Choose the Restore Type
- Click the Recovery tab and select the restore icon near the VMware backup that is to be restored. Select Disk Level Recovery as the Restore type and click Next to proceed with the restore process.
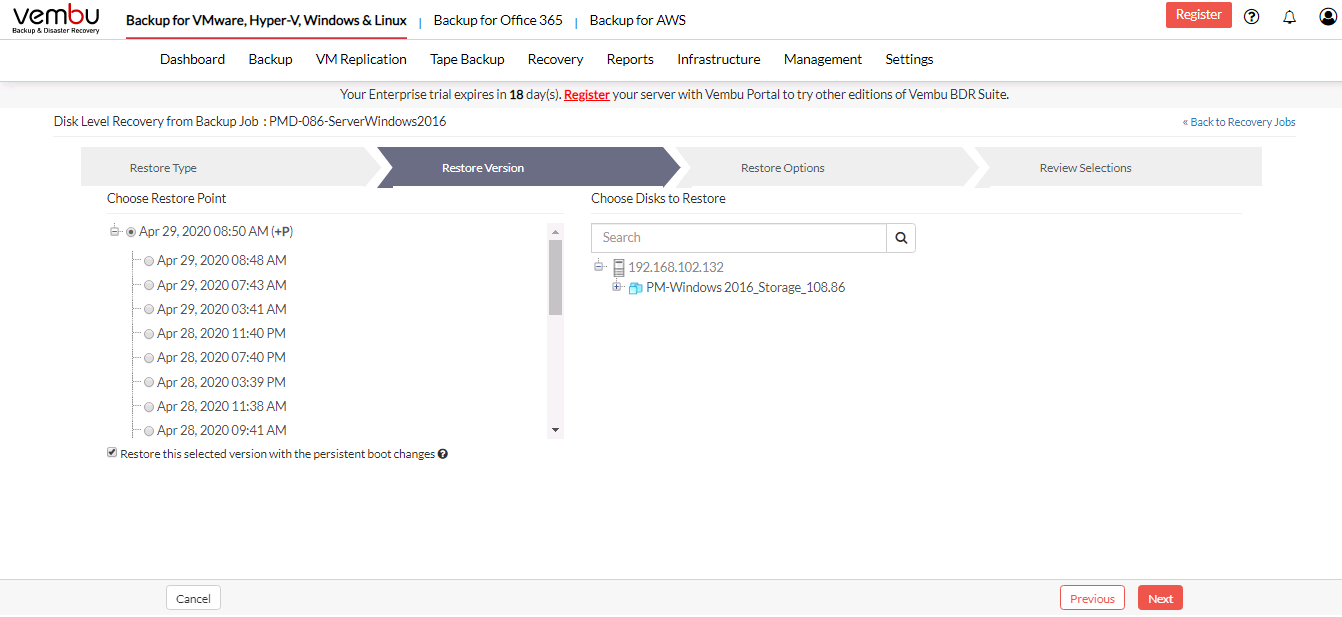
Step 2: Choose the Restore Version
- The next step will be to choose the restore version (time-stamp) of your backup data. The latest restore version will be at the top of the tree followed by the older restore versions. If the time-stamp consists of the Persistent data (+P) option and you restore that version, all the changes you have made in the VM will be restored. The restore version also consists of (d)- daily merge, (w)- weekly merge and (m)- monthly merge.
- The restore version is created based on the end time of the backup (i.e the date and time when the backup process scheduled is completed), this is named Recovery points. The full backup and incremental backup time-stamps are listed with the latest backup version as a parent node and old backup version further sub-nodes. You can fall back to the required time-stamp to recover the backed up data.
- Select the Include persistent boot changes in the restore option if you want to restore your backup data along with the changes made.
- Select the restore version and proceed to select restore data.
The 'Include persistent boot changes in restore' option will be available only if you are restoring the time-stamp with (+P) |

Step 3: Choose the Restore Data
- Once you are done selecting the restore version, the next step is to select the Restore data. Select the disk that is to be restored. You can search for a particular VM from the search tab. Click Next to proceed with the restore process.

Step 4: Configure Restore Options
- The next step is to configure the target server details. Select whether the target server is an ESXi host or a vCenter Server.
- If the target server is a vCenter Server, select the vCenter Server details and enter the following:
- Select ESXi Host
- Select the Target VM Name to which the disk is to be attached
- Select Target Datastore
- If the target server is an ESXi host, add the ESXi host details and do the following:
- Select the Target VM Name to which the disk is to be attached
- Select Target Datastore
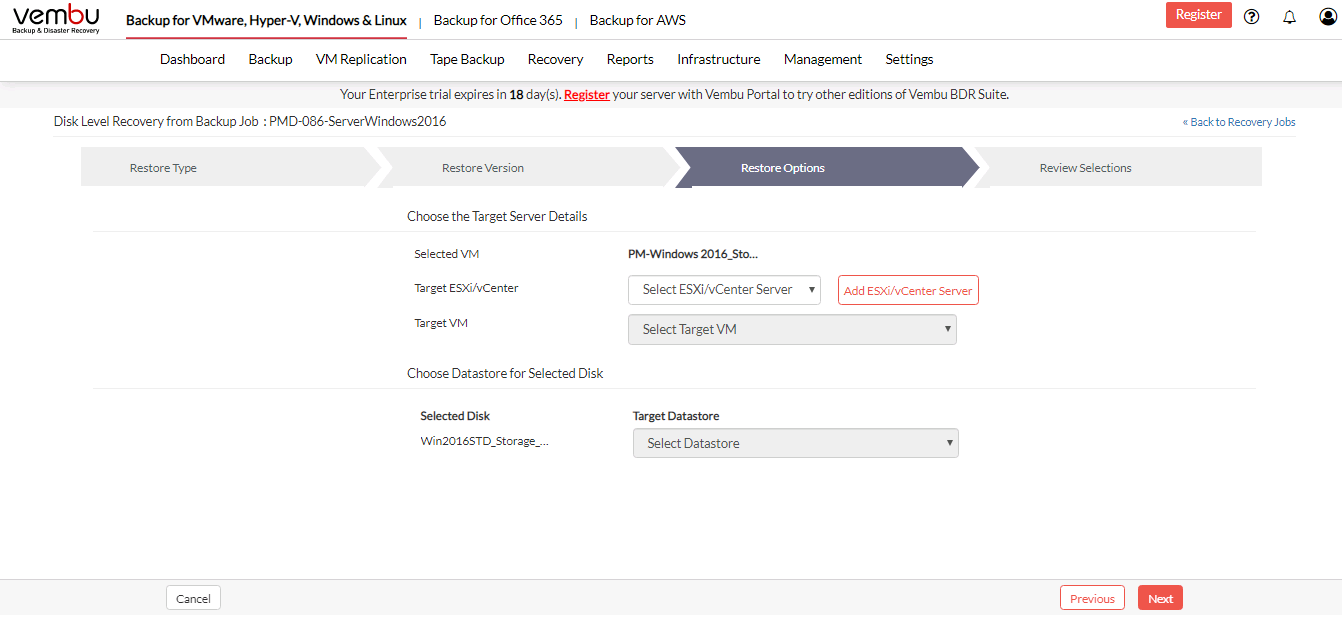
- If the VMware Server is not listed in the drop-down list, add the ESXi host or vCenter Server through the Add VMware Server option. Provide the target server Hostname/IP address. Select the credentials from the Select Credentials drop-down list or add a new credential using the Add Credentials option. Read here on adding new credentials - Credential
- Configure the port number, by default the value is 443. Click Add to add the VMware Server.
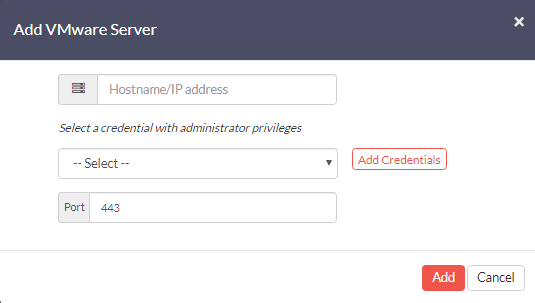
- Once done providing the details, Click Next to proceed to review your configurations.
The target virtual machine will be powered off for performing disk restore |
Step 5: Review Configurations
- The final step in this restore process is to review the configurations you have selected.
- Check the following:
- Restore type
- Restore version
- Selected VM Machine
- Target Server IP address
- Target VM Machine
- Target Datastore
- Verify all the details and click Restore Now.

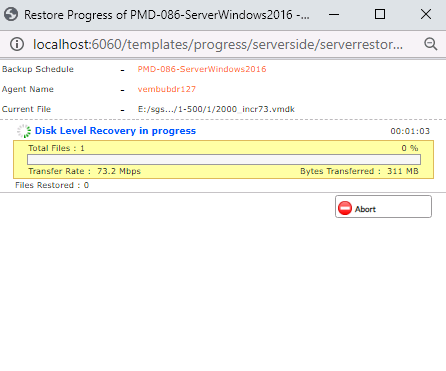
- You will be redirected to the recovery page. In the Status tab click the arrow mark which will open the restore progress window.
- The following details will be available in the restore progress page:
- Backup Schedule
- User Name
- Current File
- Total Files
- Transfer Rate
- Files Restored
To enhance the restore performance, close the restore progress window and open it occasionally to check the restore progress |
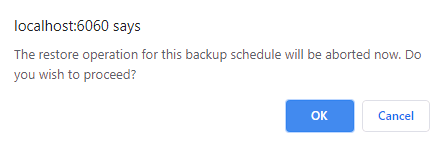
- You have the option of aborting the restore process. From the Recovery page click the Abort Server Side Restore option, this will open a pop-up window as displayed below. Click Yes to abort the restore.
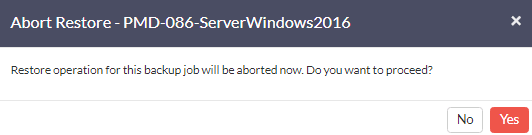
- Or open the restore progress window and click the Abort (-) option which will open a pop-up window displayed below. Click OK to abort the restore process.