File Level Recovery
File Level Recovery
- You might want to restore specific VM files instead of restoring the entire VM data. The source VM might consist of data that might be needed later. Some users do not prefer to restore the entire VM data as it occupies space and utilizes network bandwidth.
- To handle such scenarios Vembu offers File Level Recovery which allows you to restore files and folders of your choice from the backed up VM. Once you configure the restore location and trigger the restore process you can find your backup files in the specified location within minutes.
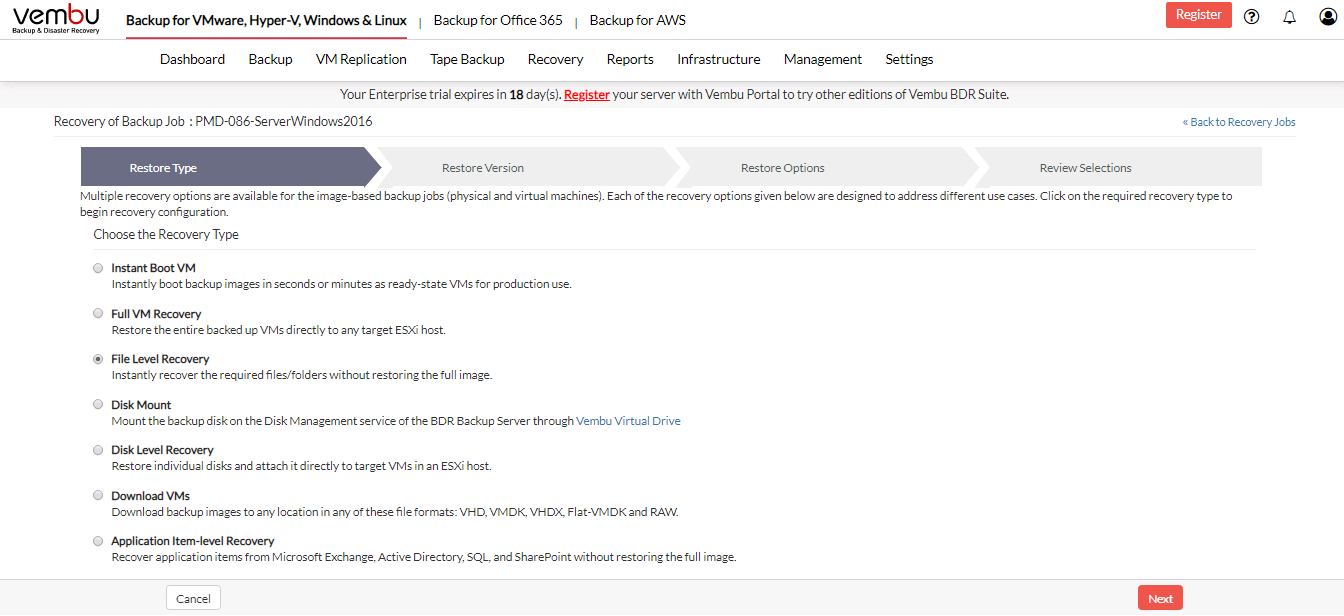
Step 1: Choose the Restore Type
- Click the Recovery tab and select the restore icon near the VMware backup that is to be restored. Select File Level Recovery as the Restore type and click Next to proceed with the restore process.
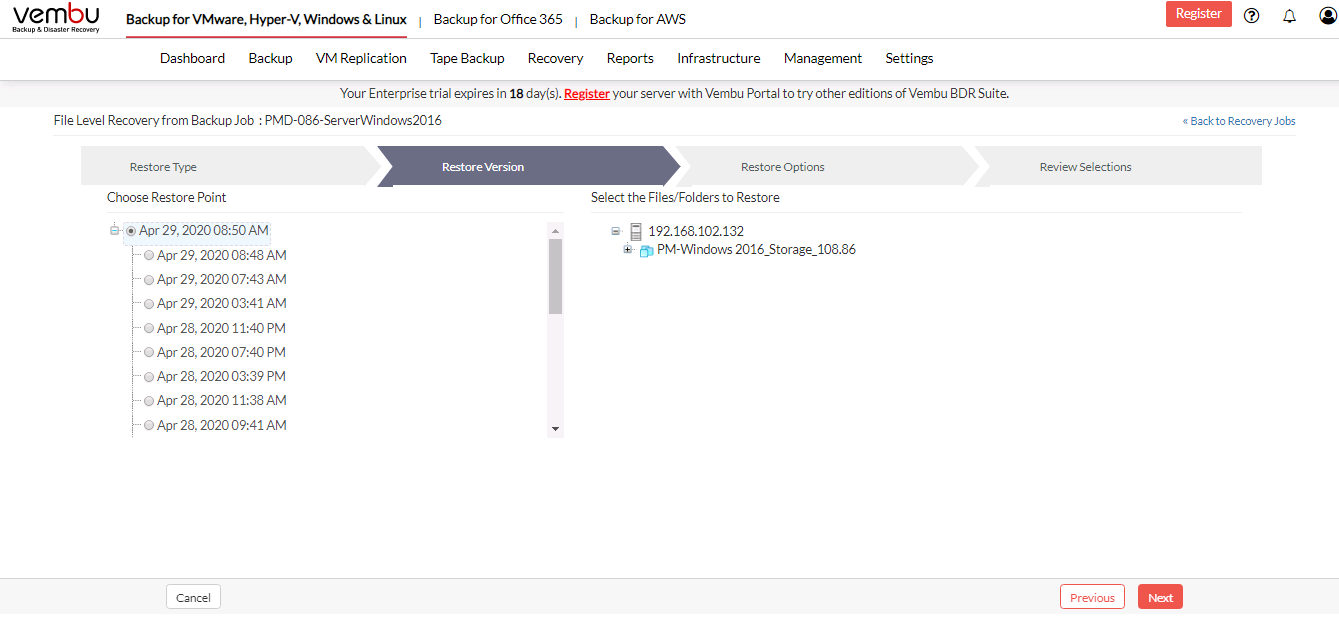
Step 2: Choose the Restore Version
- The next step will be to choose the restore version (time-stamp) of your backup data. The latest restore version will be at the top of the tree followed by the older restore versions. If the time-stamp consists of the Persistent data (+P) option and you restore that version, all the changes you have made in the VM will be restored. The restore version also consists of (d)- daily merge, (w)- weekly merge and (m)- monthly merge.
- The restore version is created based on the end time of the backup (i.e the date and time when the backup process scheduled is completed), this is named as Recovery points. The full backup and incremental backup time-stamps are listed with the latest backup version as a parent node and old backup version further sub-nodes. You can fall back to the required time-stamp to recover the backed up data.
- Select the Include persistent boot changes in the restore option if you want to restore your backup data along with the changes made.
The Include persistent boot changes in restore option will be available only if you are restoring the time-stamp with (+P) |

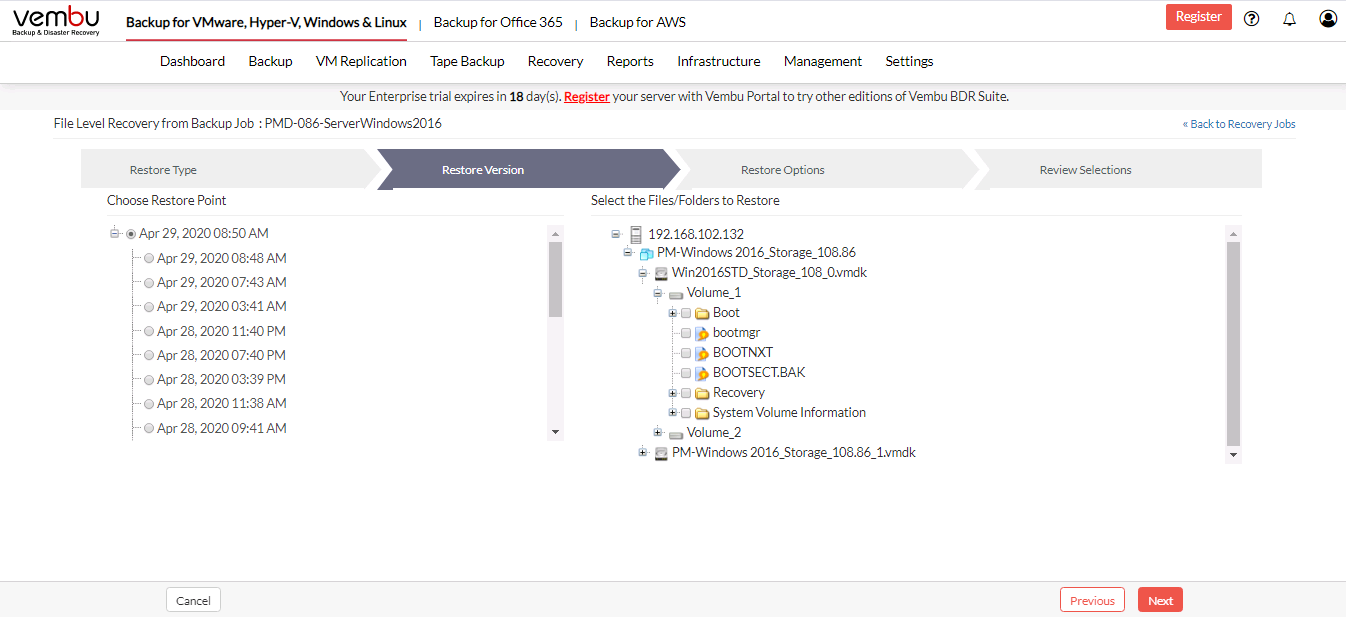
Step 3: Choose the Restore Data
- Once you are done selecting the restore version, the next step is to select the Restore data. A tree listing backed up VMs along with its disks will be displayed. Click (+) to explore the virtual machine further from the web-based console instead of opening the machine and accessing the files. On further expansion, the respective files and folders will be listed. Select the specific files and folders that have to be restored. Click Next to proceed to configure the restore option.
Vembu supports File Level Restore only for NTFS File System. If there is an error while listing VM(s)Disk(s)Volume(s), check if Vembu Storage volume is corrupted/ chunk files are not available |
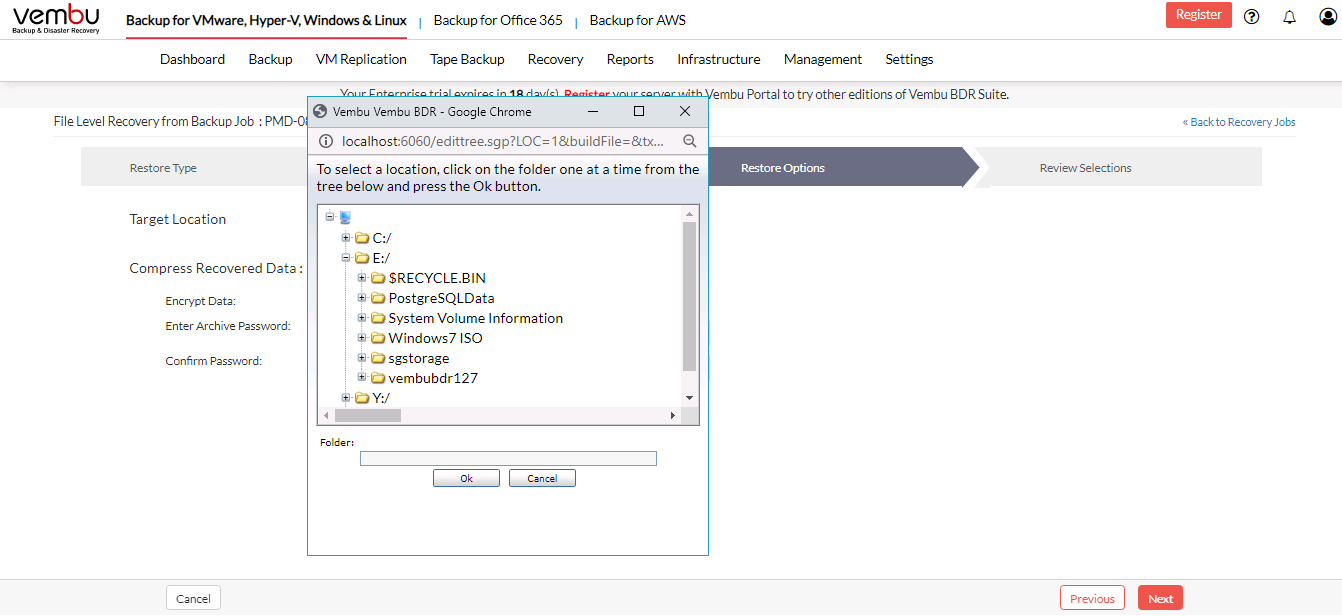
Step 4: Configure Restore Options
- The next step is to select whether you want to compress your restore data. Select the Enable option for compressing your restore data.
- You can encrypt the compressed data by selecting the Encrypt Restored files for the Zip process option. Provide the encryption password and configure the restore location where the files are to be restored. The target restore location can either be a local drive on the backup server or any network shared drive that you have mapped with BDR Backup Server. The restore can be directed to the network shared location. Click the Browse icon in the right of the restore location and choose the stipulated drive to which the data will be restored.
- Once the restore is complete, go to the restore location to access the Zip folder. Enter the corresponding password to access the Zip file. The compressed data will be available and can be downloaded from the Restore Reports page.
The password you enter should satisfy the following conditions: 1. The password should contain only the characters [a-z] [A-Z] [0-9] 2. The password should contain at least 6 characters and at most 12 characters 3. The password should not contain spaces or other special characters |
- Click Next to proceed to review your configurations.
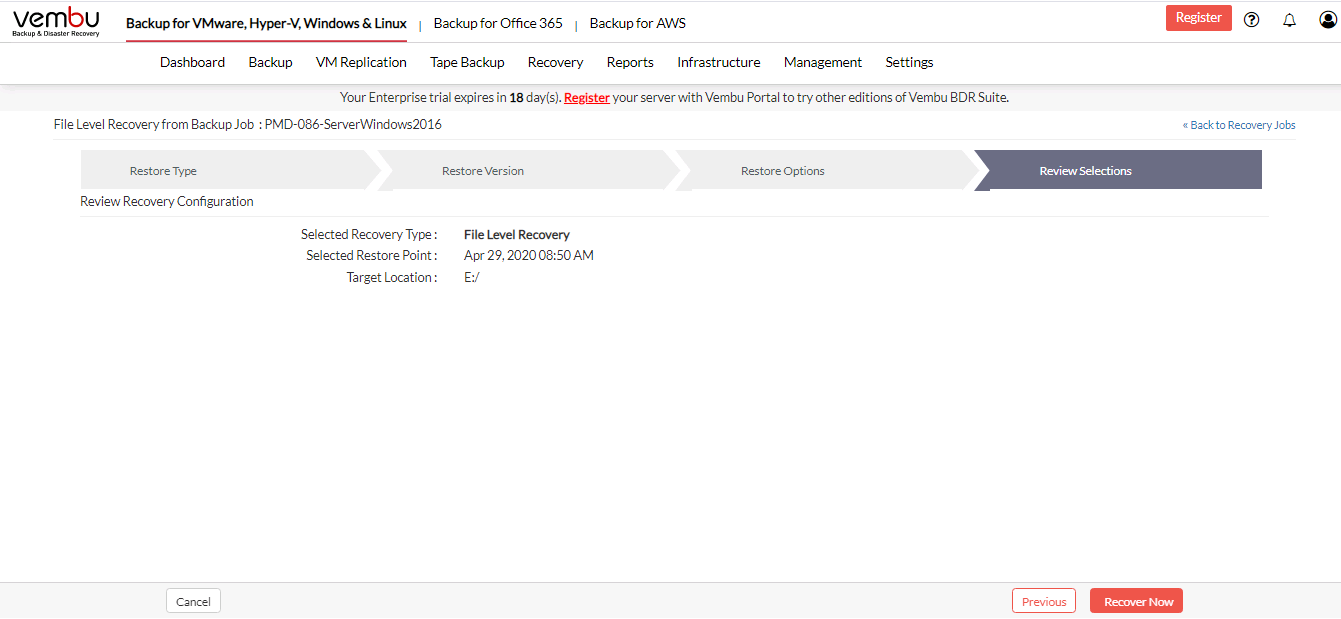
Step 5: Review Configurations
- The final step in this restore process is to review the configurations you have selected.
- Check the following:
- Restore type
- Restore version
- Target restore location
- Verify all the details and click Restore Now.
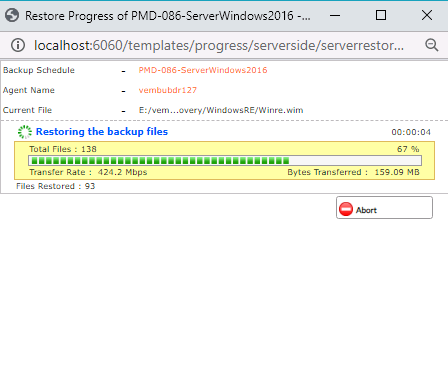
- You will be redirected to the recovery page. In the Status tab click the arrow mark which will open the restore progress window.
- The following details will be available in the restore progress page:
- Backup Schedule
- User Name
- Current File
- Total Files
- Transfer Rate
- Files Restored
To enhance the restore performance, close the restore progress window and open it occasionally to check the restore progress |
- You have the option of aborting the restore process. From the Recovery page click the Abort Server Side Restore option, this will open a pop-up window. Click Yes to abort the restore.
- Or open the restore progress window and click the Abort (-) option which will open a pop-up window. Click OK to abort the restore process.