Disk Mount
Disk Management Mount
This feature is not applicable to Linux Server |

- There may be situations in which you may want to access your backup data instantly, without having to restore the entire backup. The Disk Mount option will be helpful in such scenarios. You can auto attach your backup data to the disk management and find your backup data available.
- When the backup data is attached to disk management, the files will be created virtually by mounting the backup data. This restore type will be helpful in working with specific files and folders, immediately.
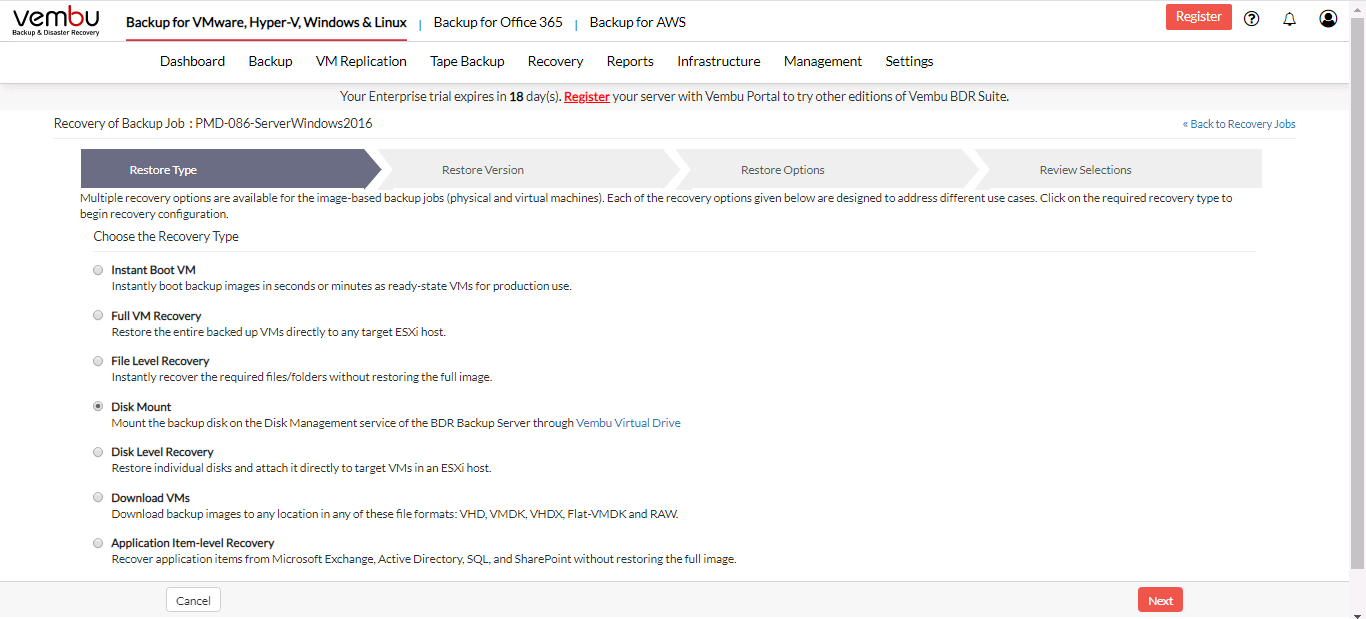
Step 1: Choose the Restore Type
- Click the Recovery tab and select the restore icon near the VMware backup that is to be restored. Select Disk Mount as the Restore type and click Next.
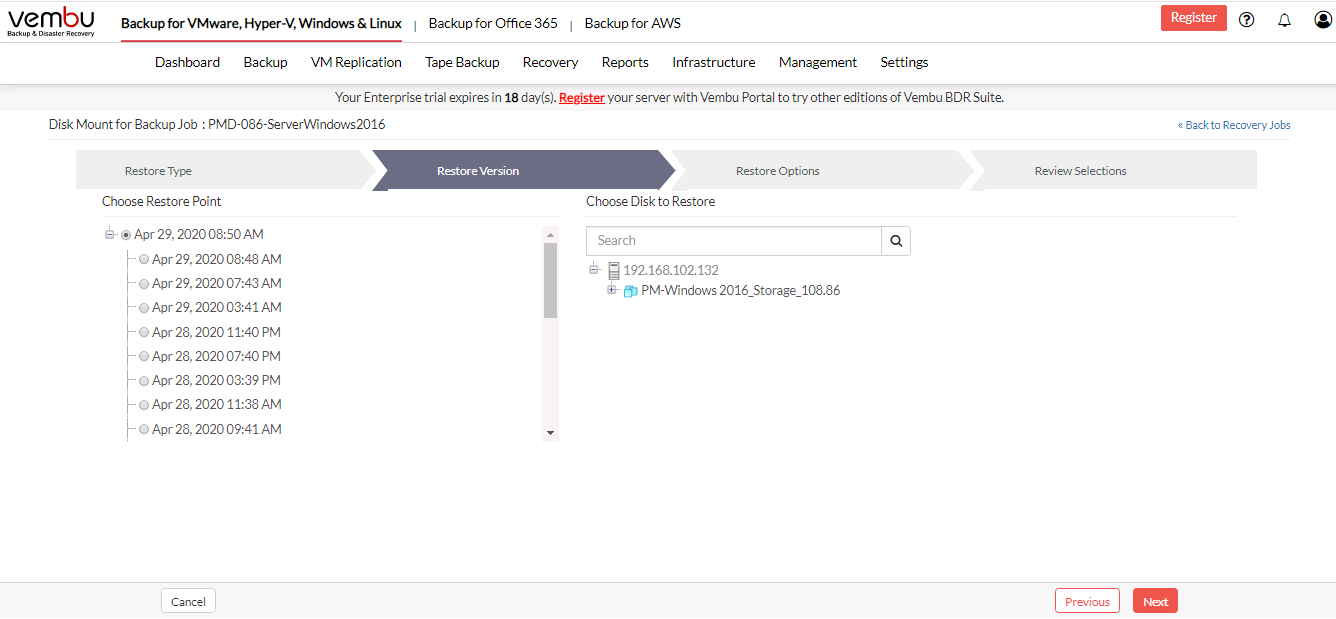
Step 2: Choose the Restore Version
- The next step will be to choose the restore version (time-stamp) of your backup data. The latest restore version will be at the top of the tree followed by the older restore versions. If the time-stamp consists of the Persistent data (+P) option and you restore that version, all the changes you have made in the VM will be restored. The restore version also consists of (d)- daily merge, (w)- weekly merge and (m)- monthly merge.
- The restore version is created based on the end time of the backup (i.e the date and time when the backup process scheduled is completed), this is named Recovery points. The full backup and incremental backup time-stamps are listed with the latest backup version as a parent node and old backup version further sub-nodes. You can fall back to the required time-stamp to recover the backed up data.
- Select the Include persistent boot changes in the restore option if you want to restore your backup data along with the changes made.
- Select the restore version and click Next to proceed to select restore data.
The 'Include persistent boot changes in restore' option will be available only if you are restoring the time-stamp with (+P) |
If the backup is mounted unmount the backup from the Recovery page and then proceed with the restore process |
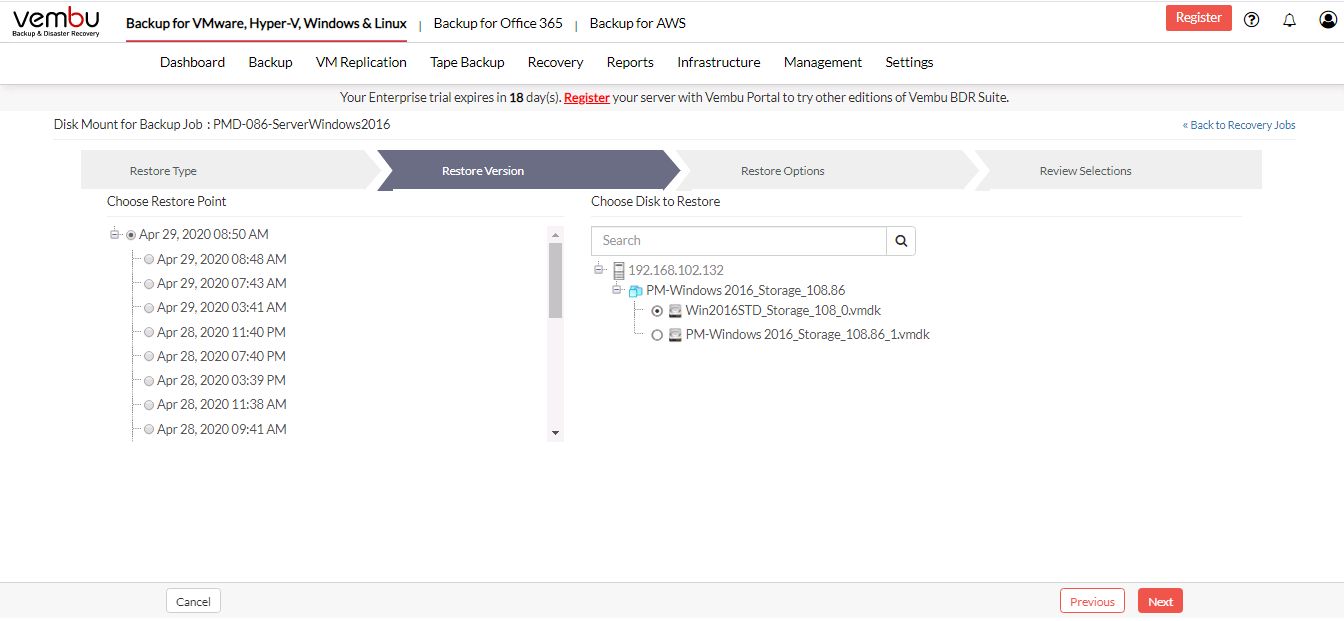
Step 3: Choose the Restore Data
- Once you are done selecting the restore version, the next step is to select the Restore data. Select the disk that has to be mounted in the disk management for the restore process.
- You can search for a particular VM from the search tab. Click Next to proceed to review your configurations.
You cannot mount more than one disk simultaneously. Choosing multiple disks for the mount process will display the error message “User allowed to restore only one disk at a time". If you choose multiple disks, previous selection should be ignored |
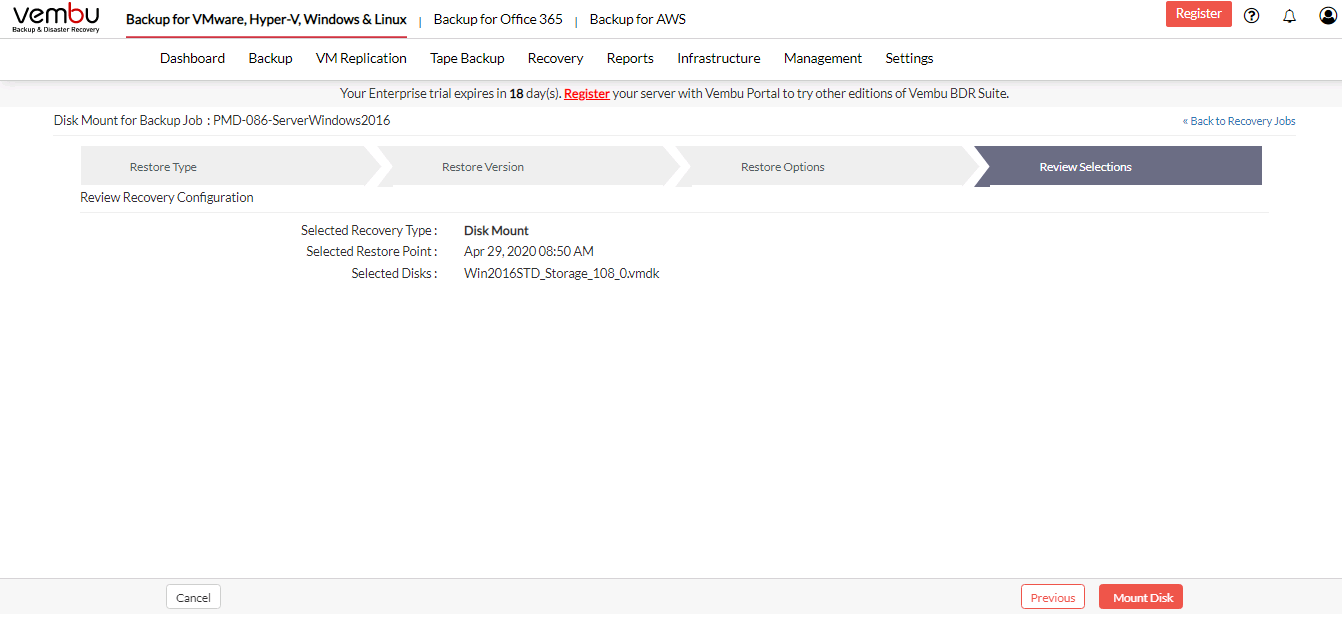
Step 4: Review Configurations
- The final step in this restore process is to review the configurations you have selected.
- Check the following:
- Restore type
- Restore version
- VM machine selected for restore
- Verify all the details and click Restore Now. This will trigger the Disk Mount process.
Once done with the requirement, unmount backup data. This will resume the backup job so that increments will run as per schedule |
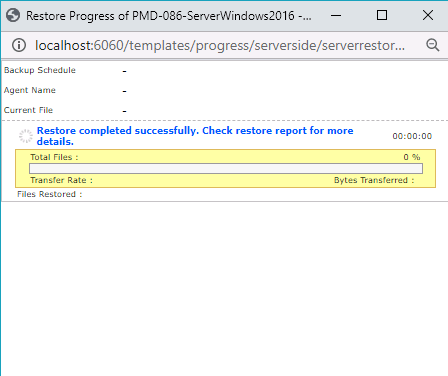
- You will be redirected to the recovery page. In the Status tab click the arrow mark which will open the restore progress window.
- The following details will be available in the restore progress page:
- Backup Schedule
- User Name
- Current File
- Total Files
- Transfer Rate
- Files Restored
To enhance the restore performance, close the restore progress window and open it occasionally to check the restore progress |
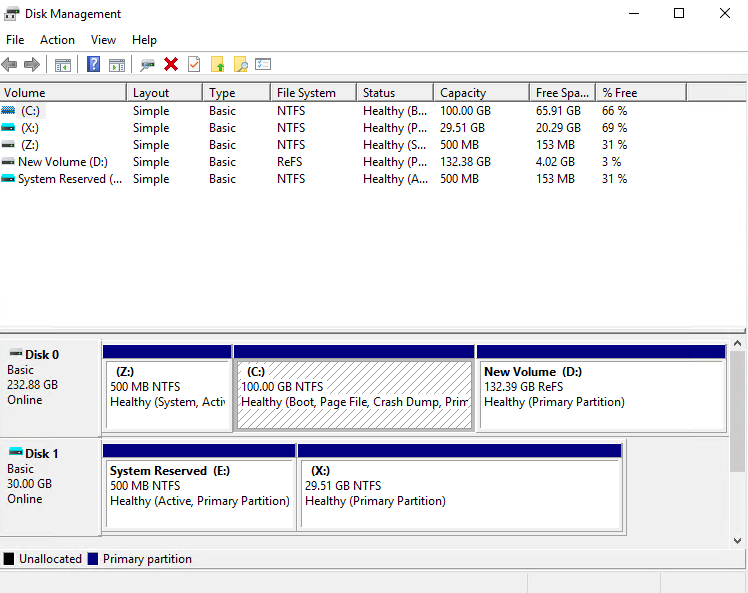
- Open Disk Management. You can find the restored disk attached, indicated in blue.