ConnectWise Ticketing
Make sure you have configured ConnectWise Manage Settings before you enable the ConnectWise Ticketing. You can navigate to 360 Server -> Credential Management -> ConnectWise Manage.
ConnectWise Manage Automatic Ticketing
To enable the ConnectWise Ticketing, navigate to the Reports -> ConnectWise Ticketing.
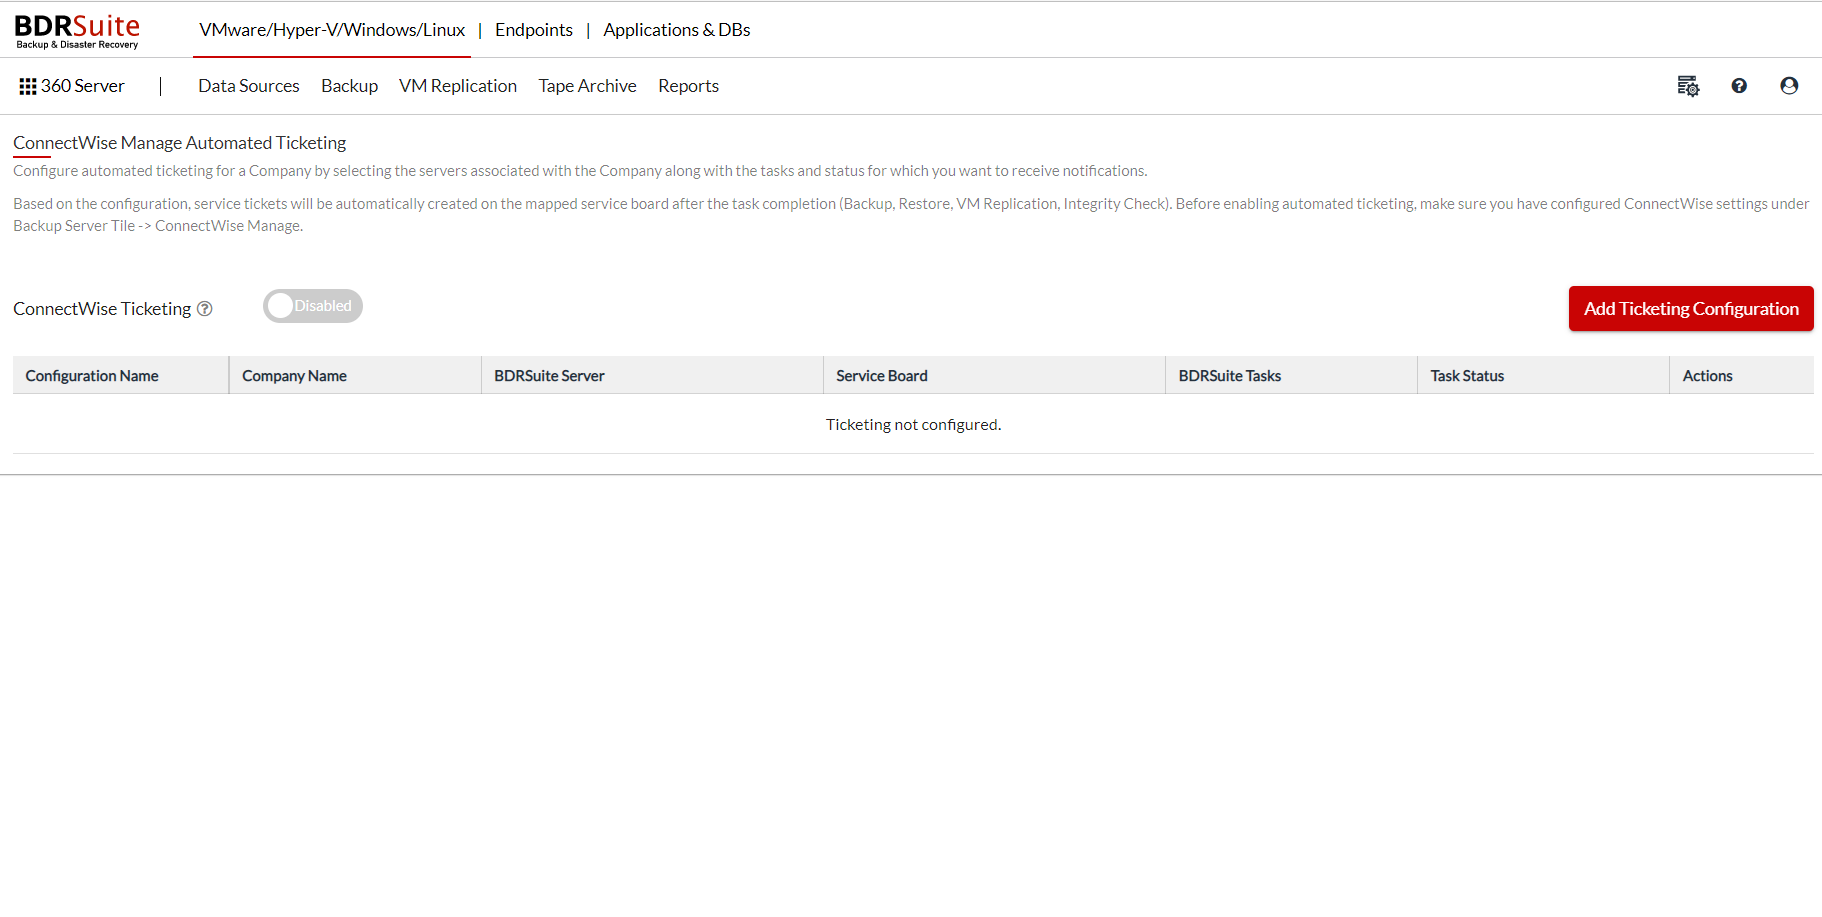
Toggle the button to enable the ConnectWise Ticketing and click on Add Ticketing Configuration.
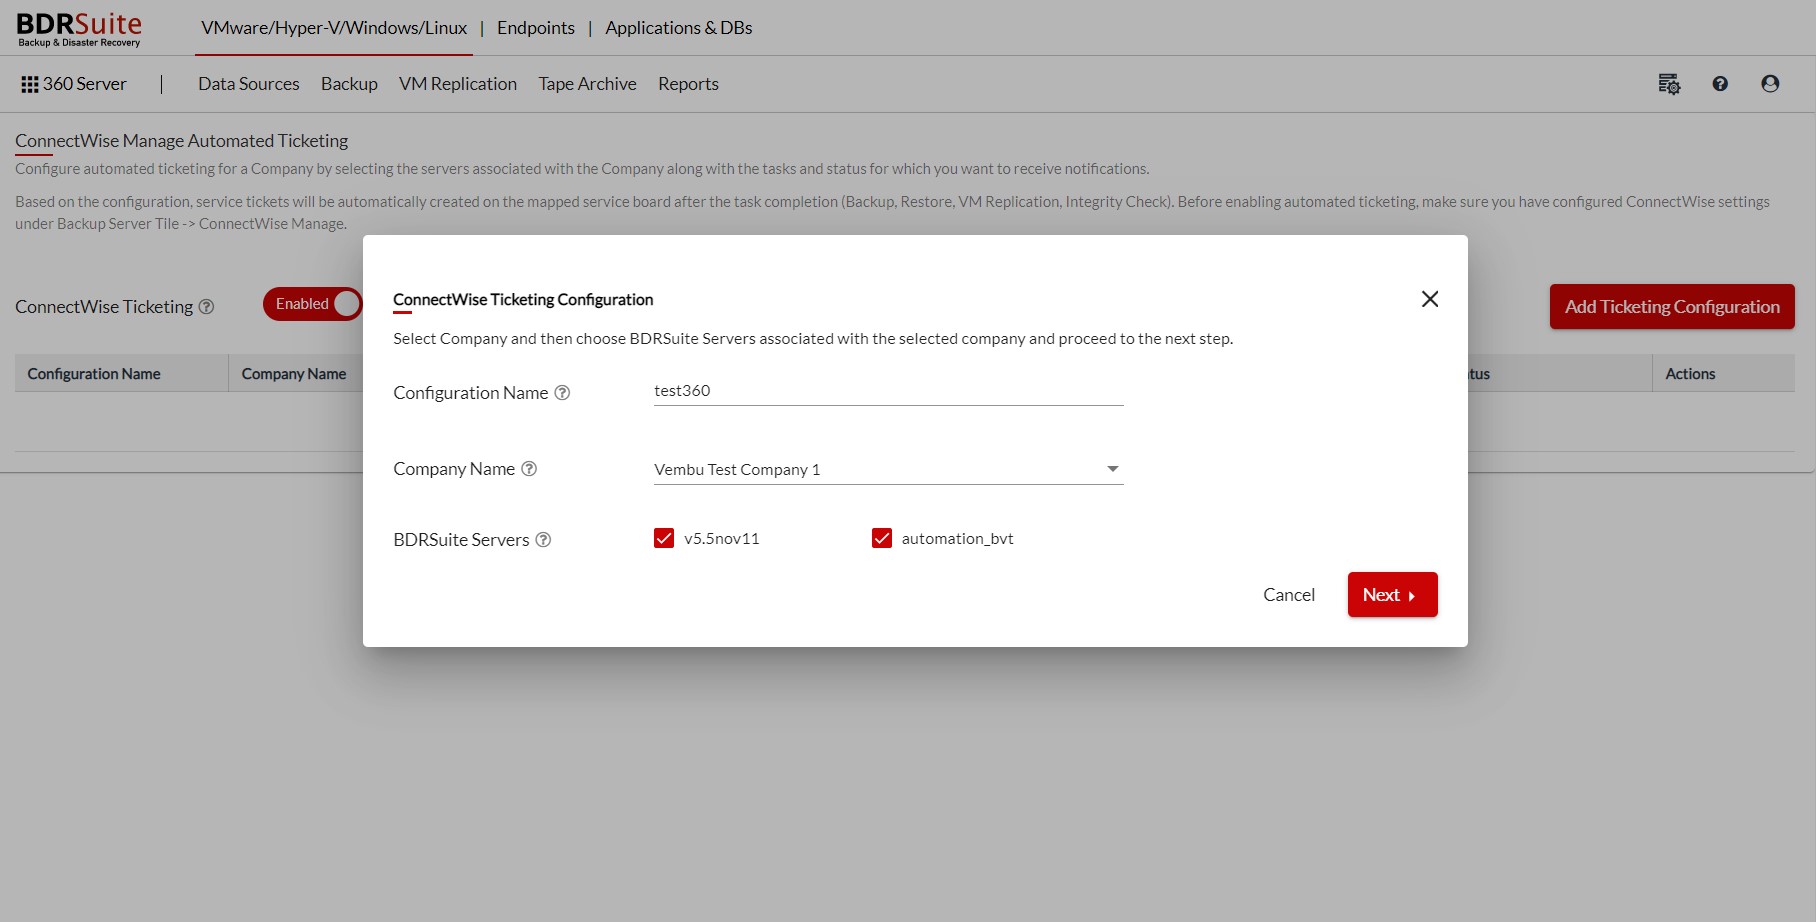
- Configuration Name: Enter a unique name to identify this particular ticketing configuration
- Company Name: Select the Company Name/ID from the drop-down menu. The Company Name/ID corresponding to the various clients under your ConnectWise Account is listed here.

|
Note: You can then change the company when required and the tickets will be automatically created based on the latest selection(Company) after the settings have been changed. |
- BDRSuite Servers: Select the BDRSuite Servers that are associated with the selected company.
After entering the above details click on Next.
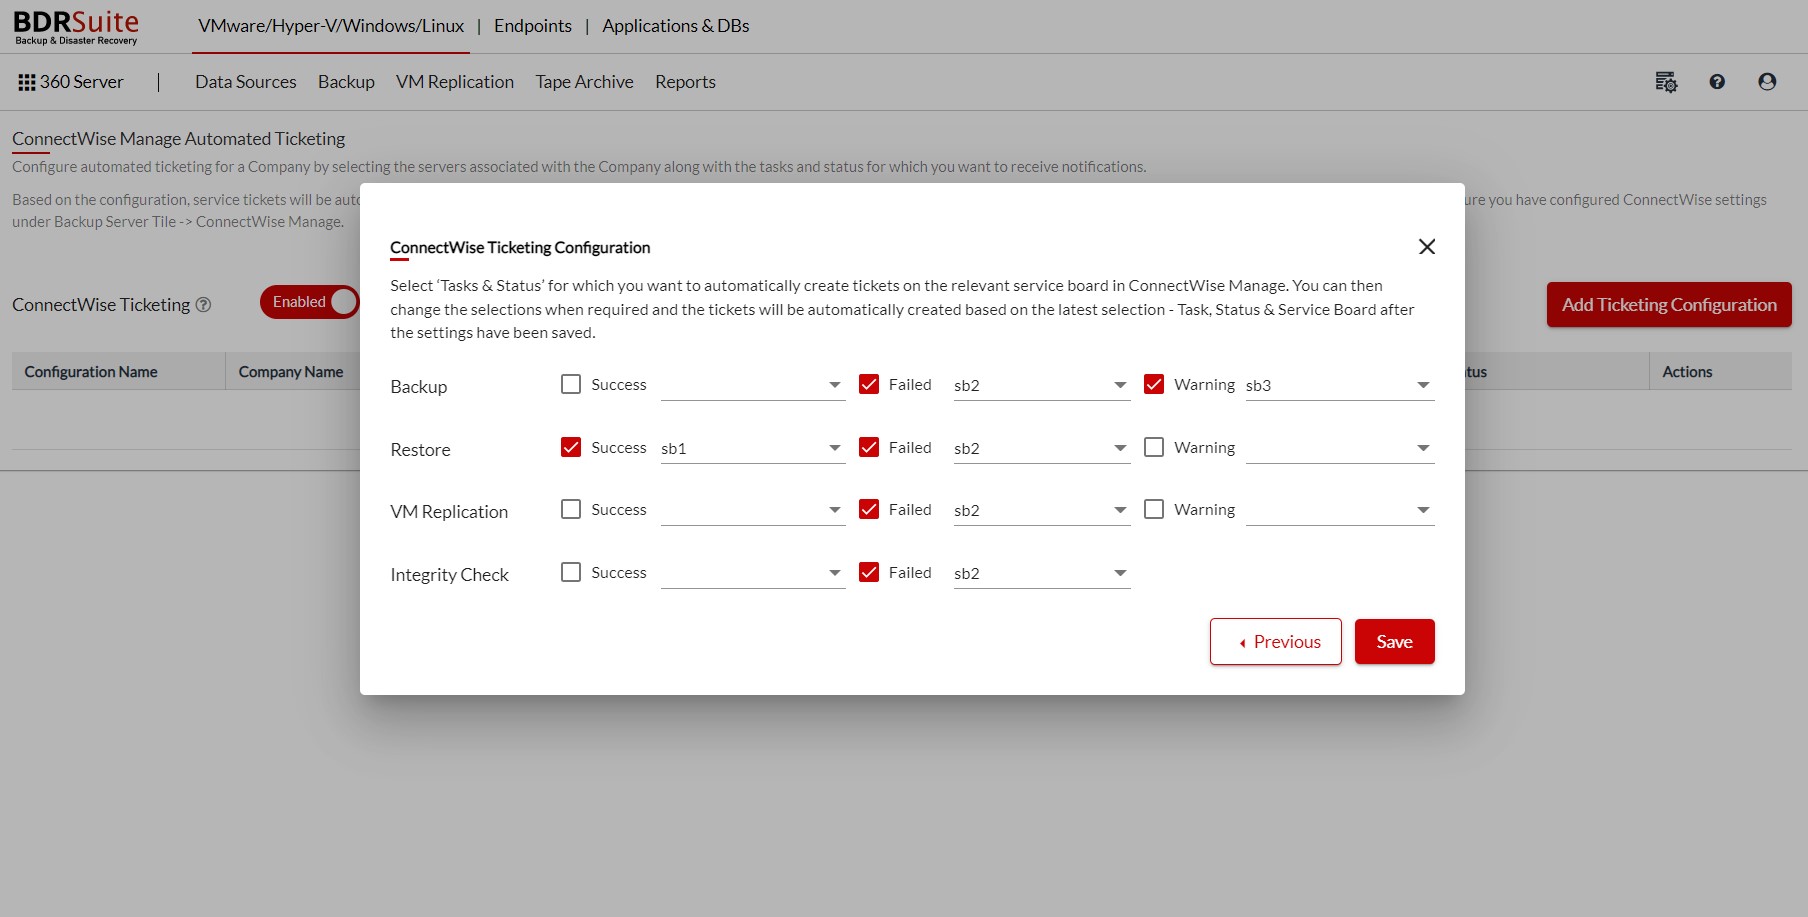
For the Tasks (Backup/ Restore/ VM Replication/Integrity Check) select the required status (Success/Failed/Warning) and the Service board to which you want to automatically create tickets in the ConnectWise Manage and click on Save.
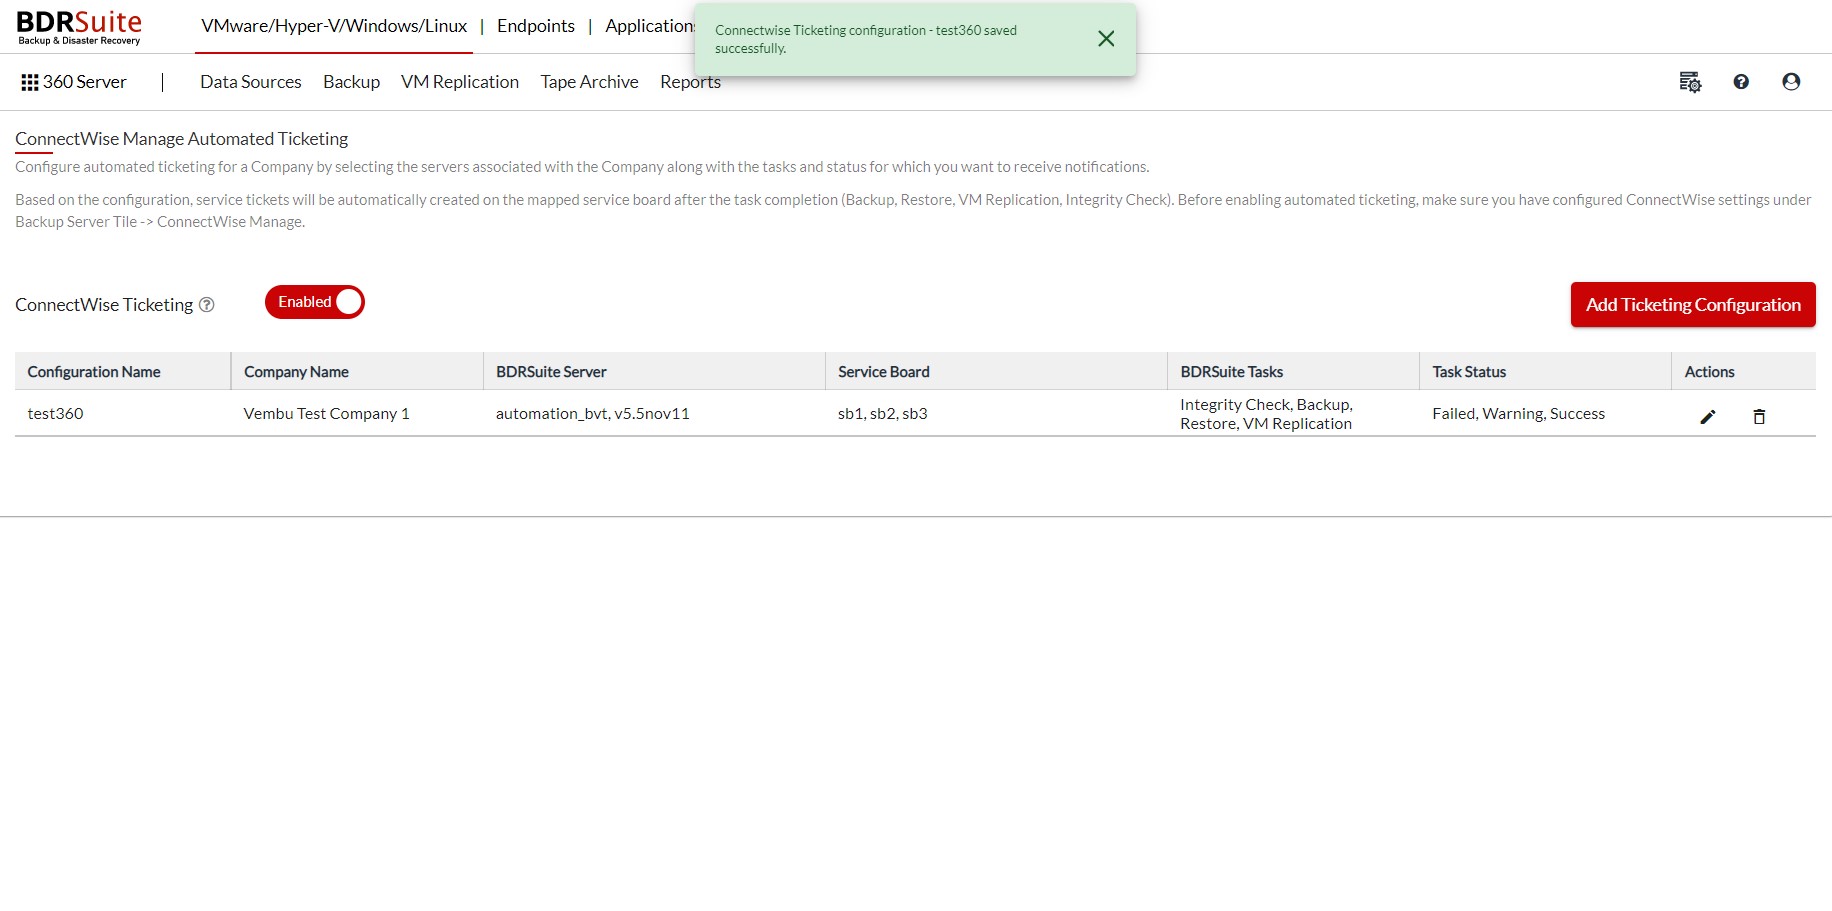
From the time ConnectWise Manage has been enabled for the first time, the ticketing process will begin.
In case you want to disable the ConnectWise Manage you can do the same by navigating to the Reports -> ConnectWise Ticketing and toggle the button.
After enabling ConnectWise Manage Ticketing, when you disable ConnectWise Ticketing and enable it again after sometime, ticketing will resume from where it left off previously, that is starting with the events that occurred from the time you disabled the ticketing.