Recovery to Microsoft Azure
Perform restore of the entire backed up VM/Host as an Azure VM to any target Microsoft Azure Account with this recovery option. Navigate to the Recovery tab-> Restore Backup Data->Restore icon of the respective backup job you would like perform recovery for.
Step 1: VM & Restore Type
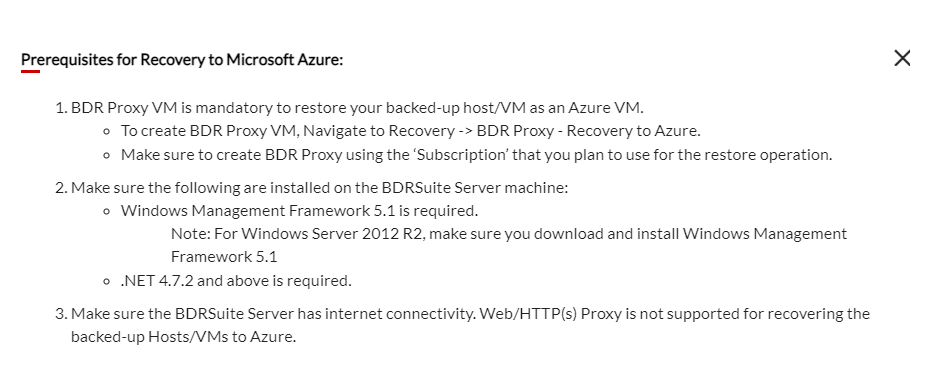
Choose the VM that you want to restore and select the restore type as Recovery to Microsoft Azure. Check the prerequisites before proceeding.
Step 2: Restore Version
Multiple restore points as per the scheduling and retention policy configured will be listed. Choose the required restore point.
Step 3: Restore Option
Enter the target Microsoft Azure Account and the target VM Account details.
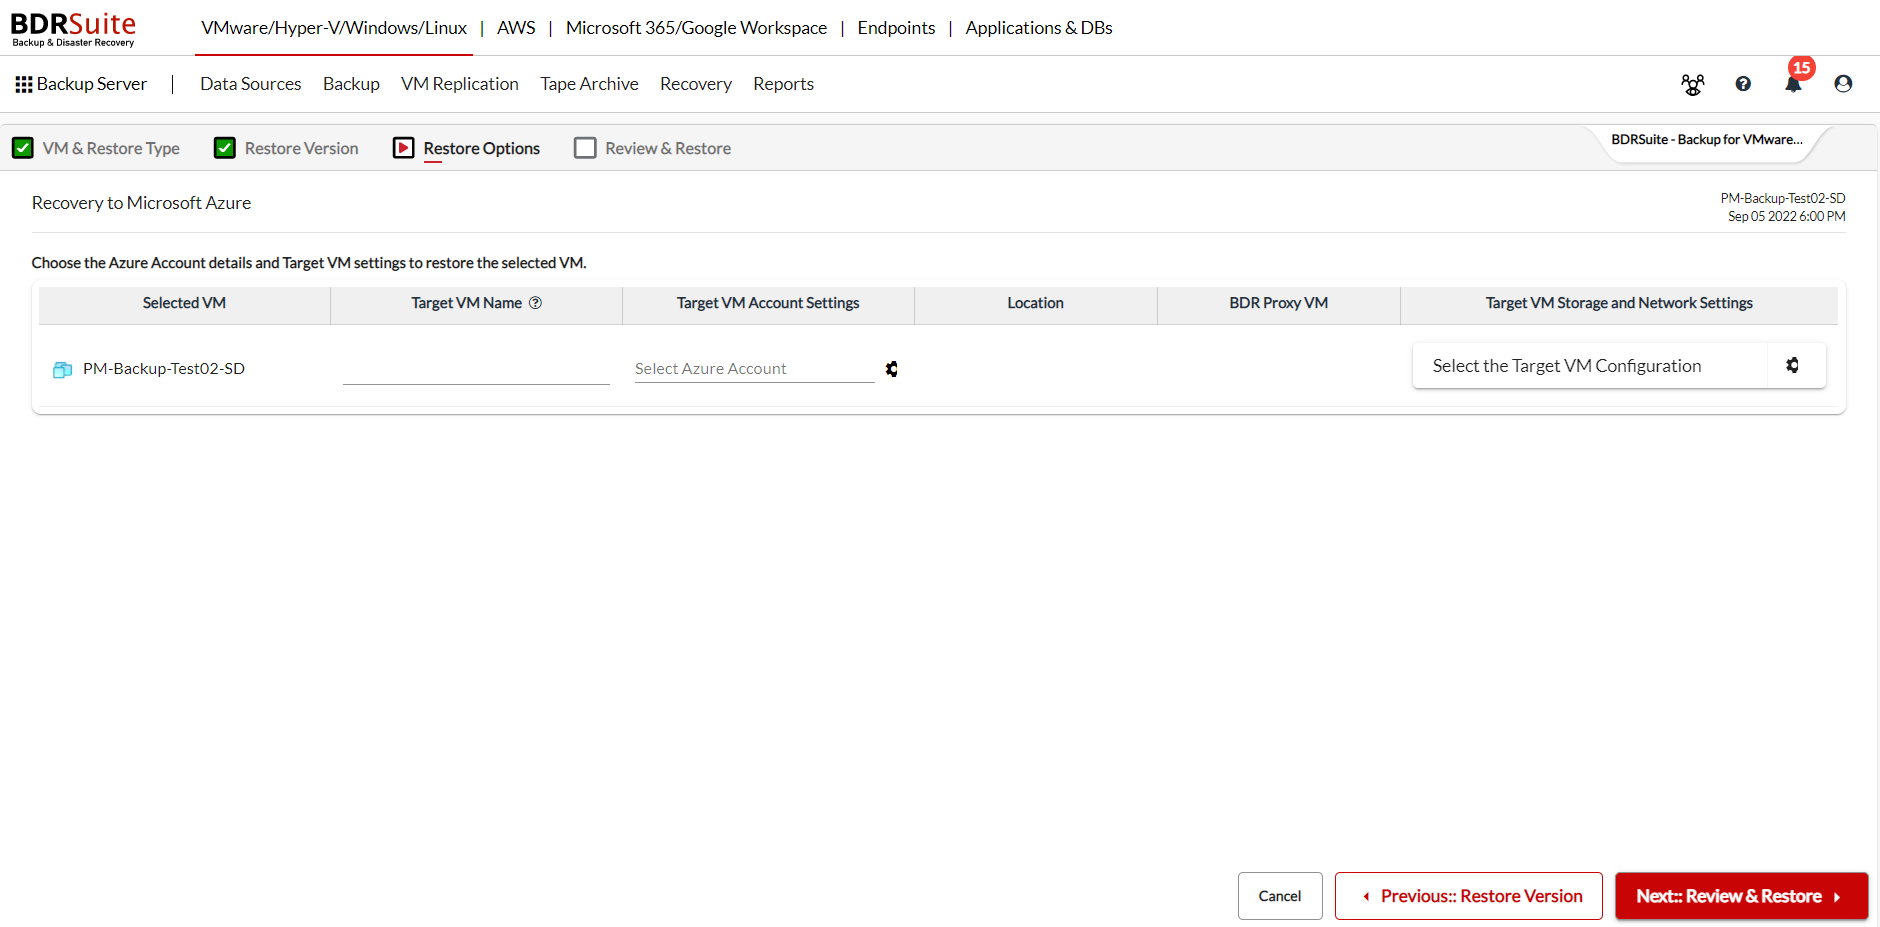
Selected VM: The machine that has been chosen to be restore to Microsoft Azure will be listed here.
Target VM Name: A unique name to identify the target that will be created after restoring.
Restore will fail if any other VM in your Azure Account uses the same name provided here. So make sure to give a unique Target VM Name. |

Target VM Account Settings: Click on the 'Select Azure Account' option and select/enter the required details.

- Azure Account : Select the Azure Account that would you want your backed up machine to be restored to.
|
- Subscription: The subscriptions associated to the selected Azure Account will be listed. Choose the same subscription you used for the BDR Proxy VM Creation.
- Location: Choose the appropriate geographical location.
- Proxy VM: The BDR Proxy VMs configured in the selected location will be listed and you can choose.
- Resource Group: The resource group of the selected locations will be listed and you can choose.
Click on Apply after entering the details and you can see the target VM account settings updated.
Location: The selected location will be updated here
BDR Proxy VM: The BDR Proxy VM chosen for the restore is shown here.
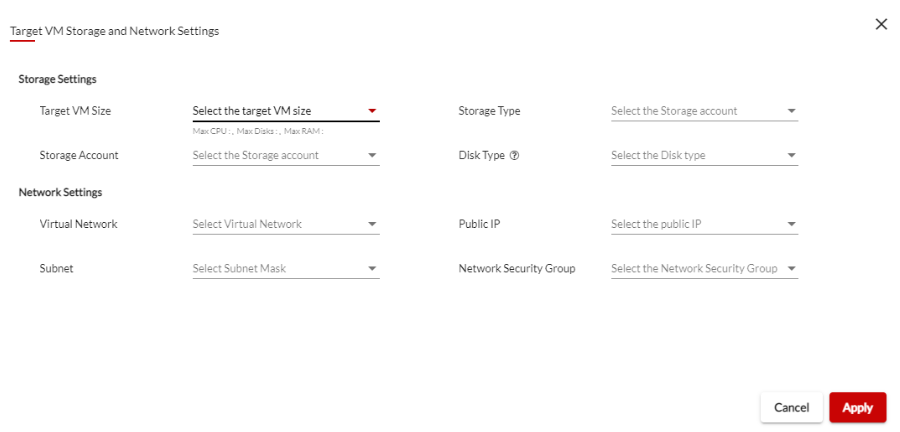
Target VM Storage and Network Settings: The Storage and Network Settings of the VM that is to be created after restore have to be updated here. Click on the settings icon and the following page will open.
Enter all the details and click on apply.
Step 4: Review and Restore
- The restore configuration you selected will be summarized and presented. Review it and click on restore.
- Confirm and click on Ok, Proceed.
- The restore will initiated and the progress can be checked by clicking on the icon under status tab.
 |
Note: The backed up VM Template cannot be restored Microsoft Azure. A VM Template supports the following types of restores;
|