Microsoft SQL Server Recovery
Different types of recovery options will available from which you can choose the one suiting your requirement.
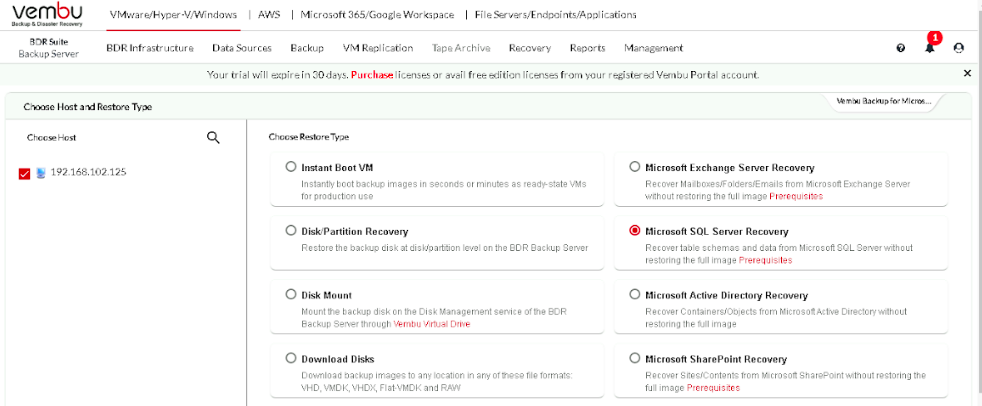
Step 1: Choose Host and Restore Type
Choose the host from the list of backed-up hosts available on the left side of the screen and choose what type of restore you want to perform. In this case, choose Microsoft SQL Server Recovery.
Step 2: Choose the Restore Version
You can select the restore point which will be available to you depending on the retention policy you used during configuration. Based on the requirement choose a restore point.

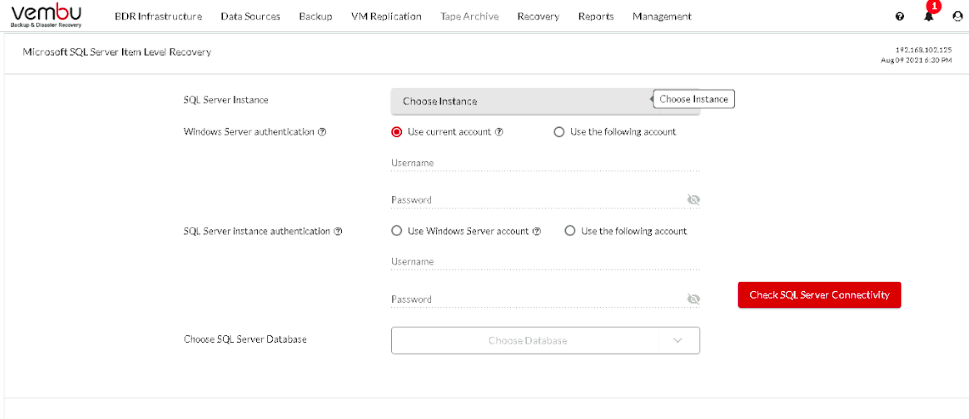
You need to choose the SQL Server Instance from the drop-down menu.
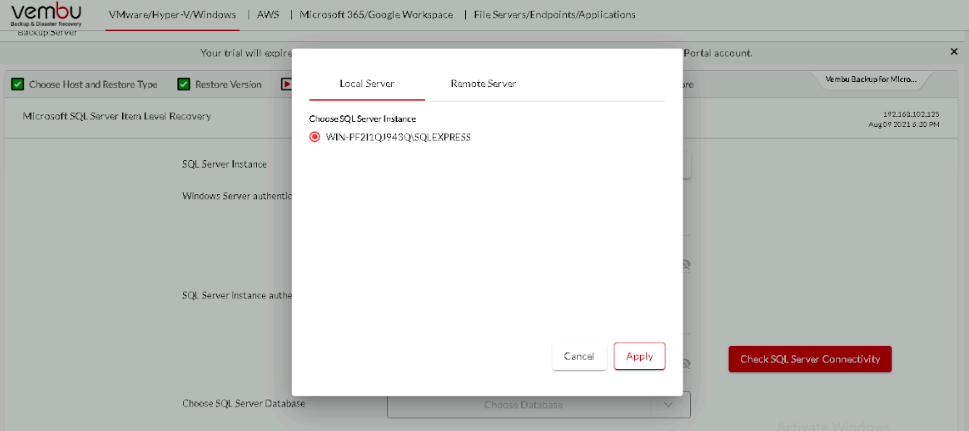
 A list of the Local Server and Remote Server will be shown from which you can choose.
choose between the current account or use the following account by giving the credential details below to authenticate the Window Server.
Next, you need to authenticate the SQL Server Instance. You can either use the Window Server account or the following account by providing the credential details.
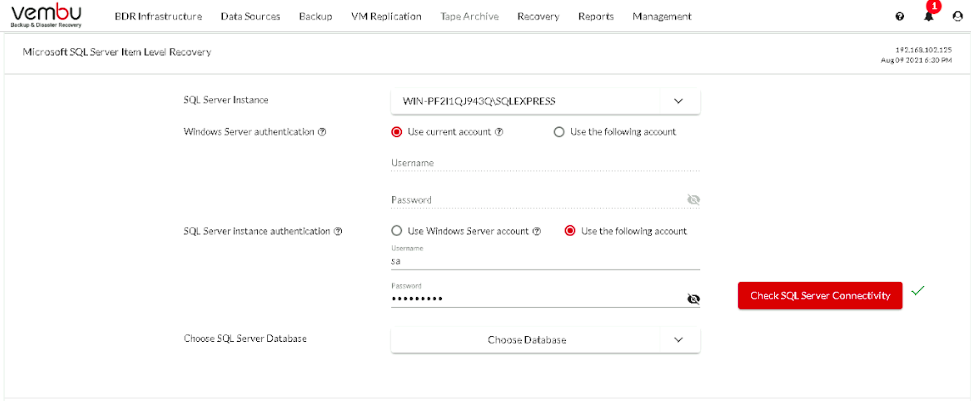
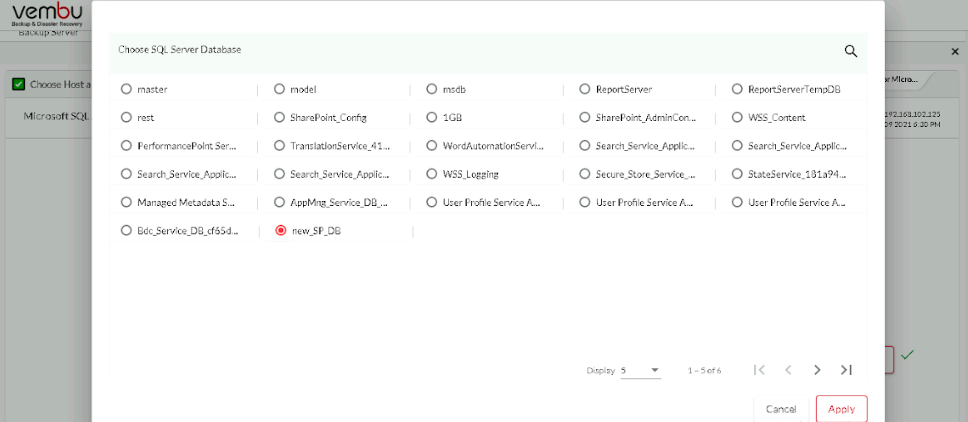
Now, choose the SQL Server Database by clicking on the drop-down menu. A window with a listed SQL Server Database will be shown from which you can choose the required Database.
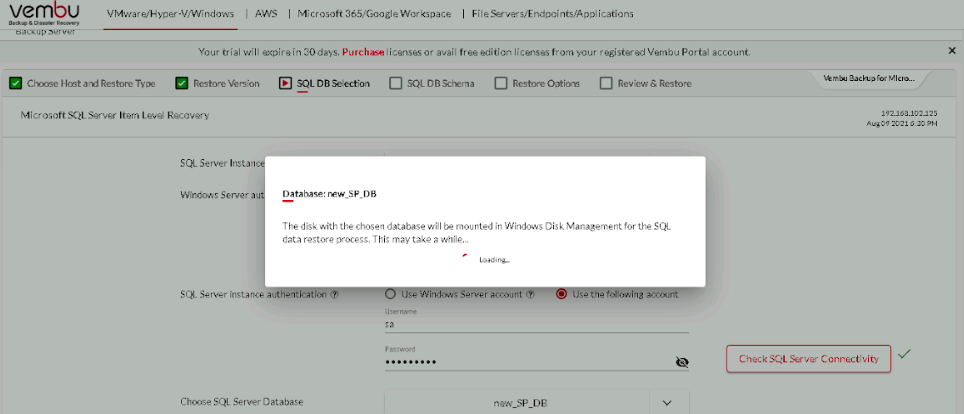
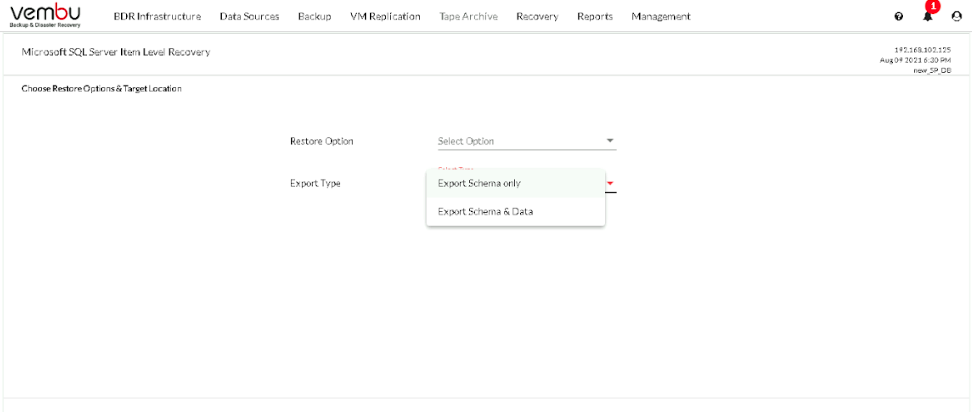
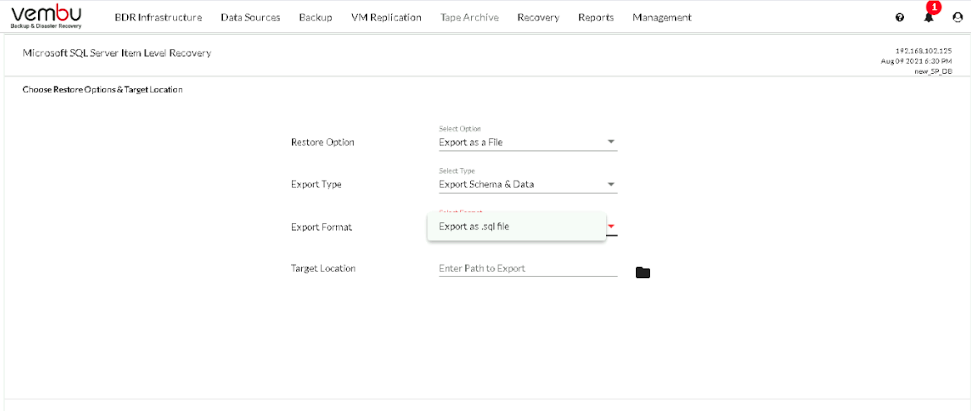
You will have the option to select one or more schema.

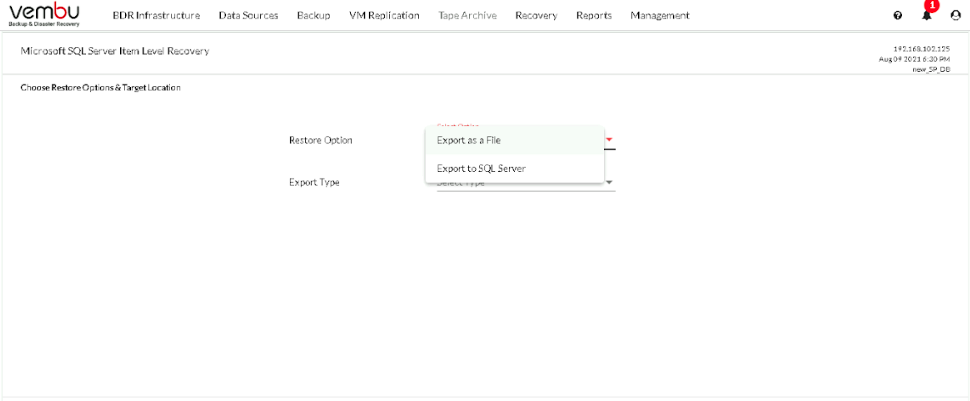
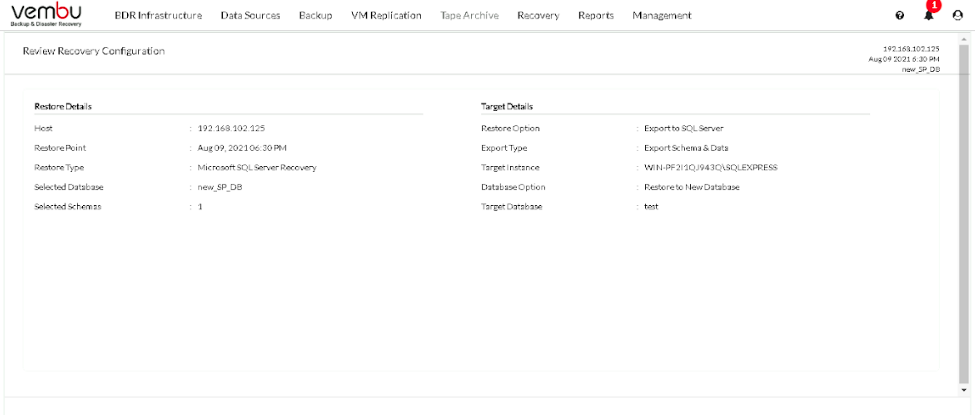
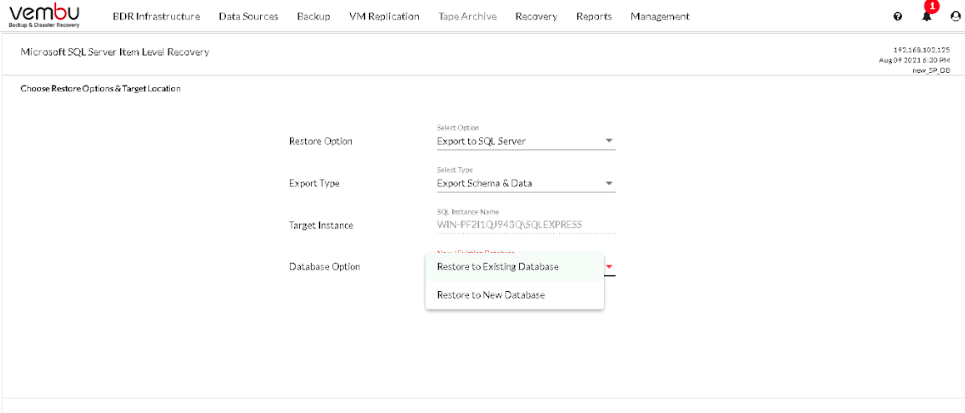
 If you select to export to SQL Server, then choose the Target Instance and the Database options
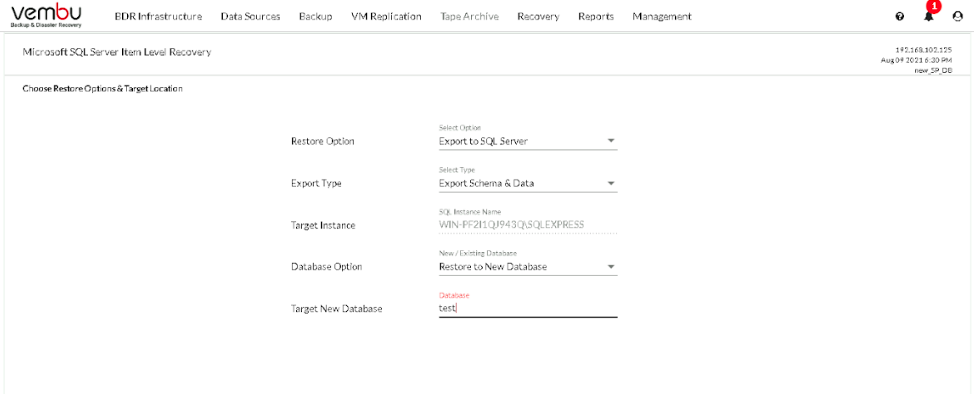
Review the restore configuration and click on Restore