Tape Infrastructure
- Select the Tape Archives tab and click the Tape Infrastructure option.
- To administrate Tape Backup and restore procedures, you must add the tape server from the BDR Backup Server Web-Console. Adding a tape server to the backup infrastructure makes data transfer possible between backup repositories and the tape server.
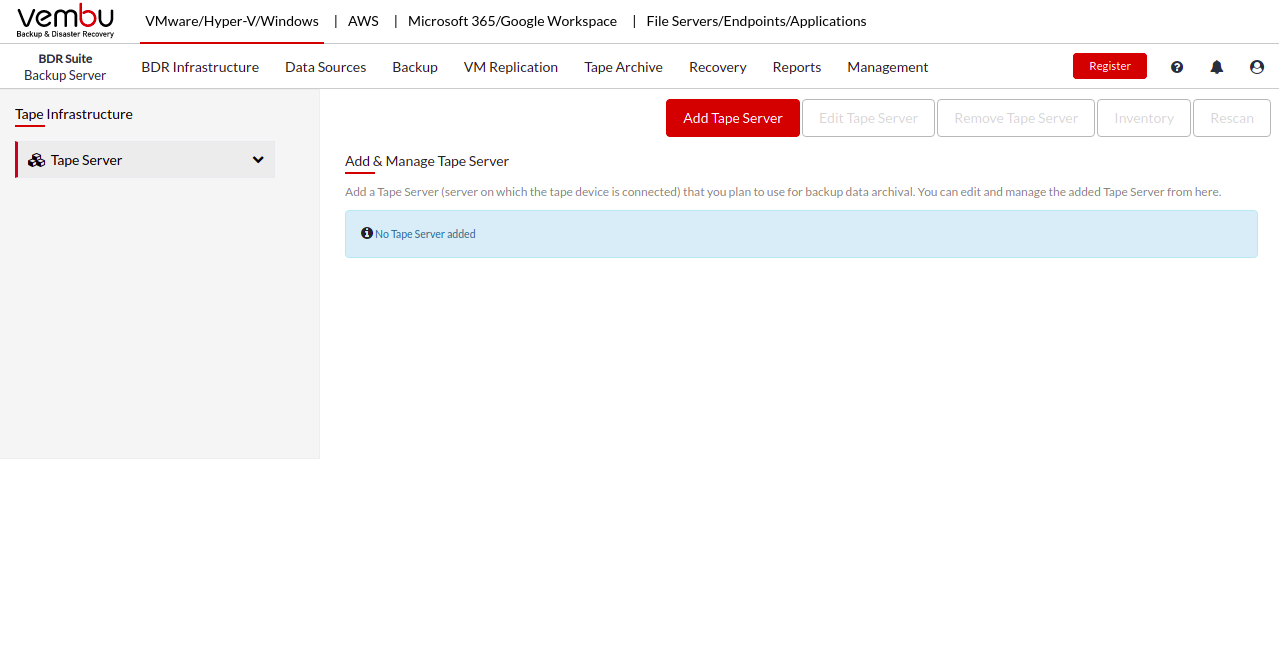
Adding Tape Server
- Click Add Tape Server button and enter the tape server credentials in the pop-up window that appears:
- Hostname/IP Address
- Add credential using the Add Credentials or if you have previously added the credentials, select it from the select credentials drop-down list. Click Here to read more on credentials.
- The port number is set to 32009 by default.
- Once all the details are provided, click the Save button.
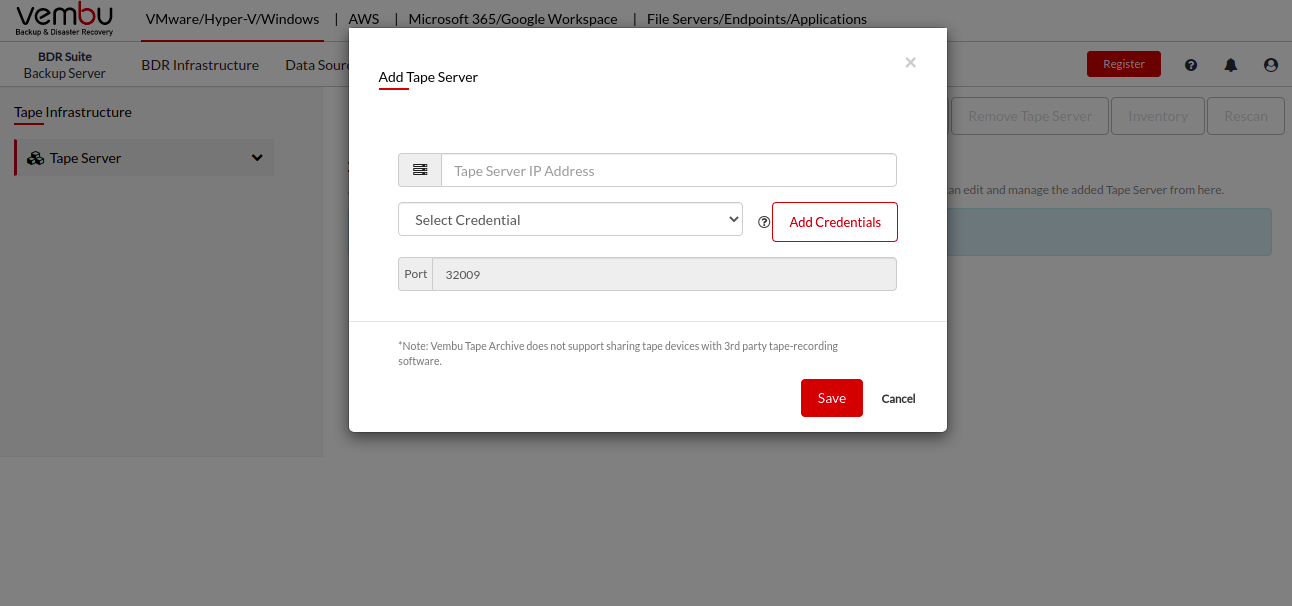
Vembu Tape Backup does not support sharing tape devices with third-party tape-recording software |

- Once a tape server is added, Vembu recognizes the number of slots, drives, and media in it. Tape infrastructure displays the list of drives and slots available under the added tape server.
- Expand the tape server in the left pane to view the tape server details such as - Name, User Name, Build number, and the Version of Vembu client installed in the tape server.
- Enable the check-box alongside the tape server and choose the respective action to:
- Edit, Remove, Inventory or Rescan the tape server.
Edit Tape Server: This option allows you to edit the login credentials of the tape server(if modified).
Remove Tape Server: This option removes the selected tape server from Vembu tape infrastructure.
Inventory: When a new tape server or media is added to Vembu tape infrastructure it will be considered Unrecognized. Run the Inventory job for that tape server or media so that it is identified.
- It is mandatory to perform inventory when a new tape server is added to scan the capacity, free space, and state of media available in a tape server. Once you are done performing inventory action, proceed to create media pools and perform backup configuration.
Rescan: This option is used to rescan the entire tape server to identify newly added media which further requires inventory to be performed before use.
You cannot remove a tape server when a backup or restore is in progress with respect to the tape server |
Edit Tape server
- Expand the tape server node in the left pane to view the list of the tape libraries available.
- Enable the check-box alongside a specific library and choose the respective action to:
- Rename, Inventory or Rescan a specific library
Inventorying and Rescanning a library performs respective actions with respect to the chosen library.
- Expand the library node in the left pane to view the list of available drives and media.
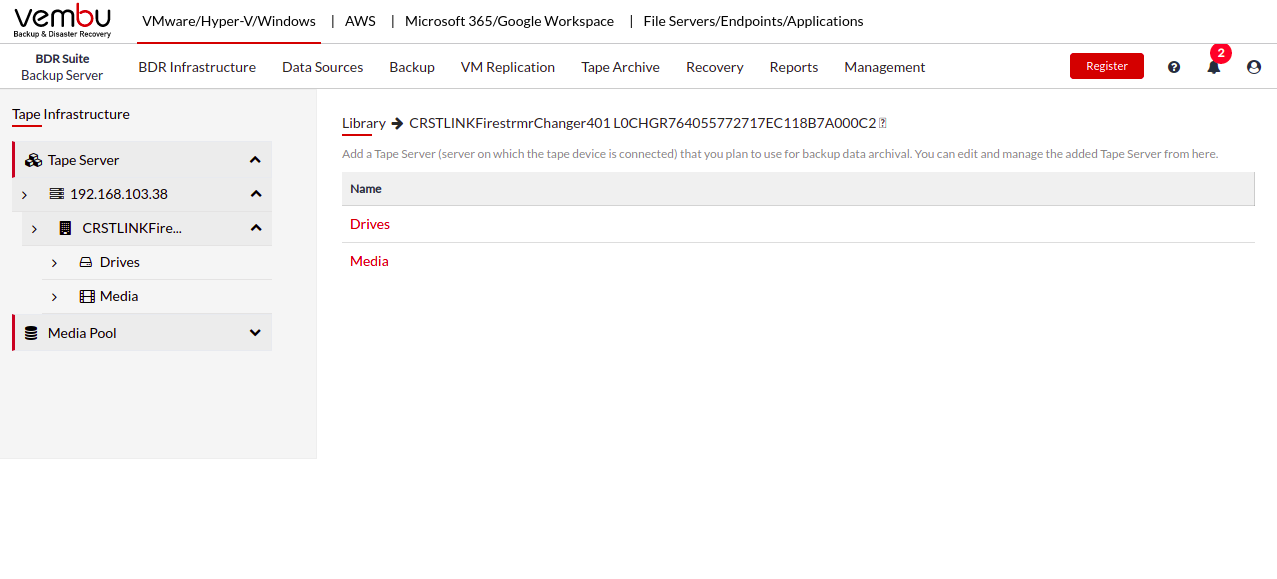 Drives
This section lists the available drives with the following details:
- Name - defines the name of the drive.
- Manufacturer - Name of the drive manufacturer
- State - defines the state of the drive, either online or offline which means the drive is enabled or disabled respectively
- Loaded Media - Shows the name of the media tape when loaded in it.
Using BDR Backup Server and Offsite DR Server you can access only one drive at a time for any ongoing operation, parallel processing is not supported |
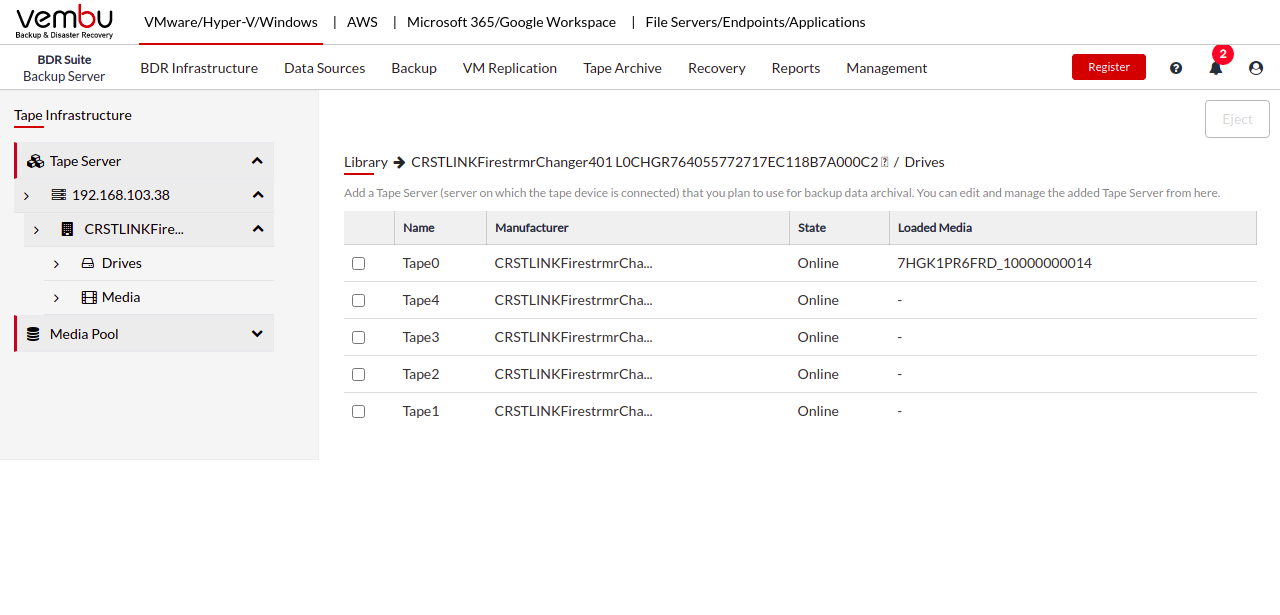 To eject a specific drive from the list of available drives, select the check-box near the respective drive and click the Eject option. The drive will be ejected from the library.
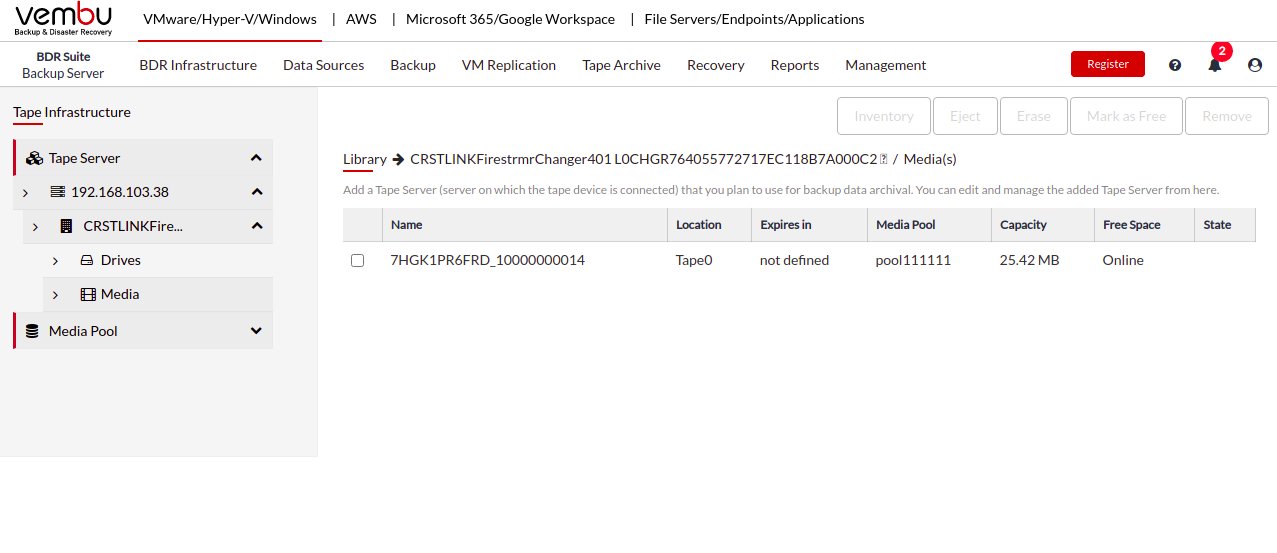
Media
This section lists the available media with the following details such as:
- Name - Name of media.
- Location - Slot in which the media is located.
- Expires in - the life expectancy of media
- Media Pool - media pool under which the media is categorized
- Capacity - total size of media
- Free space - available storage in media
- State - defines the state of media - online or offline
 Enable the check-box alongside a specific media and choose respective action to:
- inventory, eject, erase, remove or mark a specific media as free.
Inventory: Perform inventory job for selected media.
Eject: Eject the chosen media.
Remove: Removes media from the media list and once rescanned it will be listed under unrecognized media.
Mark as Free: Removes the media from the existing media pool and mark it as free.
Erase: This option allows you to erase the media, providing two methods: short erase and long erase.
- Short erase: wipes the tape header and its a quick process.
- Long erase: instructs the drive to physically do an erase of the entire media. This process is time-consuming and may take minutes to hours to complete.
Short erase is not supported by some tape devices |