Step 1: Select MS SQL Server
From the Backup tab select MS SQL Server
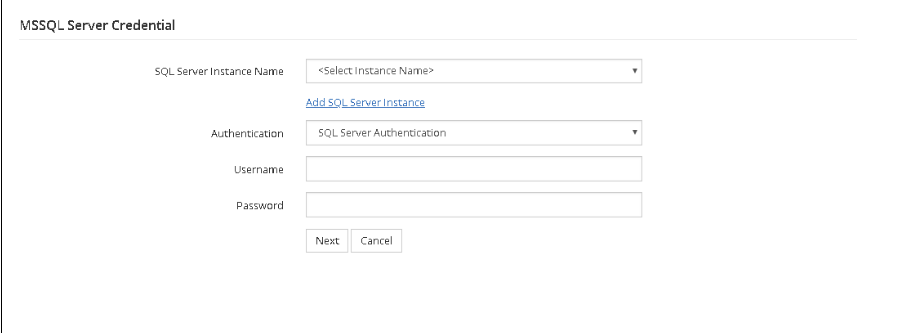
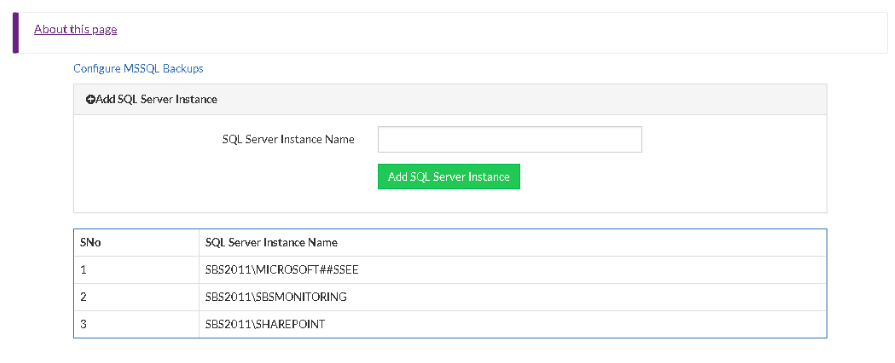
- Select a SQL Server Instance Name (i.e MS SQL instance which is to be backed up) from the SQL Server Instance Name drop-down list. You can add SQL Server Instance from the Add SQL Server Instance option. You can add the MS SQL Server instance name which is not listed for backup. The second table contains a list of automatically detected and/or manually added SQL Server instances in this machine.
- Once you have provided the Instance Name, click the Add SQL Server Instance option. To know more about this page, click the About this page option available at the top of the page.
|

- Click Configure MSSQL Backups option to proceed with the backup process.
|
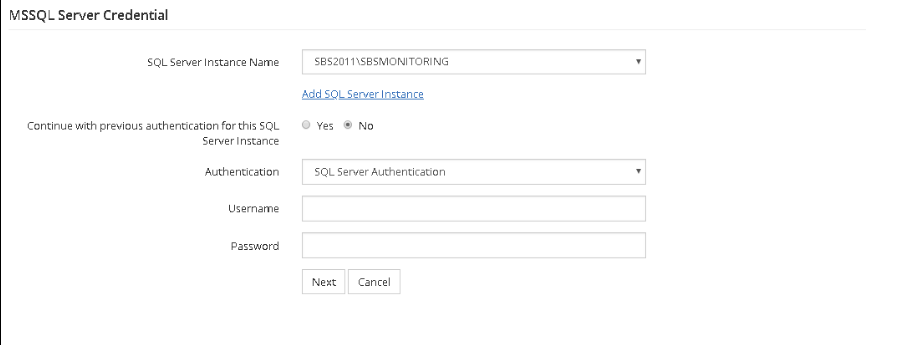
- From the list of SQL Server Instances, choose the required Instance. If you have changed the credentials for that particular Instance, click No option and provide the necessary credentials. If not, proceed with Yes.
- If Yes- Proceed to Configure Database. This option will proceed with the previous authentication which was already provided.
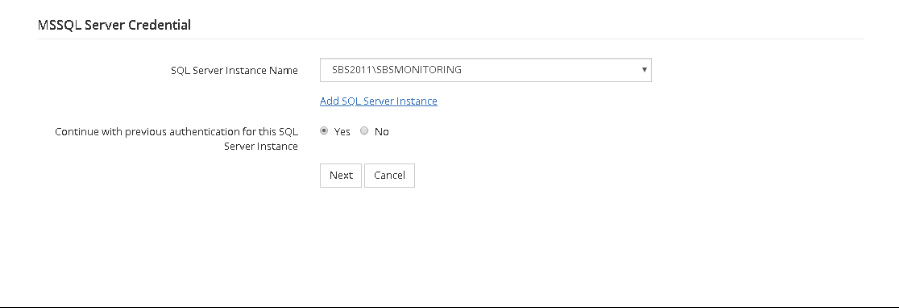
- If No- Provide new authentication credentials based on choice:
- If Windows authentication is selected click Next
- If MS SQL authentication is selected, provide user credentials for that instance and click Next