Restore from BDRSuite Client GUI
The BDRSuite Client for Applications restores your MS Outlook data to a Personal Storage File (.pst file) with the available backup data from the backup server. The BDRSuite Client for Applications provides multiple options to restore the backed up outlook data. You can directly restore the backed up data to the Outlook application. You can restore the Outlook Data to any local folder, which can be manually attached to the Outlook application whenever required. The BDRSuite Client also provides Granular Recovery of MS Outlook data.
Why is Outlook restore necessary?
- The need for MS Outlook Restore arises when a few E-Mail or items have been deleted, if any need for old data, corruption of Outlook Profile, data file gets corrupted, or in case of human errors.
How It Works
- The BDRSuite Client for Applications recovers the backed up data from the backup server as multiple PST for every mailbox folders (E-mail, Mailbox, Notes, Calendar, Contact, etc) to a local drive and then those PST files will be consolidated to single PST file using Microsoft’s Outlook plugin (MAPI). This consolidated PST file can be manually attached to Outlook whenever needed. You can also perform Granular Restore on the Outlook data by using Our Granular Restore tool - BDRSuite Universal Explorer.
- To append existing PST files in Outlook (When corrupted/deleted or in need of recovering to a previous state).
- As a new PST file that can be attached to outlook manually.
Requirements
- Microsoft Outlook 2007/2010/2013
Beginning the Restore Process
- From the Restore tab, click the Restore option that is available alongside the MS Outlook Backup you want to restore. The plugin type will also be displayed near the backup name. Begin your Restore process.
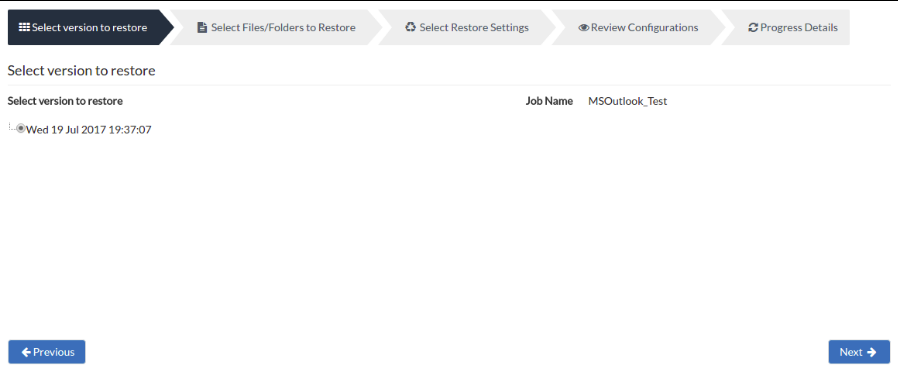
Step 1: Select the version for restore
- Select version to restore- Select the time-stamp from which you want to restore data and proceed to select files/folders. The IP address of the backup server and the name of the backup you are restoring will be available just in case you have selected another backup for restore. The Restore version will be in the following format: Day/Date/Month/Year/Hours/Minutes/Seconds. Click Next to select the Files/Folders for restore.
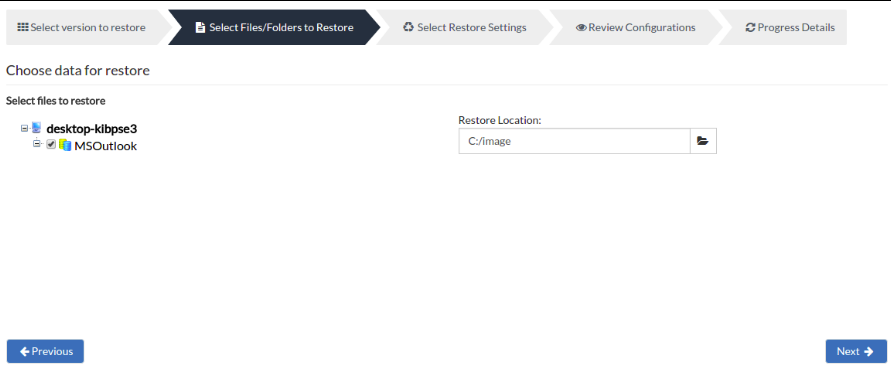
Step 2: Select Files/Folders to Restore
- The next step in the restore process will be to configure the Outlook files/folders that need to be restored. From the Outlook profile displayed choose the required file/folders for the restore.
- Configure the restore location to which your Outlook data will be restored from the backup server. Click Next to proceed further with the restore process.
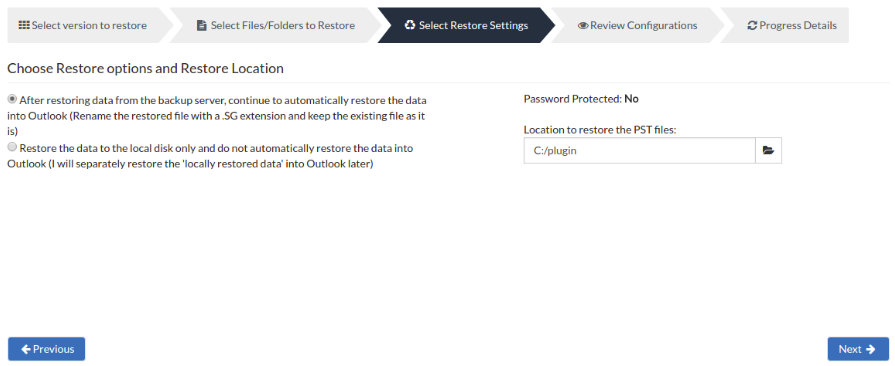
Step 3: Select Restore settings
You will have two options to choose from with respect to the restore data:
- After restoring data from the backup server, continue to automatically restore the data into Outlook
- Restore data to the local disk and do not automatically restore the data into Outlook
- Continue to automatically restore data into Outlook:
- If you select this option, once this restore process is over the changes that happen will automatically be restored to the Outlook. The file that is restored will be stored with a .SG extension and the existing file will be kept as it is and will not be overwritten.
- Restore data to local disk and do not automatically restore the data into Outlook:
- If you choose this option, the backup data(PST files) will be restored to a local location you provide and will remain there alone. It will not be automatically updated into Outlook and you have to manually do this process.
|

Password- This indicates if your MS Outlook backup is encrypted or not. If it is password protected, provide the correct password here.
|
Step 4: Review Configurations
- You have reached the final step of the restore process wherein you have to review the configuration you have provided and click Restore Now option. This will trigger the restore process. Review restore progress and make sure it gets completed successfully.
- You can view the status of your MS Outlook restore from the Status option. Once you click the inverted arrow mark, the page displayed below will be available.
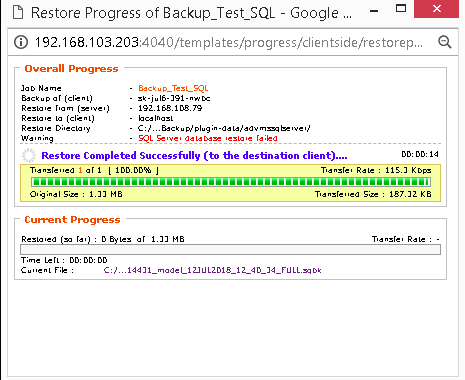
The following details will be available in the Restore Progress Page:
Job Name: Name of the backup job
Backup Of: Client Name
Restore from: From where the restore is happening, either from Client or Server
Restore to: To where the restore is happening.
Restore Directory: The location where the restore is taking place.
Warnings (If any)
Transfer Rate: Speed at which the restore is occurring
Transferred Size: The amount of backup data that is transferred
Original Size: The actual size of the backup data
Time Left: Time remaining for the restore to complete.
Current Progress: The progress of the restore, it will depend on how much data is restored.
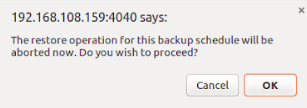
- You can abort your restore if not required from the Abort (-) option available in that window. You will get a pop up as shown below. Click OK to Abort your restore.
|
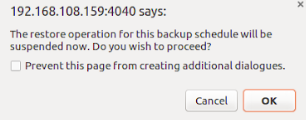
- You can suspend your restore if not required from the Suspend option available in that window. You will get a pop up as shown below. Click OK to Suspend your restore.