Full VM Recovery
With the Full VM Recovery option, you can restore the backup data to the same or different Hyper V host/server exactly in the same state as it was during the backup, including its configuration.
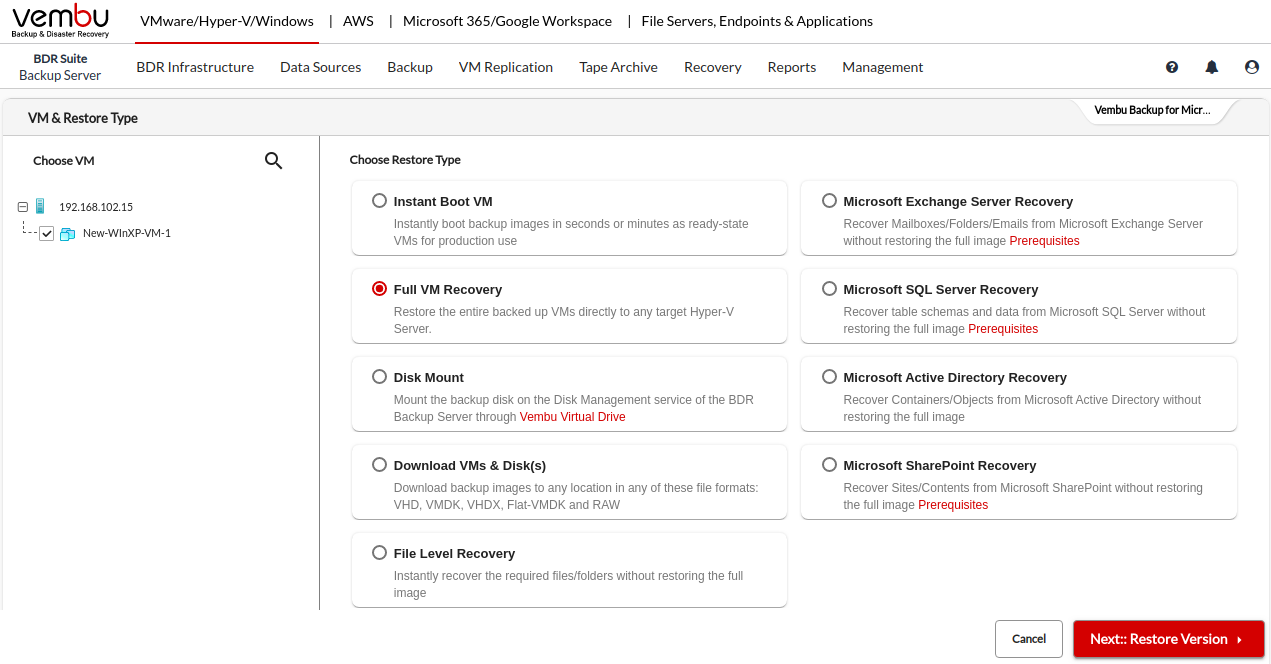
Step 1: Choose the VM and Restore type
Choose the VM that you wish to restore. You will be allowed to select only one VM to perform Full VM Recovery.
Now, select the Full VM Recovery option and click Next.
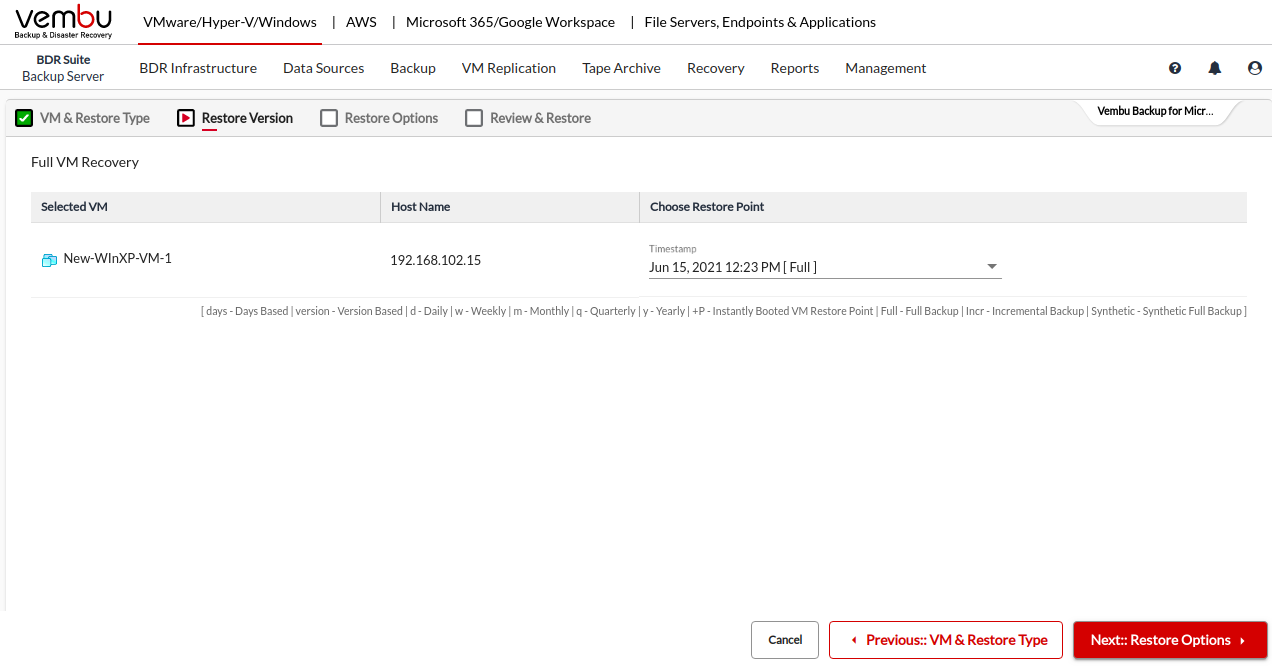
Step 2: Choose a Restore point
Select a restore point to restore the backup data. BDRSuite Backup Server retains the restore points as per the retention policy you have selected for the backup job.
Full backup and Incremental backup restore points are viewed in the dropdown box structure.
Each incremental restore point is a virtual full backup that makes full data recovery possible in each step. This makes the restoration process easier without having to recover a full backup and all the previous increments.
If the restore point is denoted with symbols (d), (w), (m), (+P) at the end, it indicates the following:
Daily Merge (d)
Weekly Merge (w)
Monthly Merge (m)
Persistent boot changes (+P)
Daily, Weekly, and Monthly merges take place based on the retention policies you have configured.
If you select Restore version time-stamp with (+P), then you have enabled the option to ’Include persistent boot changes during restore’ option that includes the changes you performed in the VM/Host during the instant boot restore process.
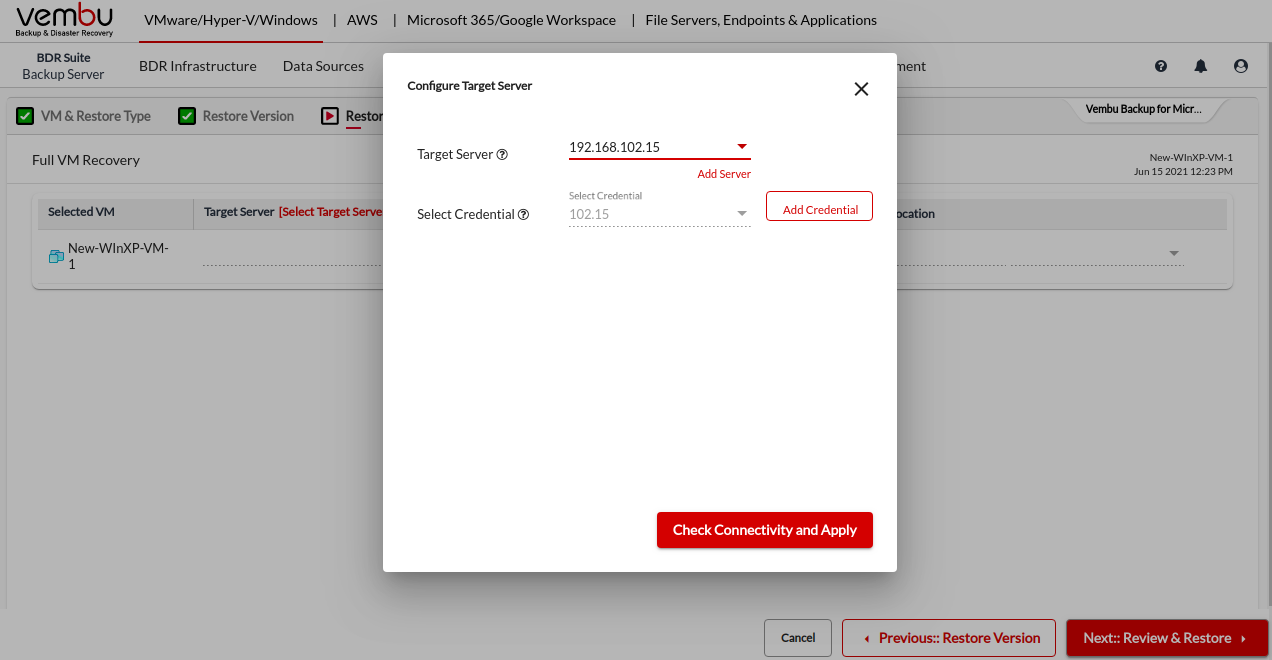
Step 3: Choose the Restore Location
Choose to which location you want to restore the VM.
If you wish to restore the VM to a location, then you have to manually provide the following details.

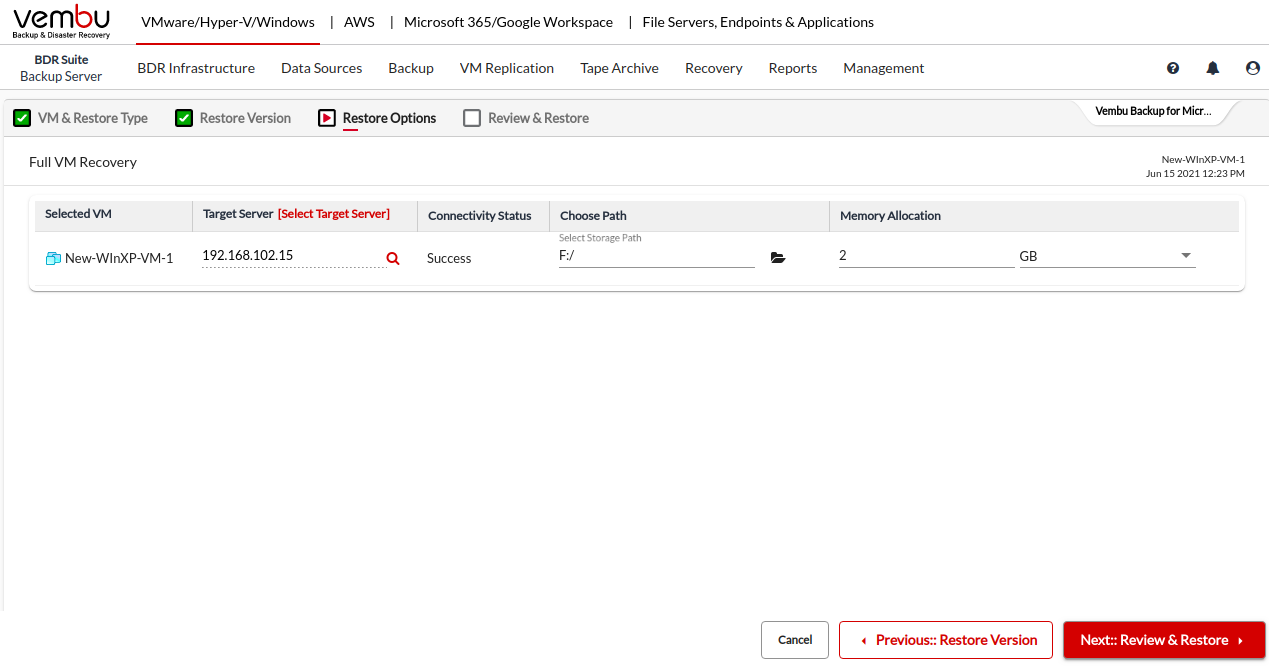
Step 4: Review & Restore
Target Server
Storage Path
Memory Allocation
Review all the Full VM Recovery configurations and click Restore to restore the entire backed-up VMs directly to any target ESXi / Hyper-V host.
 PreviousNext